Customizing the Default Animation Graph#
Warning
Creating custom animation graphs is not yet officially supported, but we provide some initial information about the internals for now to help you debug the microservice internals in case of issues.
Warning
Note that the pose provider node Animation Graph features required to configure the microservice are currently not available in the public USD Composer release. These features will be available in a future release.
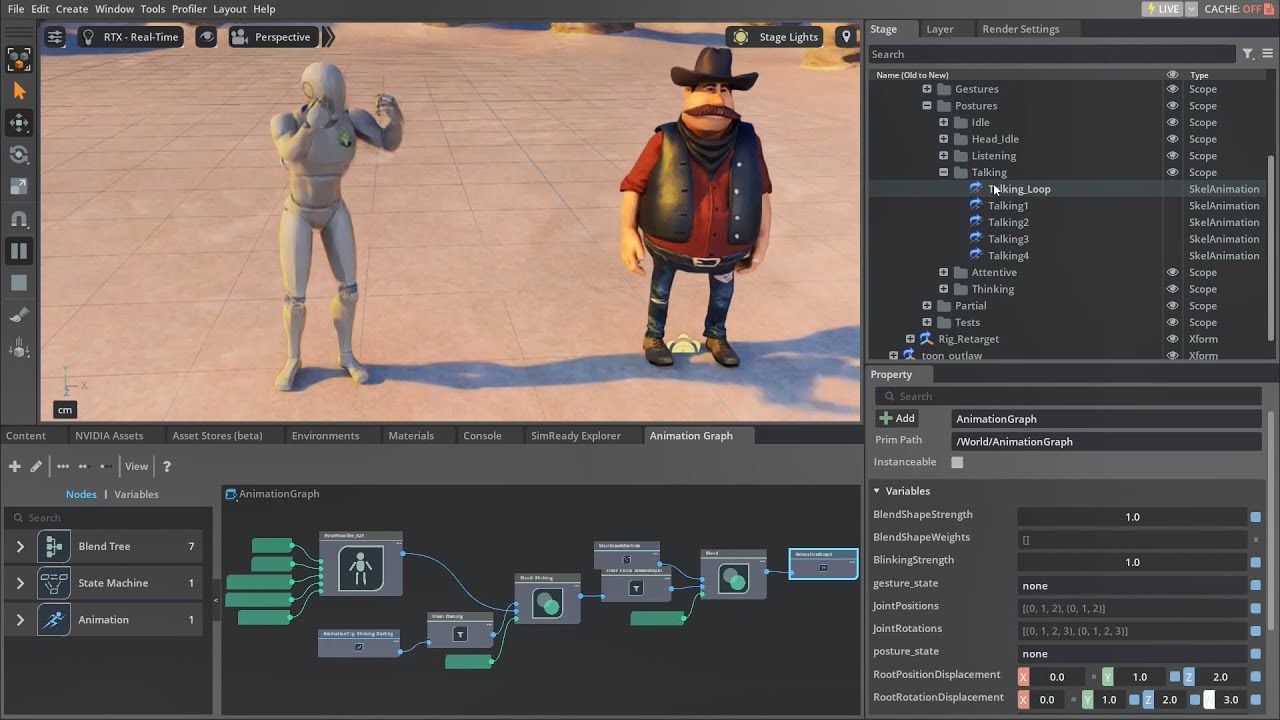
The default animation graph is made up of the following parts:
Postures
Gestures
Positions
Facial Gestures
Audio2Face-3D Input
Animation Graph Generation#
A part of this Animation Graph could be manually adjusted to some degree, but the state machines for postures, gestures and facial gestures are so massive that they need to be generated using a python script. The script named animation_graph_builder_behavior_script.py is linked inside the Animation Graph prim. On initialization it checks if the mentioned state machines exist. If not, it will generate them using the animation clips under the prim Animations.
Adding or Removing Animations from the Default Graph#
Video Tutorial: https://youtu.be/pqfm50e3hpA#
Note
The animation graph has gotten more complex since this video. There are now three state machines that need to be deleted before re-generation.
Only Posture and Gesture animations can be added using this workflow. Other animations in the Graph have more specific requirements and should not be replaced.
If you wish to add your own animations, you can add them or replace existing ones. However, this will be slightly more challenging. In the stage tab you can extend the prim “Animations”. There’s a child prim also named “Animations” under which you’ll find a list of animations placed in different scopes (folders). The scope in which they are placed decides what state each animation is assigned to. The states under “Postures” will play automatically when the avatar is interacting. Those listed under Gestures will have to be explicitly triggered. You can not simply add your own animation here. All of these animations need to use the default skeleton in order to be compatible. So any animation you wish to add will have to be converted first. You can convert your animations with the help of retargeting and a simple script.
Drag your animation into the scene. You’ll also need the skeleton of the character this animation is based on.
If this animation is not based on your custom character that you already retargeted, you will need to set up retargeting for whichever character this animation comes from. (See steps above)
Open the “Script Editor” window found in the “Windows” drop-down. Inside the script editor window click “File/Open” and open the file “animation_conversion.py” inside the scripts folder.
In the stag, select the prim of type “Skeleton” that belongs to your new animation. Right click, and select “Copy Prim Path”. Then paste this in the script where it says “YOUR_SKELETON_PATH”. Next find the prim of type “SkelAnimation”. Copy that prim path as well and use it to replace “YOUR_ANIMATION_PATH”. Last, you need to decide what state this should be used in. Click on the scope in the animation list where you wish to add this animation (e.g. “/World/Animations/Animations/Postures/Talking” or “/World/Animations/Animations/Gestures”). Copy the prim path of that scope and paste it where it says “TARGET_STATE_SCOPE”.
In the script editor window hit “run”. This might take a few seconds. After that the animation should have been converted and should now be inside the scope you selected.
Delete the following prims:
“/World/AnimationGraph/PositionsAndPosturesAndGesturesStateMachine/PositionState/PositionStateMachine”
“/World/AnimationGraph/PositionsAndPosturesAndGesturesStateMachine/PosturesAndGesturesState/PosturesAndGesturesStateMachine”
“/World/AnimationGraph/FacialPosturesAndGesturesStateMachine”
Save and re-open your scene in order for the State Machine to automatically be regenerated using the new animations. Save again.
If you’ve added your animation to one of the posture states it will automatically be used as part of those states. If you’ve added it to the gestures it will only play if it is specifically triggered by animation pipeline.
Customizing the Animation Graph#
Further altering the default animation graph is not recommended, unless you want to change the mechanics described above. In that case, please consider the following restrictions.
The Structure of the Scene#
For a scene is used in two ways: 1) to control the avatar animation with the Animation Graph microservice and 2) to render a character in the Omniverse Renderer microservice. The same scene is currently used for both services. For the avatar animation there is a generic NVIDIA humanoid character which is invisible in the scene handles the animation in a generic way. The retargeting and rendering of that animation happens in the renderer microservice using whatever character should be in the final result. This way the Animation Graph microservice doesn’t need to consider that final character at all, and only uses one generic rig. In order for this to work, this generic rig and its associated prims need to be structured in a fixed way.
Hardcoded Prim Paths#
Some paths to prims in the scene are hardcoded in the microservice. These prims need to be located and named according to the table below.
Variable Name |
Prim Path |
Description |
|---|---|---|
scene_skel_roots_scope_prim_path |
/World/SkelRoots |
The parent prim of the character. The microservice will make multiple copies up to the maxium supported stream capacity. |
scene_skel_root_prim_path |
/World/SkelRoots/Rig_Retarget/SkelRoot |
The SkelRoot is the prim that the Animation Graph is assigned to. |
scene_skeleton_prim_path |
/World/SkelRoots/Rig_Retarget/SkelRoot /Skeleton |
The Skeleton defines the joint naming, hierarchy and transforms as well as retargeting tags. |
scene_character_anim_pose_prim_path |
/World/SkelRoots/Rig_Retarget/SkelRoot /Skeleton/AnimGraphOutputPose |
The resulting poses from the Animatin Graph. This is created automatically during runtime. |
scene_skel_animation_prim_path |
/World/Animations/Rig_Retarget/SkelRoot /Skeleton/ACE_Animation_Target |
The animation clip to which the microservice writes the poses on the renderer side. |
scene_camera_prim_path |
/World/SkelRoots/Rig_Camera/SkelRoot /Skeleton/root/camera_location /camera_body/camera_main |
The location of the main camera in the scene. This isn’t currently used, but might be in the future. |
Custom Layer Data#
Whatever Animation Graph variables should be exposed by the microservice, they need to be explicitly specified in the customLayerData section of the main USD scene file. The Animation Graph microservice will then dynamically generate the necessary endpoints at startup.
   #usda 1.0
   (
      customLayerData = {
         dictionary animation_graph_microservice_api_mapping = {
            dictionary animation_graphs = {
               dictionary avatar = {
                  string animation_graph_prim_path = "/World/..."
                  dictionary variable_routes = {
                     dictionary gesture_state = {
                        string variable_name = "gesture_state"
                     }
                     dictionary posture_state = {
                        string variable_name = "posture_state"
                     }
                     dictionary facial_gesture_state = {
                        string variable_name = "facial_gesture_state"
                     }
                     dictionary position_state = {
                        string variable_name = "position_state"
                     }
                  }
               }
            }
         }
      }
   )
Note on Facial Gestures#
Facial gestures work similar to (body) gestures except that they’re additive. Meaning a facial gesture won’t interrupt an ongoing (body) gesture or posture, but combine with other animations happening at the same time. Since the additive mode of the blend node is still in early development it does not yet subtract the characters rest pose from the result. This means if you were to add two neutral poses, they would stack up and the character will visually explode. For this reason all animations used as facial gestures need to already have the rest pose subtracted from them (use relative transformations). Consequently the animations for facial gestures only work in this specific context. They only include blendshape animations as well as movements of the head and neck joints in relative space.
