UI
Introduction
The Tokkio UI is a sample referenced web application that demonstrates the end to end interactions between the front-end and the UI Server with both speech and touch inputs. It communicates with the UI server by sending HTTP REST API requests through Ingress (session management), and it maintains websocket connection with UI Server for two-way communication. The speech responses, FOV entry/exit, and the corresponding UI rendering are enabled with this websocket connection.
Tokkio UI supports both audio+video and audio only pipeline through WebRTC provided by VST. You can configure from the UI settings based on the selected pipeline as discussed below. The input sources for video and audio could be coming from the camera and microphone respectively, from the computer running the UI. Permissions for accessing the camera and/or microphone needs to be granted from the browser before UI can be run.
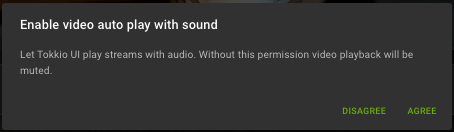
Upon accepting the permission request, the UI will show the welcome view with the menu bar. At this point, you will be able to provide touch or speech input to order food. Note that the ASR transcripts will also be rendered:

You may mute/unmute the microphone during the session by clicking the mic icon. You may also navigate to different view such as item view or cart view to create and checkout order accordingly.
Deployment Options
The are several options to deploy the Tokkio UI, as discussed in the sections below:
Deploy with production build
Tokkio UI is compiled into production build with webpack. The production build can be obtained from NGC as below:
$ ngc registry resource download-version "nvidia/ucs-ms/tokkio_ui:4.0.4"
After downloading the UI from NGC, unzip the tar file. And the build folder will be populated.
You may publish the Tokkio UI to AWS S3, using the command below:
$ aws s3 sync ./build s3://tokkio-ui
Note
You can download AWS CLI from https://docs.aws.amazon.com/cli/latest/userguide/getting-started-install.html.
[Optional] If desired, you may also configure the UI before publishing to the AWS S3 by setting the corresponding ENV variables. A list of available ENV are shown below:
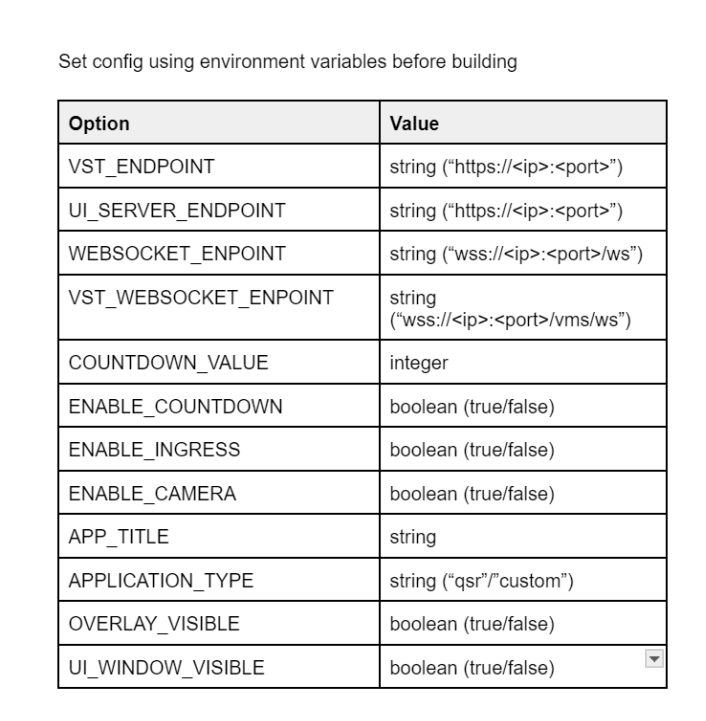
After setting the ENV, run the script to inject the ENV into UI configuration settings:
$ bash init.sh
You can also run Tokkio UI locally, provided the requirements for running “serve” is met.
$ bash run.sh
You can also provide the port number with -p <port> as shown below:
$ bash run.sh -p 3001
UI Flow
UI starts by retrieving a session token, using an IDP system. Once the UI has the session token, it will generate a random UUID to be used as connection ID. It will start a websocket connection with VMS using this connection ID. After making websocket connection to VMS, it will start a webRTC connection with VMS which is used to send audio and camera streams to the avatar, and receive the Avatar video in a single webRTC peer connection. With this, the UI will also use the connection ID to connect to the UI server WebSocket. UI server uses this to associate which UI is sending which camera stream.
Once Tokkio receives an fovEntry, the UI will display the menu, and the user’s session will begin, opening up the following interactions to the user.
Configuration
The Tokkio UI can be configured using the configuration below:
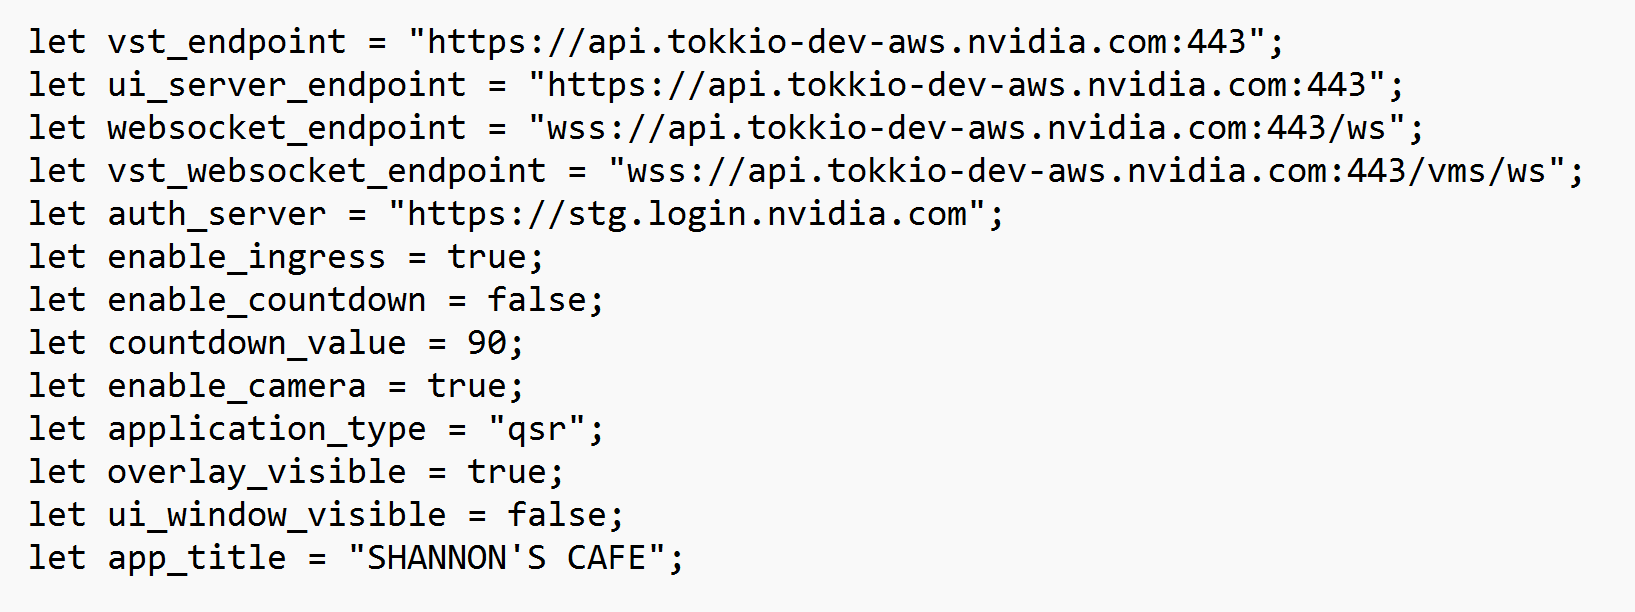
vst_endpoint: This should be set to the endpoint of the VST microservice. It is only necessary to fill out this configuration if the useVstApiDirectly configuration is set to true.
ui_server_endpoint: This should be set to be the endpoint where the UI can call the APIs of the UI server. When Ingress enabled, this should be set to the Ingress endpoint.
websocket_endpoint: This should be set to the endpoint where the UI can make a WebSocket connection to the UI server.
vst_websocket_endpoint: This should be set to the endpoint where the UI can make a WebSocket connection to the VMS.
auth_server: The location of the server used to retrieve the access token and ID token of the user accessing the system.
enable_engress: Set to true to enable the authentication flow to verify the user accessing the system. Set to false if we can retrieve a session token from ingress without the authentication flow.
enable_countdown: Set to true to show the time remaining in a user’s session. Deprecated in the current version of the UI.
countdown_value: Set the countdown value in second (deprecated)
enable_camera : Set to true if video (camera) is enabled. Set to false for audio only pipeline
application_type : Dictates the type of UI that will appear. Set to ‘qsr’ for the QSR UI with the restaurant menu, set to ‘custom’ for the UI with a fullscreen avatar.
overlay_visible : Set to true to see a overlay at the bottom of the screen to mute the microphone, open custom view, etc. Set to false to show only the avatar. This configuration is only available for the ‘custom’ application_type.
ui_window_visible : Set to true to enable a custom UI, which will display UIs that are sent to the PUT /view/custom/{id} route of the UI server. This configuration is only available for the ‘custom’ application_type.
app_title : The title of the application
Cart interactions
In the UI, all of the information about what is in a user’s cart is stored in the front end in a redux store, named “cart”. Every time the user updates their cart, either through touch or voice, the store is updated with the most recent cart, using the GET /cart API call. The UI will update the cart based on a voice interaction when it receives a WebSocket message with the field “is_update_cart” set to true. The user can add cart items from the ‘Item’ page (or through voice), and can further modify their cart from the ‘My Order’ page.
View interactions
When the user navigates around the touch menu, we update the UI server with what the UI is displaying at a given moment, using the PUT /view/items/{id} call. This is done to notify the bot of what the user is looking at, giving context to a user’s query.