> For clean Markdown of any page, append .md to the page URL.
> For a complete documentation index, see https://docs.nvidia.com/ai-workbench/llms.txt.
> For AI client integration (Claude Code, Cursor, etc.), connect to the MCP server at https://docs.nvidia.com/ai-workbench/_mcp/server.
# Basic Quickstart
Use this guide to get a simple introduction to [NVIDIA AI Workbench](/ai-workbench/overview/introduction). For a more interactive learning experience, we recommend working through the **Tutorial Project**, available in your AI Workbench interface.
For the full list of quickstarts, see [Quickstart Guides](/ai-workbench/quickstart/overview).
In this quickstart, you will:
- [Open AI Workbench and Create a New Project](/ai-workbench/quickstart/quickstart-basic#open-ai-workbench-and-create-a-new-project) - Create a new AI Workbench project.
- [Use JupyterLab to Write Simple Code](/ai-workbench/quickstart/quickstart-basic#use-jupyterlab-to-write-simple-code) - Write and run a simple Python script in JupyterLab.
- [Use Dashboards to Track GPU, Disk Usage, and Project Environment Changes](/ai-workbench/quickstart/quickstart-basic#use-dashboards-to-track-gpu-disk-usage-and-project-environment-changes) - Monitor GPU usage, disk space, and environment changes.
- [Publish Your Project to a Git Server (Optional)](/ai-workbench/quickstart/quickstart-basic#publish-your-project-to-a-git-server-optional) - Commit and push your project to a Git repository.
## Prerequisites
Before starting, ensure that:
- NVIDIA AI Workbench is installed on your local system.
## Open AI Workbench and Create a New Project
1. Start AI Workbench
- Double-click the AI Workbench icon on your desktop or search for it in your system's program list.
2. Select Your Location
- On the **My Locations** page, select **Local**.
3. Create a New Project
- On the **My Projects** page, click **New Project**.
4. Enter the following details in the **New Project** dialog:
> - Name: hello-world
> - Description: A Hello World example project
> - Local Path: Accept the default path.
5. Click **Next**.
6. Choose a Base Environment
- On the **NGC Catalog** tab, select **Python Basic**.
- Click **Create**.
For more details on available containers, see the [NVIDIA AI Workbench Containers](https://catalog.ngc.nvidia.com/containers?query=workbench).
7. Wait for the Project to Build
- Track the build progress in the status bar.
- Click **Building** or **Build Ready** to view logs.
## Use Dashboards to Track GPU, Disk Usage, and Project Environment Changes
AI Workbench dashboards provide real-time insights into your project's resource usage, helping you optimize performance and manage environments efficiently.
### Key Dashboard Metrics
**GPU Usage**
Monitor real-time GPU utilization for active project containers to optimize workloads.
**Disk Usage**
Track storage consumption across containers, volumes, and repositories.
**Project Changes**
View modifications, including added dependencies and environment updates.
AI Workbench dashboards provide real-time monitoring and control over your project environment. Use them to track system performance, manage workloads, and optimize resources.
- Monitor GPU and Disk Usage
- Open the **Project Dashboard** to check GPU load and storage consumption.
- Adjust workloads to optimize performance.
- Track Project Environment Changes
- Use the **Cloned Project Dashboard** to review changes from the original repository.
- Resolve environment warnings or unconfigured secrets as needed.
- Optimize Running Projects
- The **Running Project Dashboard** provides real-time insights into resource usage and application status.
- Start, stop, or modify containers directly from the dashboard for better resource allocation.
Using these dashboards ensures efficient workflow management, improves resource utilization, and enhances project scalability.
## Use JupyterLab to Write Simple Code
Follow these steps to create and run a simple Python script in JupyterLab within AI Workbench.
1. Start the Environment (Optional)
\- Click **Environment > Start Environment** to manually start the container.
\- If you skip this step, the environment starts automatically when you open JupyterLab.
2. Open JupyterLab
\- Click **Open JupyterLab** at the top of the AI Workbench window.
\- JupyterLab launches in your default browser.
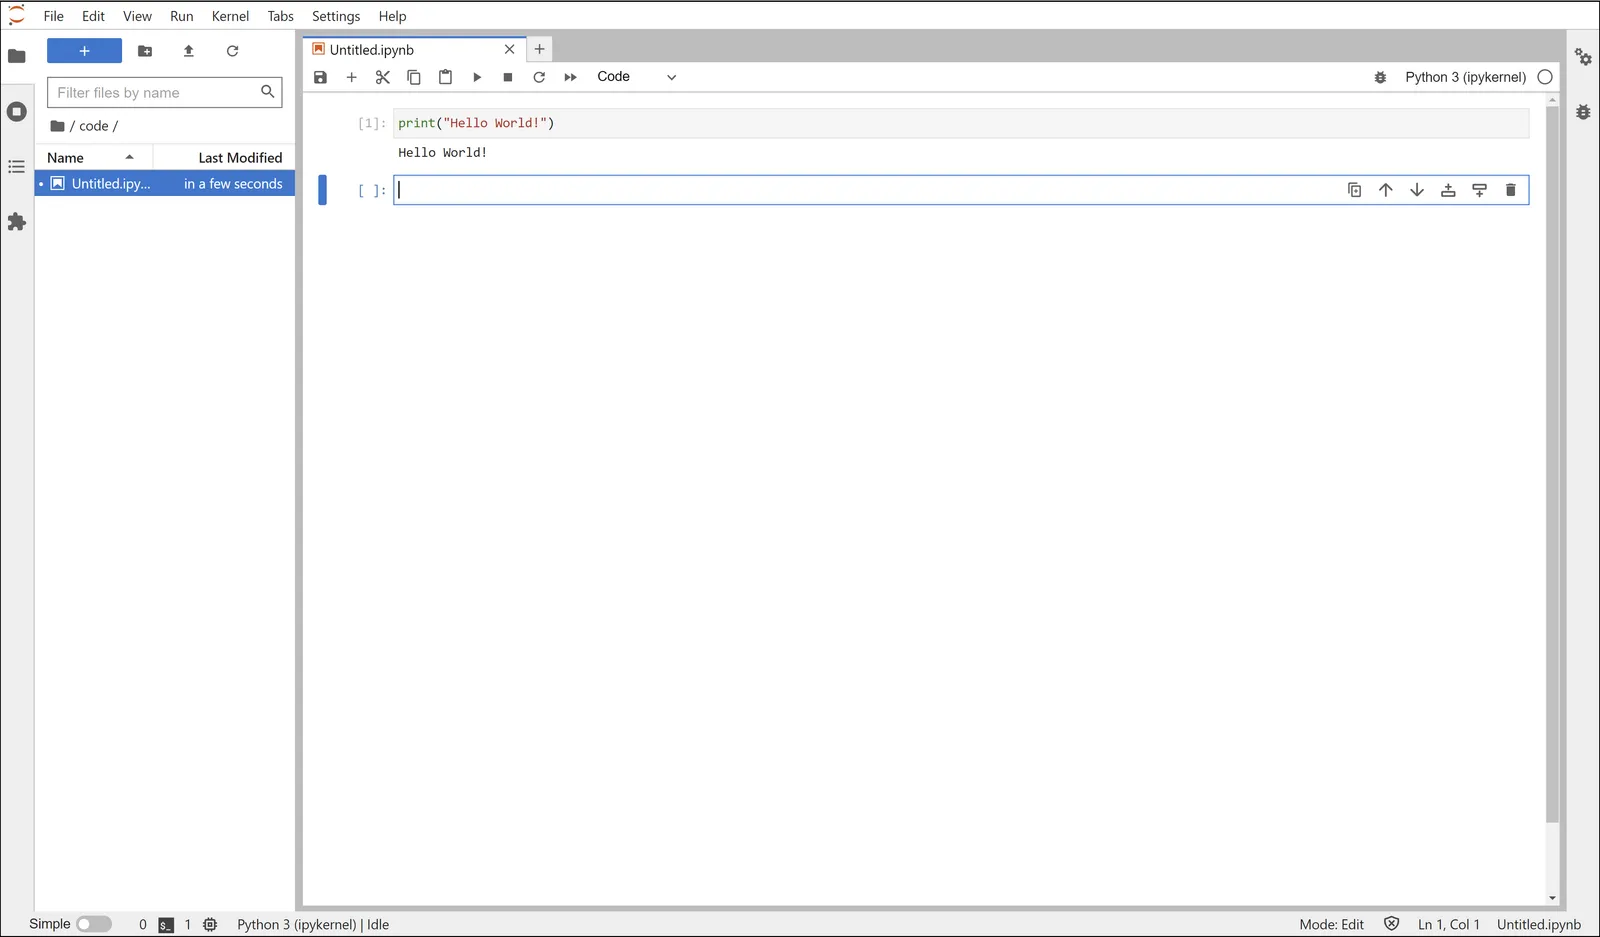
3. Create and Run a Notebook
\- Navigate to the code folder.
\- Create a new notebook and select **Python 3 (ipykernel)** as the kernel.
\- Enter the following code:
> ```python
> print("Hello World!")
> ```
- Click **Run** to execute the script.
4. Save the notebook as **hello-world.ipynb**.
 5. Close JupyterLab
- In JupyterLab, go to **File > Shut Down** and confirm the action.
- Close the browser tab.
- In AI Workbench, wait until **0 apps running** appears in the status bar.
6. Stop the Environment
\- Click **Environment > Stop Environment** to shut down the container.
7. Add Code Files to Your Project
You can add new code files to your project using:
- Drag and drop into the AI Workbench interface (recommended for code files inside the code folder).
- File browsers or terminal to manually move files into the project directory.
- Mounts to map directories between your host system and the project container. For more information, see [Mounts](/ai-workbench/how-to/environments/runtime-configuration).
## Publish Your Project to a Git Server (Optional)
EAI Workbench projects are stored as Git repositories. When you're ready to save your changes, commit and push them to a Git server.
For more details, see [Connect to Git](/ai-workbench/how-to/integrations/github-gitlab).
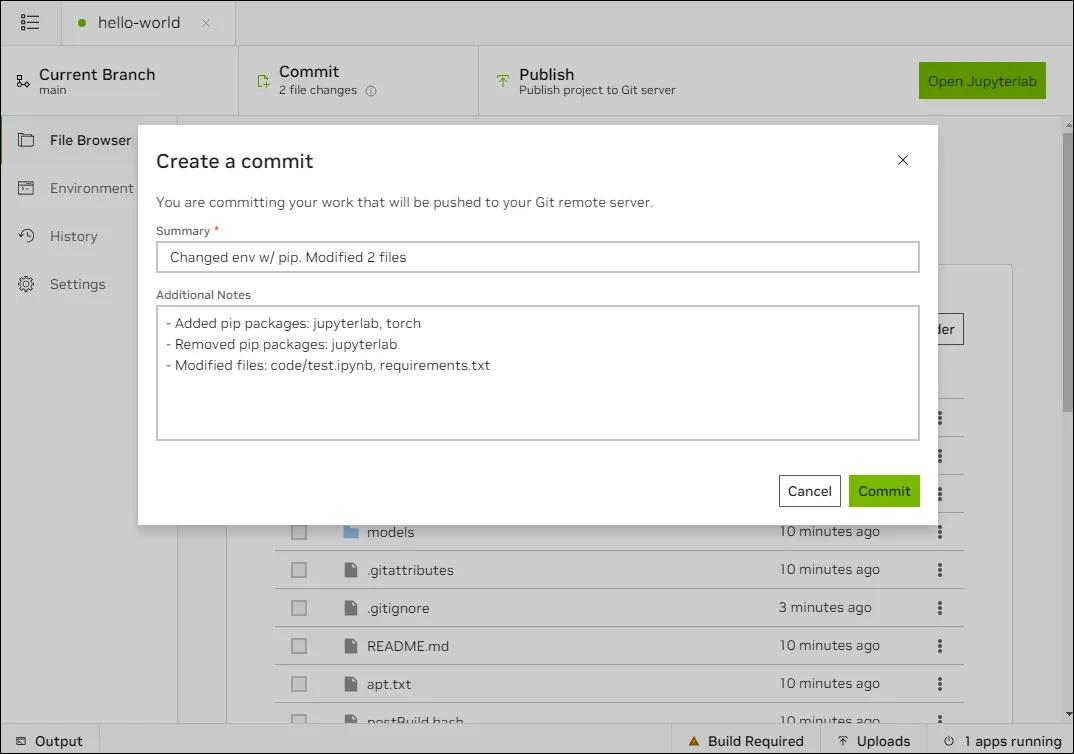
1. Commit Your Changes
\- Click **Commit** at the top of the AI Workbench window.
- The **Create a Commit** window appears, listing all changes in your project.
- Edit the commit message if needed, then click **Commit**.
5. Close JupyterLab
- In JupyterLab, go to **File > Shut Down** and confirm the action.
- Close the browser tab.
- In AI Workbench, wait until **0 apps running** appears in the status bar.
6. Stop the Environment
\- Click **Environment > Stop Environment** to shut down the container.
7. Add Code Files to Your Project
You can add new code files to your project using:
- Drag and drop into the AI Workbench interface (recommended for code files inside the code folder).
- File browsers or terminal to manually move files into the project directory.
- Mounts to map directories between your host system and the project container. For more information, see [Mounts](/ai-workbench/how-to/environments/runtime-configuration).
## Publish Your Project to a Git Server (Optional)
EAI Workbench projects are stored as Git repositories. When you're ready to save your changes, commit and push them to a Git server.
For more details, see [Connect to Git](/ai-workbench/how-to/integrations/github-gitlab).
1. Commit Your Changes
\- Click **Commit** at the top of the AI Workbench window.
- The **Create a Commit** window appears, listing all changes in your project.
- Edit the commit message if needed, then click **Commit**.
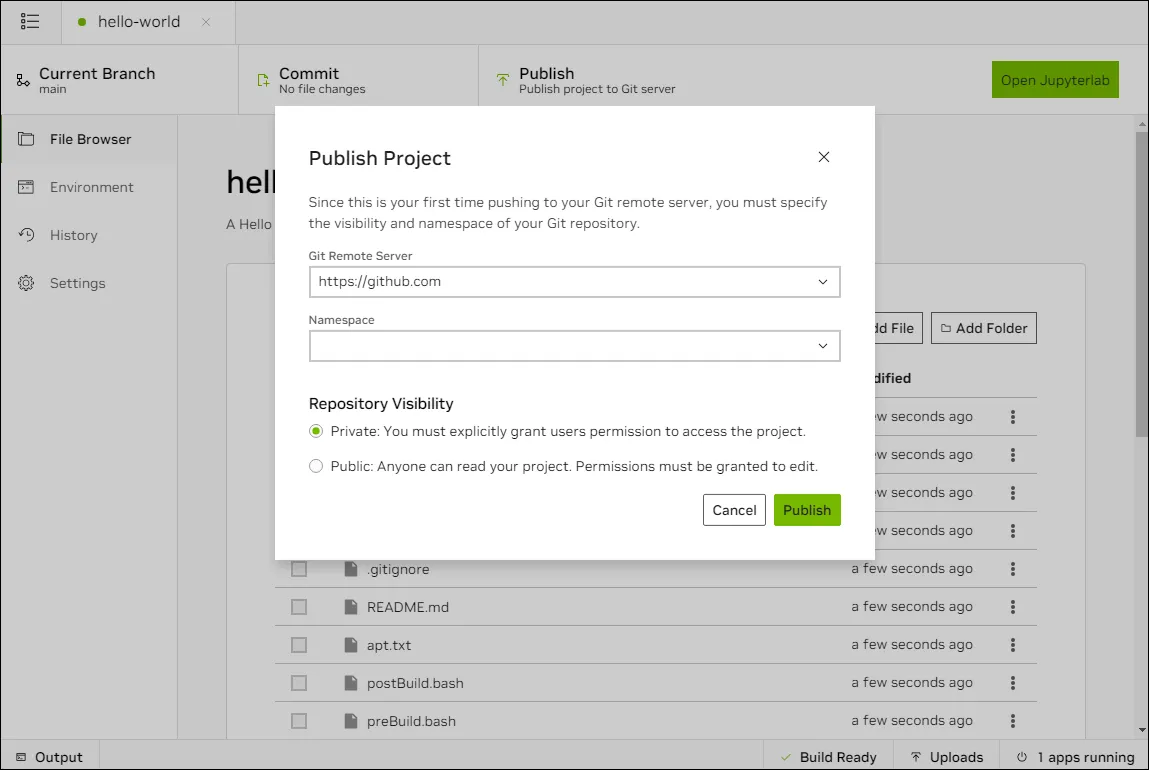
 2. Publish to a Git Server
\- Click **Publish** at the top of the AI Workbench window.
- The **Publish Project** window opens.
- Edit any Git settings if needed, then click **Publish**.
2. Publish to a Git Server
\- Click **Publish** at the top of the AI Workbench window.
- The **Publish Project** window opens.
- Edit any Git settings if needed, then click **Publish**.
 3. Verify the Changes
\- Open your Git repository manager (GitHub, GitLab, etc.) to confirm that your project has been updated.
## Next Steps
**Do a Quickstart**
- [Walkthrough: Customize Your Environment](/ai-workbench/quickstart/quickstart-environment)
- [Basic Quickstart (CLI)](/ai-workbench/quickstart/quickstart-cli)
- [Walkthrough: Project Dashboard for Onboarding, Monitoring and Managing Your Project](/ai-workbench/quickstart/quickstart-dashboards)
- [Advanced Walkthrough: Hybrid RAG](/ai-workbench/quickstart/quickstart-hybrid-rag)
- Explore [NVIDIA AI Workbench Example Projects](/ai-workbench/quickstart/example-projects)
- Explore the [NVIDIA Developer Forum](https://forums.developer.nvidia.com/c/ai-data-science/nvidia-ai-workbench/671)
**Learn the Concepts**
- [How to Work with AI Workbench Projects](/ai-workbench/how-to/projects/overview)
- [Add a Brev Instance](/ai-workbench/how-to/locations/add-brev)
- [Integrations and Credentials](/ai-workbench/reference/faq#integrations-and-credentials)
- [Applications](/ai-workbench/concepts/application-concept)
3. Verify the Changes
\- Open your Git repository manager (GitHub, GitLab, etc.) to confirm that your project has been updated.
## Next Steps
**Do a Quickstart**
- [Walkthrough: Customize Your Environment](/ai-workbench/quickstart/quickstart-environment)
- [Basic Quickstart (CLI)](/ai-workbench/quickstart/quickstart-cli)
- [Walkthrough: Project Dashboard for Onboarding, Monitoring and Managing Your Project](/ai-workbench/quickstart/quickstart-dashboards)
- [Advanced Walkthrough: Hybrid RAG](/ai-workbench/quickstart/quickstart-hybrid-rag)
- Explore [NVIDIA AI Workbench Example Projects](/ai-workbench/quickstart/example-projects)
- Explore the [NVIDIA Developer Forum](https://forums.developer.nvidia.com/c/ai-data-science/nvidia-ai-workbench/671)
**Learn the Concepts**
- [How to Work with AI Workbench Projects](/ai-workbench/how-to/projects/overview)
- [Add a Brev Instance](/ai-workbench/how-to/locations/add-brev)
- [Integrations and Credentials](/ai-workbench/reference/faq#integrations-and-credentials)
- [Applications](/ai-workbench/concepts/application-concept)