> For clean Markdown of any page, append .md to the page URL.
> For a complete documentation index, see https://docs.nvidia.com/ai-workbench/llms.txt.
> For AI client integration (Claude Code, Cursor, etc.), connect to the MCP server at https://docs.nvidia.com/ai-workbench/_mcp/server.
> AI Workbench Basic Quickstart (CLI)
# Basic Quickstart (CLI)
Use this documentation to get a basic introduction to [NVIDIA AI Workbench](/ai-workbench/overview/introduction). For the full list of quickstarts, see [Quickstart Guides](/ai-workbench/quickstart/overview).
In this quickstart, you use the [AI Workbench CLI](/ai-workbench/reference/user-interface/cli) to perform the following tasks:
1. [Start AI Workbench and Open a Location](/ai-workbench/quickstart/quickstart-cli#start-ai-workbench-and-open-a-location)
2. [Create a New Project](/ai-workbench/quickstart/quickstart-cli#create-a-new-project)
3. [Use JupyterLab to Write Simple Code](/ai-workbench/quickstart/quickstart-cli#use-jupyterlab-to-write-simple-code)
4. [(Optional) Publish Your Project to a Git Server](/ai-workbench/quickstart/quickstart-cli#optional-publish-your-project-to-a-git-server)
## Prerequisites
Before you can complete the steps in this quickstart, you need the following:
- NVIDIA AI Workbench is installed on your local system.
## Start AI Workbench and Open a Location
1. Open a command shell by doing one of the following:
- **On macOS or Ubuntu** — Open your favorite command shell, such as terminal.
- **On Windows** — Open the WSL app by searching for WSL in your app list. When the WSL app opens, you should see a command prompt similar to the following:
```shell
workbench@computer-name:~$
```
You can also use Terminal, Command Prompt, or Windows PowerShell, and access WSL by using the command `wsl -d NVIDIA-Workbench`.
2. Check the available locations (contexts) by running the following command.
```shell
nvwb list contexts
```
If you haven't added any remote locations yet, the only available location is the local computer. The output should look similar to the following.
```shell
NAME | DESCRIPTION | HOSTNAME | STATUS
--------|-------------|-----------|---------------
local | My Computer | localhost | Not Running
```
3. Run the following command to start the local location.
```shell
nvwb activate local
```
AI Workbench starts and connects to your computer, and `(nvwb:local)` now appears at the beginning of your command prompt.
## Create a New Project
1. Start the process to create a project by running the following command.
```shell
nvwb create project
```
2. Enter the project name, description, and press enter to choose the Python Basic container as the base environment for your project. You should see prompts similar to the following.
```shell
? Enter a unique name for the project: test-cli-proj
? Enter a description: A hello world test project
? Choose a base environment: Python Basic
Created new project 'test-cli-proj' (/home/nvidia/nvidia-workbench/test-project)
✓ Container build complete (59.172564951s)
```
3. After you see **Container build complete**, use the following command to open the project.
```shell
nvwb open test-cli-proj
```
AI Workbench opens your project, changes to the project directory, and `(nvwb:local/test-cli-proj)` now appears at the beginning of your command prompt.
## Use JupyterLab to Write Simple Code
1. To open JupyterLab, run the following command.
JupyterLab opens in your default browser ready for you to start working.
```shell
nvwb start jupyterlab
```
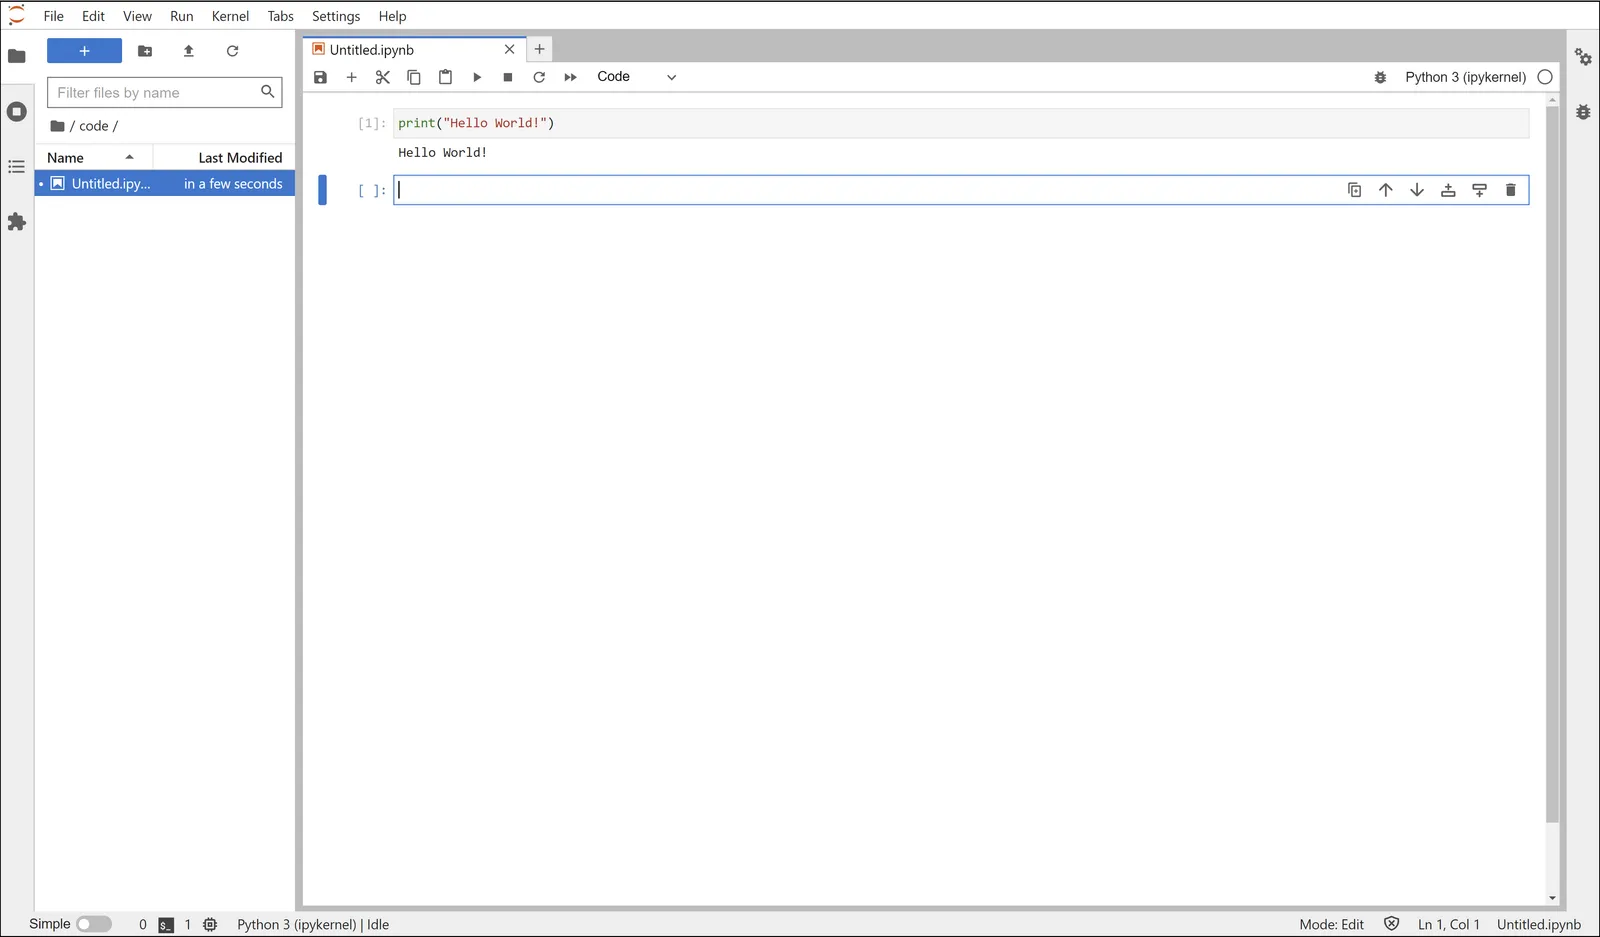
2. In JupyterLab, do the following.
1. Navigate to the *code* folder.
2. Create a new notebook by choosing Python 3 (ipykernel).
3. In the new notebook, enter `print("Hello World!")`.
4. Click run to verify the code works correctly.
5. Save the notebook, and name the file *hello-world.ipynb*.
 3. In JupyterLab, choose **File**, and then click **Shut Down**. Confirm shut down and close the browser tab.
4. In your command shell, run the following command to stop your environment.
```shell
nvwb stop --container
```
## (Optional) Publish Your Project to a Git Server
Each AI Workbench project is stored as a Git repository.
When you are ready to save changes to your project, you commit and push the changes to your Git repository.
For more information, see [Connect to Git](/ai-workbench/how-to/integrations/github-gitlab).
1. Check for changes to your project by running the following command.
```shell
nvwb status
```
You should see output similar to the following. In this case, there is one new file, the notebook that you added.
```shell
Name: test-cli-proj (/home/workbench/nvidia-workbench/test-cli-proj)
Description: A hello world test project
Environment: No Build Required
Container: Stopped
Applications:
jupyterlab: Stopped
Local Repository: 1 Added
```
2. To create a commit that contains your changes, run the following command.
```shell
nvwb commit
```
AI Workbench creates the commit message for you.
3. Press enter to accept the commit message and commit your changes.
4. To publish your changes to a Git server, run the following command. You are prompted for the information to publish your changes.
```shell
nvwb publish
```
5. Open *https://github.com/<user_name>/test-cli-proj* and verify that you see your project.
## Related Topics
- [Basic Quickstart](/ai-workbench/quickstart/quickstart-basic)
- [Walkthrough: Project Dashboard for Onboarding, Monitoring and Managing Your Project](/ai-workbench/quickstart/quickstart-dashboards)
- [Walkthrough: Customize Your Environment (CLI)](/ai-workbench/quickstart/quickstart-environment-cli)
- [Advanced Walkthrough: Hybrid RAG](/ai-workbench/quickstart/quickstart-hybrid-rag)
- Explore [NVIDIA AI Workbench Example Projects](/ai-workbench/quickstart/example-projects)
- Explore the [NVIDIA Developer Forum](https://forums.developer.nvidia.com/c/ai-data-science/nvidia-ai-workbench/671)
**Learn the Concepts**
- [AI Workbench Command Line Interface (CLI) Reference](/ai-workbench/reference/user-interface/cli)
- [How to Work with AI Workbench Projects](/ai-workbench/how-to/projects/overview)
- [Add a Brev Instance](/ai-workbench/how-to/locations/add-brev)
- [Integrations and Credentials](/ai-workbench/reference/faq#integrations-and-credentials)
- [Applications](/ai-workbench/concepts/application-concept)
3. In JupyterLab, choose **File**, and then click **Shut Down**. Confirm shut down and close the browser tab.
4. In your command shell, run the following command to stop your environment.
```shell
nvwb stop --container
```
## (Optional) Publish Your Project to a Git Server
Each AI Workbench project is stored as a Git repository.
When you are ready to save changes to your project, you commit and push the changes to your Git repository.
For more information, see [Connect to Git](/ai-workbench/how-to/integrations/github-gitlab).
1. Check for changes to your project by running the following command.
```shell
nvwb status
```
You should see output similar to the following. In this case, there is one new file, the notebook that you added.
```shell
Name: test-cli-proj (/home/workbench/nvidia-workbench/test-cli-proj)
Description: A hello world test project
Environment: No Build Required
Container: Stopped
Applications:
jupyterlab: Stopped
Local Repository: 1 Added
```
2. To create a commit that contains your changes, run the following command.
```shell
nvwb commit
```
AI Workbench creates the commit message for you.
3. Press enter to accept the commit message and commit your changes.
4. To publish your changes to a Git server, run the following command. You are prompted for the information to publish your changes.
```shell
nvwb publish
```
5. Open *https://github.com/<user_name>/test-cli-proj* and verify that you see your project.
## Related Topics
- [Basic Quickstart](/ai-workbench/quickstart/quickstart-basic)
- [Walkthrough: Project Dashboard for Onboarding, Monitoring and Managing Your Project](/ai-workbench/quickstart/quickstart-dashboards)
- [Walkthrough: Customize Your Environment (CLI)](/ai-workbench/quickstart/quickstart-environment-cli)
- [Advanced Walkthrough: Hybrid RAG](/ai-workbench/quickstart/quickstart-hybrid-rag)
- Explore [NVIDIA AI Workbench Example Projects](/ai-workbench/quickstart/example-projects)
- Explore the [NVIDIA Developer Forum](https://forums.developer.nvidia.com/c/ai-data-science/nvidia-ai-workbench/671)
**Learn the Concepts**
- [AI Workbench Command Line Interface (CLI) Reference](/ai-workbench/reference/user-interface/cli)
- [How to Work with AI Workbench Projects](/ai-workbench/how-to/projects/overview)
- [Add a Brev Instance](/ai-workbench/how-to/locations/add-brev)
- [Integrations and Credentials](/ai-workbench/reference/faq#integrations-and-credentials)
- [Applications](/ai-workbench/concepts/application-concept)