> For clean Markdown of any page, append .md to the page URL.
> For a complete documentation index, see https://docs.nvidia.com/ai-workbench/llms.txt.
> For AI client integration (Claude Code, Cursor, etc.), connect to the MCP server at https://docs.nvidia.com/ai-workbench/_mcp/server.
> Add a custom application to your NVIDIA AI Workbench project.
# Walkthrough: Add a Custom Application
The base environments for [NVIDIA AI Workbench](/ai-workbench/overview/introduction) come with a selection of applications already built-in, such as JupyterLab and Tensorboard.
For more information, see [Applications](/ai-workbench/concepts/application-concept).
AI Workbench allows you to add your own custom applications to your projects to use as part of your development workflows.
This documentation walks you through the process to add a simple, custom Gradio application to a new project in AI Workbench.
The application is similar to the quickstart example provided by [Gradio](https://www.gradio.app/guides/quickstart).
In this quickstart, you perform the following tasks:
- [Configure the Environment](/ai-workbench/quickstart/quickstart-custom-app#configure-the-environment)
- [Develop the Application](/ai-workbench/quickstart/quickstart-custom-app#develop-the-application)
- [Add the Application to Your Project](/ai-workbench/quickstart/quickstart-custom-app#add-the-application-to-your-project)
- [Launch the Application](/ai-workbench/quickstart/quickstart-custom-app#launch-the-application)
## Prerequisites
Before you complete the steps in this walkthrough, you need the following:
- NVIDIA AI Workbench is installed on your local system.
- A basic test project. If you don't have one, see [Basic Quickstart](/ai-workbench/quickstart/quickstart-basic).
## Configure the Environment
Use the following procedure to add the `gradio` package to your project.
1. In AI Workbench, navigate to **Environment > Packages > Add**.
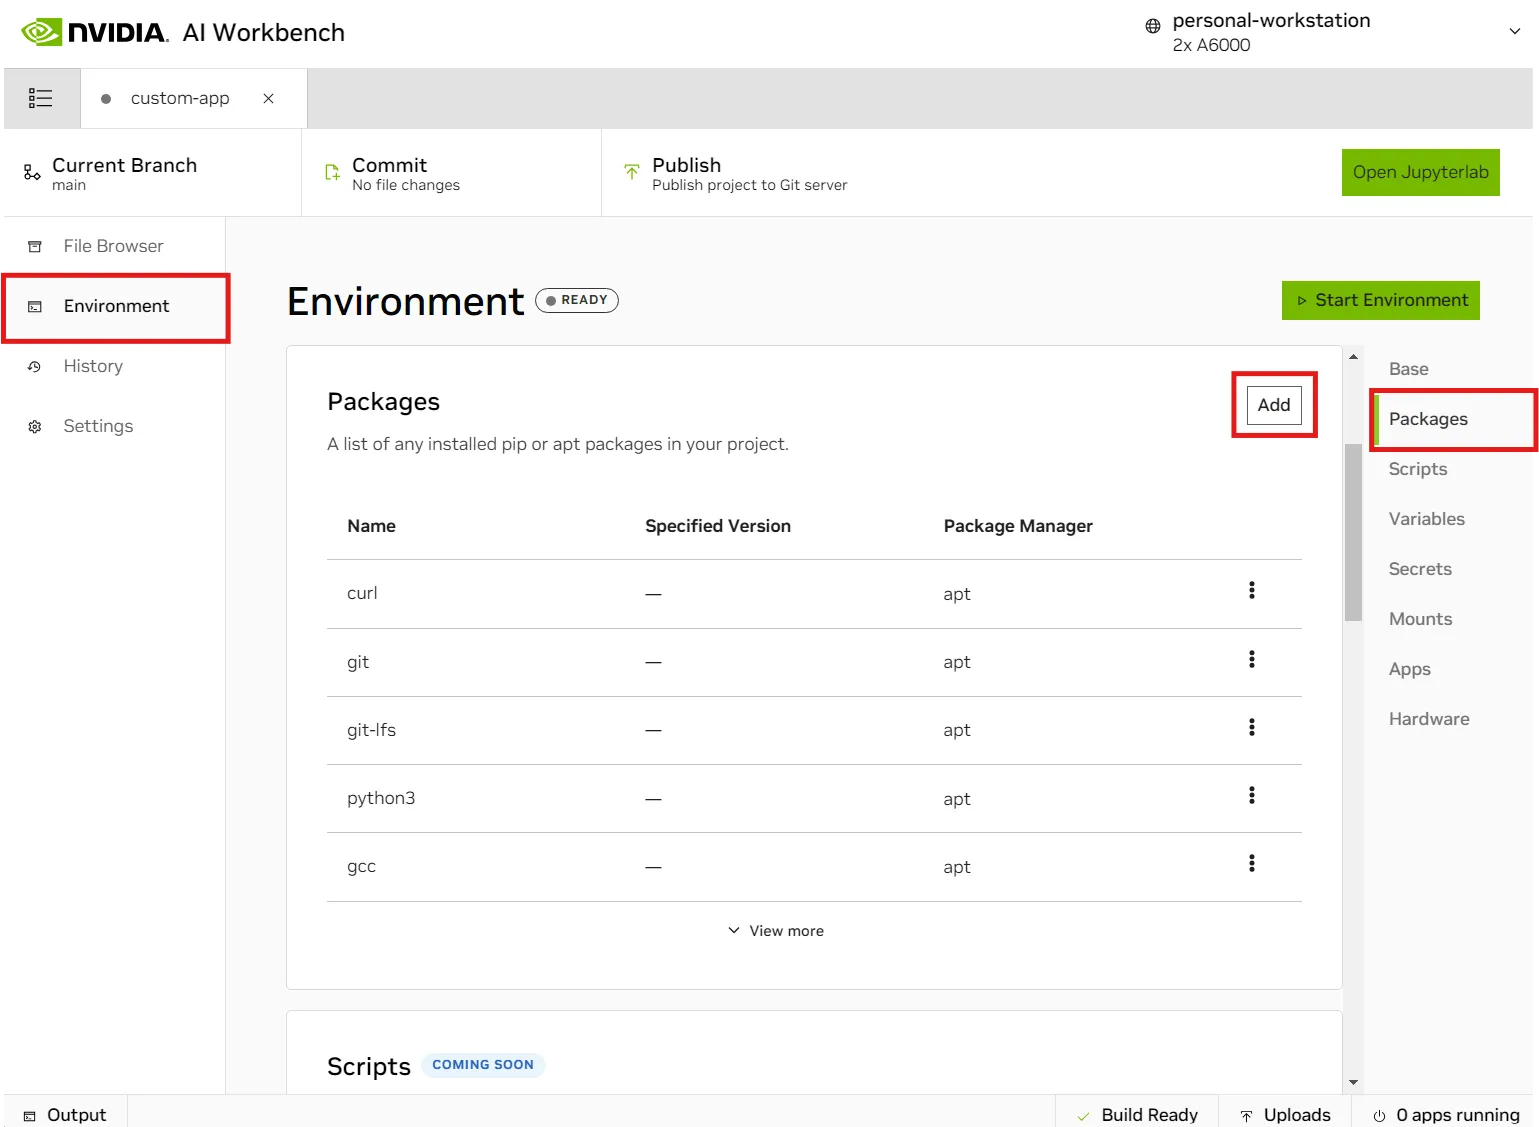 2. Select **pip** as the package manager, type `gradio` for the package name, and then click **Add**.
3. Click **Submit**.
4. AI Workbench auto-detects that the container environment has changed and prompts you to rebuild your project. Click **Start Build**.
The project starts rebuilding. To view progress in real time, click **Output** in the status bar.
## Develop the Application
After you add Gradio to your project, use the following steps to build a simple Gradio application:
1. Near the top of the AI Workbench window, click **Open JupyterLab**.
JupyterLab opens in your default browser ready for you to start working.
2. Navigate to the `code` directory, click **Python File**, and create a python file named `app.py`.
2. Select **pip** as the package manager, type `gradio` for the package name, and then click **Add**.
3. Click **Submit**.
4. AI Workbench auto-detects that the container environment has changed and prompts you to rebuild your project. Click **Start Build**.
The project starts rebuilding. To view progress in real time, click **Output** in the status bar.
## Develop the Application
After you add Gradio to your project, use the following steps to build a simple Gradio application:
1. Near the top of the AI Workbench window, click **Open JupyterLab**.
JupyterLab opens in your default browser ready for you to start working.
2. Navigate to the `code` directory, click **Python File**, and create a python file named `app.py`.
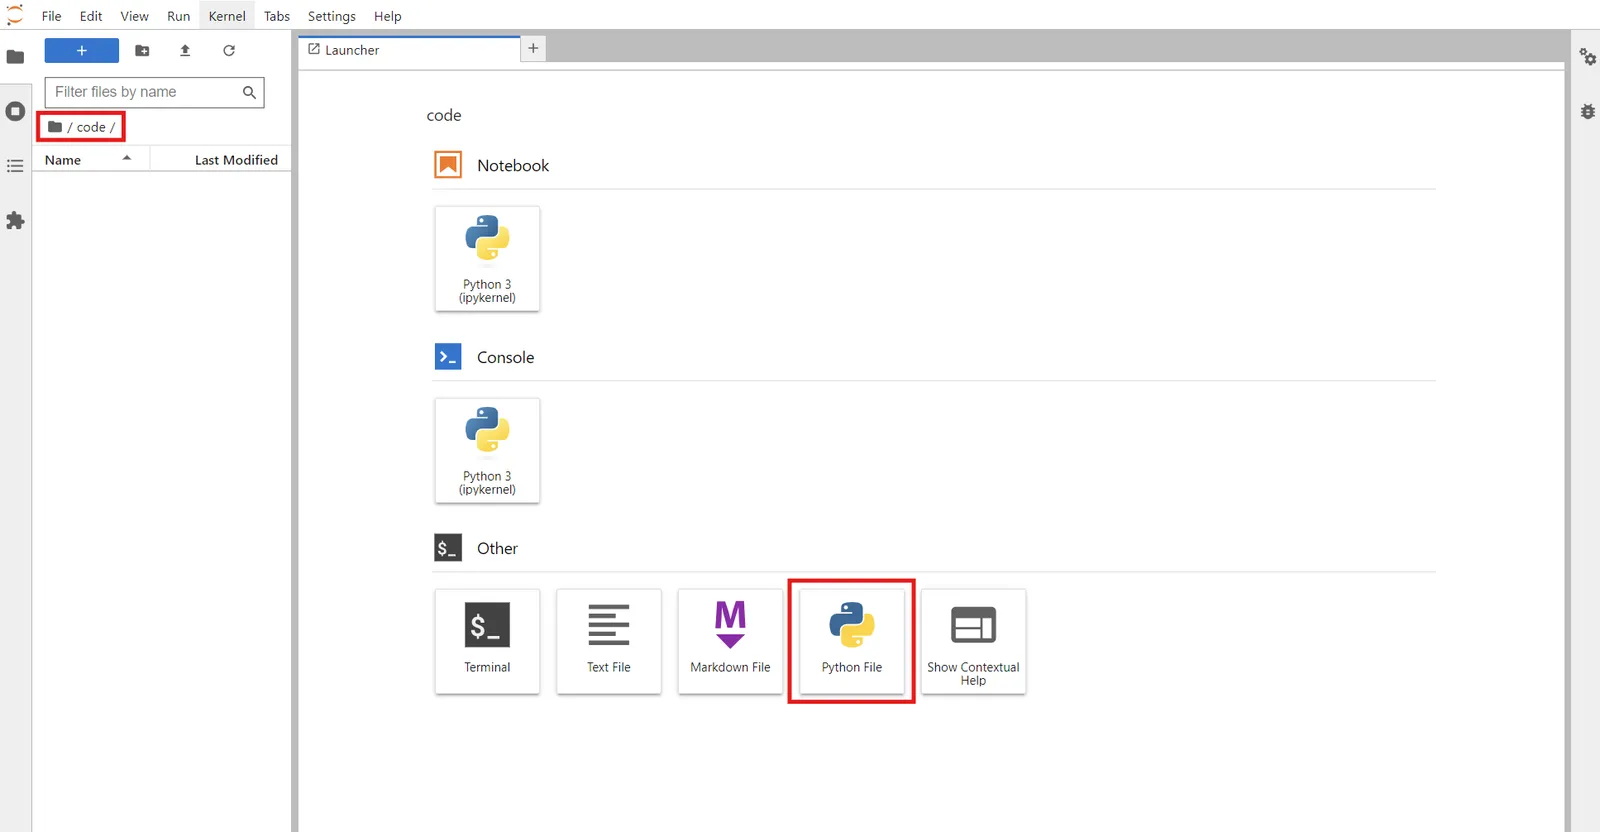 3. In the `app.py` file, write the following code to create a gradio application to run on port `8080`.
```python
import gradio as gr
import os
def greet(name, intensity):
return "Hello, " + name + "!" * int(intensity)
demo = gr.Interface(
fn=greet,
inputs=["text", "slider"],
outputs=["text"],
)
proxy_prefix = os.environ.get("PROXY_PREFIX")
demo.launch(server_name="0.0.0.0", server_port=8080, root_path=proxy_prefix)
```
This code snippet uses the AI Workbench `PROXY_PREFIX` environment variable. This environment variable is automatically injected by AI Workbench when starting an app. The variable indicates the prefix on which the app is hosted.
For some web applications that do not use relative routing for requests and assets, you often need to set some configuration to tell the application the prefix (other than just /).
## Add the Application to Your Project
Use the following procedure to add the Gradio application to AI Workbench.
1. In AI Workbench, navigate to **Environment > Applications > Add**. The **Add Applications** window appears.
3. In the `app.py` file, write the following code to create a gradio application to run on port `8080`.
```python
import gradio as gr
import os
def greet(name, intensity):
return "Hello, " + name + "!" * int(intensity)
demo = gr.Interface(
fn=greet,
inputs=["text", "slider"],
outputs=["text"],
)
proxy_prefix = os.environ.get("PROXY_PREFIX")
demo.launch(server_name="0.0.0.0", server_port=8080, root_path=proxy_prefix)
```
This code snippet uses the AI Workbench `PROXY_PREFIX` environment variable. This environment variable is automatically injected by AI Workbench when starting an app. The variable indicates the prefix on which the app is hosted.
For some web applications that do not use relative routing for requests and assets, you often need to set some configuration to tell the application the prefix (other than just /).
## Add the Application to Your Project
Use the following procedure to add the Gradio application to AI Workbench.
1. In AI Workbench, navigate to **Environment > Applications > Add**. The **Add Applications** window appears.
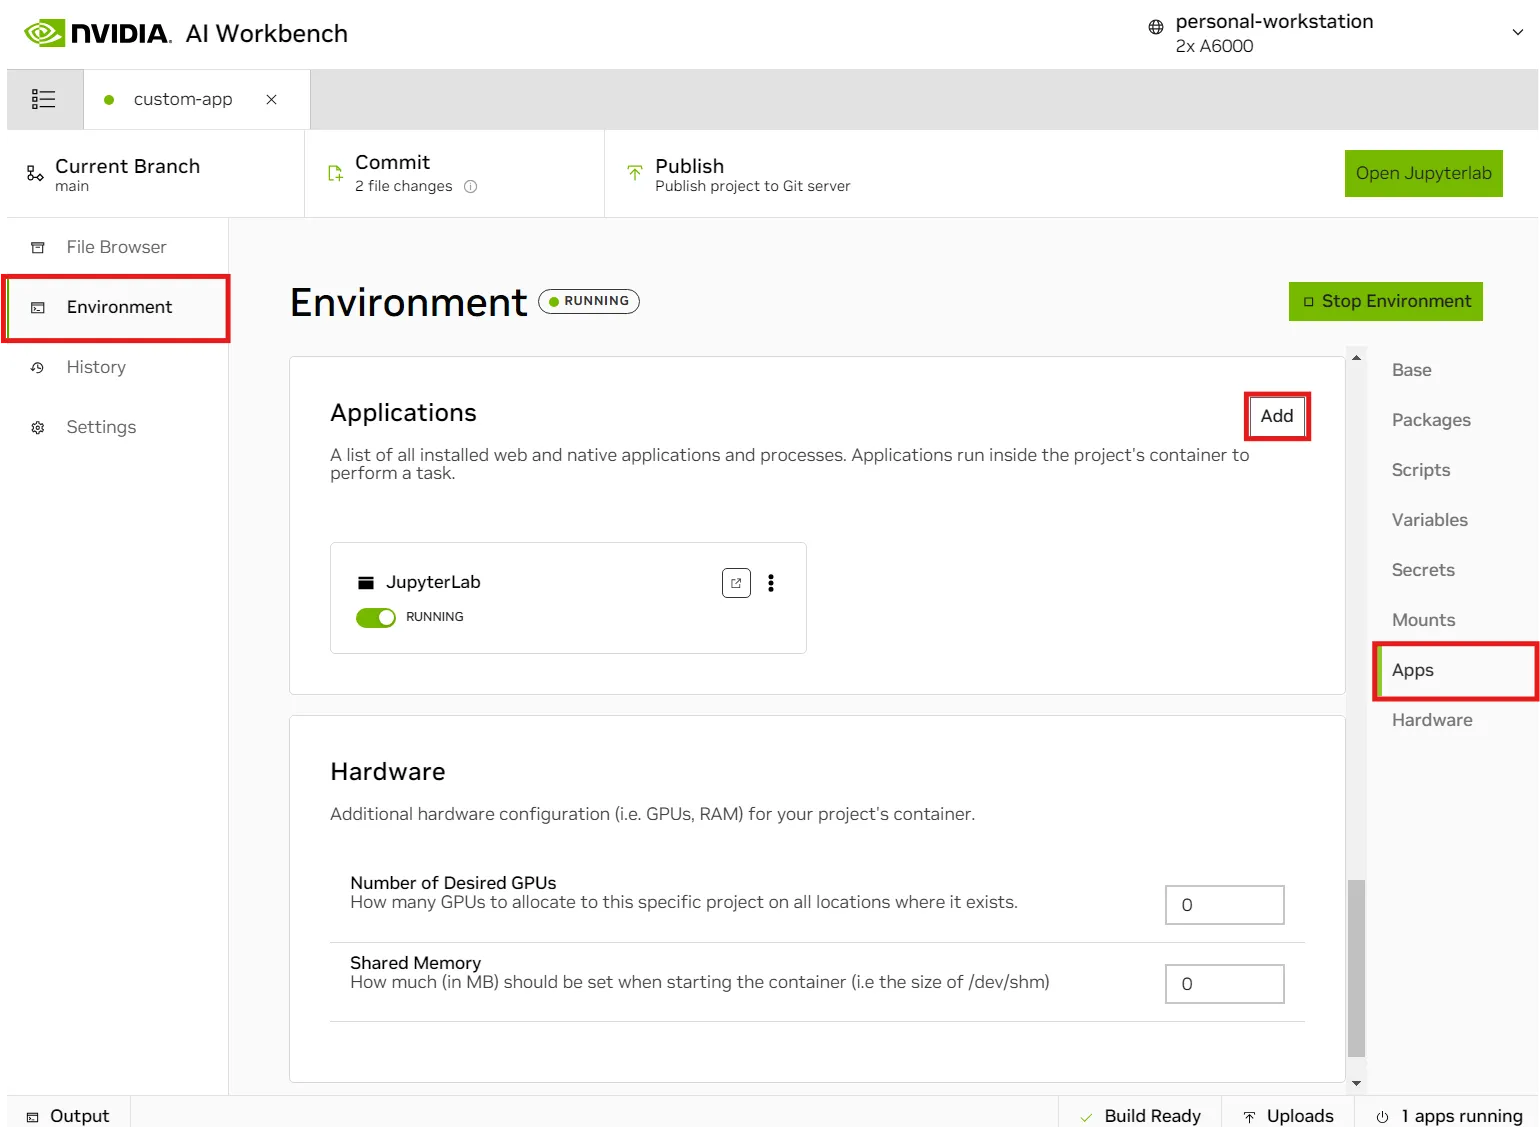 2. In the **Add Applications** window, click **Create a custom app**. The **Add Application** window appears.
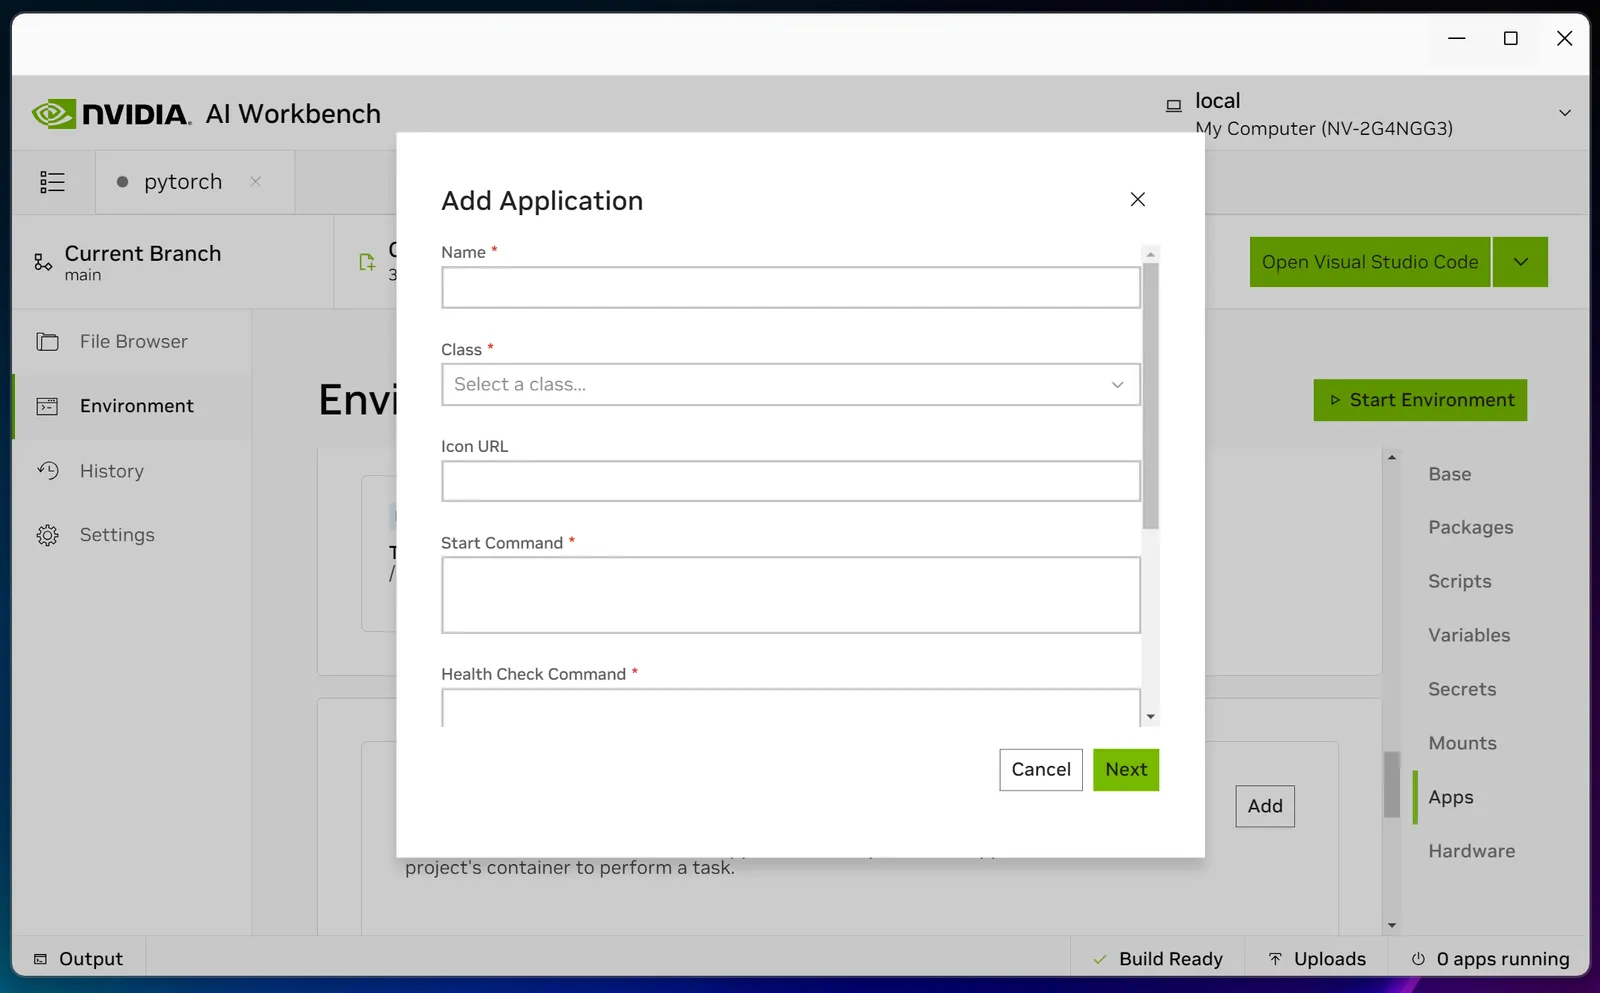
3. In the **Add Application** window, specify the following information, and then click **Next**.
01. **Name** — `simple-gradio`
02. **Class** — `Web Application`
03. **Icon URL** — Leave blank
04. **Start Command** — `cd /project/code && PROXY_PREFIX=$PROXY_PREFIX python3 app.py`
05. **Health Check Command** — `curl -f "http://localhost:8080/"`
06. **Stop Command** — `pkill -f '^python3 app.py'`
07. **Auto Launch** — Select the checkbox
08. **Port** — `8080`
09. **URL** — `http://localhost:8080/`
10. **URL Command** — Leave blank
11. **User Message** — Leave blank
4. AI Workbench adds the application and prompts you to restart your environment. Click **Restart**.
## Launch the Application
The application is now built into the project automation and is ready to be launched. To launch the application, follow these steps:
1. In AI Workbench, navigate to **Environment > Applications**.
2. In the **Applications** pane click the new **simple-gradio** application to launch it.
The new application opens automatically in a new browser window.
2. In the **Add Applications** window, click **Create a custom app**. The **Add Application** window appears.

3. In the **Add Application** window, specify the following information, and then click **Next**.
01. **Name** — `simple-gradio`
02. **Class** — `Web Application`
03. **Icon URL** — Leave blank
04. **Start Command** — `cd /project/code && PROXY_PREFIX=$PROXY_PREFIX python3 app.py`
05. **Health Check Command** — `curl -f "http://localhost:8080/"`
06. **Stop Command** — `pkill -f '^python3 app.py'`
07. **Auto Launch** — Select the checkbox
08. **Port** — `8080`
09. **URL** — `http://localhost:8080/`
10. **URL Command** — Leave blank
11. **User Message** — Leave blank
4. AI Workbench adds the application and prompts you to restart your environment. Click **Restart**.
## Launch the Application
The application is now built into the project automation and is ready to be launched. To launch the application, follow these steps:
1. In AI Workbench, navigate to **Environment > Applications**.
2. In the **Applications** pane click the new **simple-gradio** application to launch it.
The new application opens automatically in a new browser window.
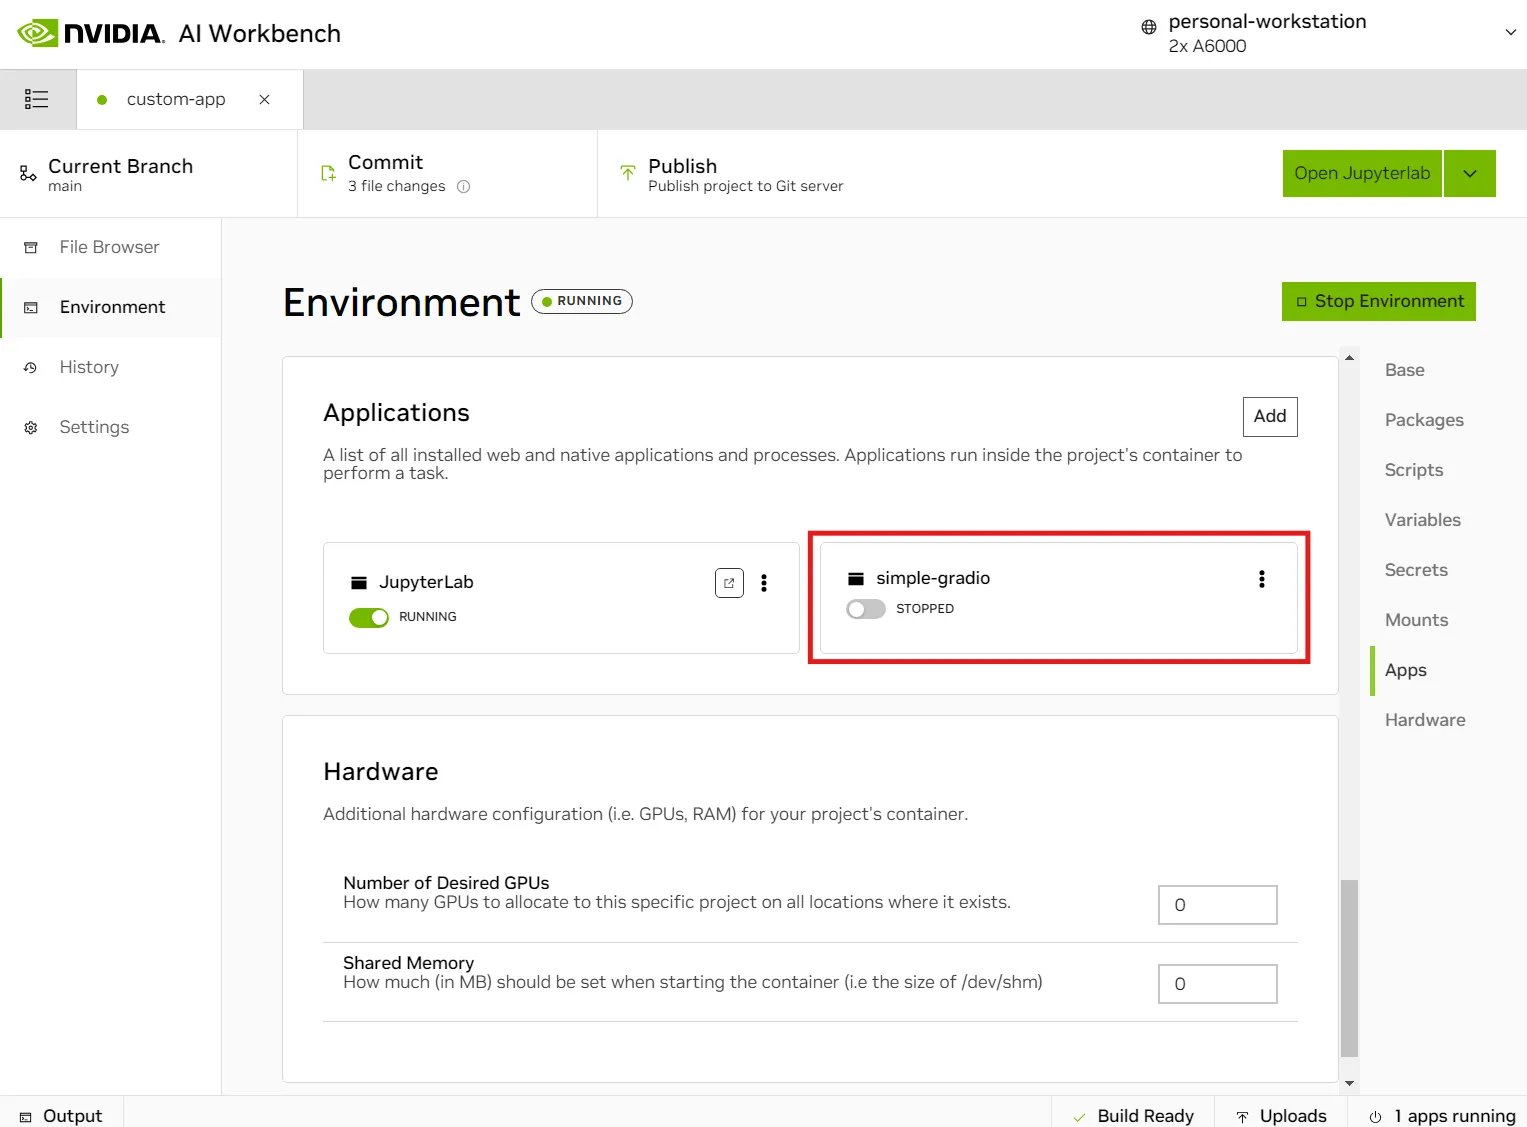 3. Close the application by toggling the application off in the **Applications** pane, or by clicking **Stop Environment**.
## Related Topics
- [Walkthrough: Customize Your Environment](/ai-workbench/quickstart/quickstart-environment)
- [Walkthrough: Customize Your Environment (CLI)](/ai-workbench/quickstart/quickstart-environment-cli)
- See how to [work with example projects on Github](/ai-workbench/quickstart/quickstart-hybrid-rag)
- Explore [NVIDIA AI Workbench Example Projects](/ai-workbench/quickstart/example-projects)
- Explore the [NVIDIA Developer Forum](https://forums.developer.nvidia.com/c/ai-data-science/nvidia-ai-workbench/671)
3. Close the application by toggling the application off in the **Applications** pane, or by clicking **Stop Environment**.
## Related Topics
- [Walkthrough: Customize Your Environment](/ai-workbench/quickstart/quickstart-environment)
- [Walkthrough: Customize Your Environment (CLI)](/ai-workbench/quickstart/quickstart-environment-cli)
- See how to [work with example projects on Github](/ai-workbench/quickstart/quickstart-hybrid-rag)
- Explore [NVIDIA AI Workbench Example Projects](/ai-workbench/quickstart/example-projects)
- Explore the [NVIDIA Developer Forum](https://forums.developer.nvidia.com/c/ai-data-science/nvidia-ai-workbench/671)