Audio Decoder in DALI
This tutorial presents, how to set up a simple pipeline, that loads and decodes audio data using DALI. We will use a simple example from Speech Commands Data Set. While this dataset consists of samples in .wav format, the following procedure can be used for most of the well-known digital audio coding formats as well.
Step-by-Step Guide
Let’s start by importing DALI and a handful of utils.
[1]:
from nvidia.dali import pipeline_def
import nvidia.dali.fn as fn
import nvidia.dali.types as types
import matplotlib.pyplot as plt
import numpy as np

batch_size = 1
audio_files = "../data/audio"
used batch_size is 1, to keep things simple.
Next, let’s implement the pipeline. Firstly, we need to load data from disk (or any other source). readers.file is able to load data, as well as it’s labels. For more information, refer to the documentation. Furthermore, similarly to image data, you can use other reader operators that are specific for a given dataset or a dataset format (see readers.caffe). After loading the input data, the pipeline decodes the audio data. As stated above, the decoders.audio operator is able to decode most of the well-known audio formats.
Note: Please remember that you shall pass proper data type (argument dtype) to the operator. Supported data types can be found in the documentation. If you have 24-bit audio data and you set dtype=INT16, it will result in loosing some information from the samples. The default dtype for this operator is INT16
[2]:
@pipeline_def
def audio_decoder_pipe():
    encoded, _ = fn.readers.file(file_root=audio_files)
    audio, sr = fn.decoders.audio(encoded, dtype=types.INT16)
    return audio, sr
Now let’s just build and run the pipeline.
[3]:
pipe = audio_decoder_pipe(batch_size=batch_size, num_threads=1, device_id=0)
pipe.build()
cpu_output = pipe.run()
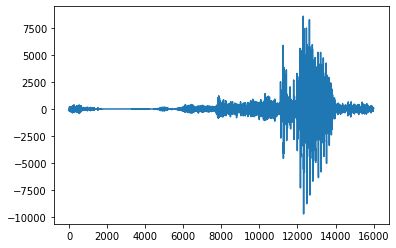
Outputs from decoders.audio consist of a tensor with the decoded data, as well as some metadata (e.g. sampling rate). To access them just check another output. On top of that, decoders.audio returns data in interleaved format, so we need to reshape the output tensor, to properly display it. Here’s how to do that:
[4]:
audio_data = cpu_output[0].at(0)
sampling_rate = cpu_output[1].at(0)
print("Sampling rate:", sampling_rate, "[Hz]")
print("Audio data:", audio_data)
audio_data = audio_data.flatten()
print("Audio data flattened:", audio_data)
plt.plot(audio_data)
plt.show()
Sampling rate: 16000.0 [Hz]
Audio data: [[  -5]
 [ -95]
 [-156]
 ...
 [ 116]
 [ 102]
 [  82]]
Audio data flattened: [  -5  -95 -156 ...  116  102   82]

Verification
Let’s verify, that the decoders.Audio actually works. The presented method can also come in handy for debugging DALI pipeline, in case something doesn’t go as planned.
We will use external tool to decode used data and compare the results against data decoded by DALI.
Important!
Following snippet installs the external dependency (simpleaudio). In case you already have it, or don’t want to install it, you might want to stop here and not run this one.
[ ]:
import sys
!{sys.executable} -m pip install simpleaudio
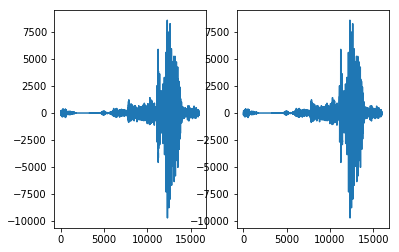
Below is the side-by-side comparision of decoded data. If you have the simpleaudio module installed, you can run the snippet and see it for yourself.
[5]:
import simpleaudio as sa

wav = sa.WaveObject.from_wave_file("../data/audio/wav/three.wav")
three_audio = np.frombuffer(wav.audio_data, dtype=np.int16)

print("src: simpleaudio")
print("shape: ", three_audio.shape)
print("data: ", three_audio)
print("\n")
print("src: DALI")
print("shape: ", audio_data.shape)
print("data: ", audio_data)
print("\nAre the arrays equal?", "YES" if np.all(audio_data == three_audio) else "NO")

fig, ax = plt.subplots(1,2)
ax[0].plot(three_audio)
ax[1].plot(audio_data)
plt.show()
src: simpleaudio
shape:  (16000,)
data:  [  -5  -95 -156 ...  116  102   82]


src: DALI
shape:  (16000,)
data:  [  -5  -95 -156 ...  116  102   82]

Are the arrays equal? YES
