RayCluster
How to set up a RayCluster on DGX Cloud Lepton for submitting Ray jobs on compute resources.
DGX Cloud Lepton supports the creation of RayClusters to manage the scheduling and scaling of machine learning workloads using the open source Ray framework.
A RayCluster is a dedicated reservation of resources on DGX Cloud Lepton with one head node and at least one worker node. You can connect to the RayCluster and submit Ray jobs, which are scheduled and run directly on the cluster. You can run a single large job on the RayCluster, or multiple smaller jobs as resources allow.
RayCluster supports heterogeneous compute types, allowing you to run a head node on a CPU‑only instance and workers on GPU nodes. Additionally, the head node can include GPUs and optionally run jobs as well.
A running RayCluster continues to reserve the requested resources until you delete it. To use the resources for other workflows, such as standard batch jobs, first shut down the RayCluster. Instructions are provided below.
The high‑level steps for running jobs with Ray on DGX Cloud Lepton are:
- Create a RayCluster
- Submit tasks to the RayCluster
This guide shows how to set up a RayCluster and launch a basic Ray job on the running cluster.
Prerequisites
- A DGX Cloud Lepton workspace with an available node group to create a RayCluster
- At least one GPU node and one CPU resource
- Basic understanding of the Ray distributed computing framework
Steps
Creating a RayCluster
To create a RayCluster, navigate to the RayCluster creation page and click the Create Cluster button in the top right. This opens the form for creating the cluster.
Enter the following details on the form:
- Ray Cluster Name: Specify a name for the RayCluster, such as
demo-ray-cluster. - Container: The RayCluster runs a container on the head node and each worker. The container specified here runs on all nodes in the RayCluster.
To use an official Ray image, select a tag from the Built‑in list. Tag format:ray:<ray version>-<python version>-<gpu>where<ray version>is the Ray version,<python version>is the Python version, and<gpu>indicates GPU support.
To use a custom container, select Custom under Image and specify the image ID. Ensure Ray is installed in the image. Then select the corresponding Ray Version. - Private Image Registry Authentication: Optionally add a private registry key for authenticating with a container registry.
- Head Node: Select the Node Group and resource shape for the head node. The head node can be CPU‑only (scheduling only) or include GPU resources to run workloads. Specify any storage to mount on the head node using + Mount Storage.
- Worker Group: Select the Node Group and resource shape for the worker(s). Using the same node group as the head node is recommended. Workers primarily run the workloads for submitted. To request multiple workers, increase Min Replicas. Add a storage mount using + Mount Storage. You can optionally specify a Group Name; otherwise, a name is generated for you.
Once the form is complete, click the Create button at the bottom of the page. You are returned to the list of RayClusters running in the workspace. When resources are available, the specified containers launch on each resource and the RayCluster starts. Depending on container size and requested resources, it can take a while for the RayCluster to reach the Ready state. When ready, the list looks similar to the following:

Connecting to the RayCluster
With a RayCluster started, you can connect to the head node to submit jobs or view the dashboard.
To connect to the head node, click the Terminal button to the right of the RayCluster as highlighted in the image below.

This opens a bash session on the head node in a virtual terminal at the bottom of the page. To verify the RayCluster, run ray status in the terminal. The output looks similar to the following, depending on the number of resources selected:
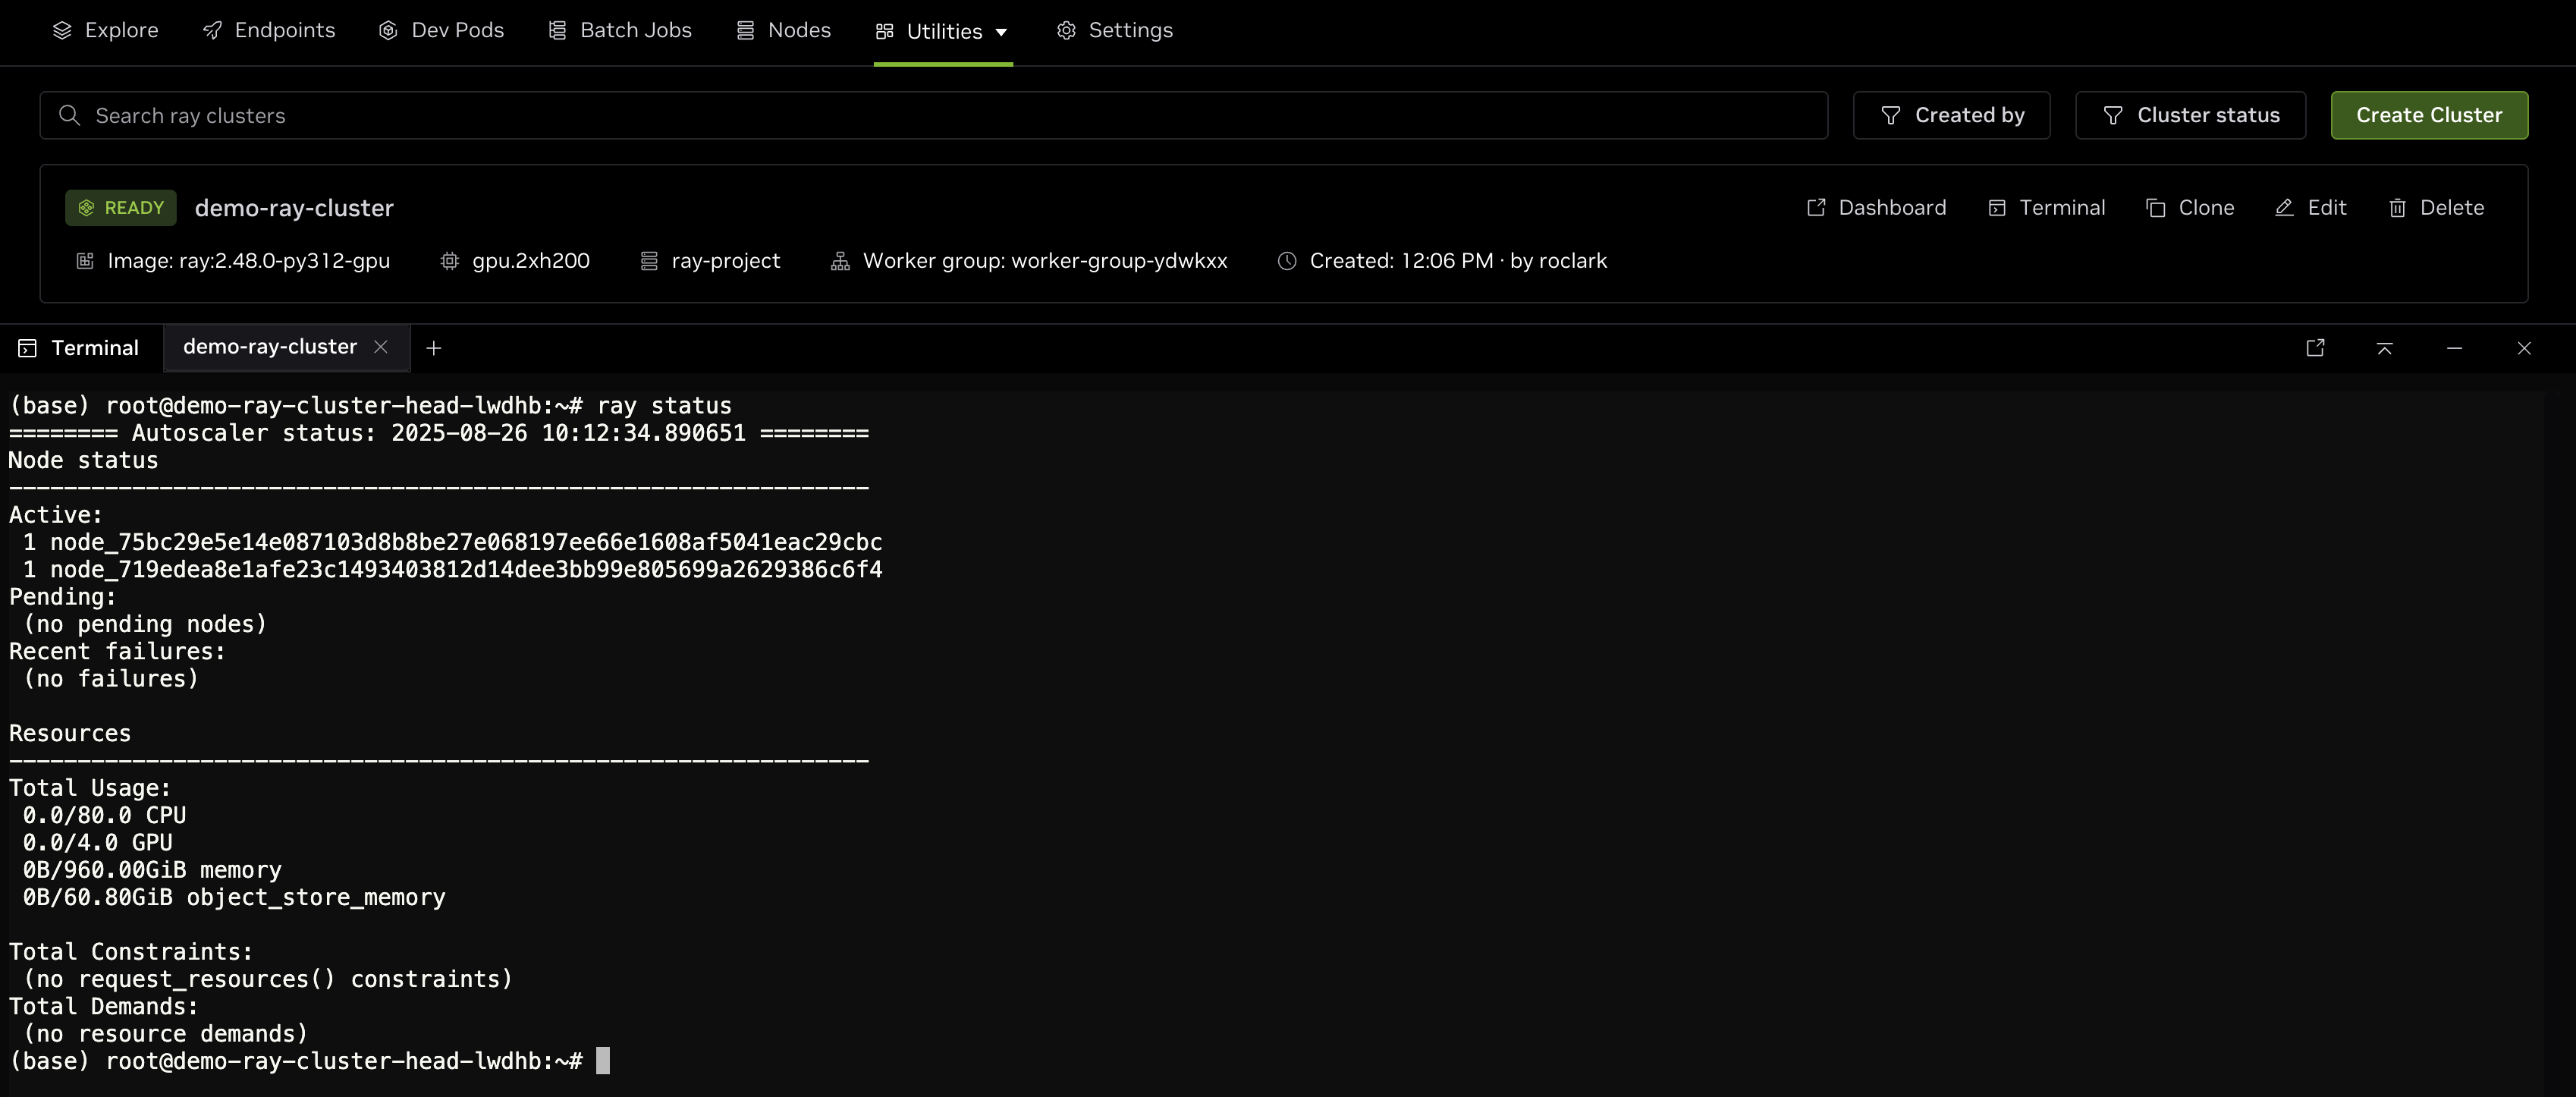
As shown, there are two nodes in the cluster with a total of 80 CPU cores and 4 GPUs available for scheduling jobs.
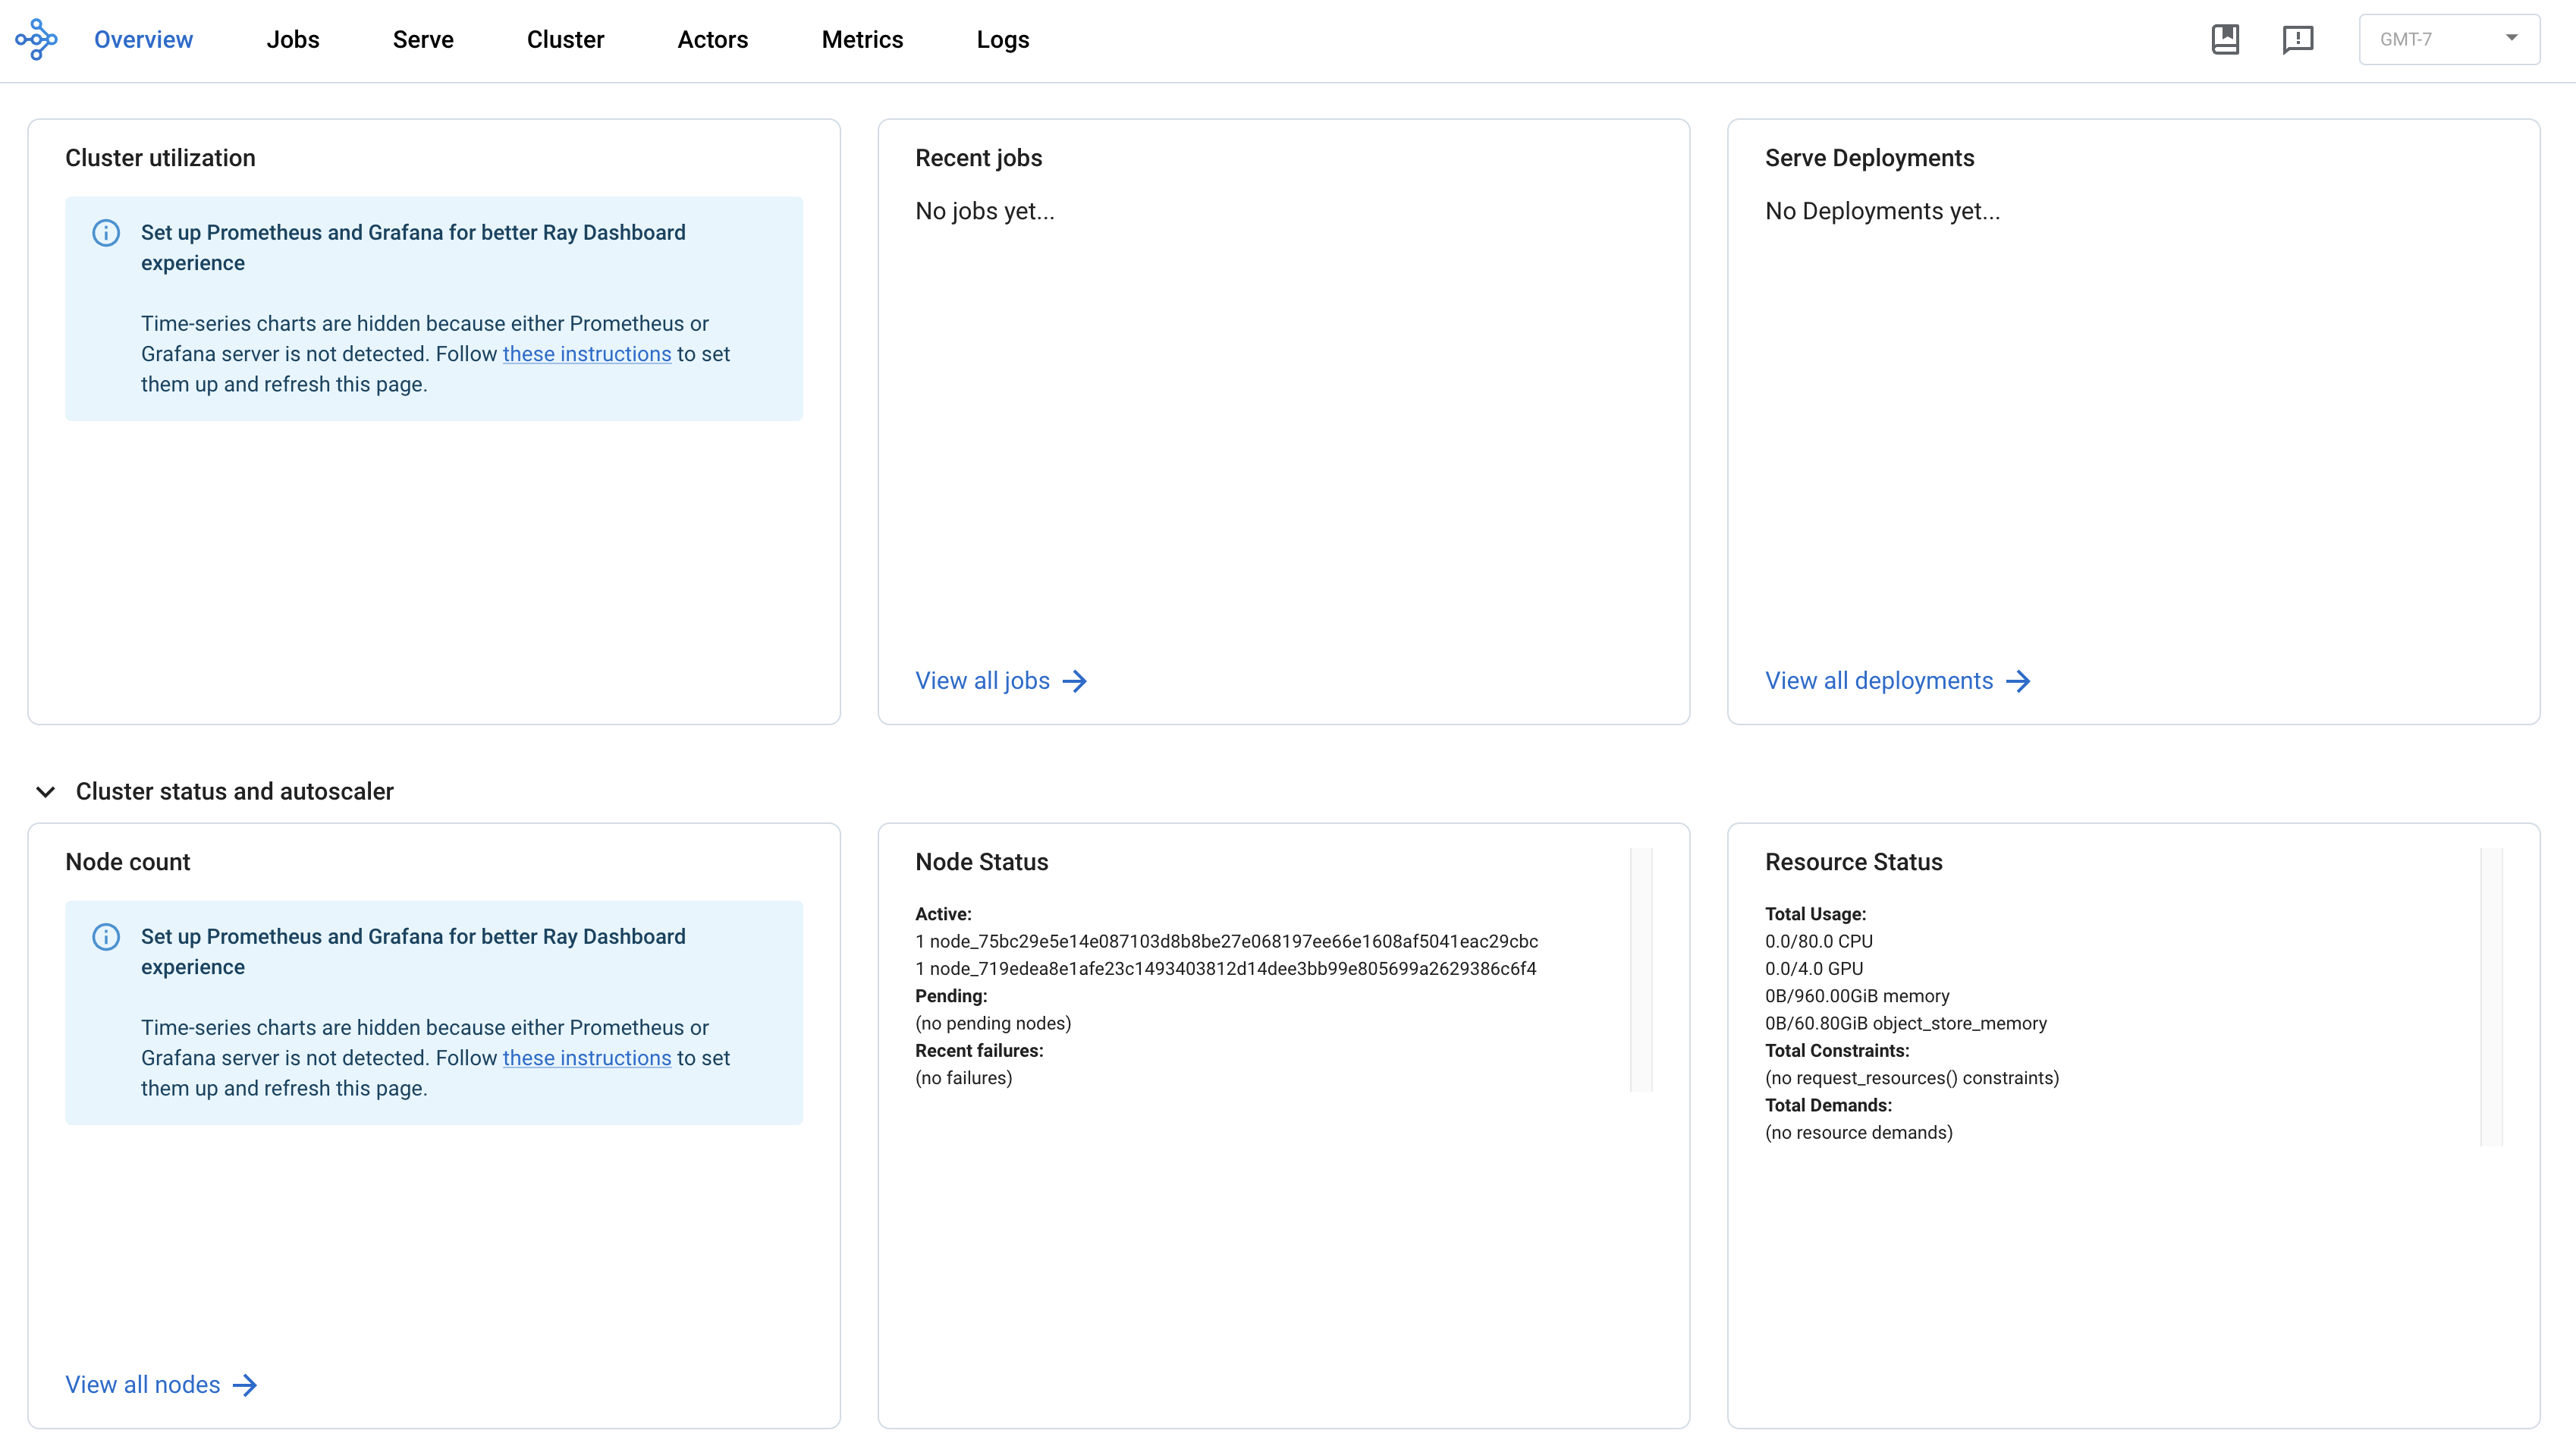
Clicking Dashboard opens a new tab with the Ray dashboard for the cluster, where you can view recent jobs, utilization, resource availability, and more.
Launching a Ray Job
To launch a job with Ray, open the terminal on the head node and create a new file named train.py with the following contents:
This simple script runs on two nodes with one GPU per node. It prints the node name and GPU index used for each worker, as well as the result of a simple matrix multiplication.
The job requires PyTorch, which is not installed in the base Ray images. Install it on the head node and configure Ray to use the package on all workers. In the head node terminal, run:
This will install PyTorch on the head node which can be used on workers via a Ray runtime environment. To install and use different dependencies which aren't available in the base container, install the packages on the head node with pip3 and update the following line with additional package names by updating the ["torch"] list:
To launch the job, run python3 train.py in the terminal. This allocates two workers with a single GPU per worker in the RayCluster and runs the script. The output should look similar to the following:
The job will also be viewable in the Recent Jobs list in the dashboard to show status, nodes, usage, and more.
While simple, this shows how to use the allocated RayCluster to run a multi‑node GPU job. For more complex examples, refer to the Ray documentation, which includes several tutorials covering a wide range of tasks.
Scaling the RayCluster
The RayCluster supports manually scaling workers up and down to meet demand. To add resources to an existing RayCluster, click Edit next to the cluster and set the desired number of replicas. This updates the number of workers to match the replica levels specified in the form. For example, increasing from one to two replicas adds an additional worker. This may take some time as the image is pulled and the replica starts. After the worker is added, verify it by running ray status again:
The output indicates there is now an additional node in the cluster and two extra GPUs available for jobs.
You can also scale down to use fewer workers if you do not need the existing capacity. When scaling down, extra workers are deleted and Ray updates automatically to reflect the desired number of workers.
Shutting down the RayCluster
As mentioned earlier, the RayCluster holds resources until it is shut down, allowing you to submit jobs in a persistent environment. To free up resources for other tasks, or when the RayCluster is no longer needed, delete it. Click the Delete button next to the cluster as shown below.
