Roles and Permissions
Learn how to create and manage roles and permissions for workspace members in DGX Cloud Lepton, including built-in roles and custom role creation.
A role defines a set of permissions (Read or Read/Write) assigned to a DGX Cloud Lepton resource (such as Batch Jobs, Node Groups, and so on).
Navigate to the Roles tab on the left side of the workspace settings page.
You will see a list of built-in roles at the top: admin, user, and viewer. By default, the user role has read access to all resources, and the admin role has both read and write access to all resources. Built-in roles cannot be edited or deleted.
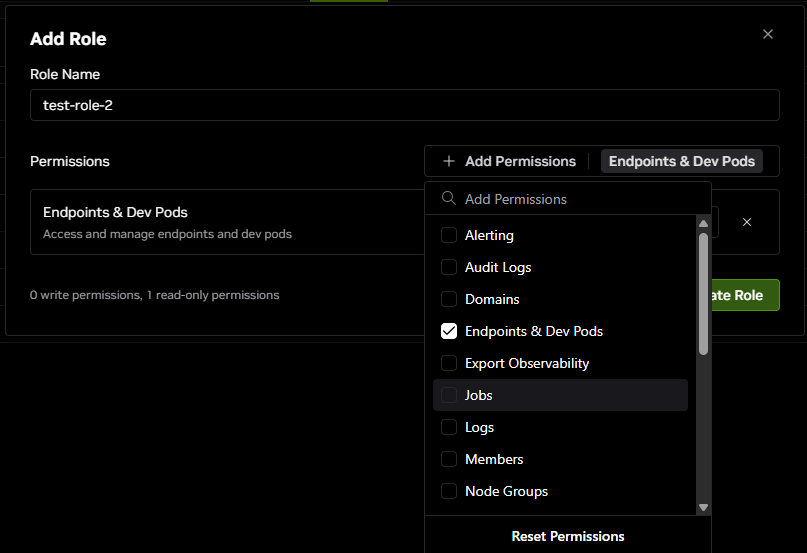
Creating Custom Roles
If you have the admin role, you can create a new role.
- Click the Add Role button.
- Enter a name for the role.
- Click Add Permissions and select the resource you want to provide permissions for.
- Select Read Only or Read/Write.
- You can add permissions for more than one resource to a role.
- Click Create Role.
Available Resources
The following is the list of resources that you can assign permissions for:
- Alerting (Configure alerts and notifications)
- Audit Logs (View and export audit logs)
- Domains (Configure ingress rules and networking)
- Endpoints & Dev Pods (Access and manage endpoints and devpods)
- Export Observability (Export observability data and metrics)
- Jobs (Access and manage all batch jobs)
- Logs (View and access system and application logs)
- Members (Manage and invite workspace members)
- Node Groups (Configure and manage node groups)
- Node Reservations (Reserve and manage compute nodes)
- Private Registry Auth (Configure private container registry authentication)
- Ray Clusters (Access for Ray clusters management)
- Secrets (Store and manage sensitive configuration)
- Service Requests (Request services from DGX Cloud Lepton team)
- Slurm Clusters (Access for Slurm clusters management)
- Storage Permission (Manage storage mounts and permissions)
- Templates (Create and manage deployment templates)
- Tokens (Access for API Tokens)
- Usages (View resource usage and billing information)
- Workspace Info (View and edit workspace information)
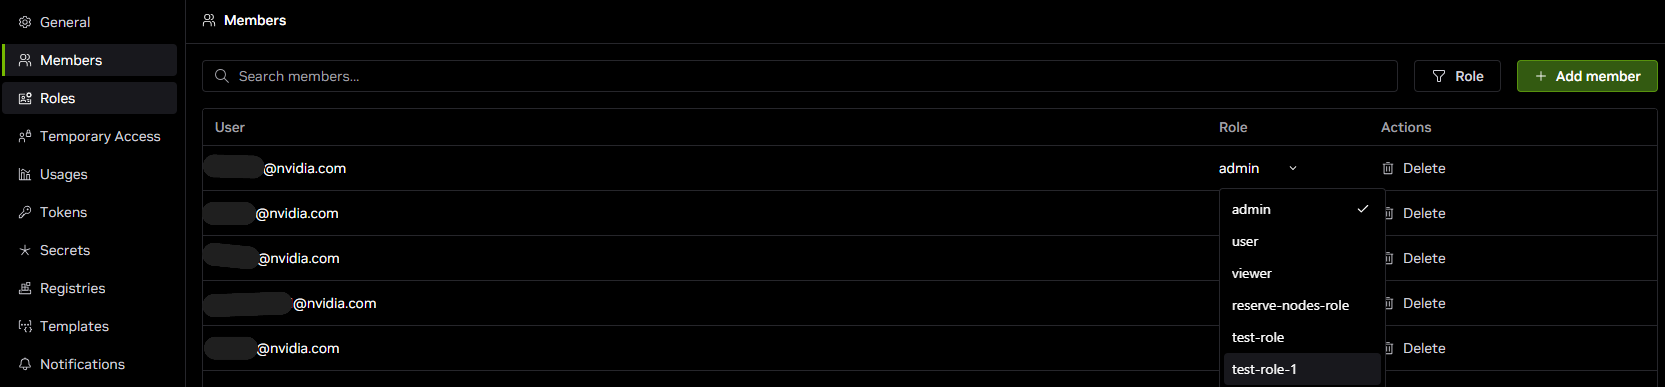
Assigning Roles to Members
Once a role is created, it can be assigned to users.
- Navigate to the Members tab on the left side of the workspace settings page.
- You will see a list of all the members in your current workspace.
- If you have the admin role, click the dropdown menu in the Role column for a member and select a role.
- This new role will override the previous role assigned to the member.