Assigning Images to Nodes and Post Installation Configurations#
This chapter provides instructions for assigning a new or updated software image to nodes in a cluster managed by Base Command Manager (BCM).
Replacing Node Images#
Once you are satisfied with a new image, you can assign the image to nodes, effectively “replacing” the image they will use upon next boot or when using syncrhonizing the contents without reboot.
In cluster environments, images would typically be applied to a node category so that all nodes in that category use the same image.
Assign the image to a node category:
% category use <category-name>
% set softwareimage my-image
Assign the image to a node:
% device use <node-name>
% set softwareimage my-image
Note
To rollback changes made to my-image, re-assign the original image to the node(s) and follow the post installation configurations in Post Installation Configurations.
Post Installation Configurations#
After assigning the new image to a node category or node, it is necessary to update BCM configurations, such as the kernel version, additional kernel modules, and kernel settings.
Important
If the new image replaces an existing image, all additional software and configurations need to be re-applied to the new image. Slurm or Kubernetes deployments must also be re-deployed to the new image. See Re-provision a New Image for more details.
Images or cloned images that were updated “in-place” do not require to re-apply configurations or additional BCM software installations
Updating the Kernel Version#
Because compute nodes boot the kernel from the head node (through PXE) and not from the local disk, any updated kernel must be registered with BCM if the kernel has changed. It also creates a new initial ramdisk for the updated kernel.
List the images with the current kernel versions:
$ cmsh -c "softwareimage;list"
Name (key)                        Path (key)                                   Kernel version           Nodes
---------------------------       -------------------------------------------  --------------------     -----
default-image                     /cm/images/default-image                    6.8.0-51-generic-64k        0
default-image-ubuntu2404-x86_64   /cm/images/default-image-ubuntu2404-x86_64  6.8.0-51-generic            0
Assign the new kernel version to the image if it has changed:
Enter the CM shell.
$ cmshGo to softwareimage and select the image with the updated kernel:
% softwareimage use baseos-image
Select the new kernel:
% set kernelversion 5.15.0-1078-nvidia
Note
Start typing
set kernelversionand Hit the Tab key twice for tab completion to select the updated version.Commit the kernel modification to the image.
% commitWait until you see that the initial ramdisk was generated successfully before exiting cmsh.
Sun Jun  1 22:15:28 2025 [notice] headnode: Initial ramdisk for image dgx-os-6.3.2-h100-image is being generated
Sun Jun  1 22:16:15 2025 [notice] headnode: Initial ramdisk for image dgx-os-6.3.2-h100-image was generated successfully
Using the BCM Post-Installation Tool#
The BCM post-installation tool bcm-pod-setup automates the application of recommended configurations for DGX clusters,
including kernel parameters, network configurations, etc.
The tool was original created for provisioning a SuperPOD clusters, from the network topology, interfaces, and network bonding, to the head node configurations.
Important
The bcm-pod-setup tool is intended for the initial configuration of a cluster and should not be used after a cluster has been deployed.
Use the Create the BaseOS image from the BCM default image for options to configure image attributes, such as kernel arguments.
The post installation tool can also be used with the --dgx-type <dgx-type> option to provision only the DGX or DGX-like systems in a cluster.
It configures the following attributes of the compute notes:
Image
Updates the image with kernel parameters and kernel modules specific to the DGX type. The image name is derived from the DGX type and defaults to a version defined by the BCM release, for example
dgx-os-7.1-b200-imagefor DGX B200 in BCM 11.30.0. The name can be specified using the--dgx-image <name>argument.
Runtiime Kernel Parameters (sysctl)
Disables arp forwarding for A100, H100, and B100
Configures
net.ipv4.*flow-based routing rules for GB200
Disk Layout
Assigns a corresponding disk layout and udev rules for a system type. It uses the plain layout for GB200 and the common persistent layout for all other systems unless
--dgx-disable-persistent-ruleswas provided. In that case, it uses the plain layout for all systems. For the persistent layout, BCM defines udev rules to assign the corresponding nvme drives to the names used in the persistent layout.
Use the tool after assigning a new image to a node category or node to configure
Install and load the bcm-post-install module, if not already available:
$ apt-get install bcm-post-install
$ module load bcm-post-install
Run the bcm-post-install command to apply the recommended configurations to the image:
$ bcm-pod-setup --dgx-type <dgx-type> --dgx-image baseos-image
Replace <dgx-type> with the appropriate DGX system type:
A100 - for DGX A100 systems
H100 - for DGX H100 systems
H200 - for DGX H100 systems
B200 - for DGX B200 systems
GB200 - for DGX GB200 systems
The --dgx-image (or -X) argument specifies the image where kernel arguments and modules are configured
The kernel parameters are extracted from the nvidia-grub-params.json file for the respective DGX system type provided with --dgx-type.
Kernel Parameters#
BCM allows to manage kernel parameters that are applied when nodes boot the kernel from the head node.
Note
The post-installation tool bcm-pod-setup has already configured default kernel arguments for the system.
Use the following instructions if you need to replace or amend them.
Important
Setting multiple kernel parameters requires to enclose the parameters in double quotes. If used in a shell script, ensure to escape the double quotes with a backslash (").
Use the following commands to set (replace) or amend kernel parameters.
These instructions define kernel parameters for the image.
Replace softwareimage use baseos-image with device use <node> or category use <category> to apply the configuration to the
node, or category, respectively.
[optional] Check the current kernel parameters set for the image:
$ cmsh -c "softwareimage; use baseos-image; get kernelparameters"
Set the required kernel parameters for the image, replacing existing parameters:
$ cmsh -c "softwareimage; use baseos-image; set kernelparameters \
\"nouveau.modeset=0 iommu.passthrough=1 systemd.unified_cgroup_hierarchy=0 \
systemd.legacy_systemd_cgroup_controller init_on_alloc=0 \
numa_balancing=disable acpi_power_meter.force_map_on=y\"; commit"
Validate the updated kernel parameters:
cmsh -c "softwareimage; use baseos-image; get kernelparameters"Append any missing kernel parameters without replacing existing parameters:
$ cmsh -c "softwareimage; use baseos-image; append kernelparameters \" nvme_core.multipath=n\""; commit
Note
Appending parameters need to have a leading space, unless the existing parameters are empty or have a tailing space.
Adding Kernel Modules to the Initial Ramdisk#
When additional kernel modules are required at boot time, such as bonding or multipathing modules, these modules need to be added to the initial ramdisk of the image.
Replace softwareimage use baseos-image with device use <node> or category use <category> to apply the configuration to the
node, or category, respectively.
Add the required kernel modules to the initial ramdisk (e.g., bonding):
cmsh -c "softwareimage; use baseos-image; kernelmodules; add bonding; commit"
Re-provision a New Image#
When a system image is replaced, all configuration changes and software installations need to be re-applied, including software deployments, such as Slurm or Kubernetes installations, or custom configurations.
Skip this section if the image or a clone of the image was updated in-place and no new image was created.
Custom Configurations and Software Installations#
If you have made custom changes to the original image, such as installed additional software or modified configuration, you need to re-apply these in the new image.
Re-deploying the Slurm Software#
The following steps re-apply the Slurm installation to the new image.
Find the
cm-wlm-setup.conffile used to install Slurm. BCM keeps the configuration file as/cm/local/apps/bcm-post-install/etc/cm-wlm-setup.conf. If deployed manually, it might be saved under /root.Disable/uninstall the Slrum cluster using
cm-wlm-setup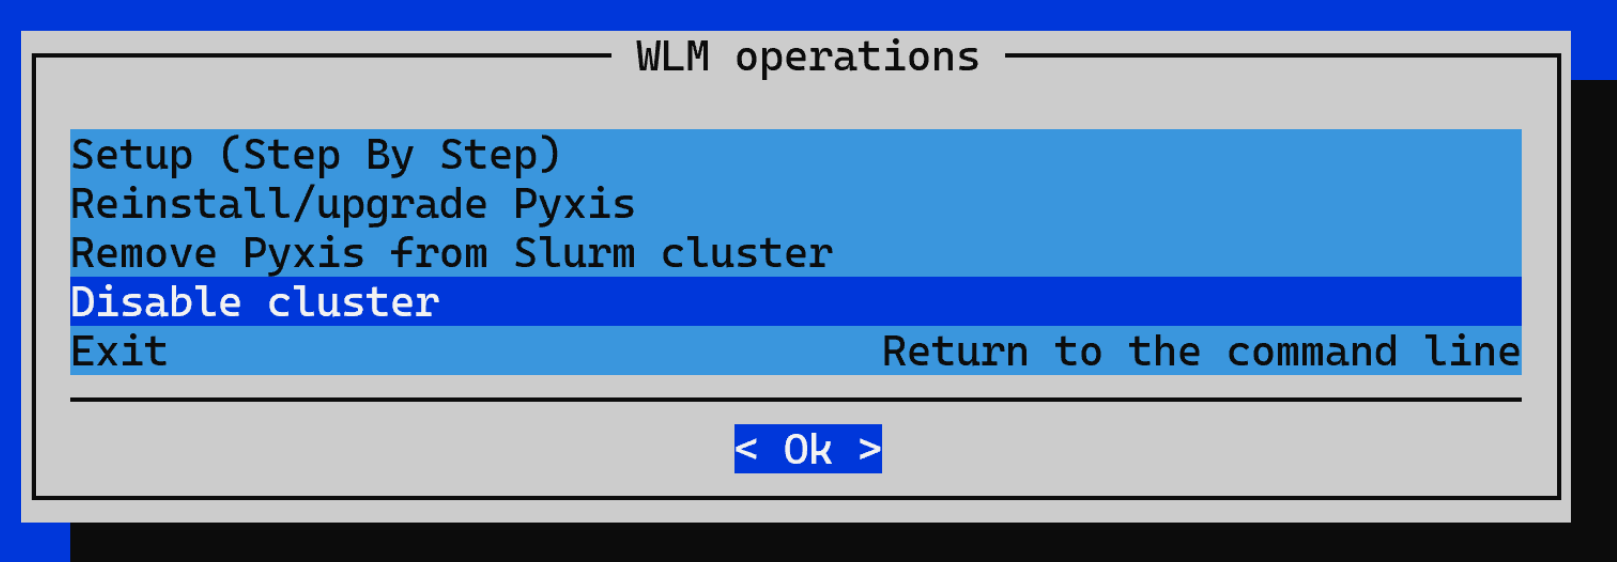
If a new category was created for the image, add the category to the
cm-wlm-setup.confconfiguration file. Skip this step if the image was assigned to the same category as the original image.... gpu: client: slurm-client-gpu: categories: - some-category - (Add the newly created category here) ...
Rerun
cm-wlm-setupwith the same configuration:$ cm-wlm-setup -c cm-wlm-setup.conf
Re-deploying the Kubernetes Software#
Similar to Slurm, when a system image is replaced, all configuration changes and software installations need to be re-applied:
Find the
cm-kubernetes-setup.conffile used to install Kubernetes. This file is tyipcally created in the /root directory by default but can be in other folders.Uninstall the Kubernetes cluster using
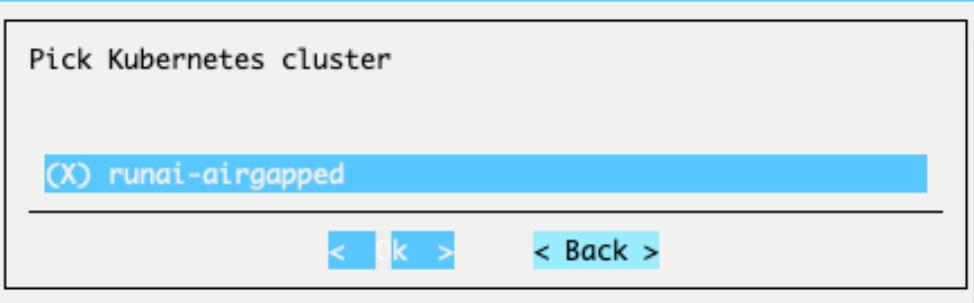
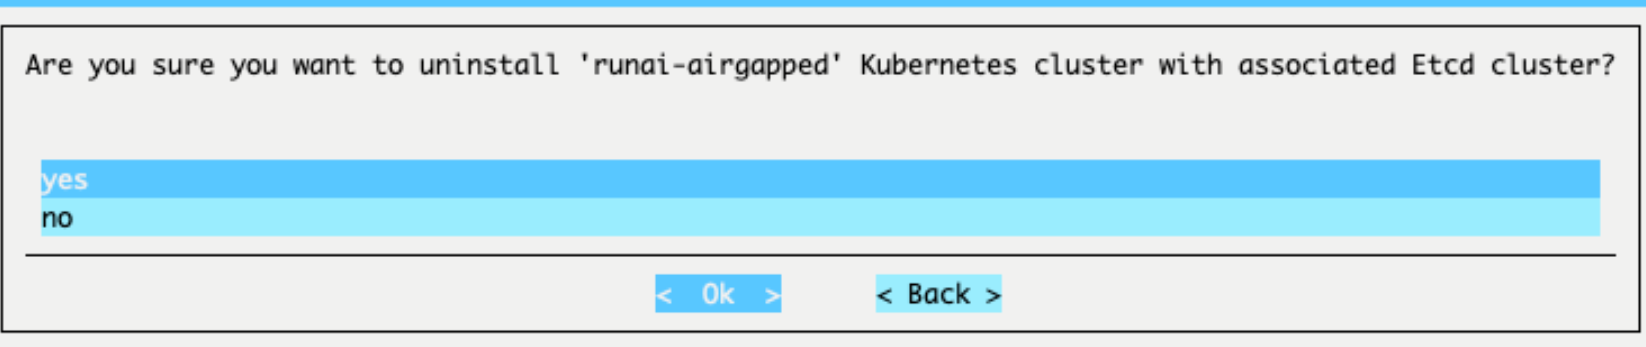
cm-kubernetes-setup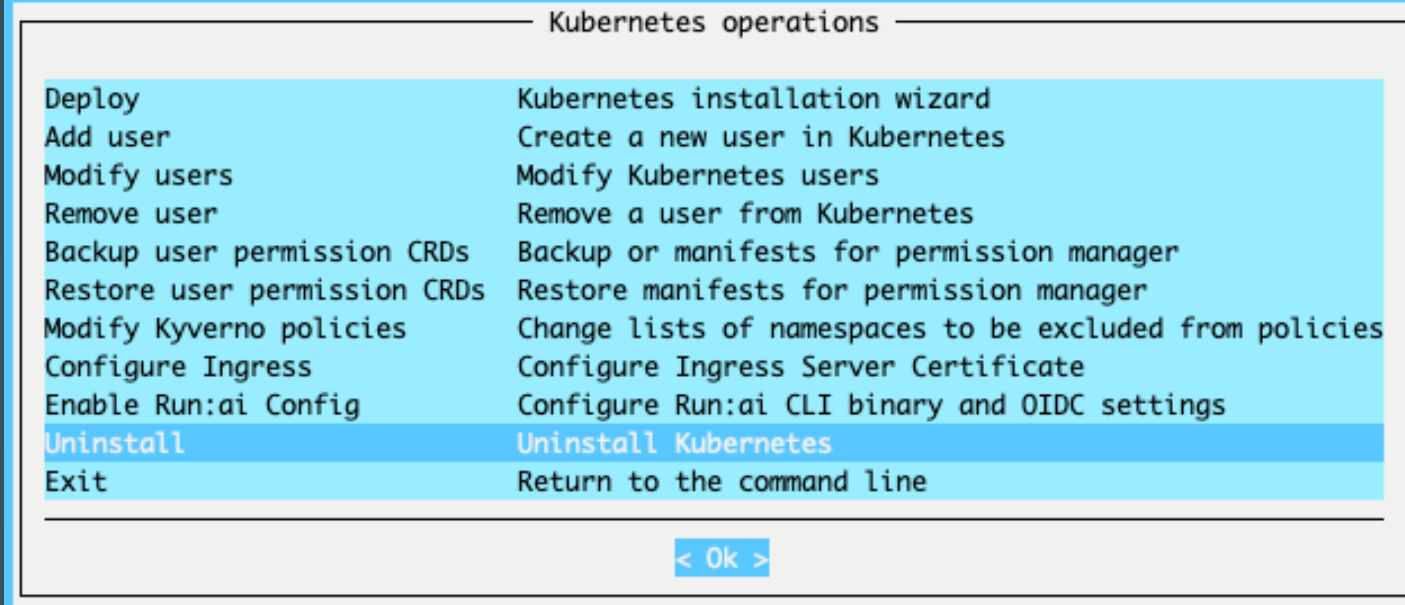
If a new category was created for the image, add the category to the
cm-kubernetes-setup.confconfiguration file.... worker: categories: - some-category - (Add the newly created category here) ...
Run
cm-kubernetes-setupwith the configuration file from above:$ cm-kubernetes-setup -c cm-kubernetes-setup.conf
Reboot Compute Nodes#
To reboot a node or nodes after the image has been assigned, use the cmsh or pdsh commands.
psdsh executes the reboot command remotely.
Note
Before assigning an image to all nodes in the cluster, it is typical to first assign it to one node and validate the image before rolling it out to the entire cluster.
Reboot a single node:
$ cmsh -c "device; reboot -n node001"
Verify that the node is running the expected image and proceed to reboot the remaining nodes:
Reboot all nodes in a node category:
$ cmsh -c "device; reboot -c baseos-category"
Reboot multiple nodes by specifying a range of node names:
$ cmsh -c "device; reboot -n node-[002-031]"