|
|
DriveWorks SDK Reference| 0.6.67 Release |
|
|
DriveWorks SDK Reference| 0.6.67 Release |
The color correction sample demonstrates H.264 playback with color correction. The sample opens an X window to play back the 4 provided video files and corrects their color based on a selected master camera index. Color correction can be activated or deactivated by pressing the SPACE key.
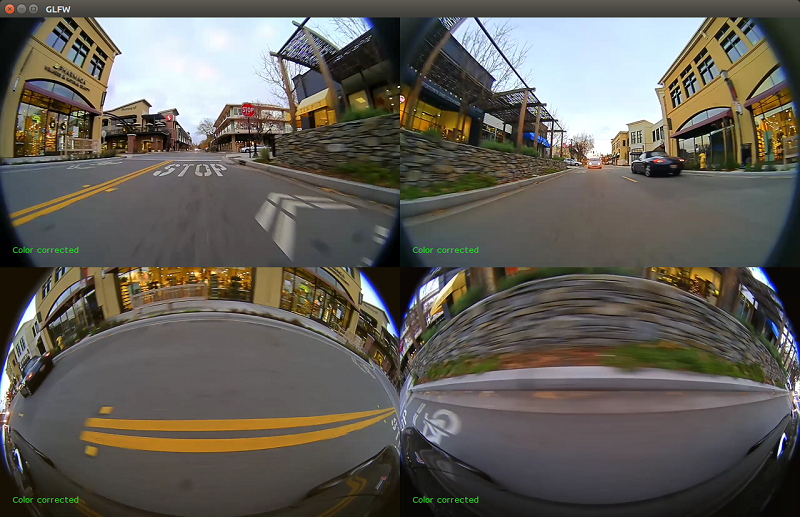
It is important to notice that color correction happens by reprojecting all cameras into a common plane. In case of this sample the common plane is the ground plane. That means when color correction is enabled the hue of the ground texture will be equalized to the selected master camera. Please note that when modfying based on ground plane, other parts of the image might look slightly different as one would intuitively expect.
Run this sample by executing:
./sample_color_correction
These are the available command line options:
--video1=filename1 --video2=filename2 --video2=filename3 --video2=filename4--ref=[0,1,2,3]On platforms that support NvMedia (i.e., DRIVE PX 2), the NvMedia engine is used for decoding the stream. On Windows and Linux, NVCUVID decoder is used; a proper NVIDIA® CUDA® toolkit installation is required.