Android applications must be digitally signed in order to install on a device (see Signing Your Application in the Android SDK).
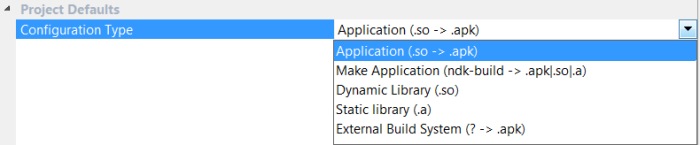
Nsight Tegra only performs signing when the Configuration Type property is set to either Application (.so -> .apk) or Make Application (ndk build -> .apk|.so|.a). Other configuration types do not produce .apk files to sign. To change this property, right-click on your project and select Properties. Then set the property on the General tab.
There are two ways to sign your application: in debug mode and in release mode. By default, release signing is applied in the Release project configuration, and debug signing is used in all other configurations.
If you already have a key store with your private keys and wish to use them to sign an application, see the Release Signing section below.
Debug signing is used by default in the Debug configuration by the Nsight Tegra building process, in order to automatically sign the application with a debug key. This kind of signing is used when running and debugging an application on an Android device. (If you need to distribute or publish your app, see Release Signing.)
Android debug builds (in which Ant Build Type is set to Debug) are automatically signed with a Debug key, so no further steps are required.
Debug signing uses the following parameters:
debug.keystoreandroidandroiddebugkeyandroidAndroid DebugAndroidUSRelease signing is used to produce a .apk file suitable for publishing on an application marketplace. To sign your application with a real certificate set the AntBuildType property to Release.
If you already have a key store file with your private keys, you can use it to sign applications. If you already have a key store file with your private keys, you can use it to sign applications via the Signing Application wizard.
Make sure to back up your key store before using it in command line tools, or in Nsight Tegra.

Security Warning: Although Nsight Tegra makes it possible to sign the application in a way that is suitable for an application marketplace (such as Google Play), you should be aware about the security issues of this approach. If you fill in the Key Passwordfield and save the project file, your password will be written in clear text on your hard drive. The real private keys used to sign release applications should be kept in secret. For more information, read Securing Your Private Key.
If Ant Build Type is set to Debug, then the .apk will be signed with the automatically generated debug key. If the Secure Properties Location option is provided in the Debug mode, it will be ignored and a warning will be shown.
If Ant Build Type is set to Release, then the .apk will be signed with the key, which is described by a secure properties file. If the Secure Properties Location is empty in the Release mode, a warning will be shown that notifies the user that the app will not be signed. Therefore, in order to have no signing warnings, the user must provide a Secure Properties Location in Release and must not provide it in Debug.
To sign a project, select the ![]() Signing Options… project’s context menu item. The signing wizard will show up. Completing the wizard will fill in the project’s Secure Properties Location. Cancelling it will not do anything.
Signing Options… project’s context menu item. The signing wizard will show up. Completing the wizard will fill in the project’s Secure Properties Location. Cancelling it will not do anything.
With Nsight Tegra, Visual Studio Edition, there is now a signing application wizard to simplify the process of creating a signed application.
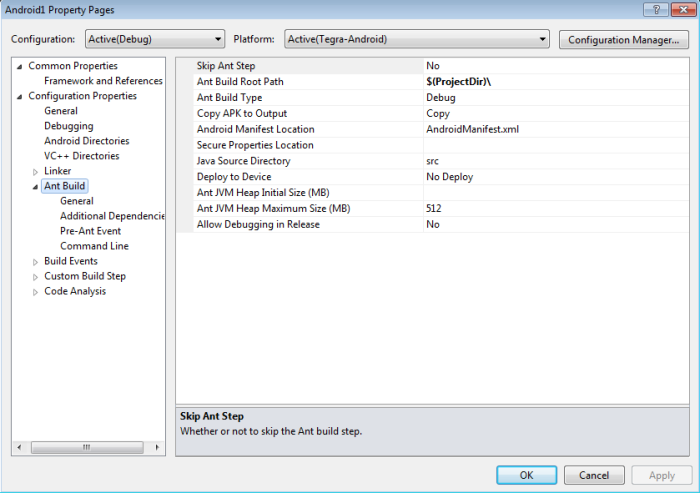
There are two project properties related to signing applications. Under the Ant Build -> General properties section, they are the Secure Properties Location and the Ant Build Type.
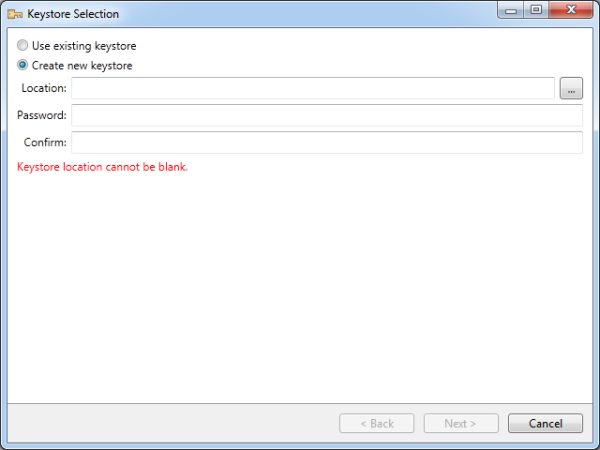
The signing wizard allows creating and reusing keystores, keys, and secure properties. To create a new keystore, select Create new keystore. (To use an existing keystore, see below.)
The signing wizard validates the user input and does not allow you to continue until all the conditions are satisfied. The wizard does not allow overwriting the keystore files, in order to avoid accidental key data loss, which could be fatal if the user does not have a backup copy.
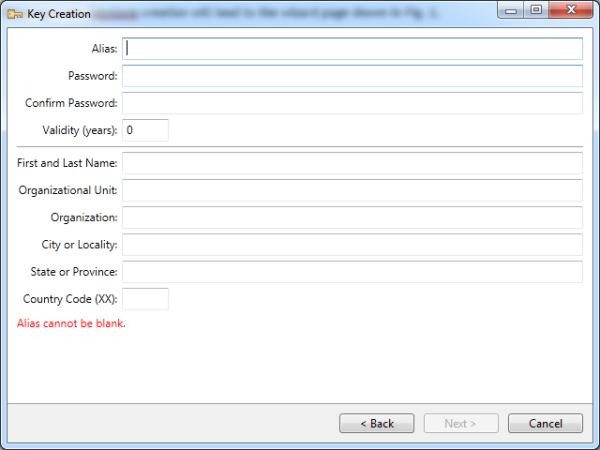
Alias, Password, Validity and at least one of the description fields must be filled. Password requirements are the same as for keystore passwords (a minimum of 6 characters in both cases). Validity must be between 1 and 1000 years; twenty-five or more is recommended (the wizard will display a warning if the value is between 0 and 25, but you will still be allowed to proceed).
The wizard will automatically set the default value for the Secure Properties Location. The default filename is secure_properties.xml, and it is located in the same folder as the corresponding keystore. Pressing Finish on this page will complete the wizard and fill in the Secure Properties Location in the project properties.
If you wish to use an existing keystore, select the Use an existing keystore option from the first page of the signing wizard and click Next.
Choosing the Create new key option will lead to the Key Creation page. The new key will be added to the selected keystore.
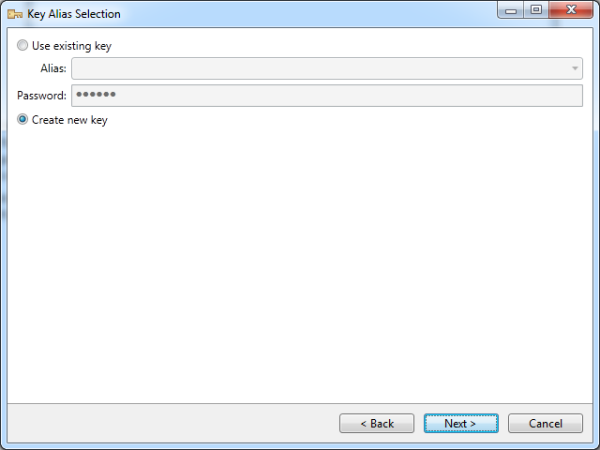
If Use existing key was selected instead, then the alias must be selected from the Alias combo box that is filled with aliases from the selected keystore. After that, the last page with the secure properties location selection will be shown.
Note that the passwords are checked only when going to the next page. If they do not match, the existing keystore/key passwords, a message box with the error message will show up and the user will not be allowed to proceed.
Switching to the new signing mechanism applies only to people who have projects made with Nsight Tegra 1.2 and earlier. To switch from the old signing options mechanism to the one described in this section, the user must do the following:
.xml), not the Ant properties file (.properties).nsight_tegra.xml (located in the same folder as build.xml). This file is recreated on every build, and is referenced from the main build.xml file. The secure properties rules file is imported as "optional," which will make the build succeed, even if this file was not found. In that case the .apk will be left unsigned.

NVIDIA® GameWorks™ Documentation Rev. 1.0.211026 ©2014-2021. NVIDIA Corporation and affiliates. All Rights Reserved.