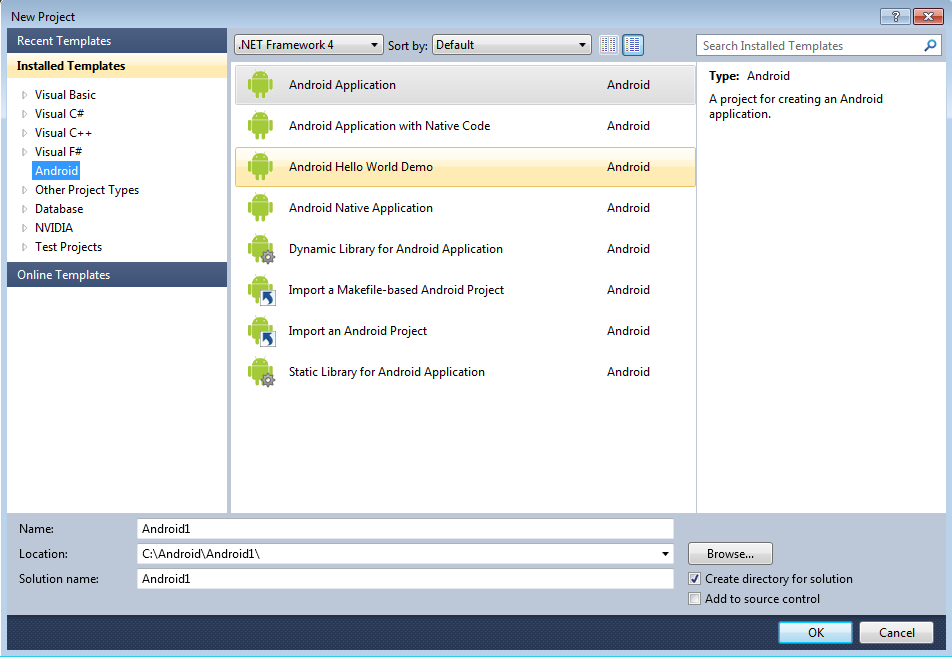
A new Android project can be created using the File > New > Project menu. Normal Visual C++ projects are created and set to use a custom Android platform. Projects can be set to build in the Visual Studio environment or using external build files.
Eight project templates are available in the Android category.
This template creates a basic Android application that contains only Java sources. The project is created with one defined Activity.
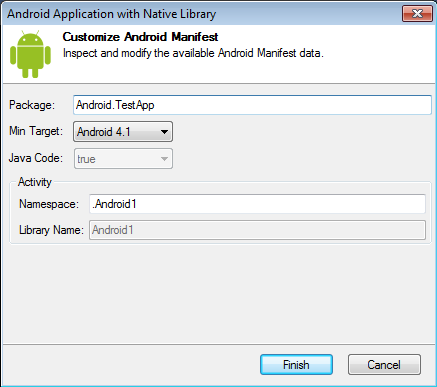
This template creates a basic Android project that includes a Native library. The project includes both Java and native C sources. One Activity is defined and includes a native JNI method that is implemented in the C source.
This project builds a sample “Hello World” application. It includes both Java and native C sources. The Java sources make JNI calls to the C sources to obtain text that is displayed on the screen. This project will build in the Visual Studio environment.
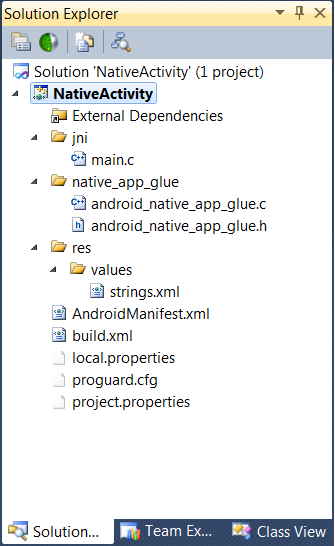
This template creates a native activity application. The project does not contain Java sources and uses the NativeActivity class, http://developer.android.com/reference/android/app/NativeActivity.html.

This template creates a basic dynamic native library for use in the Android applications. This project may contain only C/C++ code.
This template creates a Visual Studio project for an existing Android SDK and/or NDK project. The sources for the existing project are imported into the Visual Studio project. The template includes a wizard to specify the location of the existing project and what files should be imported into the Visual Studio project.
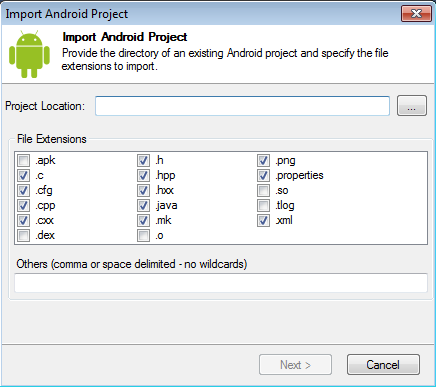
The configuration type for this project will be set to Make Application. It will build with ANT and the NDK tools ndk-build.cmd script.

This template creates a Visual Studio project for an existing Android SDK project. It is used when you want to add native C sources to an existing Android Java project. It will add template JNI C source files and build a native library.
This template creates a basic static native library for use in the Android applications. This project may contain only C/C++ code.
Project properties can be accessed through the normal means of right-clicking on the desired project and selecting the Properties menu.
This page contains the general properties for the project.
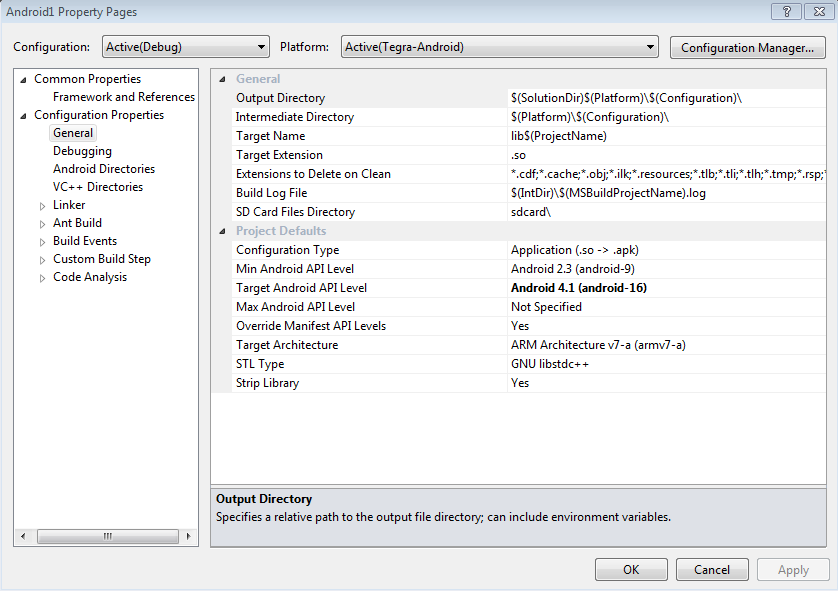
 | Note: If you are making an .so file, you must prefix the name with lib. However, when loading from Java System.loadLibrary(), then you pass in the name without the lib prefix. This is the standard Android convention. |
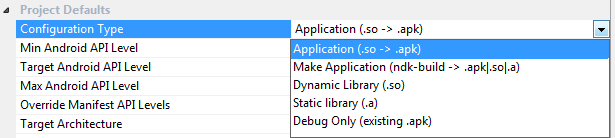
Application – Builds the native C/C++ sources into a shared library. Java sources are built using the Android SDK ANT to produce the final application package (.apk) file. For debug builds, a copy of gdbserver is included in the application and a GDB initialization file, gdb.setup, is created.
Make Application – Builds the native C/C++ sources using external make files and the ndk-build script. Java sources are built using the Android SDK ANT to produce the final application package file.
Dynamic Library – Builds C/C++ sources into a dynamic shared library. No ANT build is performed and no application package file is produced.
Static Library – Builds the C/C++ sources into a static library. No ANT build is performed and no application package file is produced.
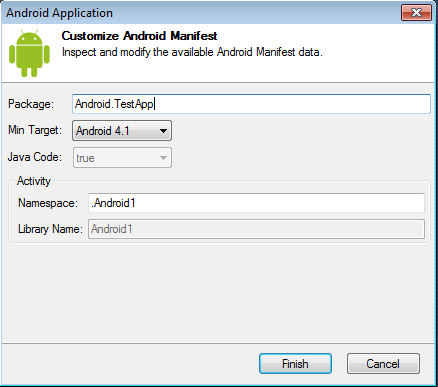
.apk that is not built by this project. The .apk could be built by a different Nsight Tegra project, or a completely different build system (such as Eclipse or Unreal Build Tools). Not all systems may work, but if compatible, then you should be able to sync, launch, and debug with Nsight Tegra. Min Android API Level – This is the minimum API level required for the application to run. The Android system will prevent the user from installing the application if the system's API level is lower than the value specified here.
maxSdkVersion attribute is lower than the API level used by the system itself, the system will not allow the application to be installed. Generally you should only set this attribute if you plan to make different versions of your app for different API ranges; otherwise, it's recommended to leave this setting blank, which provides no maximum limit. AndroidManifest.xml. Target Architecture – Sets the target architecture for the project build. For Make Application projects, this setting ensures that the correct toolset header files are found for Intellisense.
STL Type – Sets the type of STL support for the project. For Make Application projects, this setting ensures that the correct toolset header files are found for Intellisense.
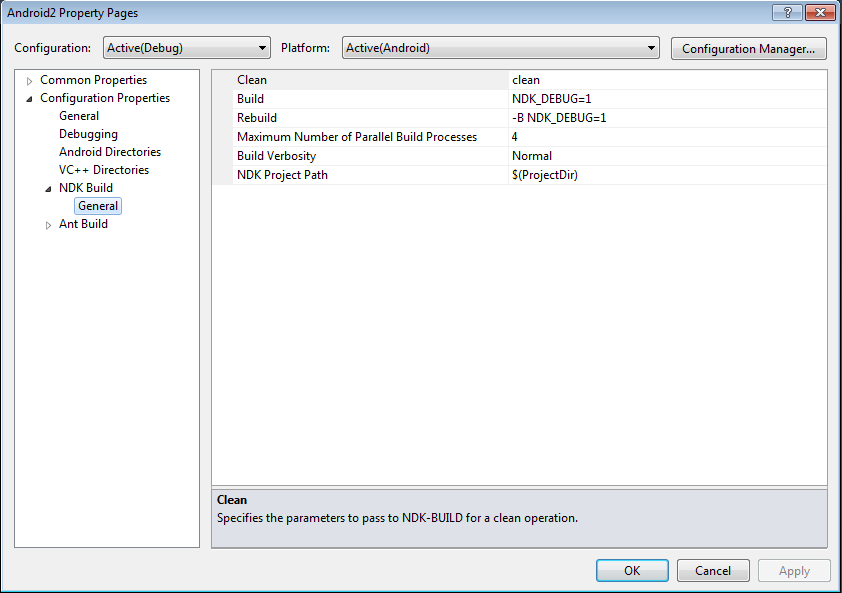
This page displays properties for projects that build with NDK-BUILD. It is only available when the configuration type is set to Make Application.
This page selects the debugger and options. The Android Debugger is used to debug the projects.
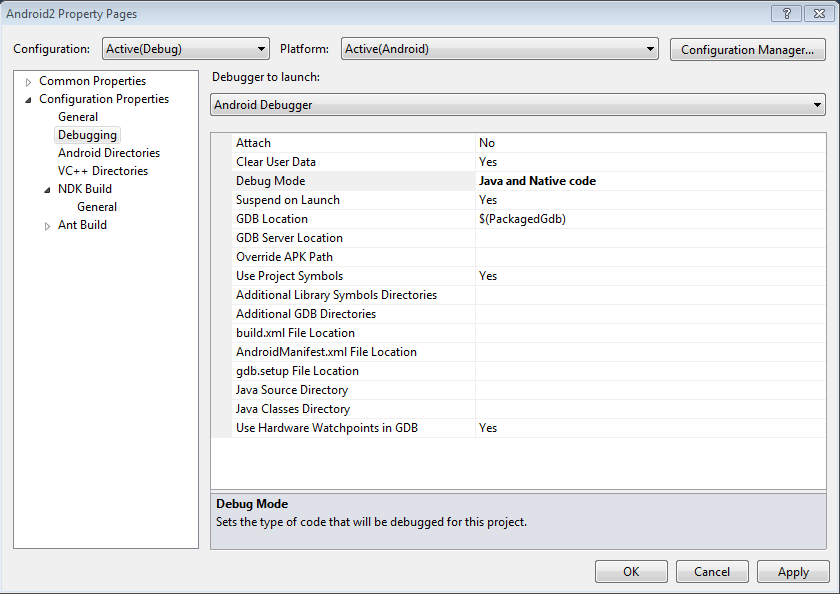
$(PackagedGdbServerPath) to use the GDB Server that is included with Nsight Tegra. .apk that will be debugged if you are using one that is not in build.xml. build.xml file folder. AndroidManifest.xml file folder. gdb.setup file folder. If one is not specified, the default path will be used. src relative to the build.xml path will be used.) bin\classes relative to the build.xml path will be used. This category contains pages for C/C++ compiler options.
This category contains pages for linker options.
This page contains settings for the directories to search for include files and libraries.
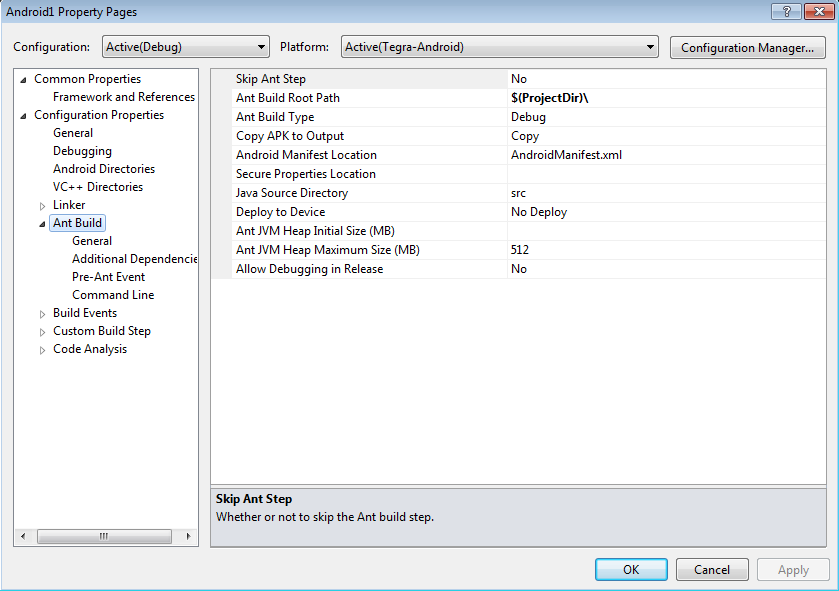
This page contains options for the Android SDK ANT build.
NDK_APP_DEBUGGABLE variable in the *.mk file instead. Android devices can be controlled using the NVIDIA Tegra Device Toolbar. The toolbar is displayed automatically after the extension is installed.
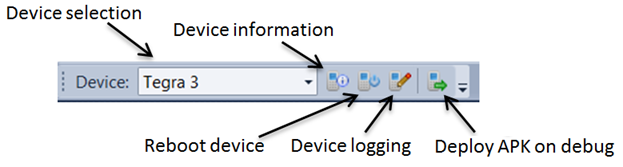
All connected Android devices and emulators are displayed in the drop-down menu. The first available device will be selected by default. The toolbar will remember the device selected in a previous session.
If no devices are available, <No Device> will be displayed. Device selection is disabled when debugging.
The Device toolbar lets you select the Android device for the following:
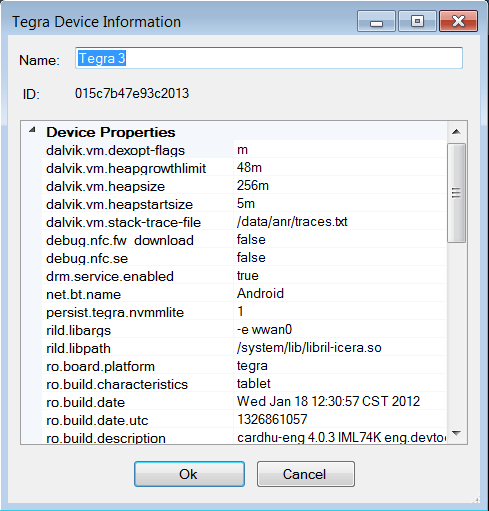
The device information button opens a dialog that displays information for the selected device.
The dialog displays properties found in the /system/build.prop file. The dialog also displays a name for the device along with the serial number. By default, the name is set to the serial number, but you can change this to help you better identify the device.
The Reboot device button will prompt to reboot the selected device.
By selecting this option, the application package file (APK) will be deployed and installed on your Android device when you begin debugging your application.
There are two ways to install a project application on a device. The project can be set to automatically install and run applications after a successful build. This can be set in the project properties (see Ant Build Properties).
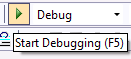
The project can also be launched using the Visual Studio Start Debugging button. This will install the application on the currently selected device and start a debug session.
NVIDIA GameWorks Documentation Rev. 1.0.140702 ©2014. NVIDIA Corporation. All Rights Reserved.