This section details the steps involved in preparing the Ardbeg to be flashed by the provided scripts.
The controls to be used in this section are available on the debug board or on the main board (when exposed) and are noted below. Either method can be used; the steps are the same in either case, with the only difference being the location of the buttons used.
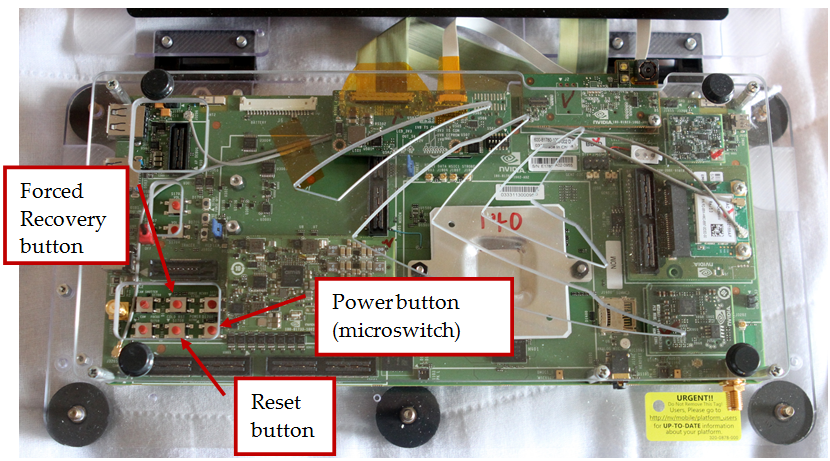
If the expansion board has not been connected, the buttons are still available on the edge of the main board. The locations of the three buttons of interest are indicated below:
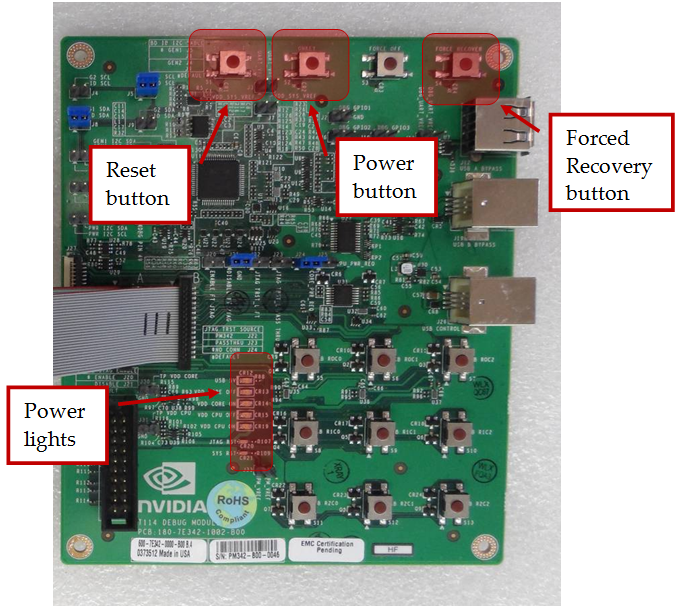
If you have chosen to connect the debug board, the switches required for flashing the device are all available on this board.

|
NOTE: Unlike previous-generation Tegra devkits, the screen on the Ardbeg devkit remains black when the devkit is booted to recovery mode. The existence of the recovery device in the Device Manager is the only indication of the device being in recovery mode. |
It is recommended that you flash your device automatically during the installation of NVIDIA CodeWorks for Android. However, if you are using a Linux host machine and want to flash your device manually, use the following instructions.
|
|
NOTE: Unlike previous-generation Tegra devkits, the screen on the Ardbeg devkit might remain black when the devkit is being flashed, depending on the version of the OS image being flashed. In this case, the PC prompt is the only indication of flashing progress. |
Having placed the Ardbeg into recovery mode, open a Linux shell to the directory for the OS image:
flash.sh.sudo, and will likely cause a request to enter the password for the user’s Linux account.

NVIDIA® GameWorks™ Documentation Rev. 1.0.220830 ©2014-2022. NVIDIA Corporation and affiliates. All Rights Reserved.