The controls to be used in this section are available on the debug board or on the main board (when exposed) and are noted below. Either method can be used; the steps are the same in either case, with the only difference being the location of the buttons used.
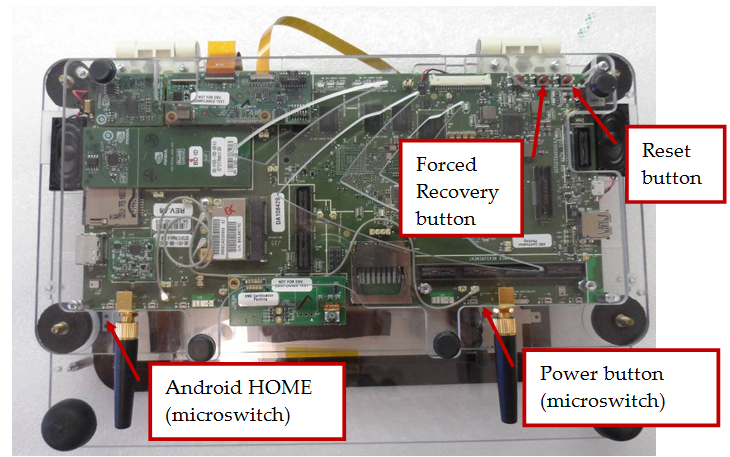
If the expansion board has not been connected, the buttons are still available on the edge of the main board. The locations of the three buttons of interest are indicated below:
If you have chosen to connect the debug board, the switches required for flashing the device are all available on this board.


|
Note: Unlike previous-generation Tegra devkits, the screen on the Dalmore devkit remains black when the devkit is booted to recovery mode. The existence of the recovery device in the Device Manager is the only indication of the device being in recovery mode. |
At this point, the development PC should recognize the device. If the device driver is not already installed, the system should ask for it. Inside of the installed OS image tree, there should be a usbpcdriver subdirectory. Point the OS to this directory to install the recovery mode flashing driver. On success, the Device Manager should show the device (NVIDIA USB Boot-recovery driver for Mobile devices):

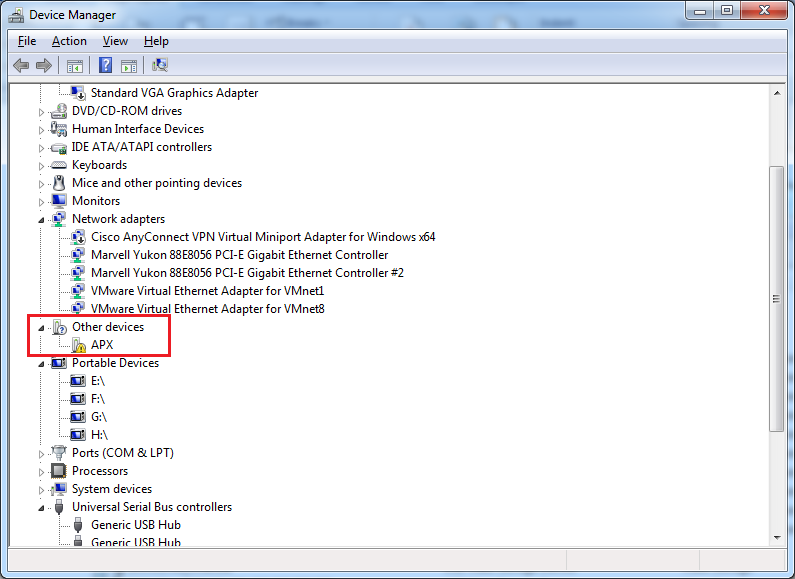
If the driver is not installed initially, you may see the following in the Device Manager:
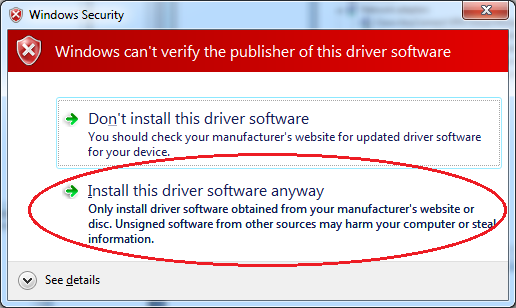
Right-click the device and select Update Driver Software…, and navigate to the usbpcdriver subdirectory of the OS pack. You may receive a dialog:
Select Install this driver software anyway.
|
|
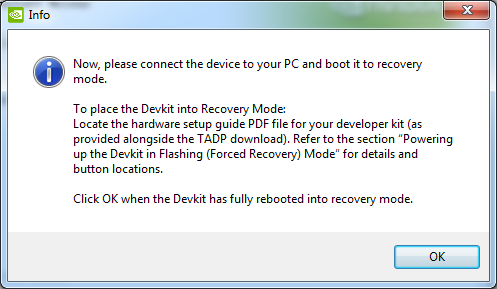
Note: Unlike previous-generation Tegra devkits, the screen on the Dalmore devkit might remain black when the devkit is being flashed, depending on the version of the OS image being flashed. In this case, the PC prompt is the only indication of flashing progress. |
After having placed the Dalmore into recovery mode, return to the dialog that is shown on the PC in the TDK installer:
readme as shown in the final step

NVIDIA® GameWorks™ Documentation Rev. 1.0.220830 ©2014-2022. NVIDIA Corporation and affiliates. All Rights Reserved.