# HEAVY.AI Installation using Docker on Ubuntu
Follow these steps to install HEAVY.AI as a Docker container on a machine running with on CPU or with supported NVIDIA GPU cards using Ubuntu as the host OS.
## Preparation
Prepare your host by installing Docker and if needed for your configuration NVIDIA drivers and NVIDIA runtime.
### Install Docker
Remove any existing Docker Installs and if on GPU the legacy NVIDIA docker runtime.
```bash
sudo apt-get purge nvidia-docker
for pkg in docker.io docker-doc docker-compose docker-compose-v2 podman-docker containerd runc; do sudo apt-get remove $pkg; done
```
Add Docker's GPG key using `curl` and `ca-certificates`
```bash
sudo apt-get install ca-certificates curl
sudo install -m 0755 -d /etc/apt/keyrings
sudo curl -fsSL https://download.docker.com/linux/ubuntu/gpg -o /etc/apt/keyrings/docker.asc
sudo chmod a+r /etc/apt/keyrings/docker.asc
```
Add Docker to your Apt repository.
```bash
echo \
"deb [arch=$(dpkg --print-architecture) signed-by=/etc/apt/keyrings/docker.asc] https://download.docker.com/linux/ubuntu \
$(. /etc/os-release && echo "$VERSION_CODENAME") stable" | \
sudo tee /etc/apt/sources.list.d/docker.list > /dev/null
```
Update your repository.
```bash
sudo apt update
```
Install Docker, the command line interface, and the container runtime.
```bash
sudo apt-get install docker-ce docker-ce-cli containerd.io docker-buildx-plugin docker-compose-plugin
```
Run the following `usermod` command so that Docker command execution does not require sudo privilege. Log out and log back in for the changes to take effect. (recommended)
```bash
sudo usermod --append --groups docker $USER
```
Verify your Docker installation.
```bash
sudo docker run hello-world
```
For more information on Docker installation, see the [Docker Installation Guide](https://docs.docker.com/engine/install/ubuntu/#install-using-the-repository).
### Install NVIDIA Drivers and NVIDIA Container GPU OPTION
#### Install NVIDIA Drivers
Install NVIDIA driver and Cuda Toolkit using [Install NVIDIA Drivers and Vulkan on Ubuntu](/installation-and-configuration/installation/installing-on-ubuntu/install-nvidia-drivers-and-vulkan-on-ubuntu)
#### Install NVIDIA Docker Runtime
Use `curl` to add Nvidia's Gpg key:
```bash
curl --silent --location https://nvidia.github.io/nvidia-container-runtime/gpgkey | \
sudo apt-key add -
```
Update your sources list:
```bash
distribution=$(. /etc/os-release;echo $ID$VERSION_ID)
curl --silent --location https://nvidia.github.io/nvidia-container-runtime/$distribution/nvidia-container-runtime.list | \
sudo tee /etc/apt/sources.list.d/nvidia-container-runtime.list
```
Update apt-get and install nvidia-container-runtime:
```bash
sudo apt-get update
sudo apt-get install -y nvidia-container-runtime
```
Edit /etc/docker/daemon.json to add the following, and save the changes:
```bash
{
"default-runtime": "nvidia",
"runtimes": {
"nvidia": {
"path": "/usr/bin/nvidia-container-runtime",
"runtimeArgs": []
}
}
}
```
Restart the Docker daemon:
```bash
sudo pkill -SIGHUP dockerd
```
#### **Check NVIDIA Drivers**
Verify that docker and NVIDIA runtime work together.
```bash
sudo docker run --gpus=all \
--rm nvidia/cuda:12.4.1-runtime-ubuntu22.04 nvidia-smi
```
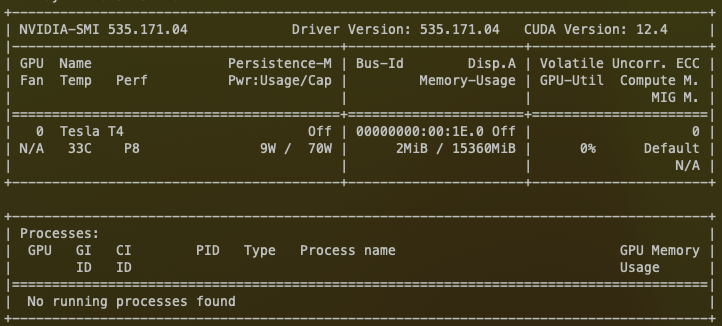
If everything is working you should get the output of nvidia-smi command showing the installed GPUs in the system.
## HEAVY.AI Installation
Create a directory to store data and configuration files
```bash
sudo mkdir -p /var/lib/heavyai && sudo chown $USER /var/lib/heavyai
```
Then a minimal configuration file for the docker installation
```bash
echo "port = 6274
http-port = 6278
calcite-port = 6279
data = \"/var/lib/heavyai\"
null-div-by-zero = true
[web]
port = 6273
frontend = \"/opt/heavyai/frontend\"" \
>/var/lib/heavyai/heavy.conf
```
Ensure that you have sufficient storage on the drive you choose for your storage dir running this command
```bash
if test -d /var/lib/heavyai; then echo "There is $(df -kh /var/lib/heavyai --output="avail" | sed 1d) avaibale space in you storage dir"; else echo "There was a problem with the creation of storage dir"; fi;
```
**Optional: Download HEAVY.AI from Release Website**
The subsequent section will download and install an image using DockerHub. However, if you wish to avoid pulling from DockerHub and instead download and prepare a specific image, follow the instructions in this section. \
\
To Download a specific version, visit one of the following websites, choose the version that you wish to install, right click and select "COPY URL".
Enterprise/Free Editions: [https://releases.heavy.ai/ee/tar/](https://releases.heavy.ai/ee/tar/)
Open Source Editions: [https://releases.heavy.ai/os/tar/](https://releases.heavy.ai/os/tar/)
Use files ending in -render-docker.tar.gz to install GPU edition and -cpu-docker.tar.gz to install CPU editions.
Then, on the server where you wish to install HEAVY.AI, run the following command (Replacing \$DOWNLOAD\_URL with the URL from your clipboard).
`wget $DOWNLOAD_URL`
Await successful download and run `ls | grep heavy` to see the filename of the package you just downloaded. Copy the filename to your clipboard, and then run the next command replacing \$DOWNLOADED\_FILENAME with the contents of your clipboard.
`docker load < $DOWNLOADED_FILENAME`
The command will return a Docker image name. Replace `heavyai/heavyai-(...):latest` with the image you just loaded.
**Download HEAVY.AI from DockerHub and Start HEAVY.AI in Docker.**
Select the tab depending on the Edition (**Enterprise**, **Free**, or **Open Source**) and execution Device (**GPU** or **CPU**) you are going to use.
```bash
sudo docker run -d --gpus=all \
-v /var/lib/heavyai:/var/lib/heavyai \
-p 6273-6278:6273-6278 \
heavyai/heavyai-ee-cuda:latest
```
```bash
sudo docker run -d \
-v /var/lib/heavyai:/var/lib/heavyai \
-p 6273-6278:6273-6278 \
heavyai/heavyai-ee-cpu:latest
```
```bash
sudo docker run -d --gpus=all \
-v /var/lib/heavyai:/var/lib/heavyai \
-p 6273-6278:6273-6278 \
heavyai/core-os-cuda:latest
```
```bash
sudo docker run -d \
-v /var/lib/heavyai:/var/lib/heavyai \
-p 6273-6278:6273-6278 \
heavyai/core-os-cpu:latest
```
Replace ":latest" with ":vX.Y.Z" to pull a specific docker version. (Eg: `heavyai-ee-cuda:v8.0.1`)
Check that the docker is up and running a `docker ps commnd:`
```bash
sudo docker container ps --format "{{.Image}} {{.Status}}" \
-f status=running | grep heavyai\/
```
You should see an output similar to the following.
```bash
heavyai/heavyai-ee-cuda Up 48 seconds ago
```
See also the note regarding the [CUDA JIT Cache](https://docs.omnisci.com/latest/4_performance.html#jit-cache) in Optimizing Performance.
### Configure Firewall OPTIONAL
If a firewall is not already installed and you want to harden your system, install the`ufw`.
```bash
sudo apt install ufw
sudo ufw allow ssh
```
To use Heavy Immerse or other third-party tools, you must prepare your host machine to accept incoming HTTP(S) connections. Configure your firewall for external access.
```bash
sudo ufw disable
sudo ufw allow 6273:6278/tcp
sudo ufw enable
```
Most cloud providers use a different mechanism for firewall configuration. The commands above might not run in cloud deployments.
For more information, see [https://help.ubuntu.com/lts/serverguide/firewall.html](https://help.ubuntu.com/lts/serverguide/firewall.html).
### Licensing HEAVY.AI ee-free only
If you are on **Enterprise** or **Free Edition**, you need to validate your HEAVY.AI instance using your license key.\
**You must skip this section if you are on Open Source Edition** [²](/installation-and-configuration/installation/install-docker/docker-enterprise-edition-gpu#in-the-os-edition-heavy-immerse-service-is-unavailable.-1)
1. Copy your license key of Enterprise or Free Edition from the registration email message. \
\
If you don't have a license and you want to evaluate HEAVY.AI in an enterprise environment, contact your Sales Representative or register for your 30-day trial of Enterprise Edition [here](https://www.heavy.ai/product/downloads/enterprise).\
If you need a Free License you can get one [here](https://www.heavy.ai/product/downloads/free).
2. Connect to Heavy Immerse using a web browser to your host on port 6273. For example, `http://heavyai.mycompany.com:6273`.
3. When prompted, paste your license key in the text box and click **Apply**.
4. Log into Heavy Immerse by entering the default username (`admin`) and password (`HyperInteractive`), and then click **Connect**.
### Command-Line Access
You can access the command line in the Docker image to perform configuration and run HEAVY.AI utilities.
You need to know the `container-id` to access the command line. Use the command below to list the running containers.
```bash
sudo docker container ps
```
You see output similar to the following.
```bash
CONTAINER ID IMAGE COMMAND CREATED STATUS PORTS NAMES
9e01e520c30c heavyai/heavyai-ee-gpu "/bin/sh -c '/heavyai..." 50 seconds ago Up 48 seconds ago 0.0.0.0:6273-6280->6273-6280/tcp confident_neumann
```
Once you have your container ID, in the example **9e01e520c30c**, you can access the command line using the Docker exec command. For example, here is the command to start a Bash session in the Docker instance listed above. The `-it` switch makes the session interactive.
```bash
sudo docker exec -it 9e01e520c30c bash
```
You can end the Bash session with the `exit` command.
### **Final Checks**
To verify that everything is working, load some sample data, perform a `heavysql` query, and generate a Scatter Plot or a Bubble Chart using Heavy Immerse [¹](/installation-and-configuration/installation/install-docker/docker-enterprise-edition-gpu#in-the-os-edition-heavy-immerse-service-is-unavailable.)
#### Load Sample Data and Run a Simple Query
HEAVY.AI ships with two sample datasets of airline flight information collected in 2008, and a census of New York City trees. To install sample data, run the following command.
```bash
sudo docker exec -it \
./insert_sample_data --data /var/lib/heavyai/storage
```
Where \ is the container in which HEAVY.AI is running.
When prompted, choose whether to insert dataset 1 (7,000,000 rows), dataset 2 (10,000 rows), or dataset 3 (683,000 rows). The examples below use dataset 2.
```bash
Enter dataset number to download, or 'q' to quit:
# Dataset Rows Table Name File Name
1) Flights (2008) 7M flights_2008_7M flights_2008_7M.tar.gz
2) Flights (2008) 10k flights_2008_10k flights_2008_10k.tar.gz
3) NYC Tree Census (2015) 683k nyc_trees_2015_683k nyc_trees_2015_683k.tar.gz
```
Connect to HeavyDB by entering the following command (a password willò be asked; the default password is HyperInteractive):
```bash
sudo docker exec -it bin/heavysql
```
Enter a SQL query such as the following:
```sql
SELECT origin_city AS "Origin",
dest_city AS "Destination",
ROUND(AVG(airtime),1) AS "Average Airtime"
FROM flights_2008_10k
WHERE distance < 175 GROUP BY origin_city,
dest_city;
```
The results should be similar to the results below.
```sql
Origin|Destination|Average Airtime
West Palm Beach|Tampa|33.8
Norfolk|Baltimore|36.1
Ft. Myers|Orlando|28.7
Indianapolis|Chicago|39.5
Tampa|West Palm Beach|33.3
Orlando|Ft. Myers|32.6
Austin|Houston|33.1
Chicago|Indianapolis|32.7
Baltimore|Norfolk|31.7
Houston|Austin|29.6
```
#### Create a Dashboard Using Heavy Immerse ee-free only [¹](/installation-and-configuration/installation/install-docker/docker-enterprise-edition-gpu#in-the-os-edition-heavy-immerse-service-is-unavailable.)
Installing Enterprise or Free Edition, check if Heavy Immerse is running as intended.
1. Connect to Heavy Immerse using a web browser connected to your host machine on port 6273. For example, `http://heavyai.mycompany.com:6273`.
2. Log into Heavy Immerse by entering the default username (`admin`) and password (`HyperInteractive`), and then click **Connect**.
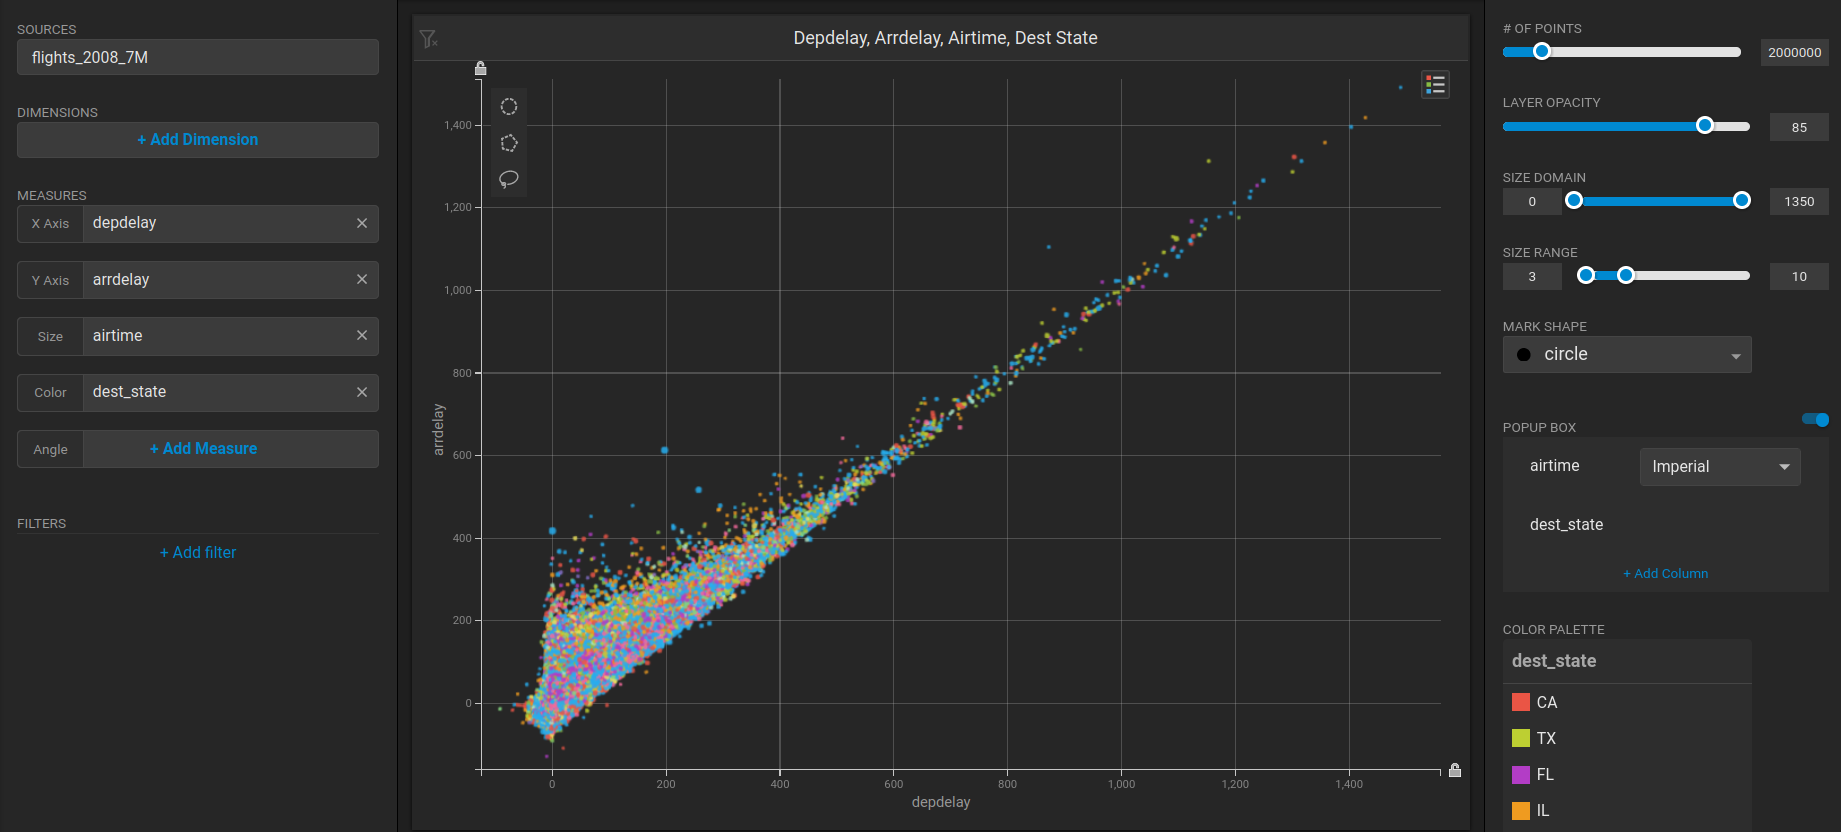
Create a new dashboard and a Scatter Plot to verify that **backend rendering** is working.
1. Click **New Dashboard**.
2. Click **Add Chart**.
3. Click **SCATTER**.
4. Click **Add Data Source**.
5. Choose the *flights\_2008\_10k* table as the data source.
6. Click **X Axis +Add Measure**.
7. Choose *depdelay*.
8. Click **Y Axis +Add Measure**.
9. Choose *arrdelay*.
10. Click Size **+Add Measure**.
11. Choose *airtime.*
12. Click Color **+Add Measure**.
13. Choose *dest\_state.*
The resulting chart shows, unsurprisingly, that there is a correlation between departure delay and arrival delay.\\
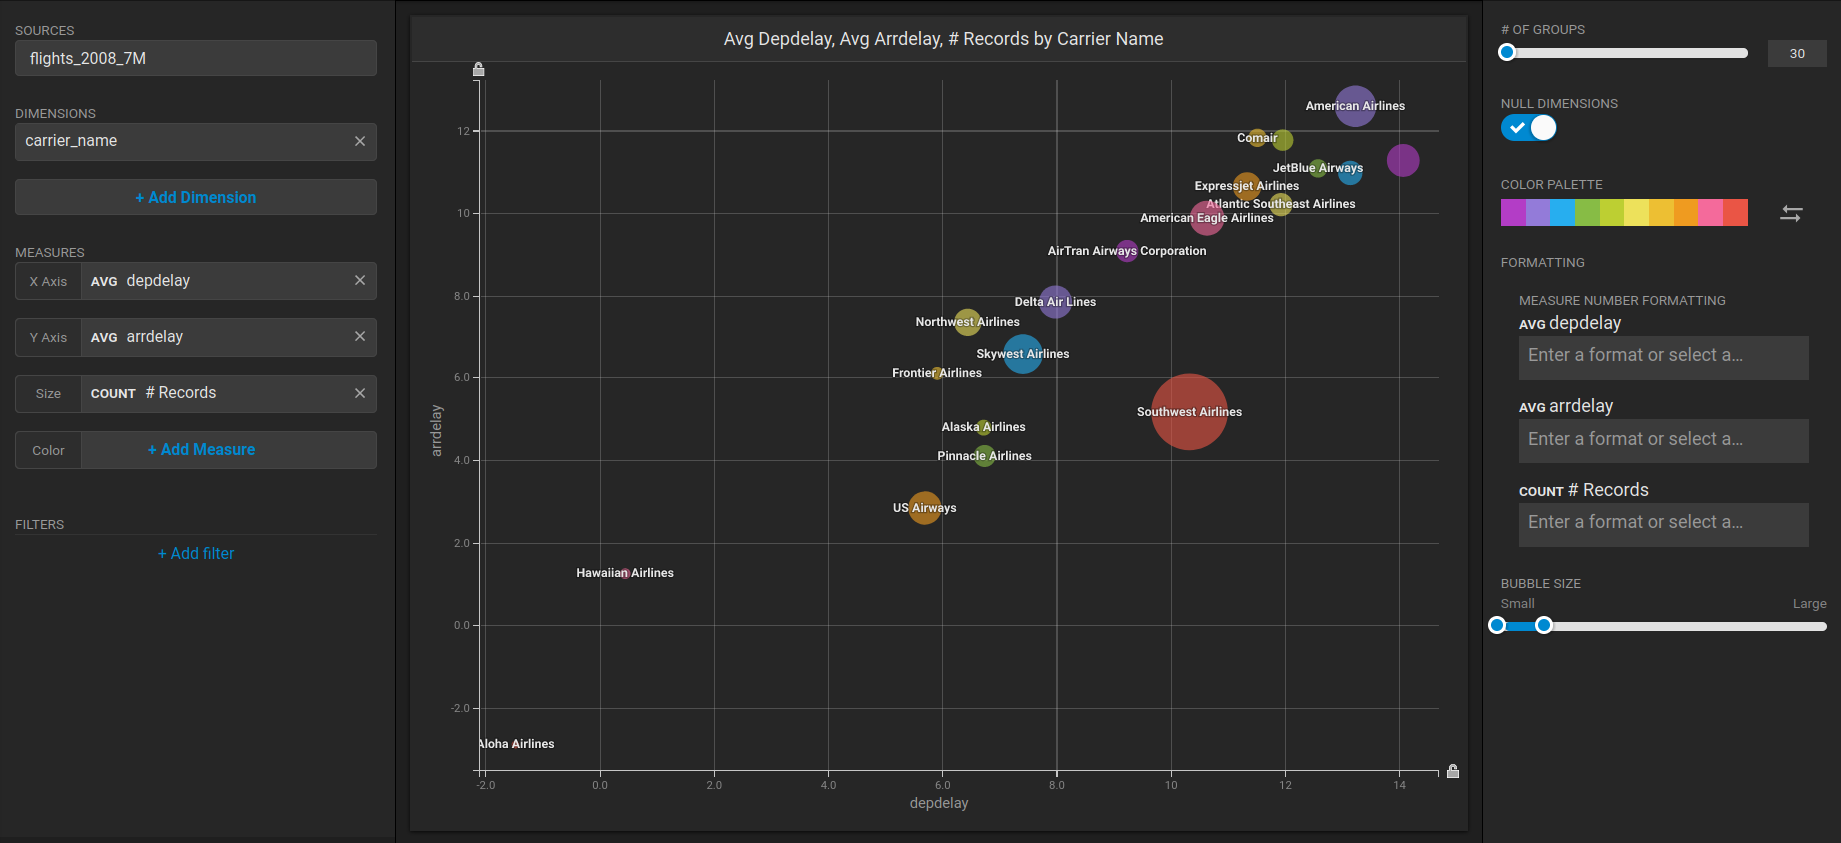
Create a new dashboard and a Table chart to verify that Heavy Immerse is working.
1. Click **New Dashboard**.
2. Click **Add Chart**.
3. Click **Bubble**.
4. Click **Select Data Source**.
5. Choose the *flights\_2008\_10k* table as the data sour
6. Click **Add Dimension**.
7. Choose *carrier\_name*.
8. Click **Add Measure**.
9. Choose *depdelay*.
10. Click **Add Measure**.
11. Choose *arrdelay*.
12. Click **Add Measure**.
13. Choose *#Records.*
The resulting chart shows, unsurprisingly, that also the average departure delay is correlated to the average of arrival delay, while there is quite a difference between Carriers.\\
#### ¹ In the OS Edition, Heavy Immerse Service is unavailable.
#### ² The OS Edition does not require a license key.