BMC Quick Start#
Hardware Setup#
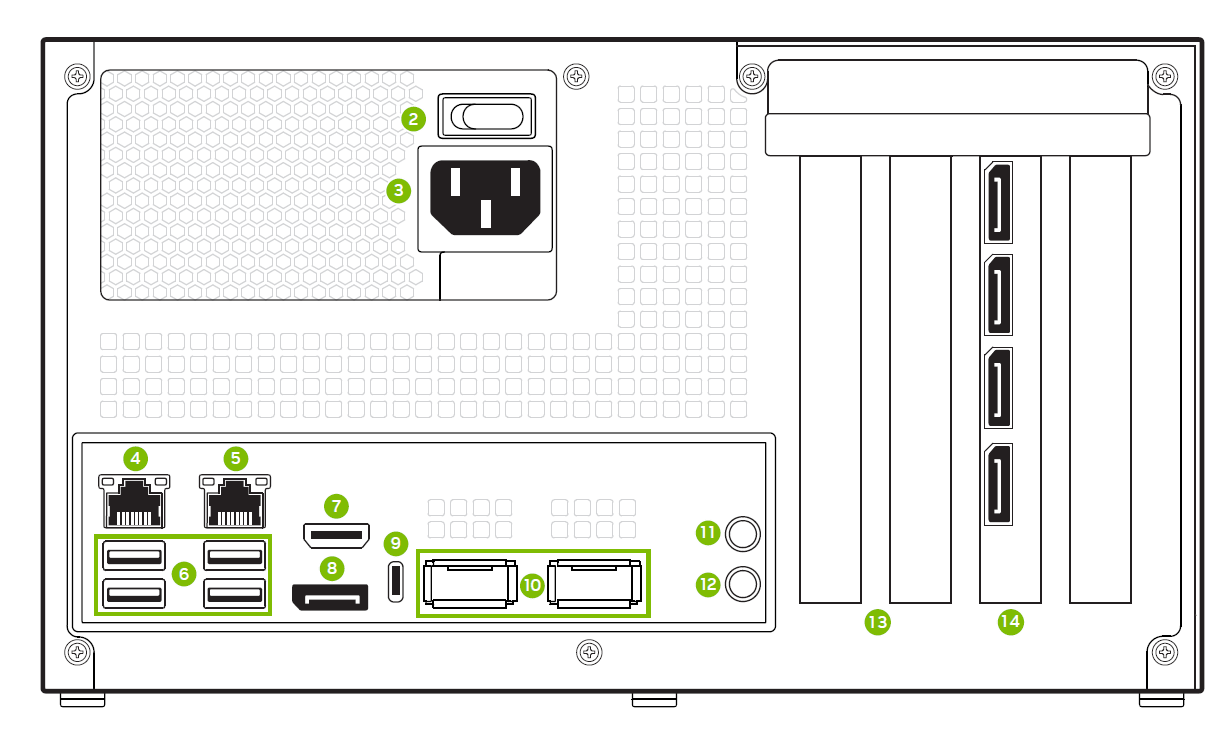
Figure 1. Back side of the NVIDIA IGX Developer Kit#
The following are the IGX Developer Kit hardware connections required to set up your BMC and access it over Ethernet:
2 — Power switch
3 — Power cable connection
5 — 1GbE RJ45 connection for BMC
8 — DisplayPort Output
9 — USB 3.2 Gen2 Type C connector
You can see the other numbered components in the System Overview.
Power up the system#
Connect the peripherals listed above to the system before powering up.
Connect the power cable to the system.
Turn on the Power Switch. Wait for approximately 1 minute until the device powers on.
Set up your host to access the BMC#
Connect your Ubuntu host machine and the developer kit with an Ethernet cable. Make sure it’s port 5, the right side of one of the two Ethernet ports.
Determine which Ethernet adapter on the host machine is connected, then start static IP configuration.
Configure the remote Ubuntu host machine Ethernet adapter as a static node. Thus, the Ubuntu Host can communicate to the BMC over the static IP address
192.168.1.110.Find the network adapter in
ifconfig, which is connected to the RJ45 port of the NVIDIA IGX Developer Kit, then configure it as a static route. The name can beem1oreno1or whatever you choose. As an example:ifconfig eno1 192.168.1.1 netmask 255.255.255.0Test the connection to the BMC default IP address with either an SSH or ping.
Access the BMC over SSH#
The first time you log in, you are prompted to change the password: add default password "0penBmc (here, the first character is '0' zero)"
Set the new password and include uppercase letters, lowercase letters, special characters, and numbers.
For example, your new password could be Bmc@123.
Warning
Save the password in a secure place. For security reasons, there is no way to reset the password.
ssh root@192.168.1.110
password: 0penBmc
You are required to change your password immediately (administrator enforced)
Changing password for root.
Current password: 0penBmc
New password: <your-new-password>
Retype new password: <your-new-password>