How-to#
Power ON/OFF#
Power the Jetson AGX Orin Dev Kit either through the DC jack ( 5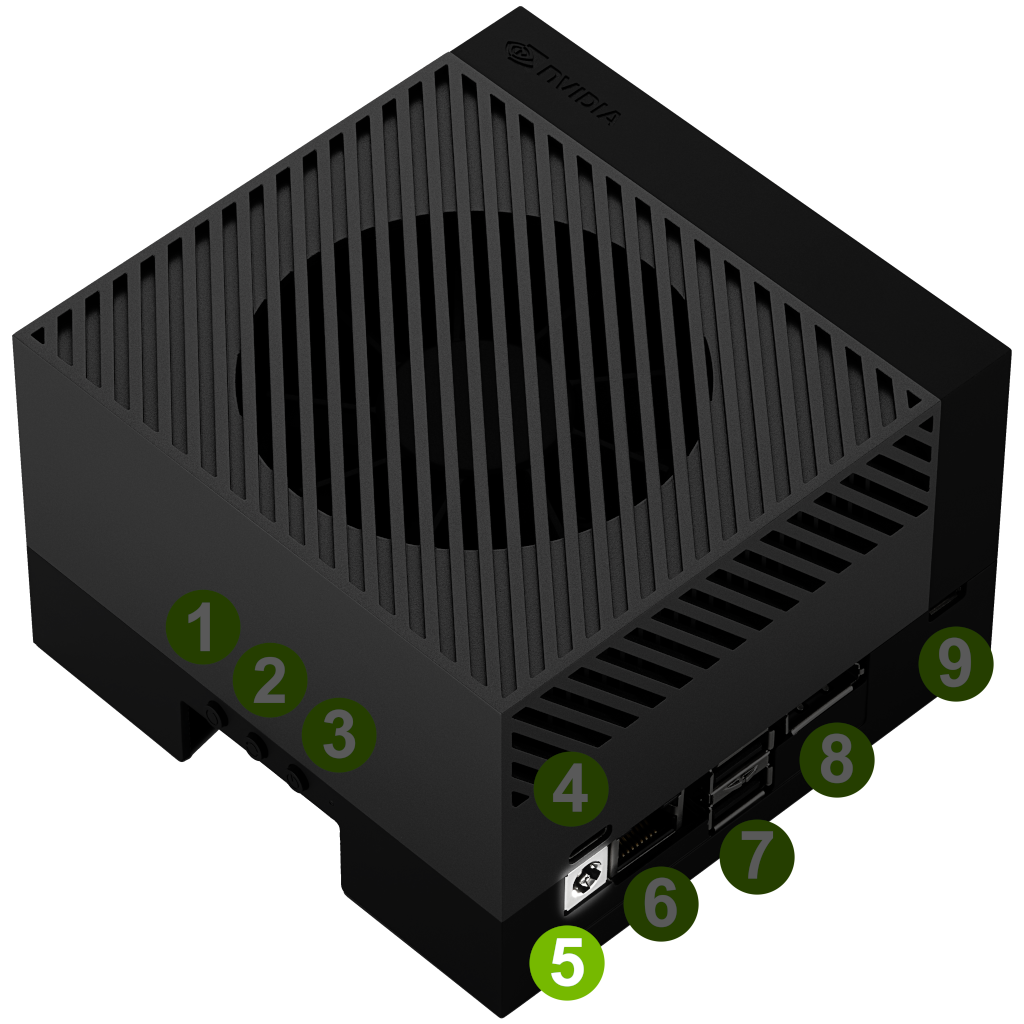 ) or through one of USB Type-C ports ( 4
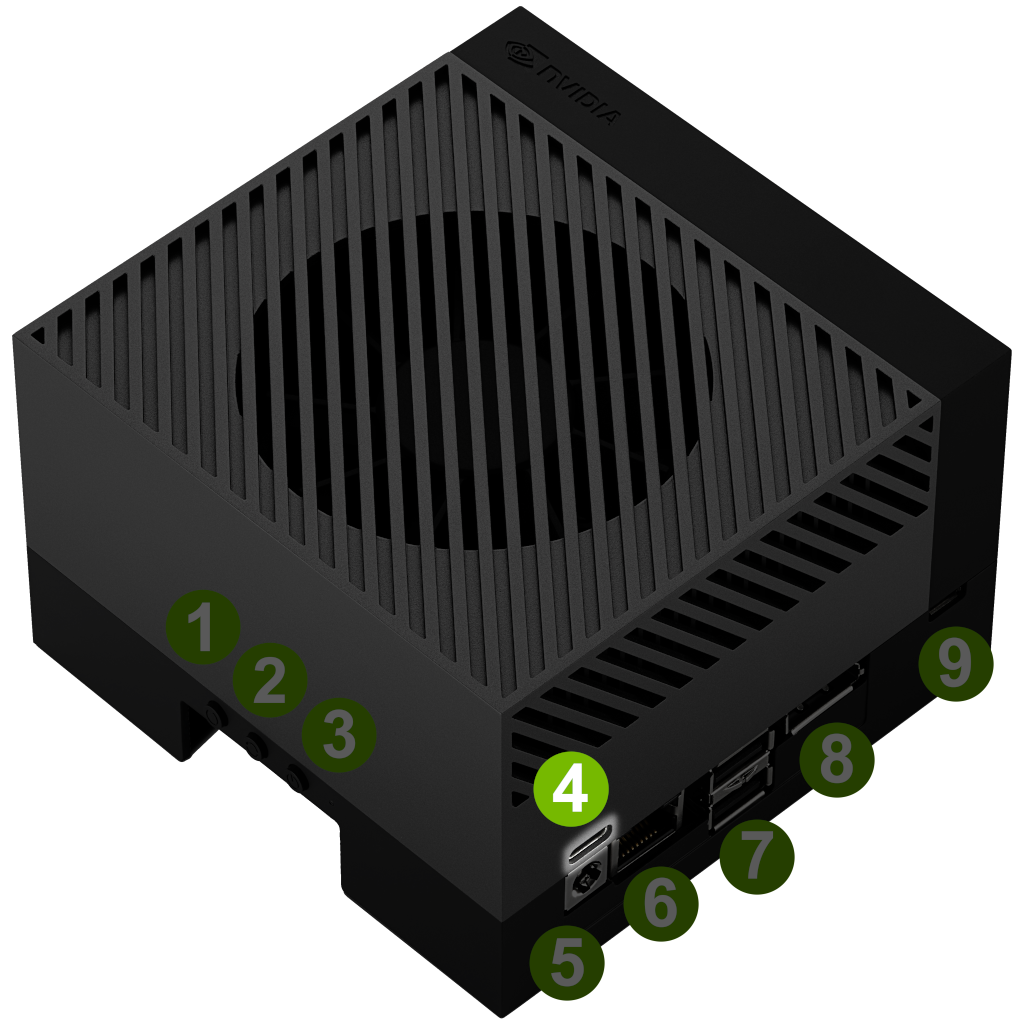 10
10 ).
).
Power ON#
By default, Jetson AGX Orin Dev Kit turns on automatically as soon as powered. You can change this behavior with the jumper on Automation header J42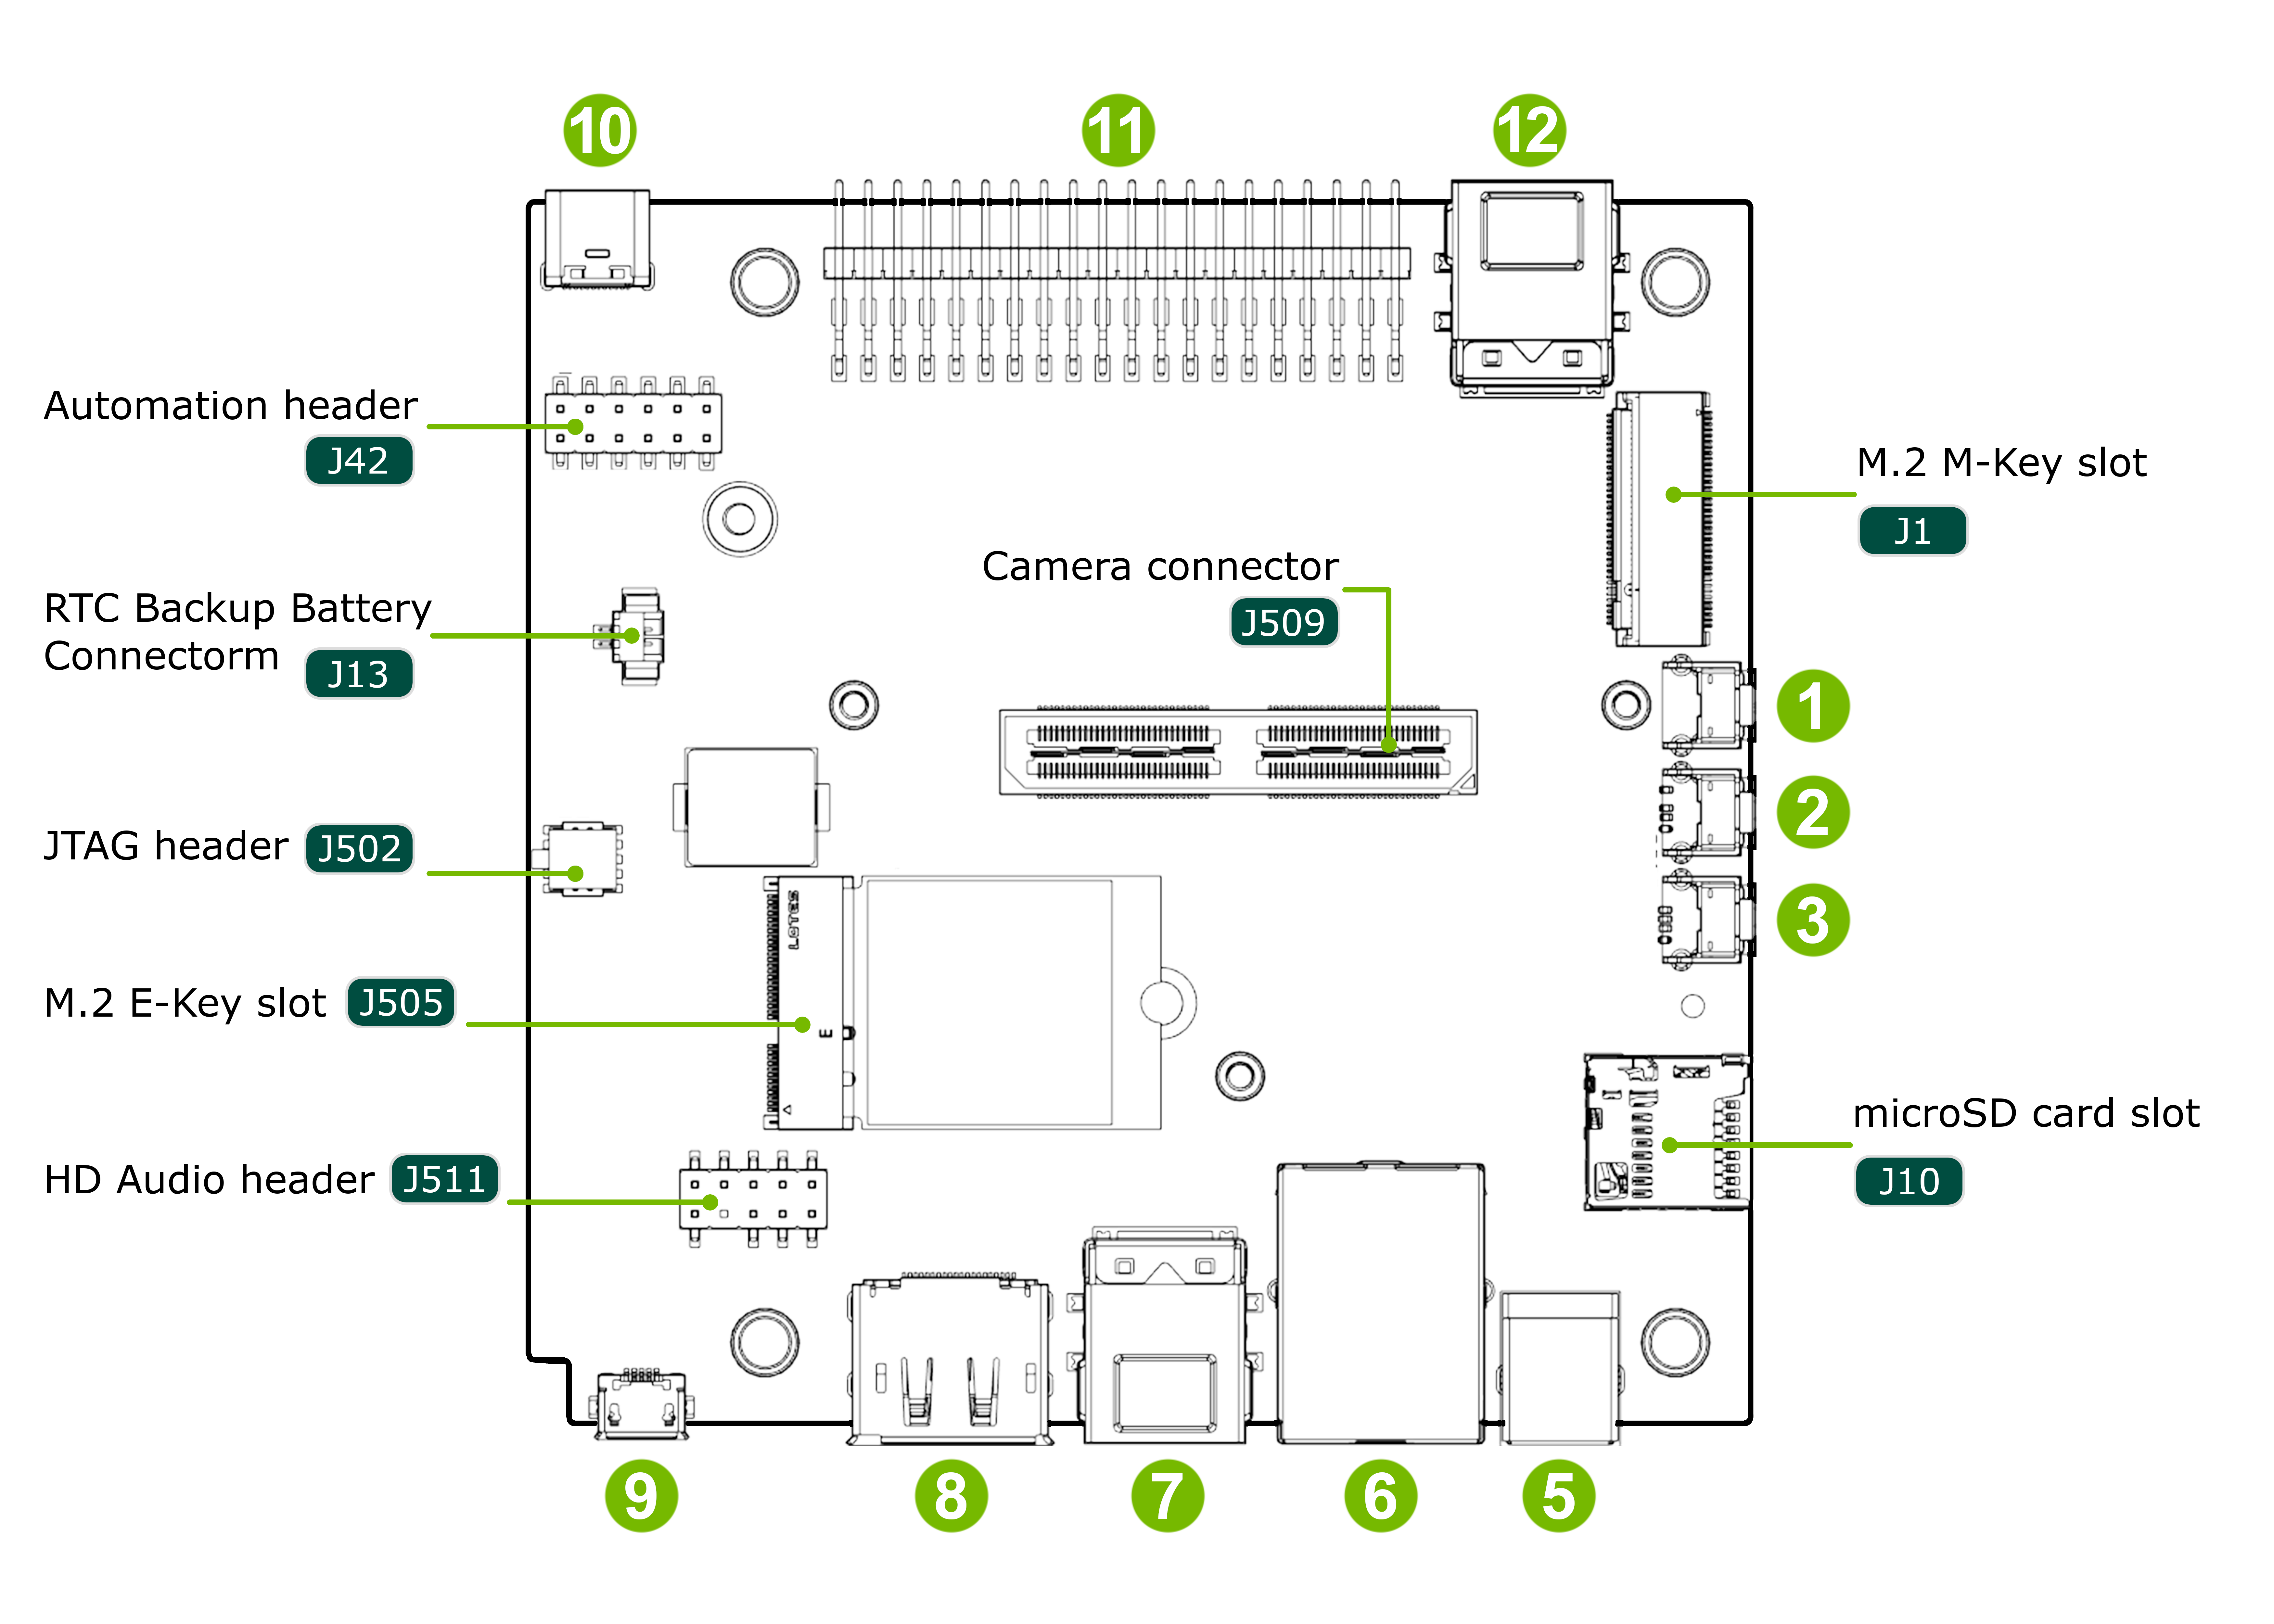 . See Automation header.
Power Off#
To power down the developer kit, complete the Ubuntu shutdown sequence using either the shutdown button (GUI) or command (CLI).
Use USB Port#
USB port |
DFP (Jetson as host) |
UFP (Jetson as device) |
|---|---|---|
Type-A next to Ethernet port ( 7 |
:white_check_mark: (10Gbps) |
(n/a) |
Type-A next to 40pin header ( 12 |
:white_check_mark: (5Gbps) |
(n/a) |
Type-C above DC jack ( 4 |
:white_check_mark: (10Gbps) |
:no_entry_sign: |
Type-C next to 40pin header ( 10 |
:white_check_mark: (10Gbps) |
:white_check_mark: (For flashing, and USB Device mode) |
micro-B ( 9 |
(n/a) |
Debug UART |
Down-stream Facing Port (DFP)#
All USB Type-A ports ( 7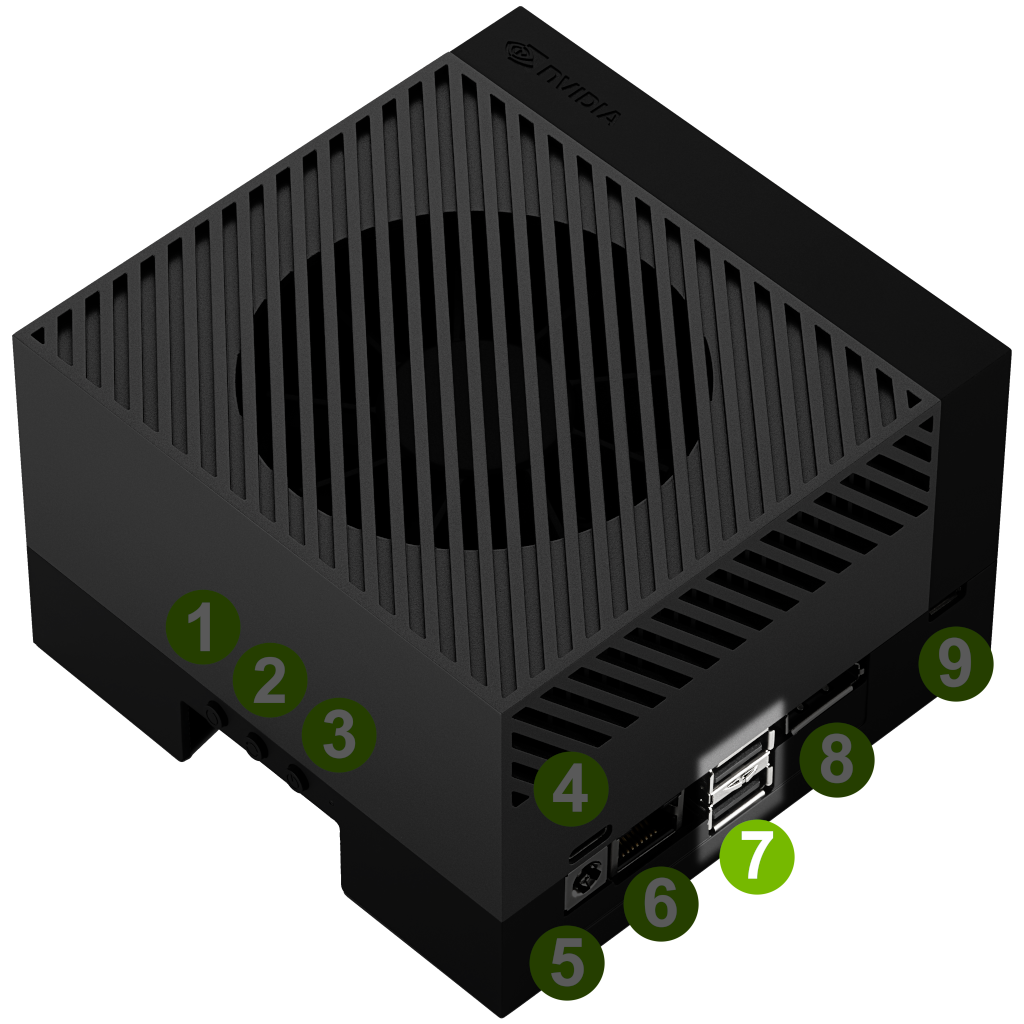 12
12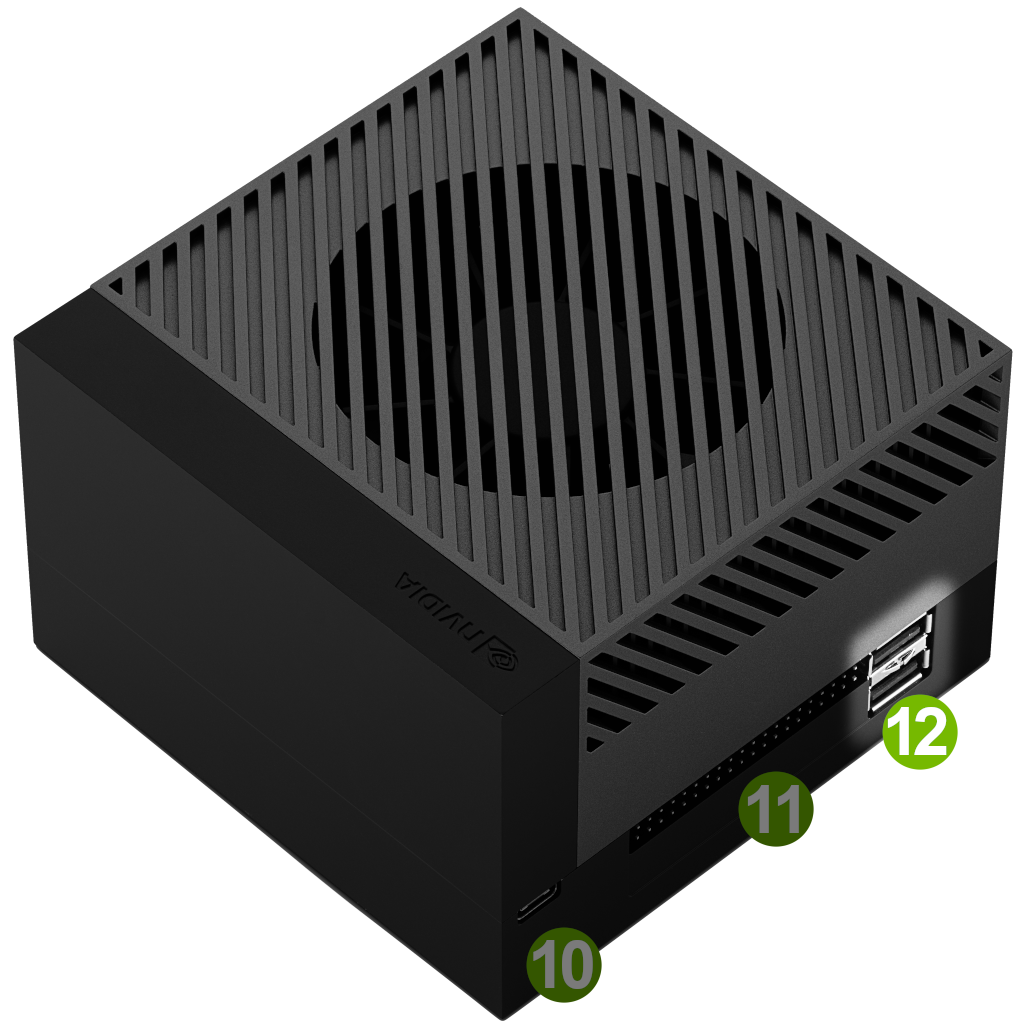 ) and USB Type-C ports ( 4 10 ) on NVIDIA Jetson AGX Orin Developer Kit can act as a host (DFP, Down-stream Facing Port), so you can connect a USB device such as USB webcam, USB thumb drive, etc. to any of the port.
Up-stream Facing Port (UFP)#
USB Type-C port next to 40-pin can act as UFP (Up-stream Facing Port) so NVIDIA Jetson AGX Orin Developer Kit act as a USB device when attached to a host PC.
You use this port as UFP when;
Flashing NVIDIA Jetson AGX Orin Developer Kit from a host PC
Using USB Device mode on L4T, which offers;
Virtual Ethernet connection (Jetson being
192.168.55.1) over USBVirtual UART connection (to complete OEM-config headless)
USB Mass Storage class device mounted on host PC
USB Type-C PD Sink Ports#
Both USB Type-C ports ( 4 10) can accept power using USB Power Delivery (USB PD).
Plug the bundled USB Type-C power supply into either USB Type-C ports on the developer kit.
USB PD source power rating:
4.5A@20V,3A@15V,3A@14.8V,3A@9V,3A@5V
USB micro-B for Debug UART#
Use the USB micro-B port ( 9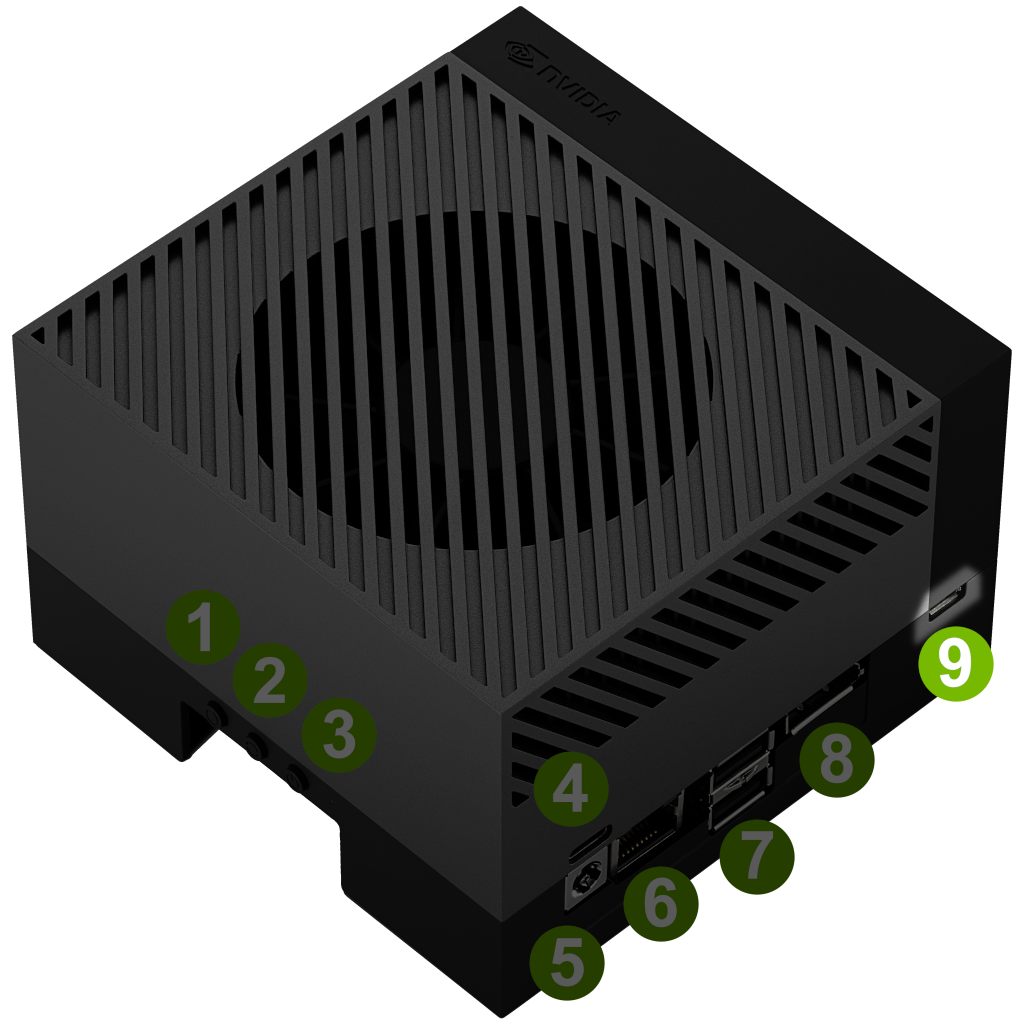 J26 ) to connect NVIDIA Jetson AGX Orin Developer Kit to your host PC in order to monitor the Debug UART output and to access to the terminal.
The host PC finds four (4) USB Serial devices, and one of them is to be opened at 115200 baud rate for debug UART.
Force Recovery Mode#
The developer kit must be in Force Recovery Mode (RCM) to enabled the flashing of Jetson module.
To put the developer kit in RCM:
=== “:fontawesome-solid-toggle-on: Developer Kit already powered on”
1. Press and hold down the Force Recovery button ( <span class="dmark"><span class="numberCircle">2</span><span class="dmarkpopup"><img src="https://developer.download.nvidia.com/embedded/images/jetsonAgxOrin/getting_started/jaodk_highlight_02.png"></span></span> ).
2. Press and hold down the Reset button ( <span class="dmark"><span class="numberCircle">3</span><span class="dmarkpopup"><img src="https://developer.download.nvidia.com/embedded/images/jetsonAgxOrin/getting_started/jaodk_highlight_03.png"></span></span> ).
4. Release both buttons.
=== “:fontawesome-solid-toggle-off: Developer Kit powered off”
1. Press and hold down the Force Recovery button ( <span class="dmark"><span class="numberCircle">2</span><span class="dmarkpopup"><img src="https://developer.download.nvidia.com/embedded/images/jetsonAgxOrin/getting_started/jaodk_highlight_02.png"></span></span> ).
2. Plug in a DC power supply's USB Type-C plug into the USB Type-C port ( <span class="dmark"><span class="numberCircle">4</span><span class="dmarkpopup"><img src="https://developer.download.nvidia.com/embedded/images/jetsonAgxOrin/getting_started/jaodk_highlight_04.png"></span></span> ) above the DC jack,
    - Or plug a DC plug of a power supply into DC jack ( <span class="dmark"><span class="numberCircle">5</span><span class="dmarkpopup"><img src="https://developer.download.nvidia.com/embedded/images/jetsonAgxOrin/getting_started/jaodk_highlight_05.png"></span></span> ).
3. If the white LED ( <span class="dmark"><span class="numberCircle">0</span><span class="dmarkpopup"><img src="https://developer.download.nvidia.com/embedded/images/jetsonAgxOrin/getting_started/jaodk_highlight_00.png"></span></span> ) is not lit, press the Power button ( <span class="dmark"><span class="numberCircle">1</span><span class="dmarkpopup"><img src="https://developer.download.nvidia.com/embedded/images/jetsonAgxOrin/getting_started/jaodk_highlight_01.png"></span></span> ).
4. Release both buttons.
Monitor Resource Usage using tegrastats#
Use tegrastas to monitor memory, CPU, GPU and other hardware usage, as well as temperature on the Jetson hardware.
Unlike x86-64 CUDA environment,
nvidia-smiis not available for use with L4T.
sudo tegrastats
See the latest L4T documentation for details.
Control Power Mode using nvpmodel#
Change Jetson’s power mode with:
sudo /usr/sbin/nvpmodel -m <x>
To learn about other options, enter the command:
sudo /usr/sbin/nvpmodel -h
nvpmodel GUI#
The nvpmodel GUI provides a front end for the nvpmodel command line tool. It is an easy way to access power-related functionality and information.

See the latest L4T documentation for details.