Configuring Jetson Expansion Header
Each Jetson developer kit includes several expansion headers and connectors (collectively, “headers”):
• 40‑pin expansion header: Lets you connect a Jetson developer kit to off-the-shelf Raspberry Pi HATs (Hardware Attached on Top) such as Seeed Grove modules, SparkFun Qwiic products, and others. Many of the pins can be used either as GPIO or as “special function I/O” (SFIO) such as I2C, I2S, etc.
• 30‑pin expansion header: An NVIDIA custom header similar to the 40-pin header, available on NVIDIA® Jetson™ TX2 and Jetson TX1 platforms. Its pins can also be used as GPIO or as “special function I/O” (SFIO).
• CSI connector (30‑pin expansion header)
• M.2 Key E slot
This table shows which expansion headers are available on each Jetson platform:
Jetson Platform | 40-pin header | 30-pin header | M.2 Key E slot | CSI connector * |
NVIDIA® Jetson Xavier™ NX | P | — | P | P |
NVIDIA® Jetson Nano™ A02 and B0x | P | — | P | P |
NVIDIA® Jetson Nano 2GB | P | — | — | P |
NVIDIA® Jetson AGX Xavier™ series | P | — | P | P |
NVIDIA® Jetson™ TX2 series | P | P | P | P |
NVIDIA® Jetson TX1 | P | P | P | P |
* Jetson-IO identifies the CSI connector on Jetson Xavier NX series and Jetson Nano devices as "CSI Nano connector." The CSI Nano connector is a 30‑pin connector. The CSI connector on other Jetson devices is a standard 128‑pin connector. | ||||
The configuration of all of the I/O pins on Jetson developer kits is statically defined, and is programmed into the device when it is flashed. To change the pin configuration directly, you must update a pinmux spreadsheet for your platform, then flash the new configuration to the Jetson device.
This is a suitable means of configuring production systems, but for development systems it is very inconvenient. Therefore NVIDIA provides the Jetson Expansion Header Tool (also known as Jetson‑IO), a Python script that runs on a Jetson developer kit and lets you change pin configurations through a graphic user interface. Jetson‑IO modifies the Device Tree Blob (DTB) firmware so that a new configuration for the expansion headers is applied when the developer kit is rebooted.
Running Jetson-IO
To launch Jetson‑IO, enter this command on the developer kit:
$ sudo /opt/nvidia/jetson-io/jetson-io.py
Main Screen: Selecting a Header
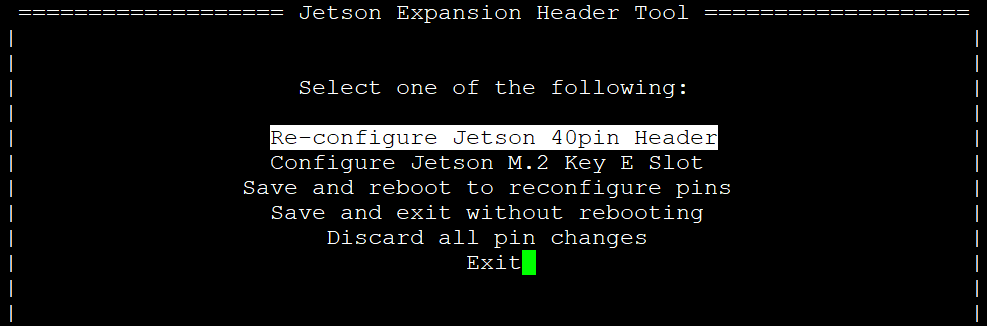
When you launch Jetson‑IO it displays its main screen, which lists the expansion headers supported on your Jetson device. For example, on Jetson Nano Developer Kit, the main screen looks like this:
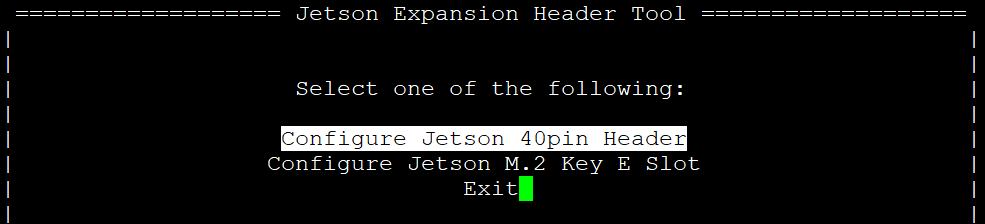
Select one of the options to display the header screen, which you can use to configure the selected header.
Header Screen
The header screen displays the current configuration of the selected header. On Jetson Nano, for example, the header screen for the 40-pin expansion header looks like this:
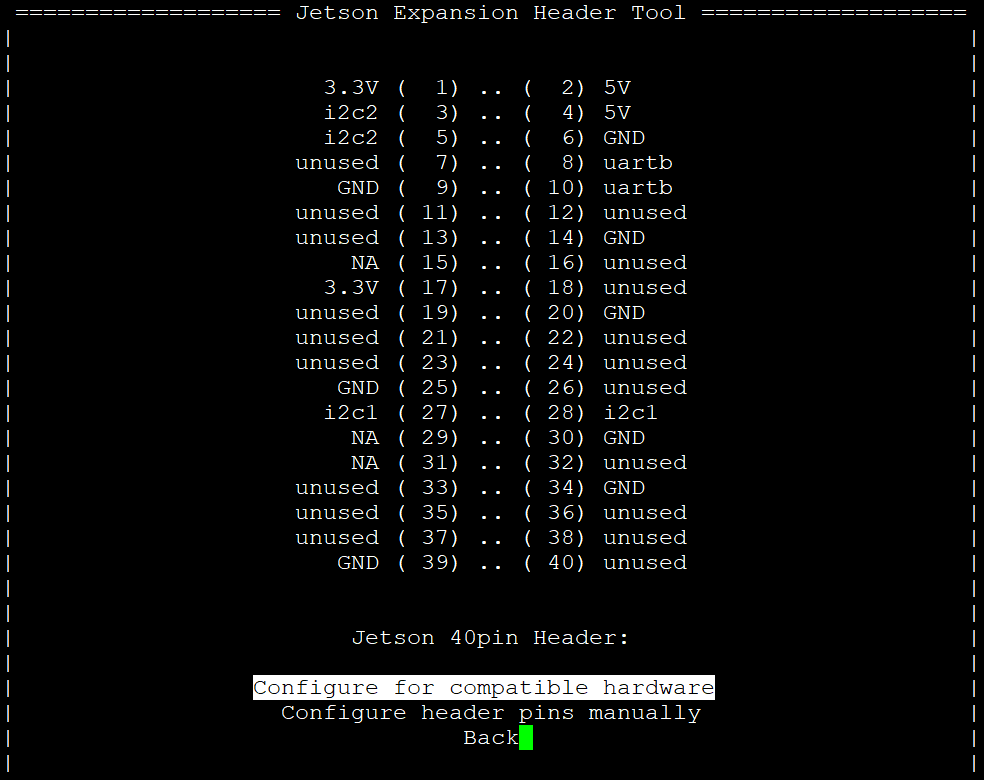
The header screen offers you two options for configuring I/O pins:
• Configure for compatible hardware: Displays the compatible hardware screen, which lets you select from a list of configurations for hardware modules that can be attached to the header.
• Configure header pins manually: Displays the expansion header configuration screen, which lets you specify which functions to enable on the header.
• Back: Returns you to the main screen.
Compatible Hardware Screen
The compatible hardware screen displays a list of configurations for interfacing the selected header with certain hardware modules. On Jetson Nano, for example, the compatible hardware screen for the 40‑pin expansion header looks like this:

When you select a configuration, Jetson‑IO returns to the header screen, where it updates the header configuration to reflect the hardware module you selected:
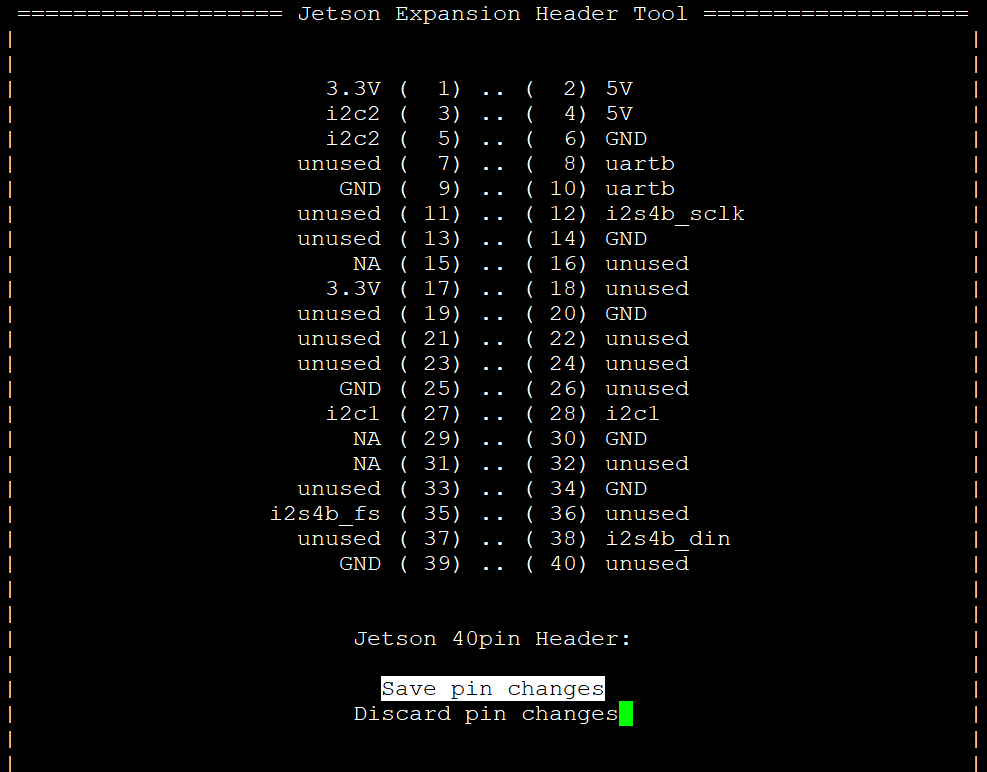
The header screen also displays a different set of options:
• Save pin changes: Saves the header’s new configuration and returns to the main screen; see Main Screen: Save, below.
• Discard pin changes: Discards the header’s new configuration changes and redisplays the prior configuration with the original set of options (see Header Screen, above). You can select a configuration option again, or select Back to return to the main screen.
Expansion Header Configuration Screen
The expansion header configuration screen displays a list of special functions that the selected header supports. It shows the pins associated with the functions in parentheses. On Jetson Nano, for example, the expansion header configuration screen for the 40‑pin header looks like this:
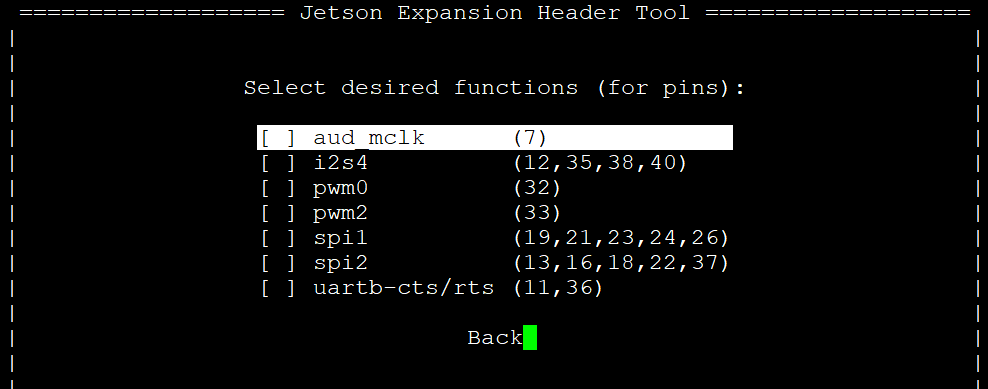
To toggle any one of the pin functions, highlight that function by pressing the up-arrow and down-arrow keys, then press Enter or the space bar.
For more details on the supported functions, see the Technical Reference Manual for the Jetson SoC in your developer kit.
To accept the selected set of functions, select Back. Jetson‑IO redisplays the header screen, updated to reflect the new state of the selected functions. The header screen also shows the Save pin changes and Discard pin changes options, as described in section Compatible Hardware Screen, plus one additional option:
• Export as Device-Tree Overlay: Exports the selected header’s configuration as a new device tree overlay (DTBO). It stores the file in the /boot directory.
Configuring the CSI Connector
Applies to: Jetson Xavier NX series and Jetson Nano 4GB only
The main menu option “Configure Jetson Nano CSI Connector” lets you configure the 30‑pin expansion header on a Jetson Nano device.
1. From the main menu, select “Configure Jetson Nano CSI Connector.”
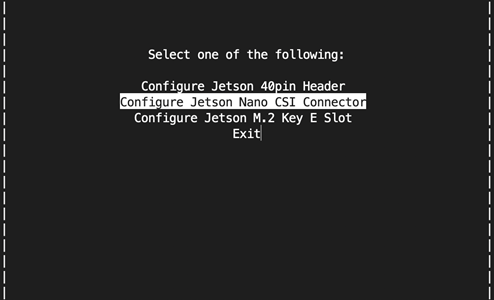
2. Jetson‑IO displays the CSI Connector Screen.
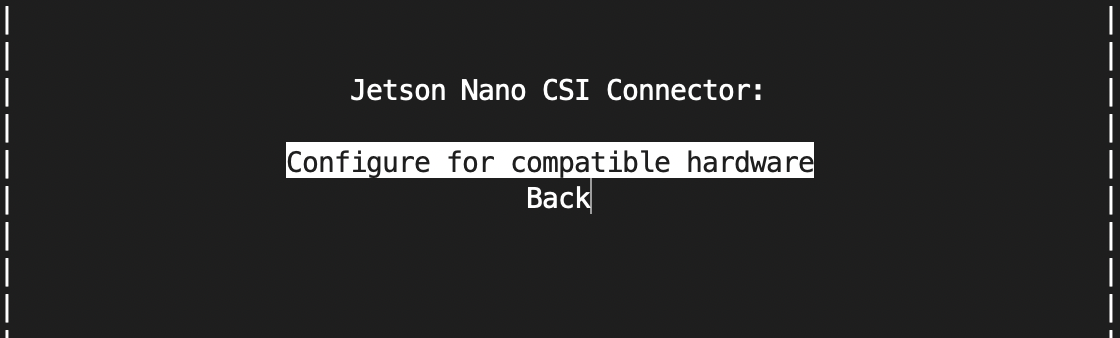
3. Select from a list of compatible hardware. You can add custom configurations as shown in Kernel Configuration in the topic Sensor Software Driver Programming.
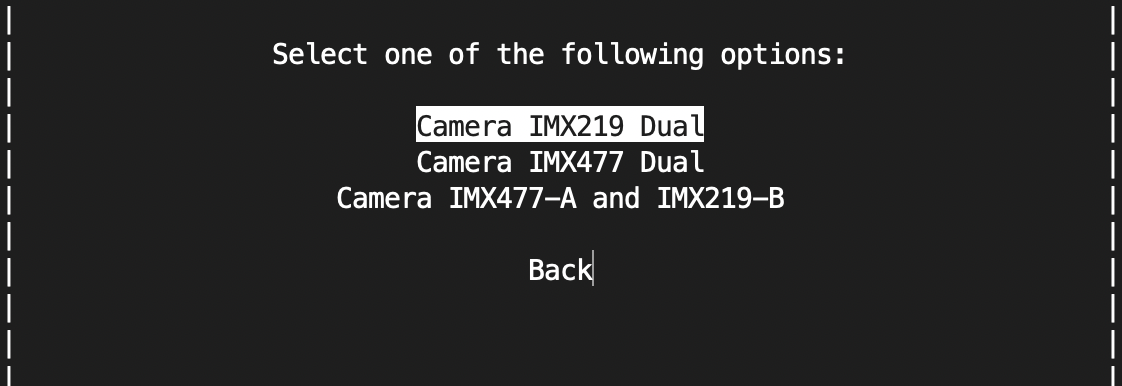
4. Select “Save pin changes” to save the selection you have made:

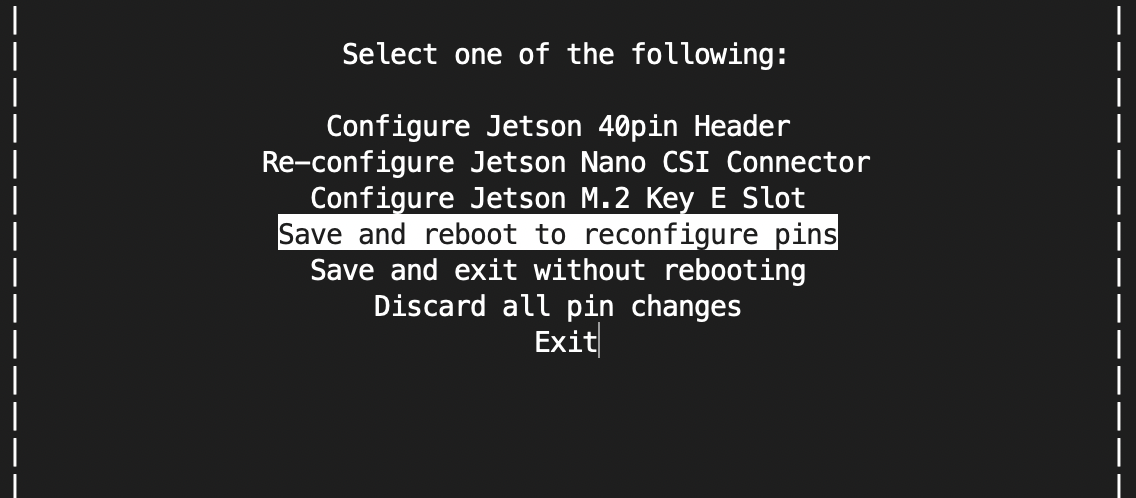
5. Select “Save and reboot to reconfigure pins” to complete the reconfiguration:
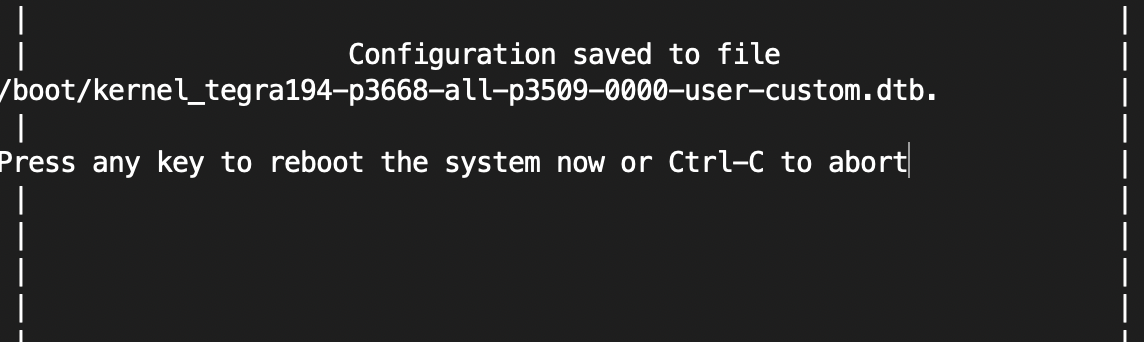
6. Jetson-IO displays the name of the DTB file it modified and prompts you to reboot the device:
Main Screen: Save
When you have finished making changes to a header configuration and select the header screen’s Save pin changes option, Jetson-IO redisplays the main screen.
The main screen allows you to configure or reconfigure another header, and also displays some additional options:
• Save and reboot to reconfigure pins: Creates a new DTB by applying device tree overlays for the header configurations, updates the configuration file for booting Linux (/boot/extlinux/extlinux.conf), and reboots the developer kit.
• Save and exit without rebooting: Creates a new DTB and updates extlinux.conf as “Save and reboot” does, but does not reboot the developer kit. You can apply the new configuration by rebooting at a time of your choice.
• Discard all pin changes: Discards changes you have made to all headers; redisplays the main screen with the original set of options.
Note: | Jetson‑IO preserves all of the configurations you have saved in the configuration file, not just the latest one. When you have saved one or more configurations in addition to the default, the developer kit displays a menu of configurations each time you boot it, allowing you to select the current one or any older one. |
Command Line Interface
If you prefer to configure the headers from the command line instead of menus, NVIDIA provides a set of command line utilities that offer the same functionality. The following sections describe these utilities.
config-by-pin: View Header Configuration by Pin
Displays the current configuration of supported headers.
$ config-by-pin.py [<options>]
The command line options specify the part(s) of the configuration to display. If no options are specified, the entire configuration is displayed.
The following table describes the command line options.
Command line option | Meaning |
-h --help | Displays a usage message and exits. |
-l --list | Lists the headers supported on the target platform and each header’s header number. (The command line utilities use header numbers to refer to specific headers.) |
-n <h> --header <h> | Specifies the header number of a header. If not specified, the header number defaults to 1, which currently represents the 40‑pin expansion header. This option is used together with ‑p to specify a header and a pin on that header. |
-p <p> --pin <p> | Displays the current configuration of pin <p> on expansion header number <h>. |
Examples:
$ sudo /opt/nvidia/jetson-io/config-by-pin.py
$ sudo /opt/nvidia/jetson-io/config-by-pin.py -l
$ sudo /opt/nvidia/jetson-io/config-by-pin.py -p 5
$ sudo /opt/nvidia/jetson-io/config-by-pin.py -p 10 -n 2
config-by-function: Configure Header(s) by Special Function
Displays and configures the I/O functions available on all supported headers.
$ config-by-function.py -h
$ config-by-function.py ‑l {all,enabled}
$ config-by-function.py ‑o {dtb,dtbo} <hfs> <hfs> ...
The following table describes the command line options.
Command line option | Meaning |
-h --help | Displays a usage message and exits. |
-l {all,enabled} --list {all,enabled} | Lists functions supported by the headers. all lists all functions; enabled lists only functions that are currently enabled. |
-o {dtb,dtbo} --out {dtb,dtbo} | Creates a new DTB or one or more device tree overlays incorporating the configuration changes made to the headers. dtb: Creates a new DTB file. The Linux boot configuration file (/boot/extlinux/extlinux.conf) is updated with a new option to boot using this DTB. dtbo: Creates a device tree overlay file for each reconfigured header. |
<hfs> <hfs> ... | Used with ‑o, enables one or more functions on one or more headers. Each <hfs> has one of the forms: <hn>="<f1> <f2> ..." <hn>=<f1> Where: • <hn> is a header number, e.g. 1 or 2. • <f1> <f2> ... is a list of one or more functions to be enabled on that header. • The quotation marks may be omitted if only one function is specified. You can also specify <hfs> in one of these forms to configure only header number 1: "<f1> <f2> ..." <f1> |
Examples:
$ sudo /opt/nvidia/jetson-io/config-by-function.py -l all
$ sudo /opt/nvidia/jetson-io/config-by-function.py -l enabled
$ sudo /opt/nvidia/jetson-io/config-by-function.py -o dtb i2s4 spi1
$ sudo /opt/nvidia/jetson-io/config-by-function.py -o dtbo i2s4 spi1
$ sudo /opt/nvidia/jetson-io/config-by-function.py -o dtb 1="i2s4 spi1" 2=dmic2
$ sudo /opt/nvidia/jetson-io/config-by-function.py -o dtbo 1="i2s4 spi1" 2=dmic2
config-by-hardware: Configure Header(s) by Hardware Module
Displays a list of the supported hardware module configurations and configures the Jetson device for a given hardware module.
$ config-by-hardware.py -h
$ config-by-hardware.py -l
$ config-by-hardware.py -n <hds> <hds> ...
The following table describes the command line options.
Command line option | Meaning |
-h --help | Displays a usage message and exits. |
-l --list | Displays a list of available hardware module configurations. |
‑n <hds> <hds> … ‑name <hds> <hds> … | Configures one or more headers to interface with specified hardware modules. Each <hds> has the form: <hn>=<module> Where: • <hn> is a header number, e.g. 1 or 2. • <module> is a hardware module for which the header is to be configured. You can also specify <hds> as <module> alone (with no <hn> or `=`) to configure only header number 1. This option generates a new DTB file for the specified hardware modules and updates the Linux boot configuration file, /boot/extlinux/extlinux.conf, with a new option to boot using this DTB. |
Examples:
$ sudo /opt/nvidia/jetson-io/config-by-hardware.py -l
$ sudo /opt/nvidia/jetson-io/config-by-hardware.py -n "Adafruit SPH0645LM4H"
$ sudo /opt/nvidia/jetson-io/config-by-hardware.py -n 1="Adafruit SPH0645LM4H"
Adding Support for Custom Hardware
You can use Jetson‑IO to support a custom hardware module by creating a device tree overlay for the hardware module. The following sections describe this process.
Device Tree Overlays
To add support for your custom hardware to Jetson‑IO you must understand how Jetson‑IO manages hardware add-ons. Support for hardware modules is handled by device tree overlay files (.dtbo files).
A device tree overlay for a hardware module must define:
• The overlay-name property, which specifies a name for the hardware module; a unique name that distinguishes this overlay from others
• The jetson-header-name property, which specifies the expansion header with which the hardware module is associated; must specify one of the values described, depending on which header the hardware module is associated with
• The compatible property, which indicates which combination of Jetson module and carrier board the overlay supports; must specify one or more of the values described below, depending on what Jetson platforms are supported
• The special-function I/O pins (if any) defined for the headers
• The nodes and/or properties for any devices on the module, for example, external integrated circuits such as audio codecs
jetson-header-name property values | |
Header | Value |
40-pin expansion header | "Jetson 40pin Header" |
30-pin expansion header | "Jetson 30pin Header" |
M.2 Key E slot | "Jetson M.2 Key E Slot" |
CSI connector (Jetson TX1 and TX2 series) | "Jetson TX1/TX2 CSI Connector" |
CSI connector (Jetson AGX Xavier series) | "Jetson AGX Xavier CSI Connector" |
compatible property values | |
Jetson Platform | Value |
Jetson Xavier NX (with developer kit module, SKU 0000) | "nvidia,p3509-0000+p3668-0000" |
Jetson Xavier NX (with production module, SKU 0001) | "nvidia,p3509-0000+p3668-0001" |
Jetson Nano (A02) | "nvidia,p3449-0000-a02+p3448-0000-a02" |
Jetson Nano (B0x) | "nvidia,p3449-0000-b00+p3448-0000-b00" |
Jetson Nano 2GB | "nvidia,p3542-0000+p3448-0003" |
Jetson TX2 series | "nvidia,p2597-0000+p3310-1000" |
Jetson AGX Xavier series | "nvidia,p2822-0000+p2888-0001" |
Jetson TX1 | "nvidia,p2597-0000+p2180-1000" |
Users can obtain the correct compatible string for their Jetson platform by entering the following command. If you have a Jetson Nano developer kit, this command also identifies the PCB revision.
$ cat /sys/firmware/devicetree/base/compatible
As an example, consider the “FE-PI Audio V1 and Z V2” module. In the target’s /boot directory are overlay files with names matching the pattern:
*-fe-pi-audio.dtbo
You can use the fdtdump utility to inspect the contents of the overlay files and view the overlay-name, jetson-header-name, and compatible properties. For example, on Jetson Nano Developer Kit you can display these properties by entering the command:
$ fdtdump /boot/tegra210-p3448-0000-p3449-0000-a02-fe-pi-audio.dtbo
Creating a Simple Device Tree Overlay
To create a simple device tree overlay to add a new custom property for Jetson Nano Developer Kit (with A02 carrier board and A02 module) and attach it to the 40‑pin expansion header, create a file named my-overlay.dts on the target platform with the following contents:
/dts-v1/;
/plugin/;
/ {
overlay-name = "My Jetson Overlay";
jetson-header-name = "Jetson 40pin Header";
compatible = "nvidia,p3449-0000-a02+p3448-0000-a02";
fragment@0 {
target-path = "/";
__overlay__ {
my-custom-property = "This Is My Overlay";
};
};
};
Enter the following command to compile the DTS source file into an overlay file:
$ dtc -O dtb -o my-overlay.dtbo -@ my-overlay.dts
After you copy the new overlay file to the /boot directory, Jetson‑IO finds the overlay file and allows you to apply it:
$ sudo cp my-overlay.dtbo /boot
$ sudo /opt/nvidia/jetson-io/config-by-hardware.py -l
Header 1 [default]: Jetson 40pin Header
Available hardware:
1. Adafruit SPH0645LM4H
2. Adafruit UDA1334A
3. FE-PI Audio V1 and Z V2
4. MCP251x CAN Controller
5. ReSpeaker 4 Mic Array
6. My Jetson Overlay
Header 2: Jetson M.2 Key E Slot
No hardware configurations found!
$ sudo /opt/nvidia/jetson-io/config-by-hardware.py -n "My Jetson Overlay"
Creating a Custom Device Tree Overlay
If you want to create an overlay for a custom hardware module that attaches to one of the supported headers, the simplest way to do so is to use Jetson‑IO to configure the header as needed and export the configuration as an overlay. You can do this with either the menu-oriented Jetson‑IO script or the associated config-by-... command line tools.
For example, to create an overlay for Jetson Nano (A02) that enables the I2S interface on the 40‑pin expansion header, enter this command:
$ sudo /opt/nvidia/jetson-io/config-by-function.py -o dtbo i2s4
Configuration saved to /boot/tegra210-p3448-0000-p3449-0000-a02-hdr40-user-custom.dtbo.
You can then convert the overlay into a device tree source file by entering this command.
$ dtc -I dtb -O dts -o my-overlay.dts /boot/kernel_tegra210-p3448-0000-p3449-0000-a02-hdr40-user-custom.dtbo
You can modify the generated device tree source as necessary for your custom hardware, adding any additional nodes and/or properties that the hardware module requires. Then you can re-compile the device tree source and place it in the /boot/ directory for Jetson‑IO to use:
$ dtc -O dtb -o my-overlay.dtbo -@ my-overlay.dts
$ sudo cp my-overlay.dtbo /boot