Grasp Authoring#
Overview#
In this lesson, we’ll gather and save grasp data for several distinct “grasps”. Because the grasp is both defined by the poses of the gripper and the object, this grasp data is defined around the “gripper/object” pairing.
We will iterate on this authoring process until we have several known-good grasps that we can later give to the motion planner, which can decide which pose to use at a given moment.
Important
This course assumes you will be using the cloud compute through the Deep Learning Institute, as mentioned in the previous unit.
If you are using your own hardware, you’ll need to bring up the Isaac ROS Dev containers and adapt these steps slightly.
Launching Isaac Sim and Loading the Scene#
For this module, we will interact with an Isaac Sim instance running on the cloud.
Open the Remote Desktop instance by clicking on Notebook > RemoteDesktop.ipynb on the File Explorer. Afterwards, follow the instructions in the notebook to open the instance it should open a window as shown below.
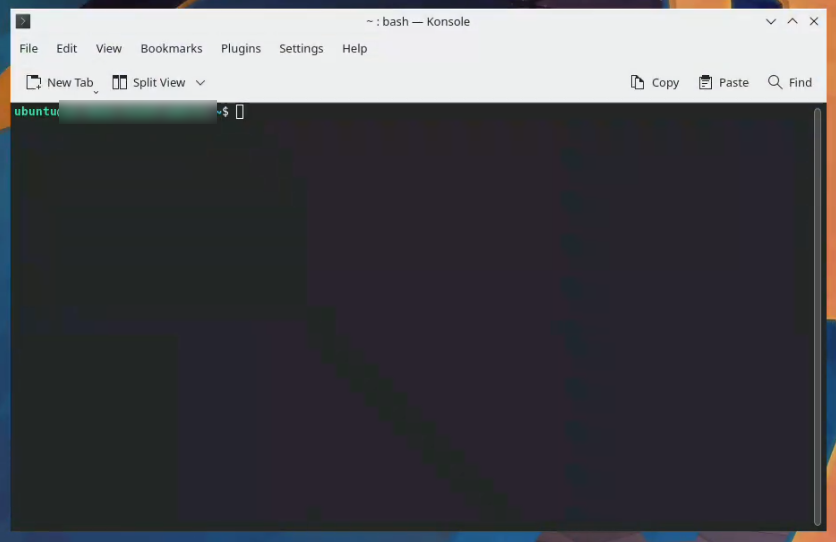
In the browser for the Isaac Sim instance, open a terminal window by selecting the icon in the bottom left of the Desktop, then choose
Konsole.
Run the commands below to configure a few environment variables. Make sure to replace
<YOUR_ID>with a valid ROS domain ID (positive integer between 0-101 or 215-232).
export isaac_sim_package_path=$HOME/isaacsim
export ROS_DOMAIN_ID=<YOUR_ID>
export RMW_IMPLEMENTATION=rmw_cyclonedds_cpp
export LD_LIBRARY_PATH=$LD_LIBRARY_PATH:$isaac_sim_package_path/exts/isaacsim.ros2.bridge/humble/lib
Important
Go ahead and select a ROS Domain ID of your choice, and keep note of it for later. This is a best-practice to avoid cross-talk with ROS domains.
Launch Isaac Sim. This will take a few minutes the first time.
$isaac_sim_package_path/isaac-sim.sh --/renderer/multiGpu/autoEnable=0 --/renderer/multiGpu/enabled=0 --/renderer/activeGpu=1
Important
In the terminal, wait until the Isaac Sim Full App is Loaded message is visible.
Even though the UI will become visible before this message, it’s important we wait for it.
Selecting the scene#
Select the Content panel at the bottom of the UI.
Navigate to My Computer > Downloads and find grasp_editor.usd
/home/ubuntu/Downloads/grasp_editor/grasp_editor.usdDouble click this USD file to open it.
In the popup window select Don’t Save if asked to save the stage.
Using the Grasp Editor#
The Grasp Editor is an extension within Isaac Sim that allows you to hand-author and simulate grasps for a specific gripper, on a specific object. It essentially describes positions and orientations of a gripper, with respect to an object, that are acceptable to grab the object and with a particular gripper pose.
It also gives us controls to test the candidate grasp in our scene, to validate that it works before saving. The successful grasps can be exported to a YAML file, then imported and used within a motion planner algorithm to determine which pose works best for a given situation.
In this activity, we’ll focus on authoring the grasp data for a box of Macaroni and Cheese, and a Robotiq 2F-140 gripper. Think about ideal ways to position the gripper so that it can grip the box effectively. Just like grabbing the box by hand, some poses will work better than others.
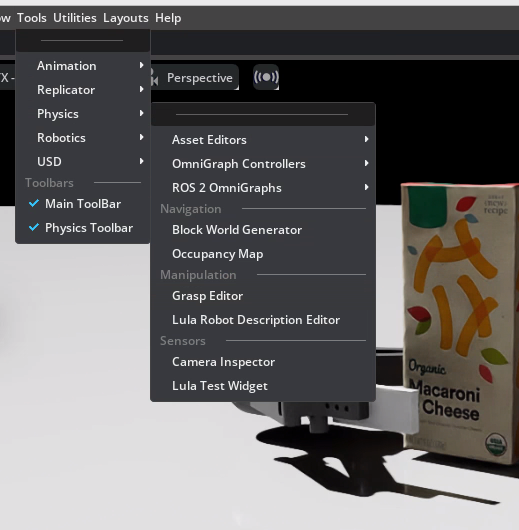
Open the Grasp Editor tool by clicking Tools > Robotics > Grasp Editor.
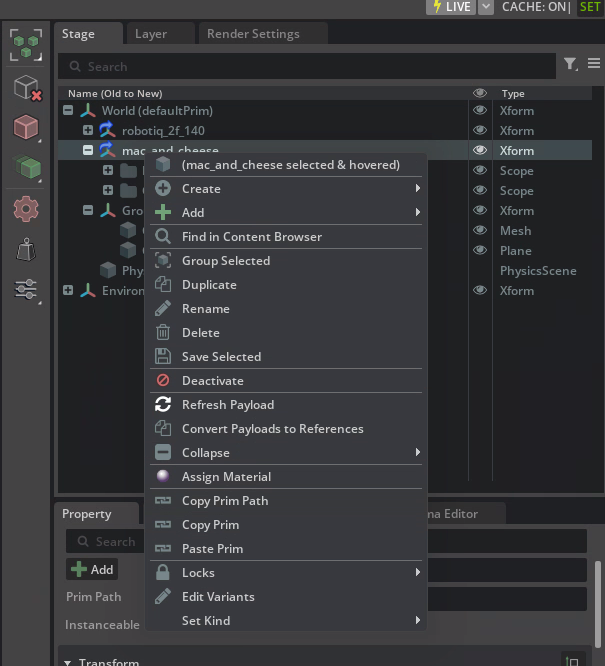
On the Stage panel to the right, select the
mac_and_cheesexform.Right click and choose Copy Prim Path.
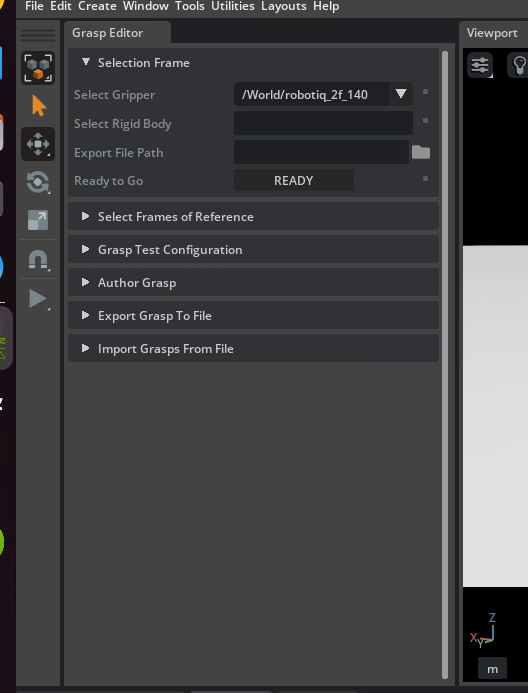
Paste this path into the Select Rigid Body textbox of the Grasp Editor’s Selection Frame section.
Under Export File Path in the Grasp Editor window, select a file path to export the grasps into. Here is the sample file path:
/home/ubuntu/Downloads/grasps_mac_and_cheese.yaml
Important
Make sure this path is correct, as we will reference this grasp information in an upcoming step.
Note
Export File Path’s value must be a path ending in .yaml for the READY button to be available.
Click READY.
Configure Frames#
Next let’s indicate which prims represent the frame for the gripper, and for the object being gripped.
An important concept in robotics is a frame of reference. Simply put, if an object is at a given position, what is that position in relation to? In this case, we want to capture the pose of the object, with respect to the gripper.
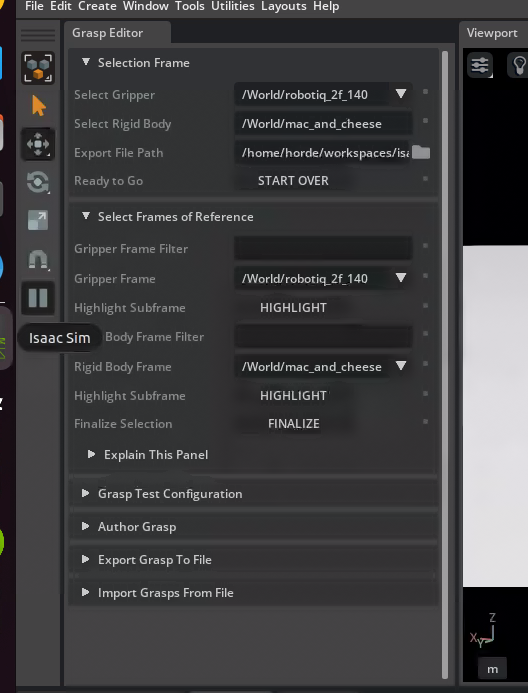
Under the Select Frames of Reference section, set the Gripper Frame as
/World/robotiq_2f_140Under the Select Frames of Reference section, set the Rigid Body Frame as
/World/mac_and_cheeseSelect Finalize.
We now need to enable gravity for the mac_and_cheese box. This is a small workaround for a known issue.
Select the
mac_and_cheeseprim.In the Property panel, scroll down to the Rigid Body section and uncheck Disable Gravity.
Configure Joint Settings#
Next, let’s indicate which bodies of the gripper control the gripping. In the case of the Robotiq 2F-140 gripper, we’ll configure the appropriate joints.
In the Stage panel, select the gripper’s prim and navigate to its joint settings. Indicate which bodies control gripping by configuring the joint settings accordingly.
Specifically, under the Stage panel, select the joint named finger_joint.
Scroll down until you see the Author Grasp section as shown below. This is where we can simulate a grasp or bypass simulation and export directly once the appropriate selections are made.
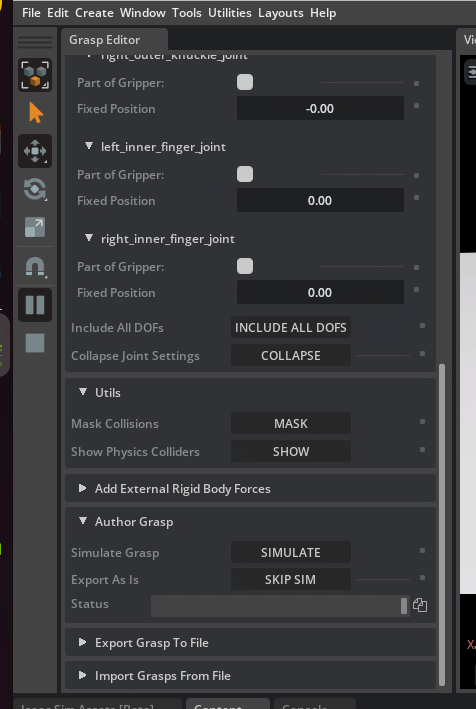
Now, we will move the gripper to the desired grasp poses by simulating grasps. The current position is a good starting point.
Navigate to the Export Grasp To File section, and then click the Export button.
Tip
To see the gripper from different angles, you can control the camera using these controls:
Press the MMB (middle mouse button) to Pan.
Press RMB (right mouse button) to rotate.
Use mousewheel to zoom.
Press F when an object is selected to Zoom on Selected Object.
Press F when nothing is selected to Zoom All.
Generate Multiple Grasps and Export#
Next we’ll author additional grasp data, moving the gripper to different poses, simulating, and exporting successful grasps.
Click on the READY button in the Grasp Editor if not already clicked.
In the Stage panel, click robotiq_2f_140 so the upward-facing blue arrow of the 3D gizmo along with the whole gripper can be moved.
Click and drag on the upward-facing blue arrow of the 3D gizmo to move the gripper slightly up.
Go back to the Author Grasp section of the Grasp Editor and press the SIMULATE GRASP button.
If successful, navigate to the Export Grasp To File section and click on Export. The new data will be appended to your existing file.
Repeat steps 2-4 three to five times: moving the gripper around to different poses, simulating each grasp to test it, then exporting until a more complete set of grasp data is available.
Note
Three to five grasps should be sufficient for this activity.
Tip
If you encounter issues with grasp simulation:
Select the mac_and_cheese box, then in its Property panel confirm that Disable Gravity is unchecked.
Review#
In this module, we authored multiple grasps for a Robotiq 2F-140 gripper and Macaroni and Cheese box. Now that we have a more robust grasp set, we can pass this information to a motion planner and test our work with a more complete scene.
Checkpoint
If you weren’t able to generate the grasp pose data, that’s okay, we’ll have a backup for you when we need this data later: /home/ubuntu/Downloads/grasps_mac_and_cheese.yaml