Application Workflow
This guide helps you get familiar with the application workflow which includes following:
Launch Graph Composer
Sync extensions from NVIDIA Cloud repository
Create simple application using Graph Composer
Run application
Create container image for the application
We will start by first setting up the system and explain the basic layout of the Composer on Ubuntu 22.04 x86_64. Then, we will load, understand, and run a simple application. This will provide an understanding of how the Composer works. Finally, we will create a simple application without writing a single line of code. Graph development is currently supported only on x86. Graph Composer package for arm64 can be used to deploy or execute graph on Jetson.
Installation step installs all tools in the /opt/nvidia/graph-composer directory with links to tools in /usr/bin directory. You can access the tools without switching to the installation directory. After installation, check if the installation was successful using the following commands in a terminal:
registry --help
usage: registry [-h] [-v]  ...

positional arguments:

   cache        Perform actions on cache
   repo         Perform actions on repositories
   comp         Perform actions on components
   extn         Perform actions on extensions
   graph        Perform actions on graph

optional arguments:
 -h, --help     show this help message and exit
 -v, --version  Print registry tool and GXF Spec version
container_builder --help
usage: container_builder [-h] [-v] [--log-level {DEBUG,INFO,WARNING,ERROR,CRITICAL}] [--log-file LOG_FILE]  ...

build docker images from config file

positional arguments:

    build               Build container image using config files
    push                Push local container image to remote repo

optional arguments:
  -h, --help            show this help message and exit
  -v, --version         Container Builder Version
  --log-level {DEBUG,INFO,WARNING,ERROR,CRITICAL}
                        set log level, default is INFO
  --log-file LOG_FILE   Optional, set log output file
If you still don’t see the components, check the FAQ section.
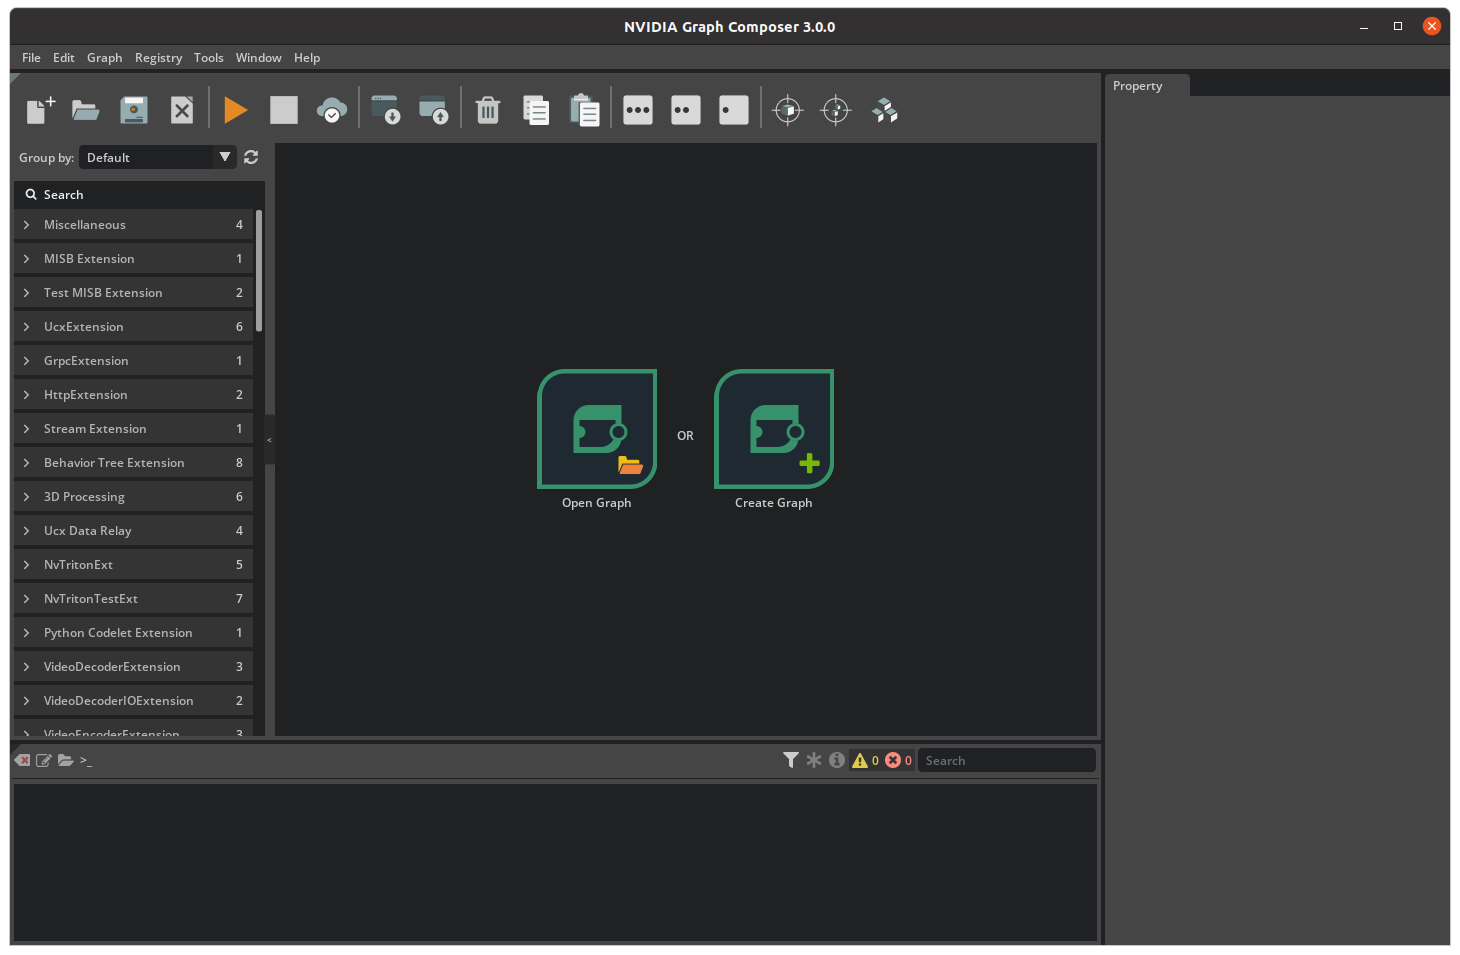
Launch Graph Composer
There are two options to launch Composer:
Native workstation:
Launch Composer from native workstation using following command:
composer
DeepStream SDK devel container image:
Launch Composer from DeepStream SDK devel container image, installation on local system is not required for it:
docker pull nvcr.io/nvidia/deepstream:6.4-gc-triton-devel
xhost +
docker run -it --entrypoint /bin/bash --gpus all --rm --network=host -e DISPLAY=${DISPLAY} -v /tmp/.X11-unix/:/tmp/.X11-unix --privileged -v /var/run/docker.sock:/var/run/docker.sock nvcr.io/nvidia/deepstream:6.4-gc-triton-devel
composer
Note
When using the Composer from the devel container image, users could have a problem browsing the “/” folder from the file browser, in this case they can just type the file path directly or copy and paste it.
Sync Extensions
Before any graph can be executed or container built, extensions from NGC public repo must be synced. Follow the steps below to sync the extensions:
Start the gxf_server in a terminal by running the following command:
gxf_server
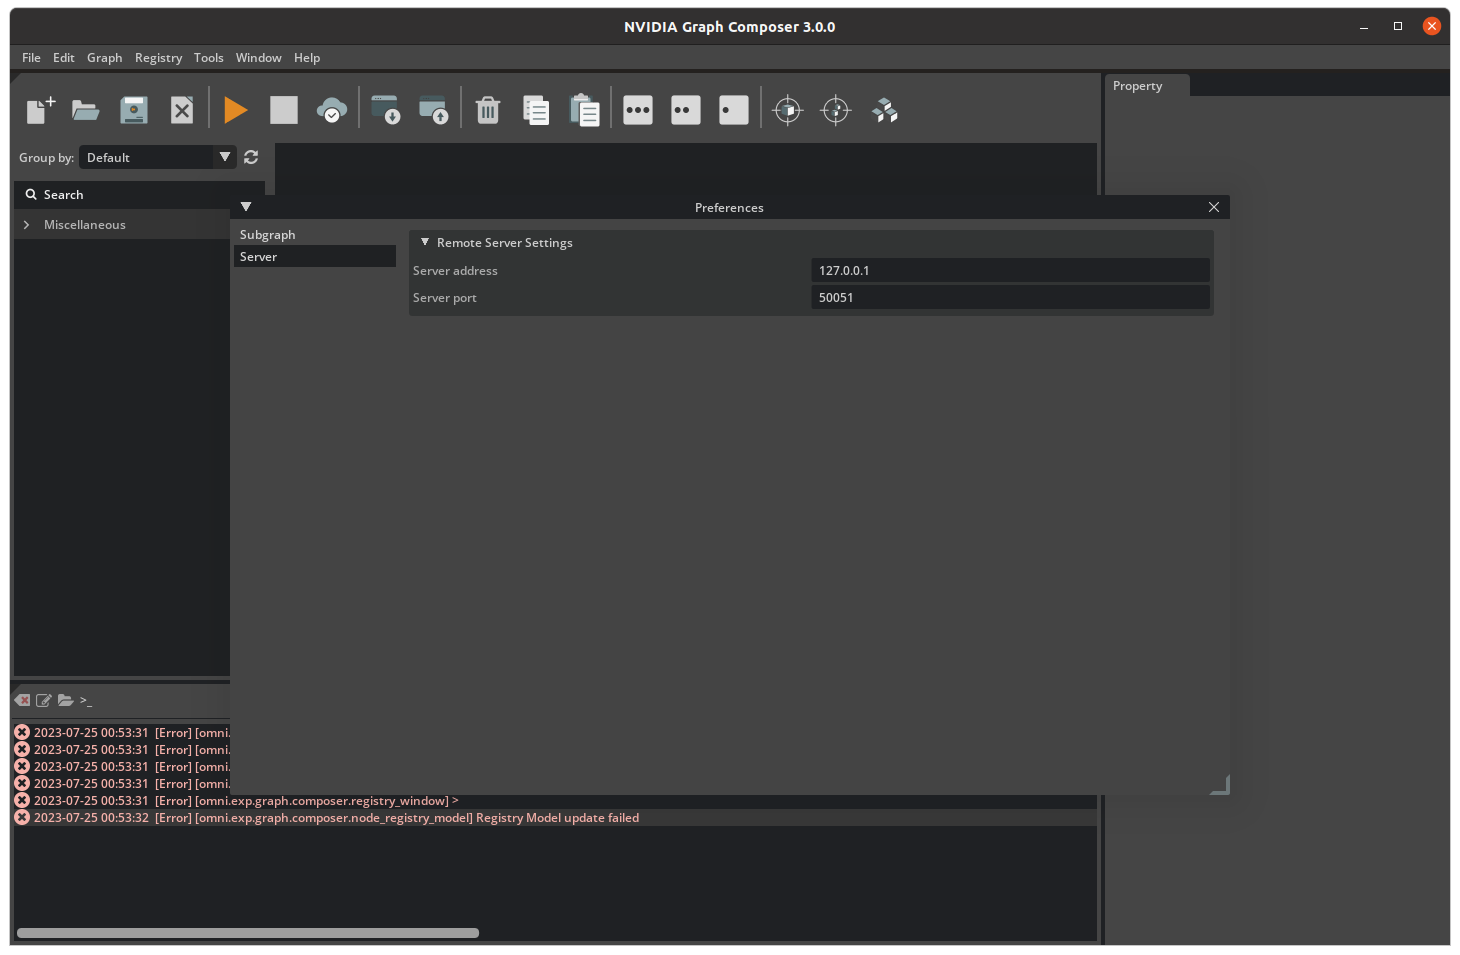
By default, gxf_server runs on port 50051. It can be changed by export GXF_SERVER_PORT=<port_number>.
Also change the port number in Composer.
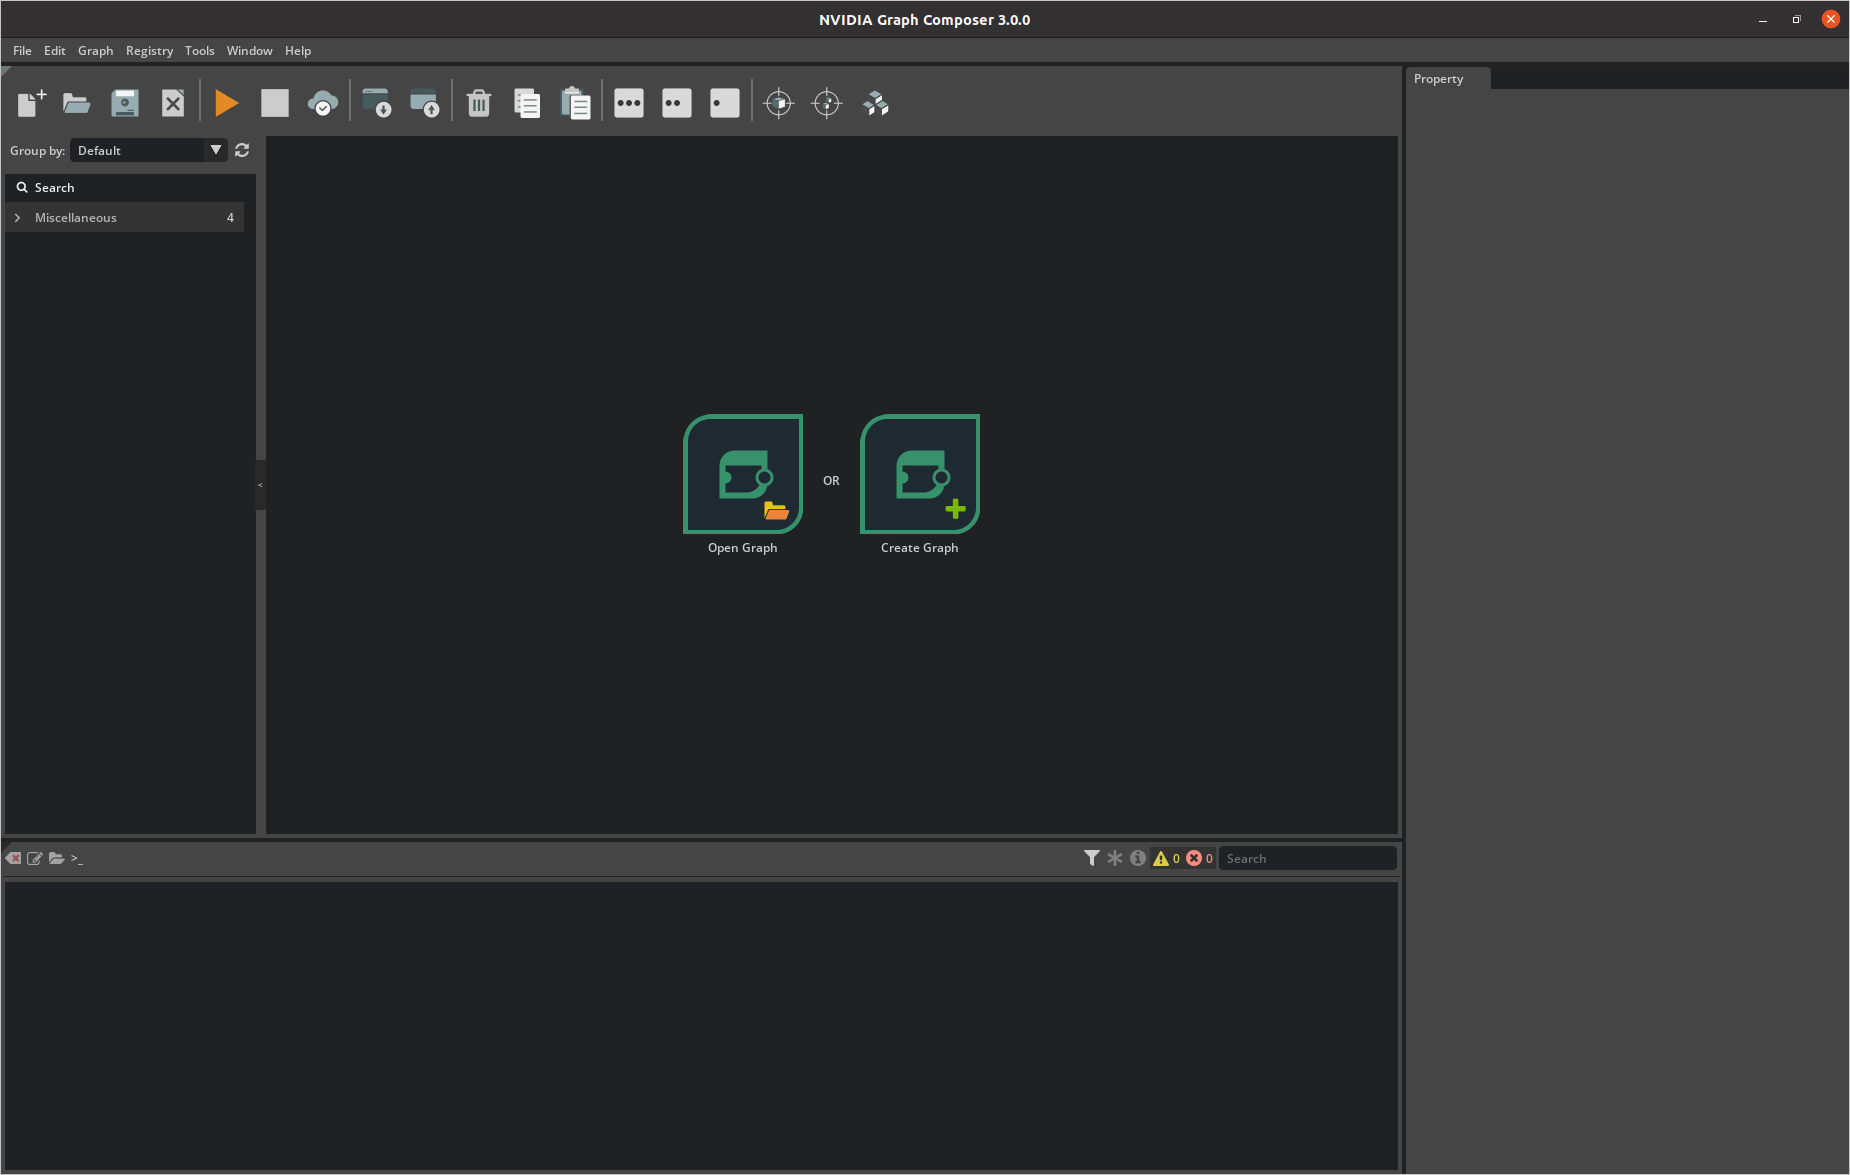
- Open the
Preferenceswindow.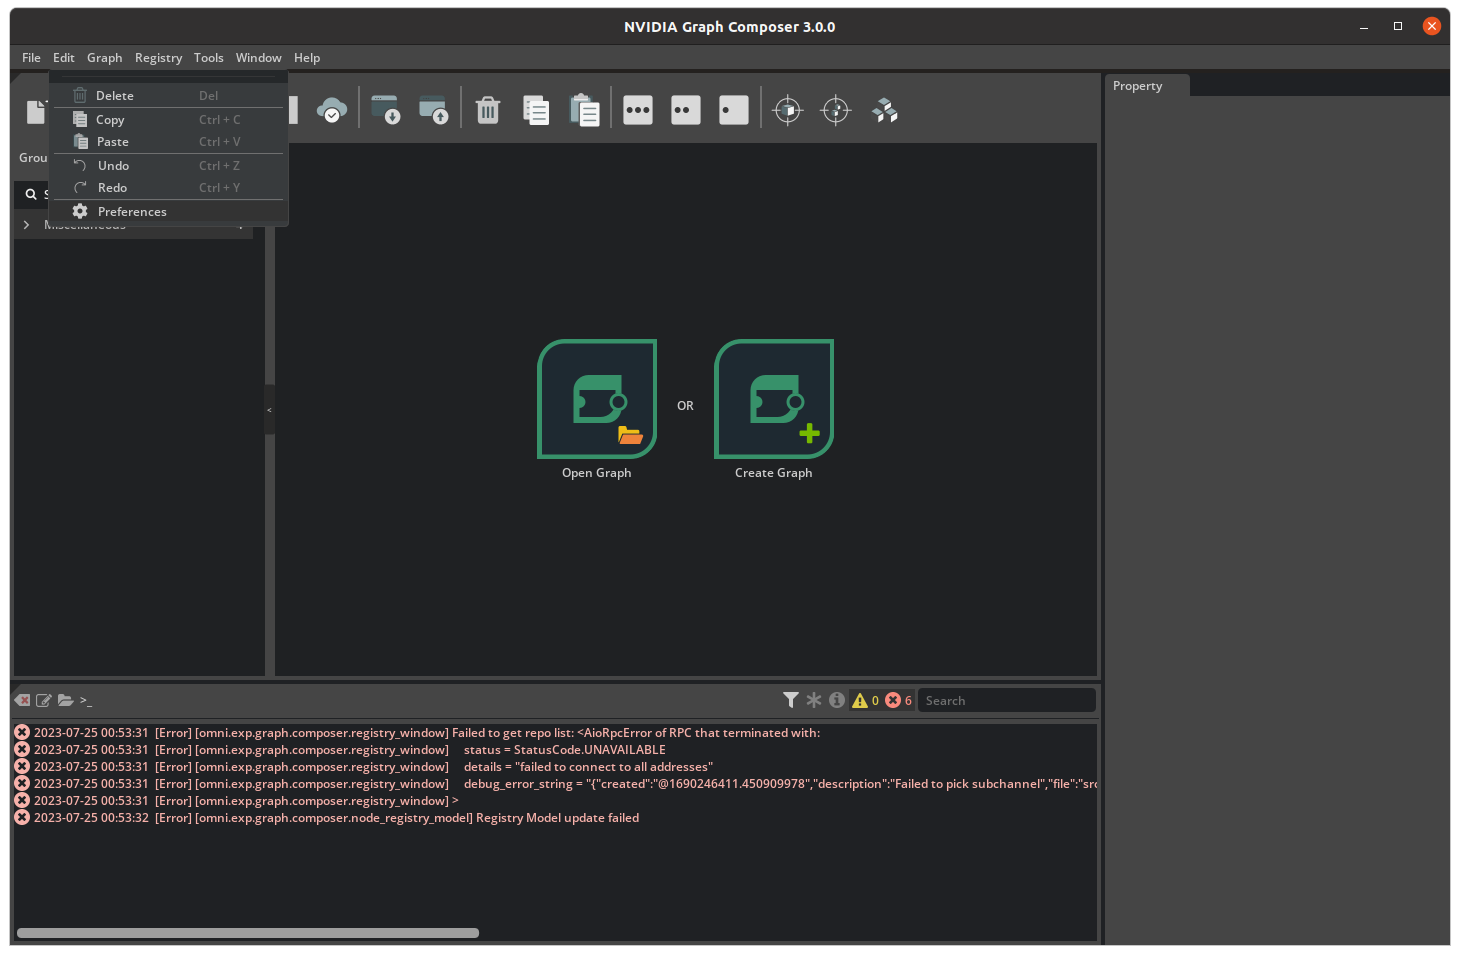
- Change the port number in the server tab.
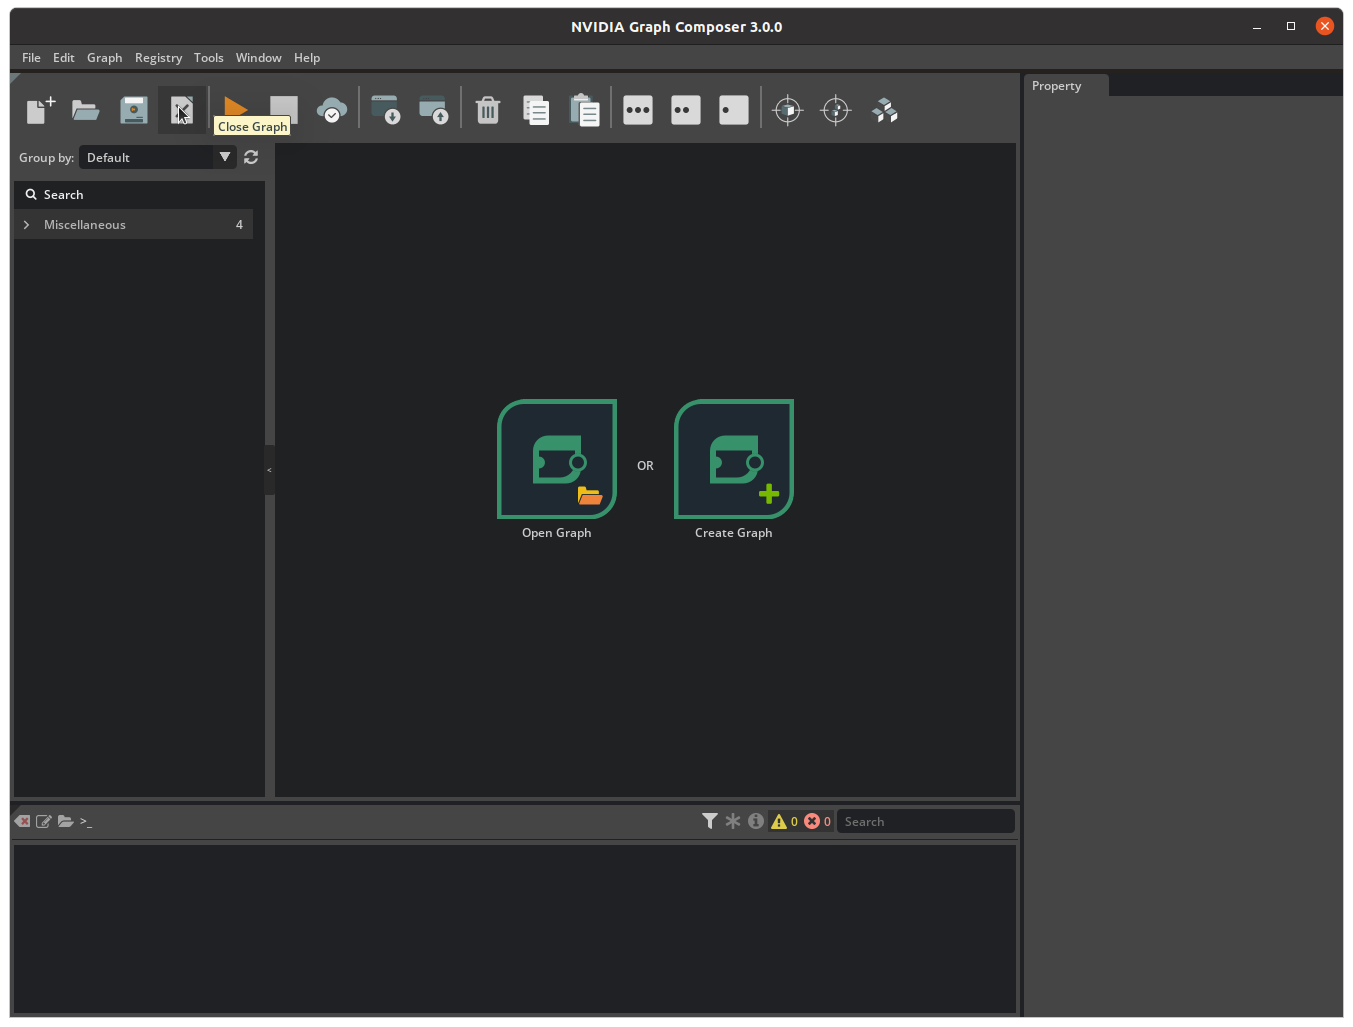
Be sure no graph is opened. If there is an graph being opened, it must be closed to make the registry menu usable.
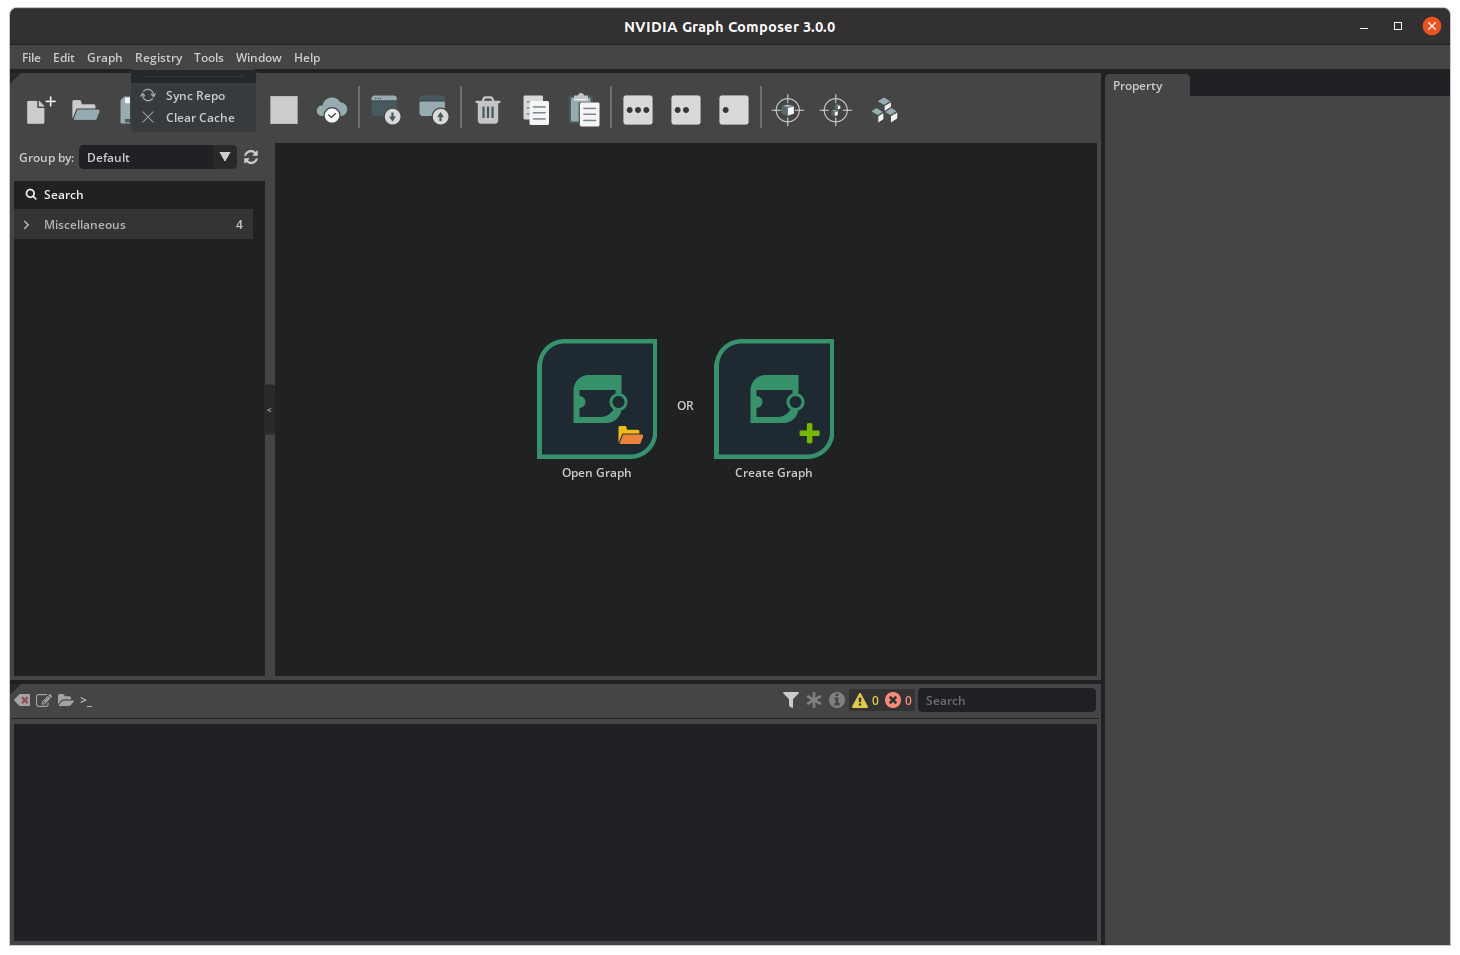
Open the
Registrymenu from the menubar at the top and click onSync Repo
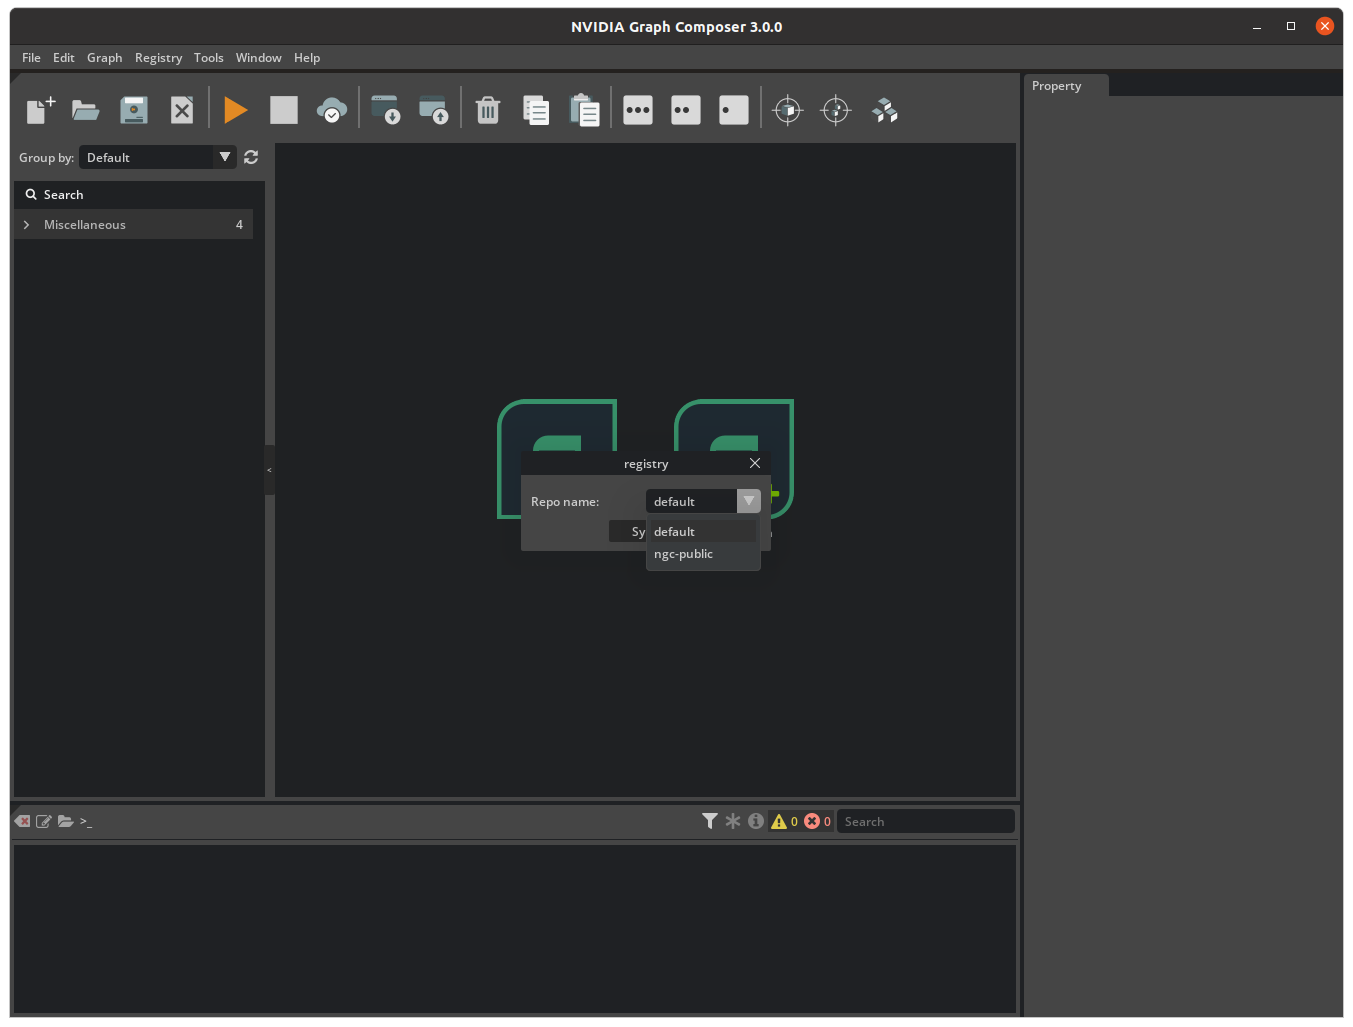
Select
ngc-publicfrom the drop-down list and click onSync
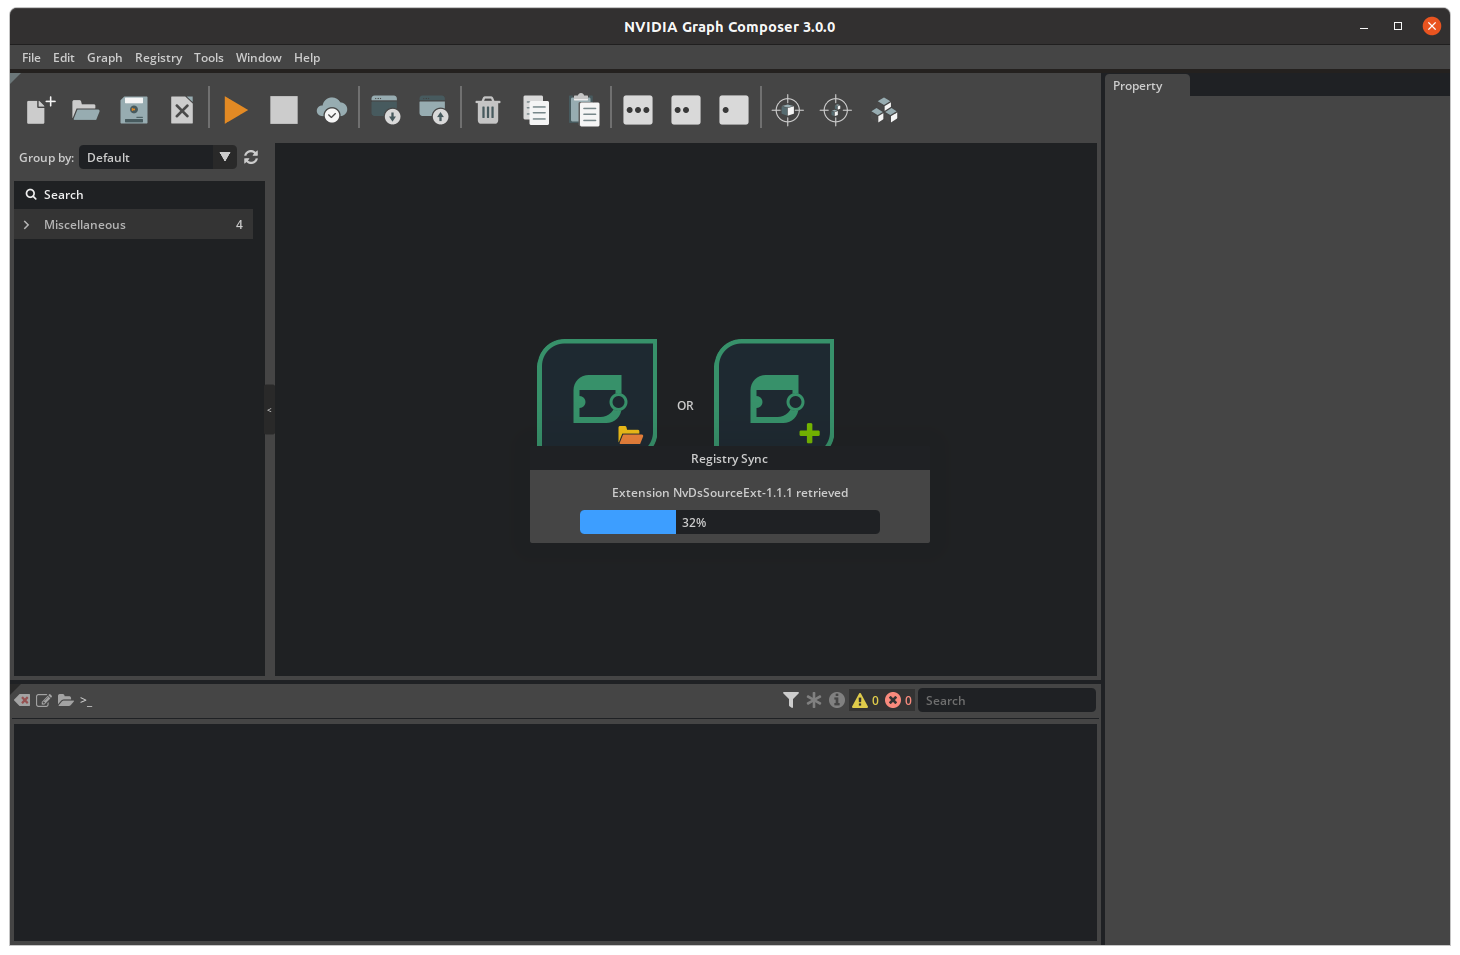
The composer reports the current status using a progress bar.
Once the extension sync is complete, the composer displays a success message.
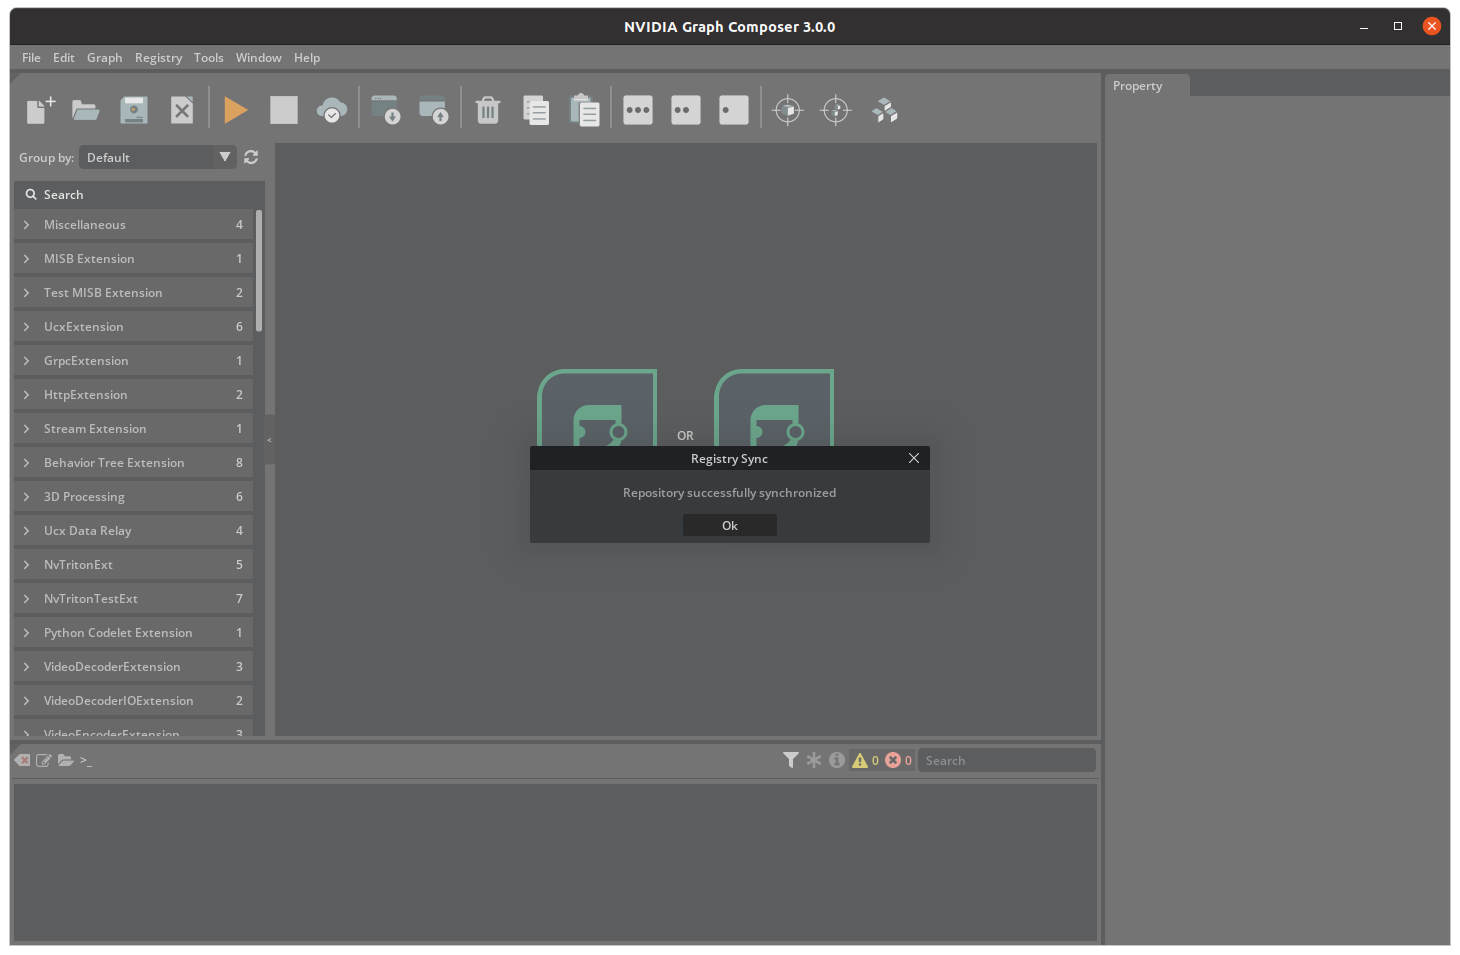
On clicking ‘OK’, the composer automatically refreshes component list. You can see the refreshed list in the component list window on the right.
Create a Graph
Now, let’s create a simple graph and run it. For this example we will create a simple Ping Graph using components present in the Sample Extension and Standard Extension. In this Ping Graph, we simply send a message from one entity to another periodically for certain number of counts. It uses the following components:
- Transmitter:
DoubleBufferTransmitter- This is a queue which is holds a message being transmitted.
PingTx- This component creates and publishes a message every time it’s executed.
PeriodicSchedulingTerm- Scheduling Terms determine when to execute an entity in this case Transmitter. PeriodicSchedulingTerm is used to execute entities periodically.
CountSchedulingTerm- CountSchedulingTerm is used to stop the execution after a certain count. If you want to keep it running then skip adding this component.
- Receiver:
DoubleBufferReceiver- This is a queue which hold the messages sent by other components.
PingRx- This component receives a message on DoubleBufferReceiver every time it’s executed.
MessageAvailableSchedulingTerm- This Scheduling Term determines if a new message has arrived and only then PingRx codelet is ticked.
- Scheduler:
GreedyScheduler- Scheduler determines the order in which components are executed. GreedyScheduler is a simple single-threaded scheduler which executes components one after another.
RealtimeClock- A clock used by Scheduler to track time.
Follow the steps:
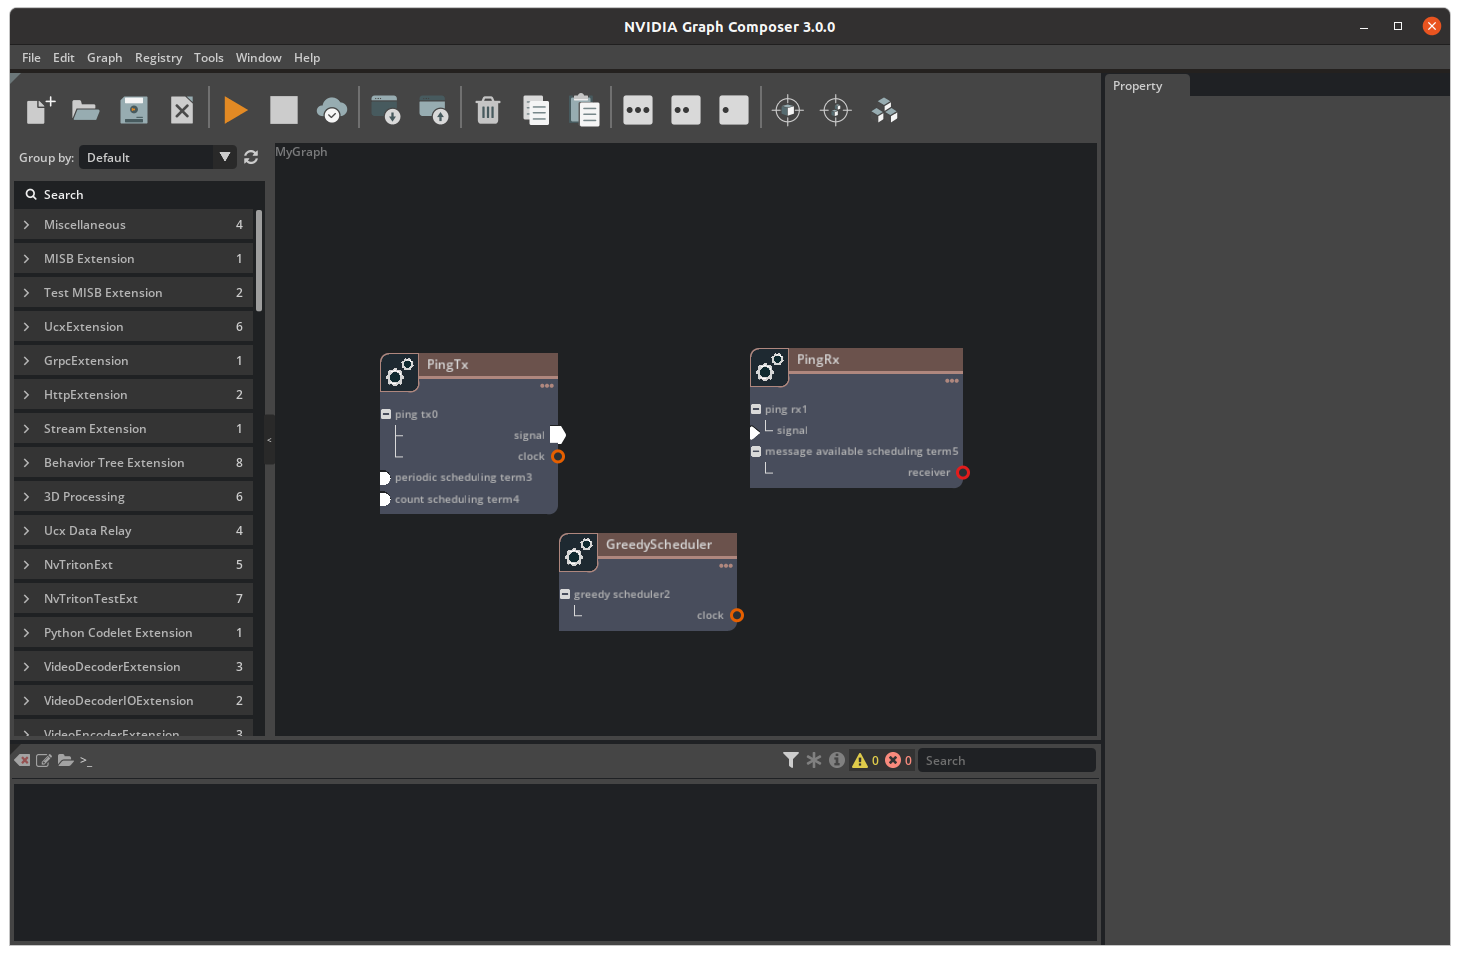
Add PingTx, PingRx and GreedyScheduler by dragging and dropping them from the components panel the graph window.
Add the rest of the components such as CountSchedulingTerm, PeriodicSchedulingTerm and MessageAvailableSchedulingTerm by dragging and dropping into the respective entity node.
Now, right click on the signal in PingTx and click Create DoubleBufferTransmitter. Follow the same steps for PingRx’s signal and GreedyScheduler’s clock.
We can create a graph by simply dragging and dropping components from the Component Panel and add more components to it.
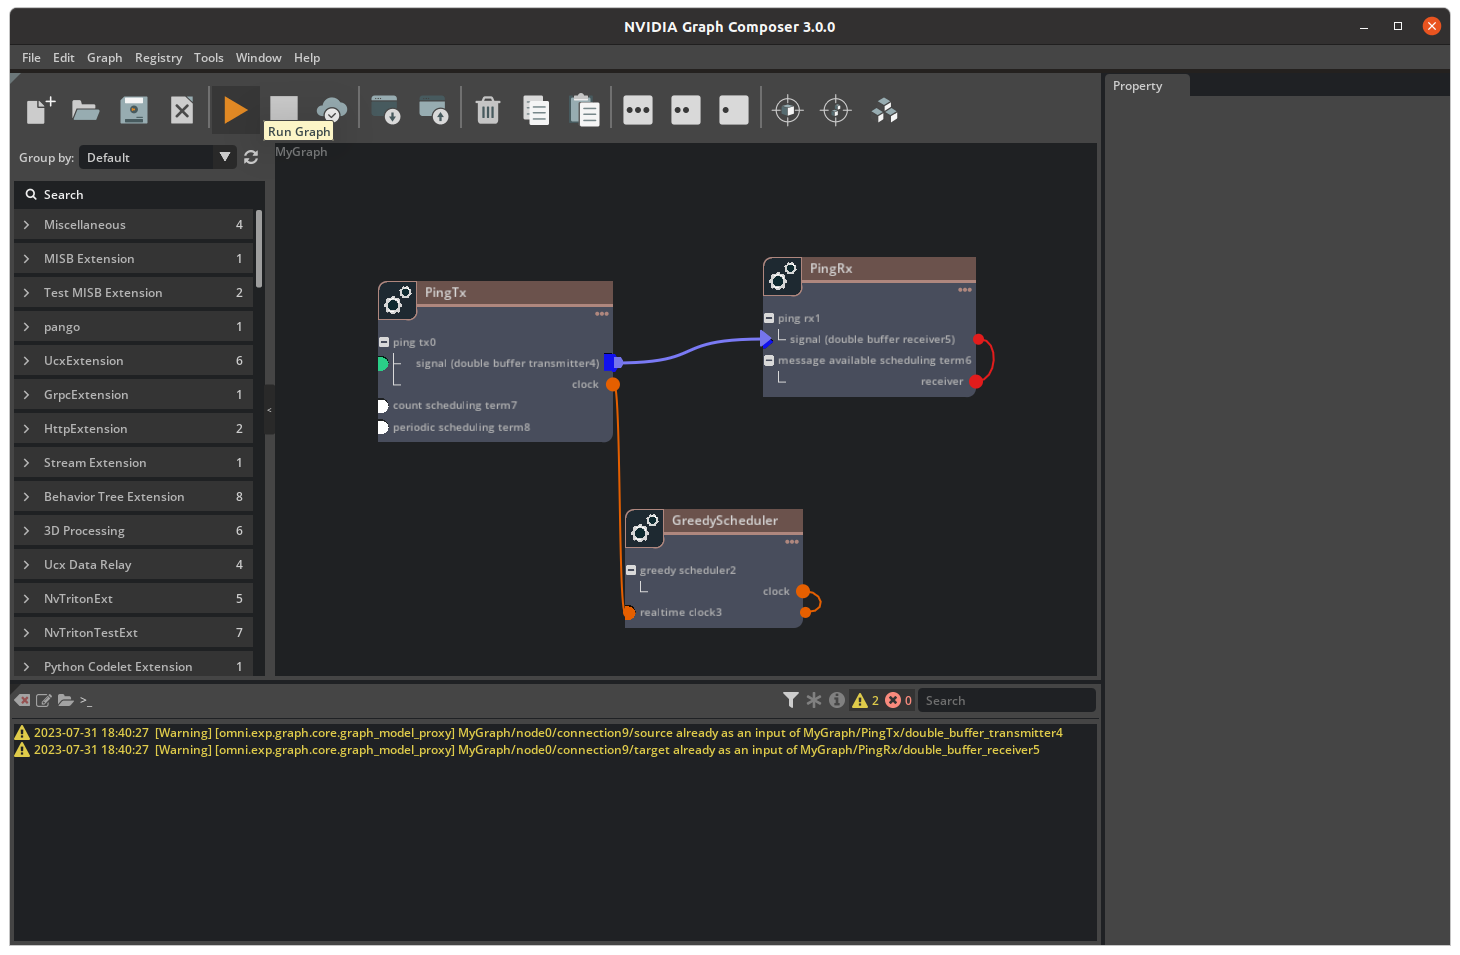
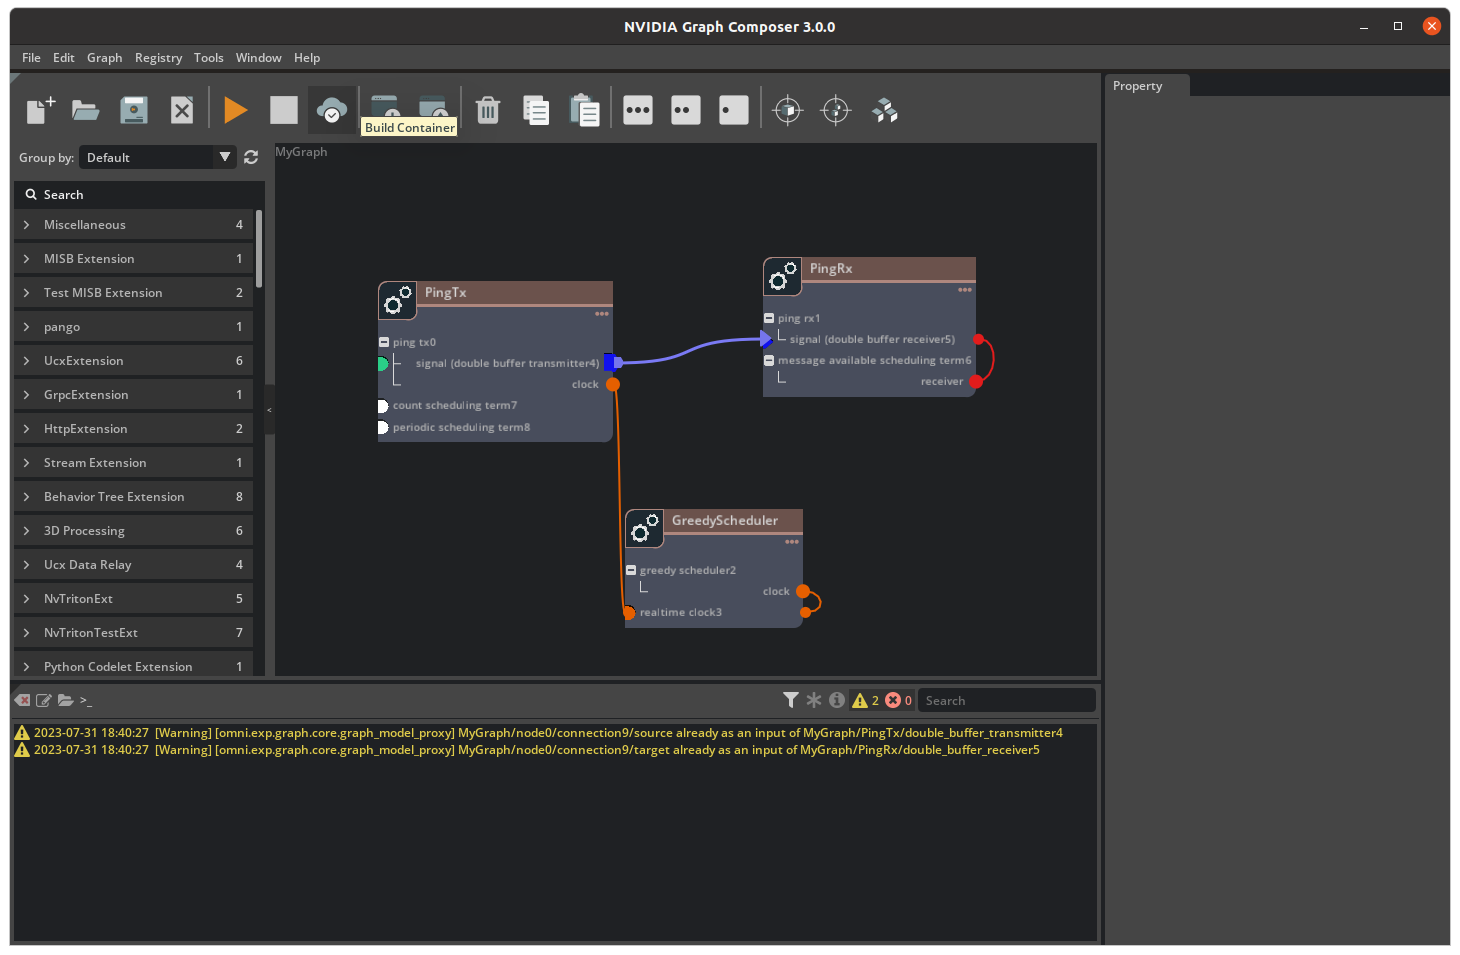
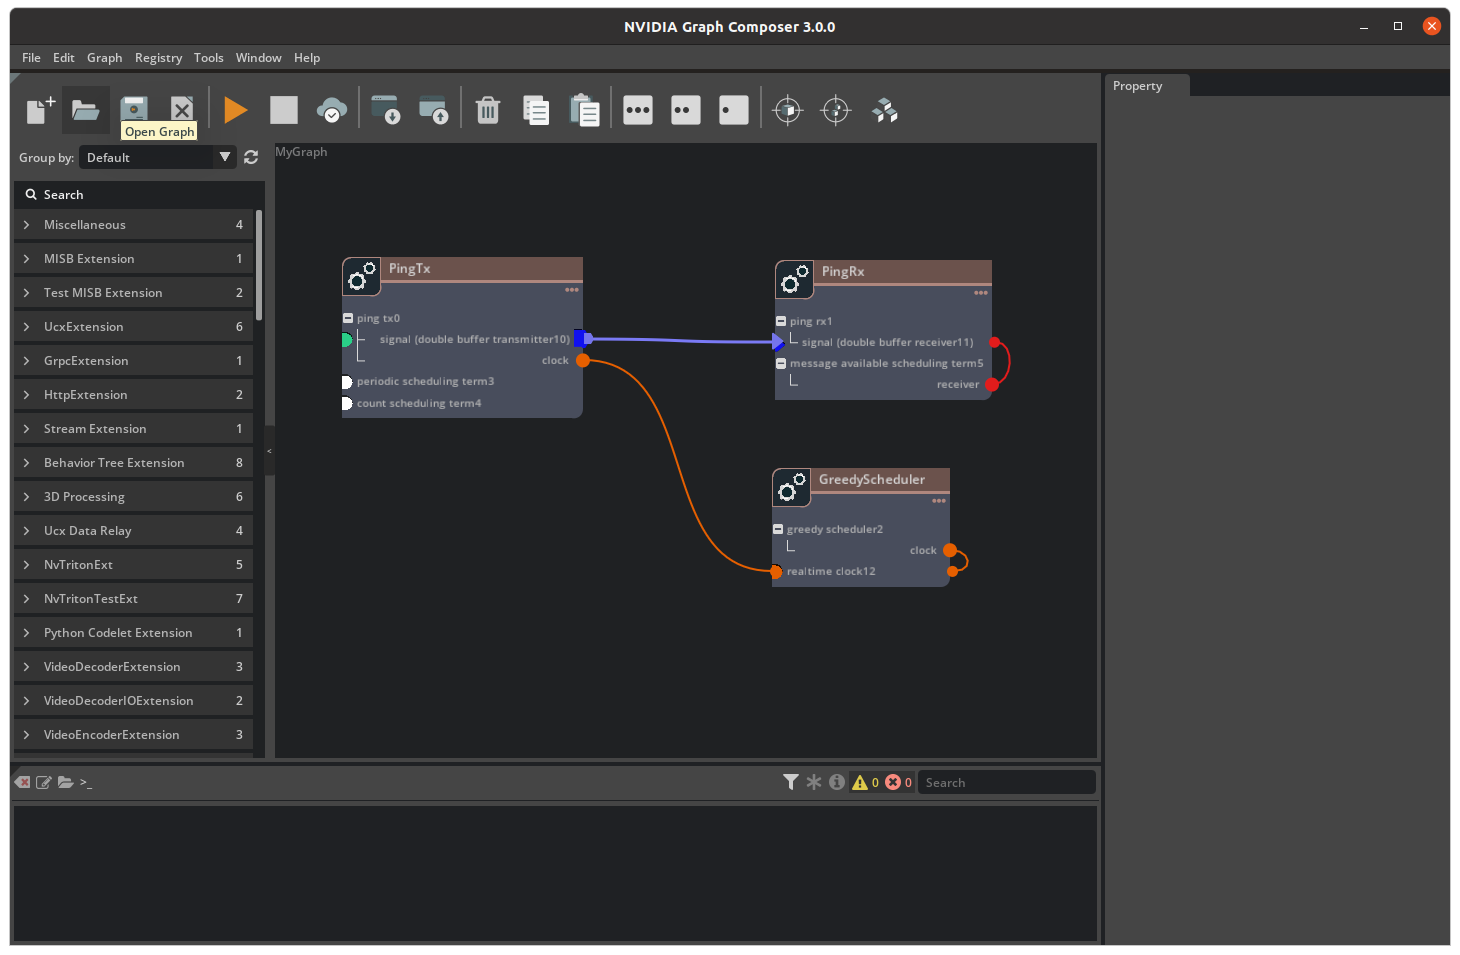
After adding the components your graph will look like the image below:
Now we make connections between components. For instance, you will have to connect a DoubleBufferTransmitter to a DoubleBufferReceiver to pass messages between them. PingTx/clock needs to be linked to GreedyScheduler/RealtimeClock. These connections are made by creating an edge between the components as shown below:
Finally, we have to set the required parameters for the components:
In
PingRx/MessageAvailableSchedulingTerm: set min_size to1In
PingTx/CountSchedulingTerm: set count to5In
PingTx/PeriodicSchedulingTerm: set recess_period to5
Now you can save the graph using File -> Save Graph (as). This will create a yaml file with all the components and the connections.
application:
  name: MyGraph
---
dependencies:
- extension: SampleExtension
  uuid: a6ad78b6-1682-11ec-9621-0242ac130002
  version: 1.3.0
- extension: StandardExtension
  uuid: 8ec2d5d6-b5df-48bf-8dee-0252606fdd7e
  version: 2.3.0
---
components:
- name: ping_tx0
  parameters:
    clock: GreedyScheduler/realtime_clock12
    signal: double_buffer_transmitter10
  type: nvidia::gxf::PingTx
- name: periodic_scheduling_term3
  type: nvidia::gxf::PeriodicSchedulingTerm
- name: count_scheduling_term4
  type: nvidia::gxf::CountSchedulingTerm
- name: double_buffer_transmitter10
  type: nvidia::gxf::DoubleBufferTransmitter
name: PingTx
ui_property:
  position:
    x: 56.0
    y: 103.0
---
components:
- name: ping_rx1
  parameters:
    signal: double_buffer_receiver11
  type: nvidia::gxf::PingRx
- name: message_available_scheduling_term5
  parameters:
    receiver: double_buffer_receiver11
  type: nvidia::gxf::MessageAvailableSchedulingTerm
- name: double_buffer_receiver11
  type: nvidia::gxf::DoubleBufferReceiver
name: PingRx
ui_property:
  position:
    x: 489.0
    y: 106.0
---
components:
- name: greedy_scheduler2
  parameters:
    clock: realtime_clock12
  type: nvidia::gxf::GreedyScheduler
- name: realtime_clock12
  type: nvidia::gxf::RealtimeClock
name: GreedyScheduler
ui_property:
  position:
    x: 486.0
    y: 314.0
---
components:
- name: connection13
  parameters:
    source: PingTx/double_buffer_transmitter10
    target: PingRx/double_buffer_receiver11
  type: nvidia::gxf::Connection
name: node1
Run Graph from Graph Composer
You can deploy the graph using one of the following methods:
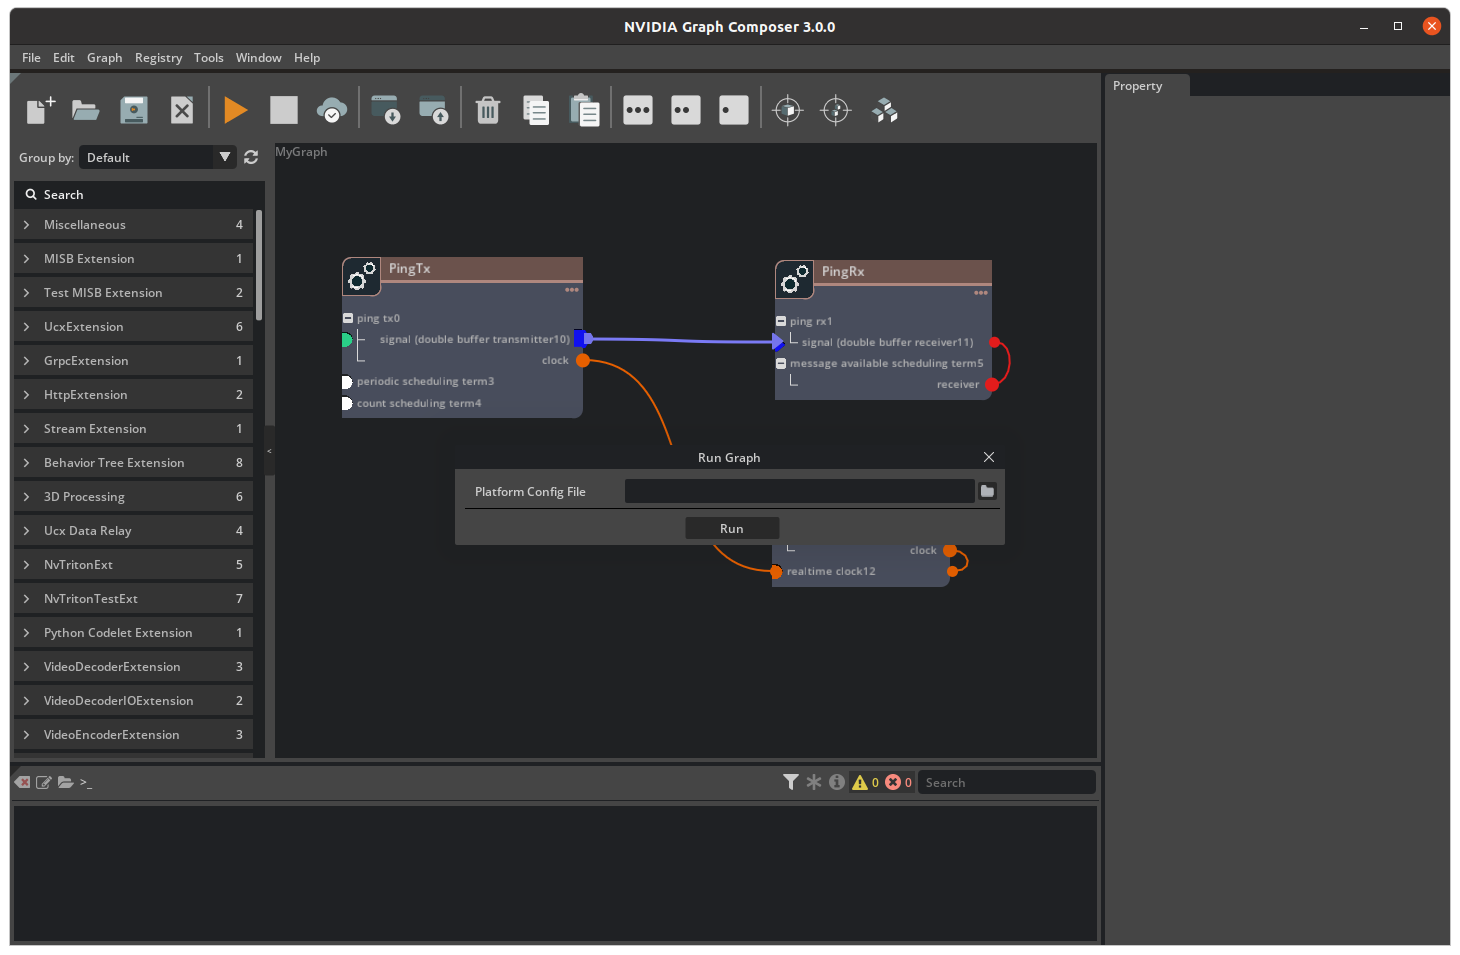
To execute the currently open graph, click on the Run Graph button from the
toolbar on the left. This will open the Run Graph dialog.
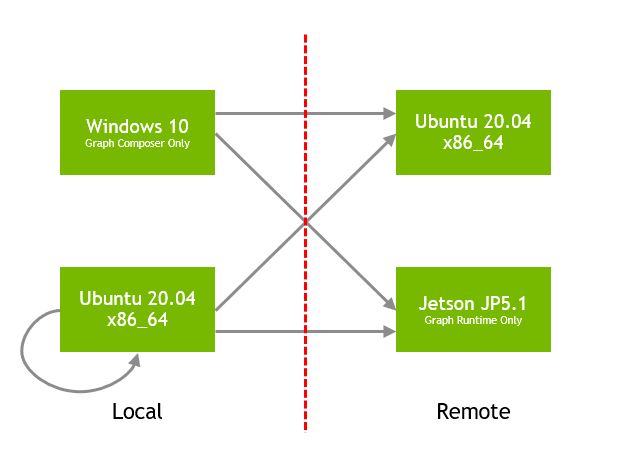
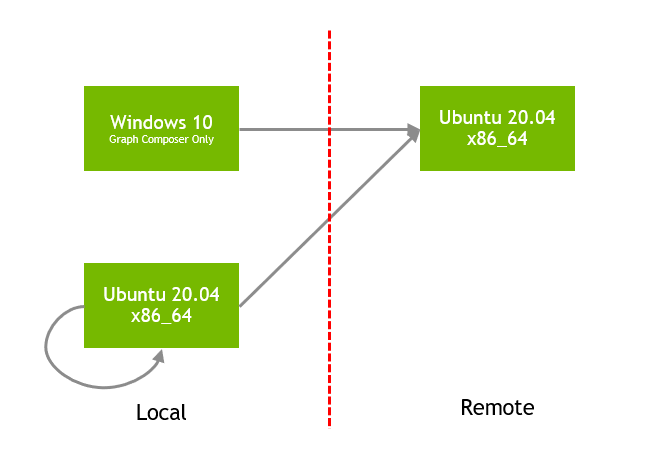
Local System
Make sure
gxf_serveris running on the local system and the IP address in the Edit/Preferences is of local host.Select appropriate Platform config file using the file browser.
Click on
Run. The graph execution progress will be reported via logs in the console window.
Remote System
Execute on Jetson or another remote system
Make sure
gxf_serveris running on the remote system and the IP address in the Edit/Preferences is of remote host.Select appropriate Platform config file (aarch64 or x86_64) based on the remote machine configuration.
Click on
Run. The graph execution progress will be reported via logs in the console window.
Please note that this requires Graph Composer package be installed on the remote system.
Execute on Jetson or another remote system through Windows
Executing graph through Windows is very similar to executing graph on Jetson or another remote system. Please note that this requires Graph Composer package be installed on the remote system.
Run Graph from Command line
Execute Graph using commandline (execute_graph.sh script)
The execute_graph.sh script provided with the graph composer helps with graph execution and provides added functionality.
Complete usage reference:
Usage: /opt/nvidia/graph-composer/execute_graph.sh [options] <graph-file> [additional graph files]

Options:
  -d, --graph-target "<graph-target-file>"    [Required] Graph target config file
  -s, --subgraphs <subgraph1>,<subgraph2>,... [Optional] Paths of subgraphs used by the application, comma-separated list
      --resources <graph-resources-file>      [Optional] Graph resources file
  -f, --fresh-manifest                        [Optional] Re-install graph and generate a new manifest file
  -g, --with-gdb                              [Optional] Execute the graph under gdb
  -m, --use-manifest <existing-manifest>      [Optional] Use an existing manifest file
  -r, --remove-install-dir                    [Optional] Remove graph installation directory during exit
  -t, --target <username@host>                [Optional] Target to execute the graph on. SSH will be used
      --target-env-vars "<env-vars>"          [Optional] Separated list of environment variables to be set before running on target
  -a  --app-root <app-root>                   [Optional] Root path for gxe to search subgraphs
Note
To execute graphs on a remote target: * Graph Composer package must already be installed on the target * It is recommended that a password-less login method be used for SSH
To execute a graph locally, run:
/opt/nvidia/graph-composer/execute_graph.sh <graph-file> -d <graph-target>
For example, on dGPU host, run:
/opt/nvidia/graph-composer/execute_graph.sh <graph-file> -d /opt/nvidia/graph-composer/config/target_x86_64.yaml
To execute on a remote Jetson target, run:
/opt/nvidia/graph-composer/execute_graph.sh <graph-file> -d /opt/nvidia/graph-composer/config/target_aarch64.yaml \
-t <username@host> --target-env-vars "DISPLAY=:0"
Note
If a graph has resources associated with it described in a resources YAML file, an additional argument
--resources <resources.yaml> can be passed to the script. The resources would be copied to the remote target before
graph execution
Note
When executing a graph that uses subgraphs, you must pass additional argument -s <subgraph1>,<subgraph2>,... containing paths
to the subgraph files. You must not pass the subgraphs as graph file arguments without an option.
Note
To run the graph on the remote machine, install the following packages:
openssh-client
sshfs
Use ssh-keygen to generate an ssh key pair. Copy key to target using ssh-copy-id ${TARGET}
Create Container Image from Graph Composer
Container image can be created for Ubuntu 22.04 x86_64 or Jetson but creation is supported only on Ubuntu 22.04 x86_64. Following scenarios are supported for it.
To build a container, first click on the Build Container button from the
toolbar on the top. This will open the Build Container window.
Local System
For creating a container on the local system,
Make sure
gxf_serveris running on the local system and the IP address in the Edit/Preferences is of local host.Launch the file browser using the button next to the
Configuration Fileinput.
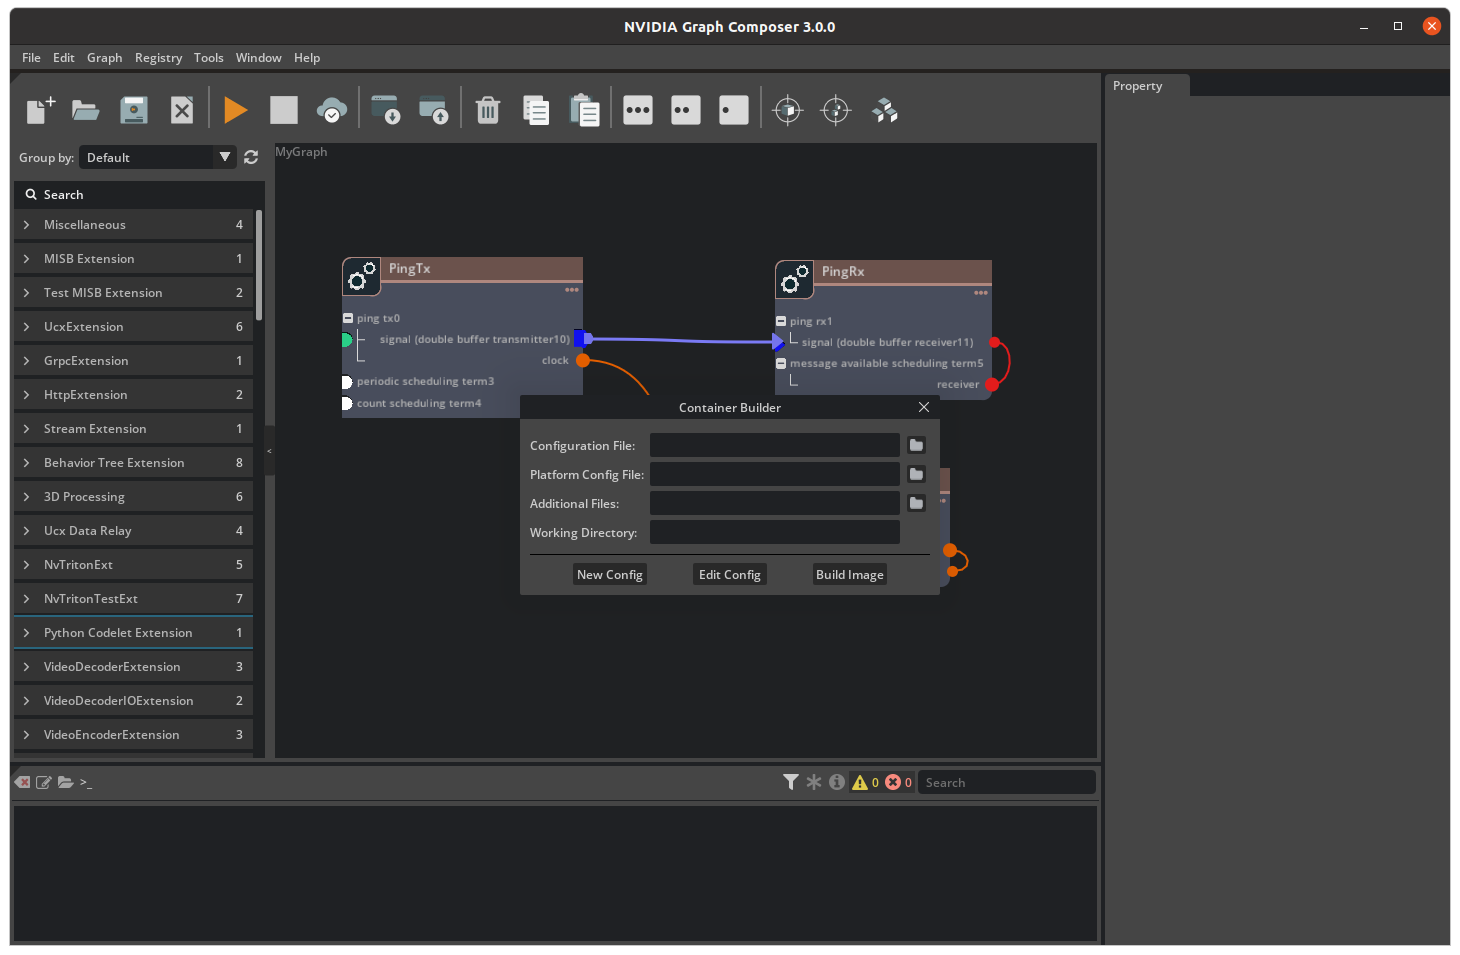
Select a container builder configuration file and open it.
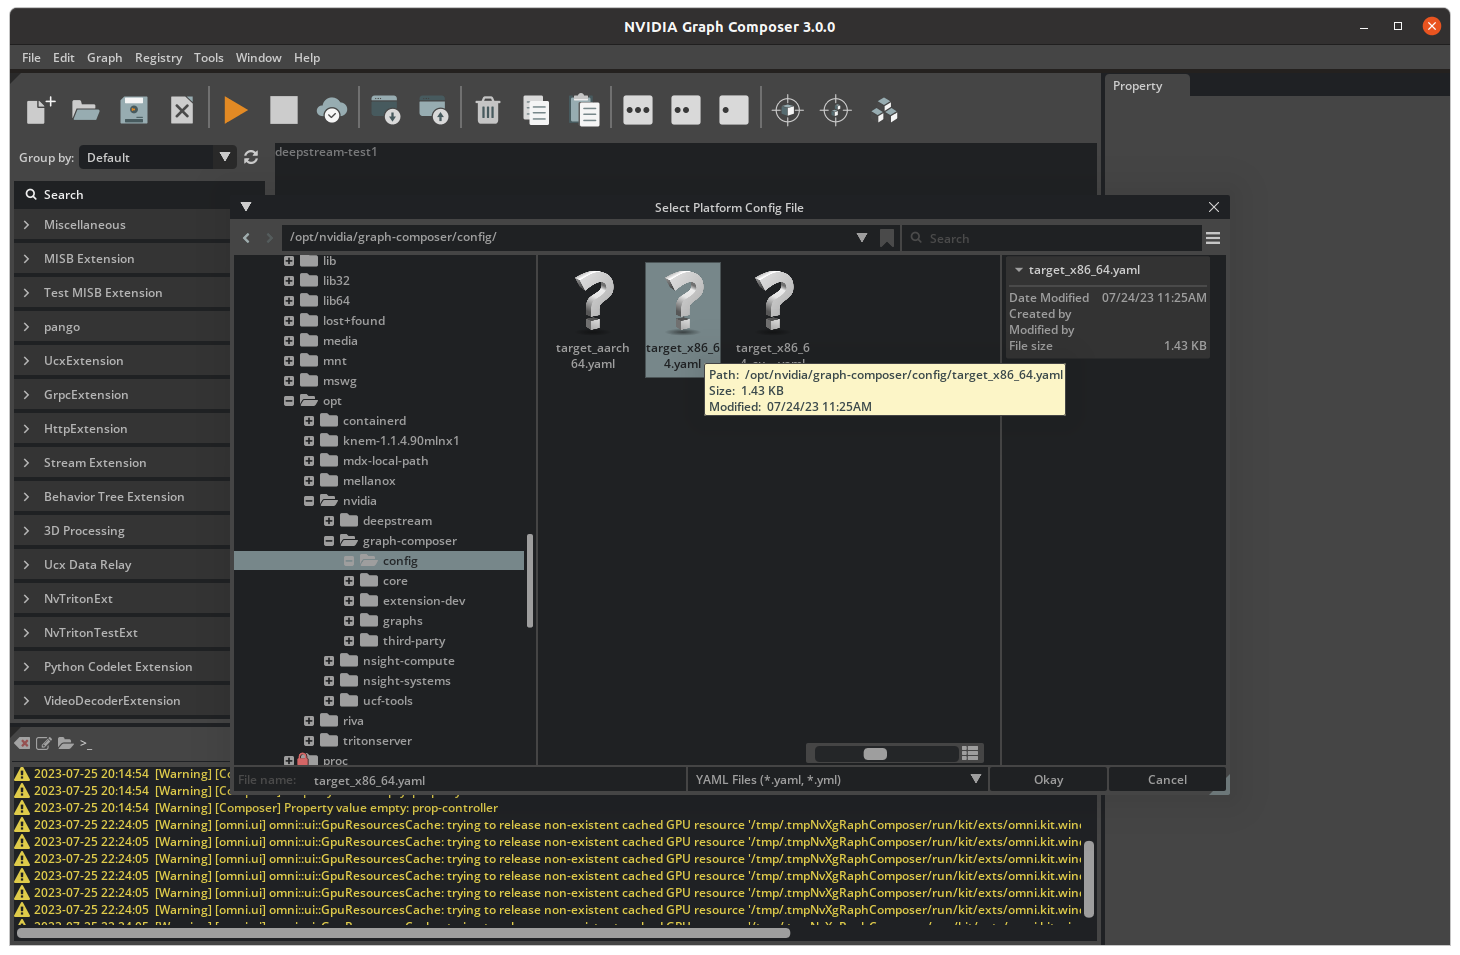
Click the button next to the
Platform config Fileinput to launch the file browser. Select a platform config file and open it.
Click on
Buildto start the build process. Composer reports the container build status using a progress bar.
On successful completion, composer will show a success message.
Remote System (Windows)
Building container image through Windows is very similar to building container image on Linux system.
Add remote system’s IP address and port number in the Server tab in Edit/Preferences window.
For creating a container on the remote system,
Choose the container builder config file and target config file and click on Build Image.
Please note that this requires Graph Composer package be installed on the remote system.
DeepStream Application
Previous application was simple demonstrating application workflow. Similar workflow can be used to create, load and run DeepStream applications using GXF. It requires that DeepStream 6.4 and reference graphs packages are installed on the system with all the dependencies.
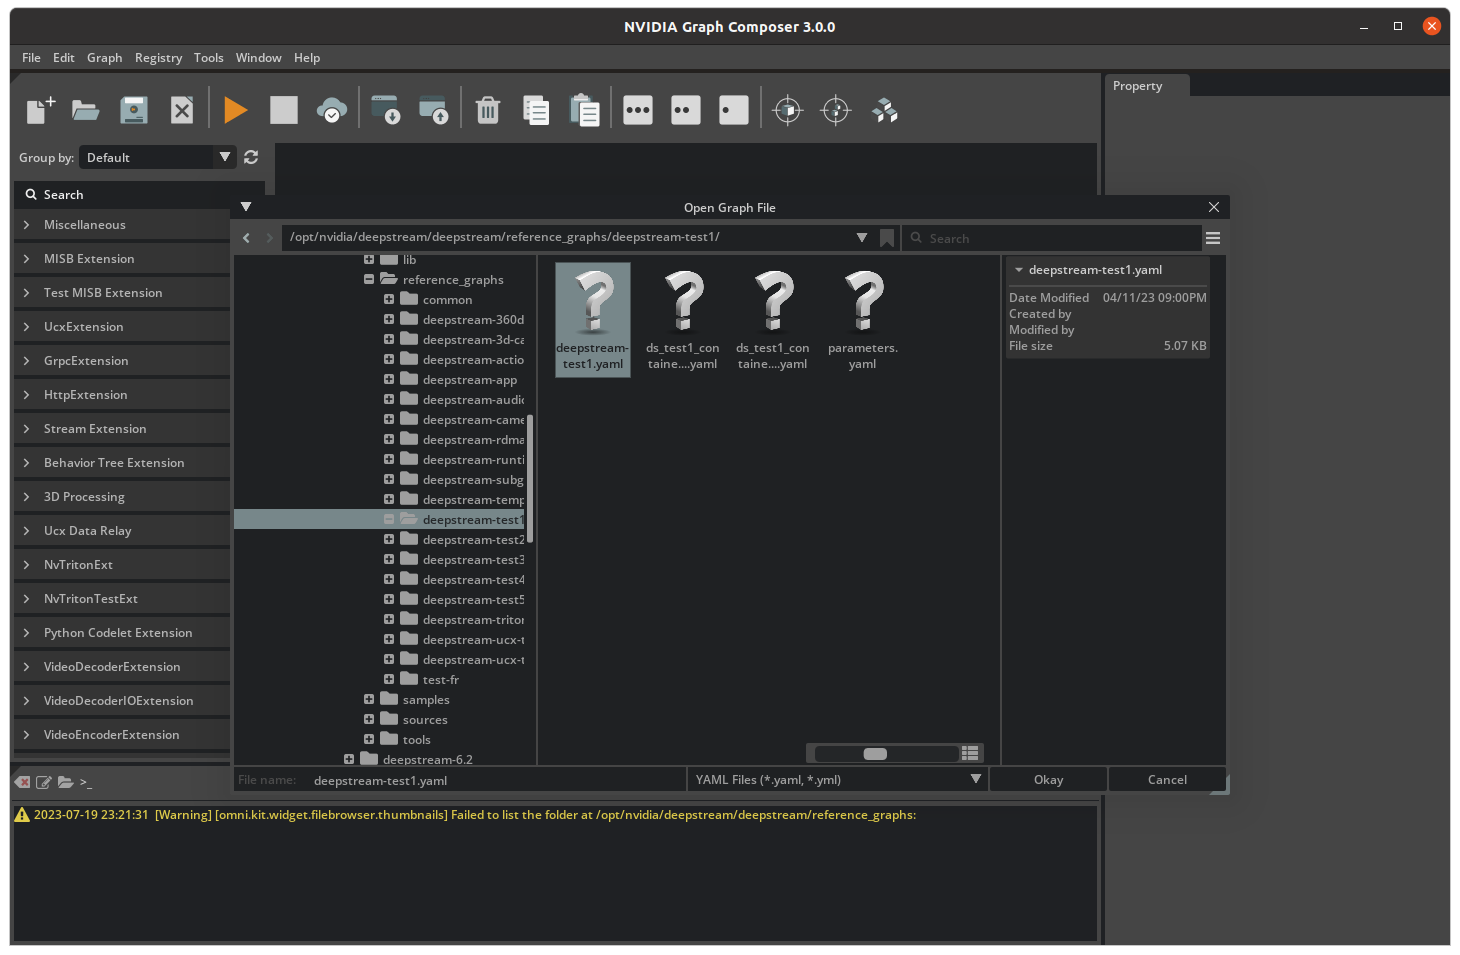
Open the
Filemenu from the menubar at the top and click onOpen Graphto launch the file browser. You may alternatively use theCtrl + Okey combination.
Browse to a valid graph file, select it and click on
Okayto open the graph.
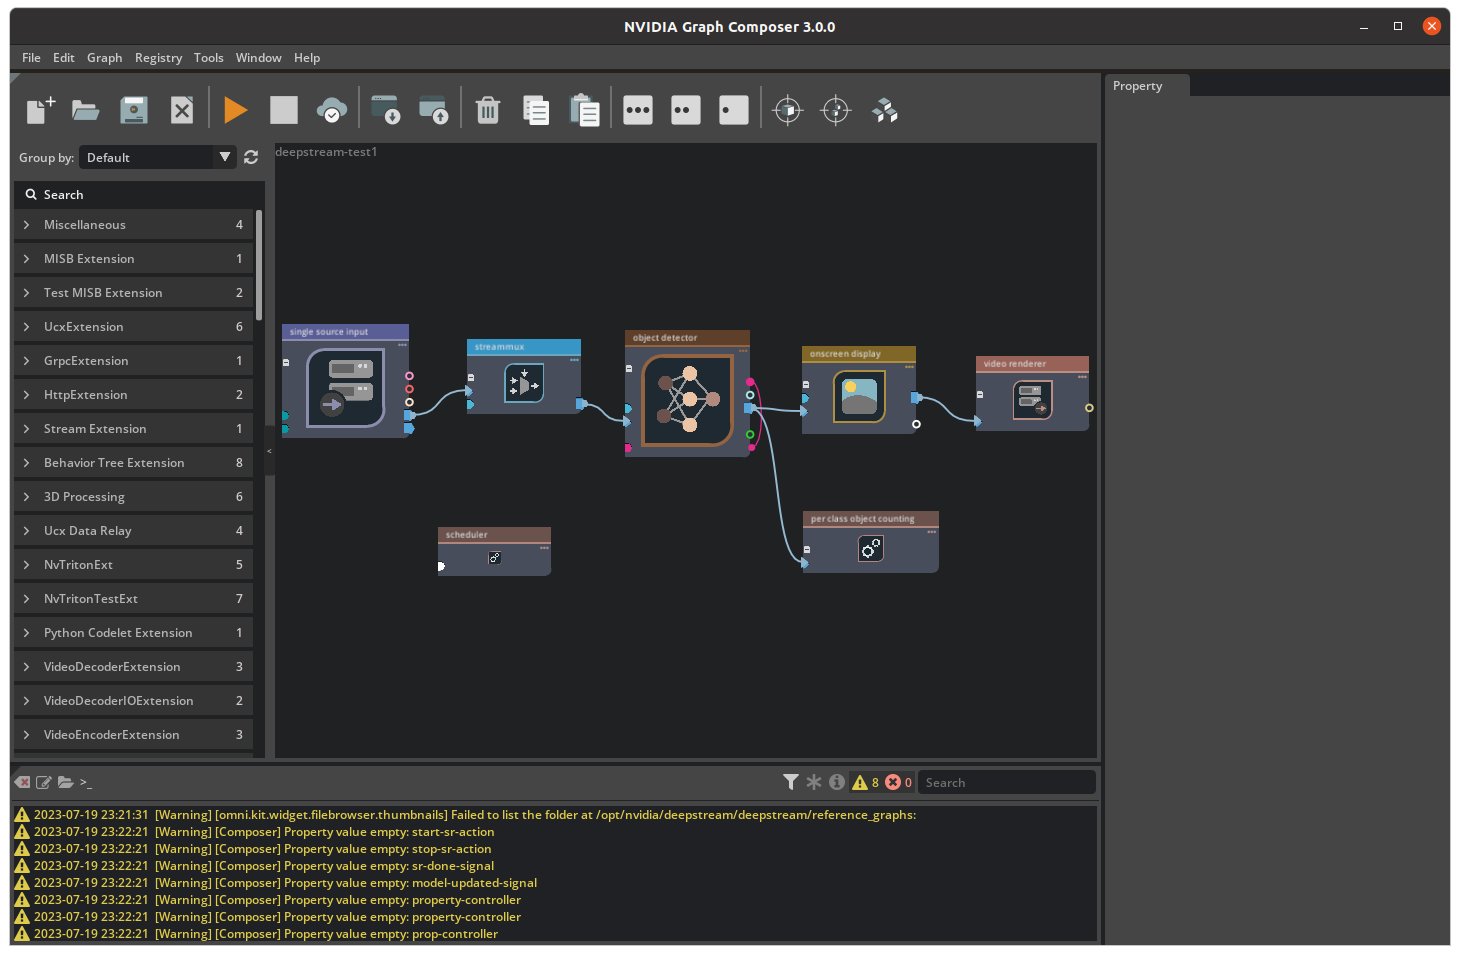
Composer should now show the application graph.
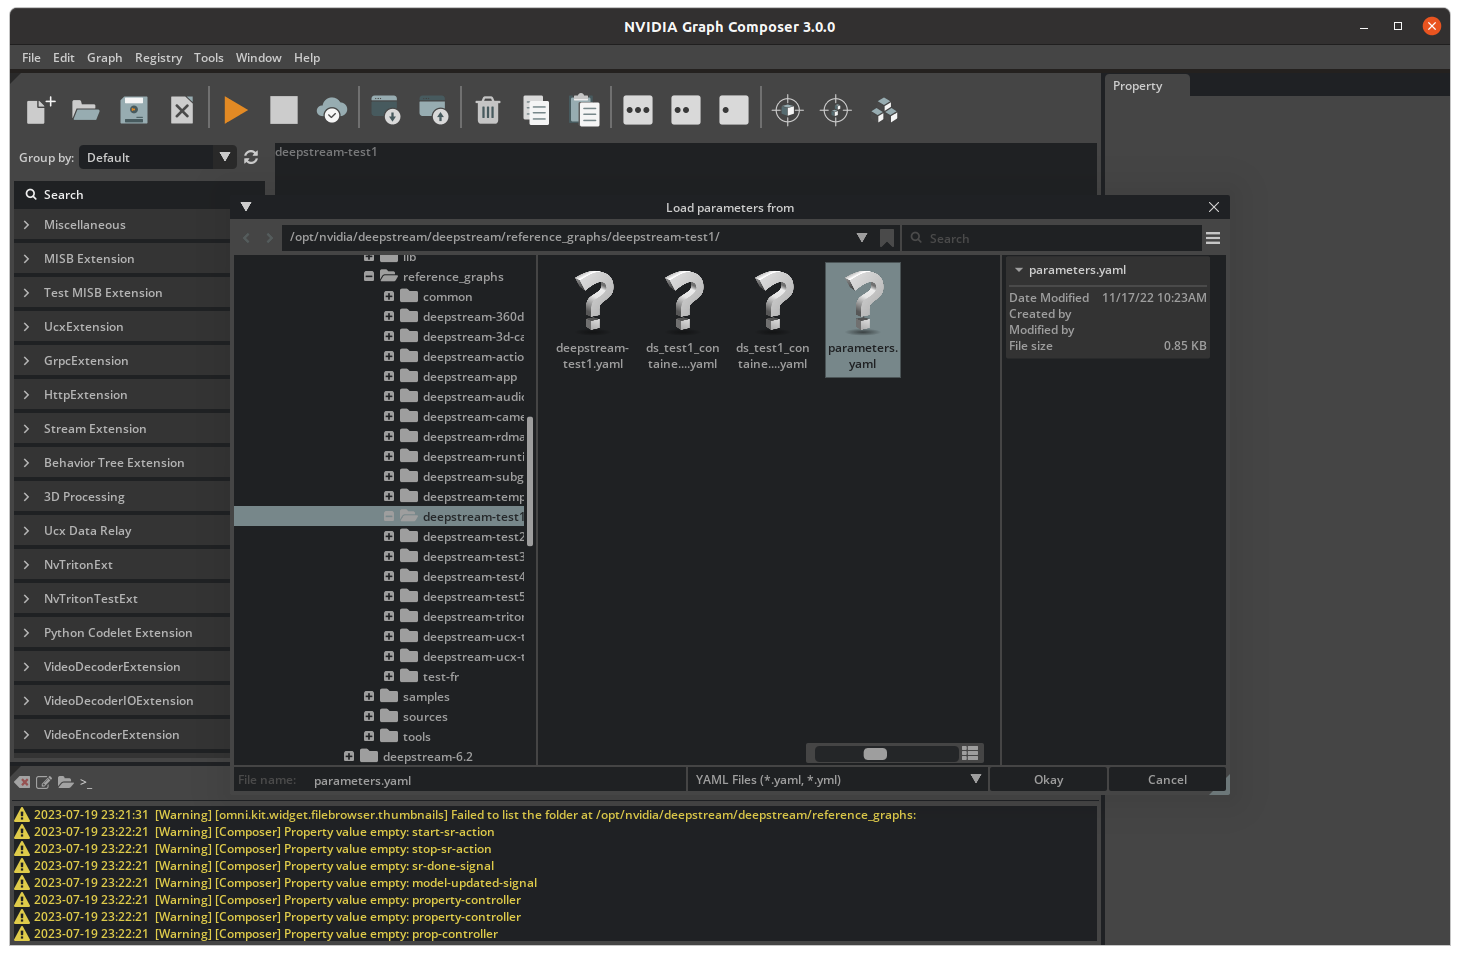
To load component parameters from a separate file, right-click on the graph and select
Load parametersfrom the context menu to launch the file browser.
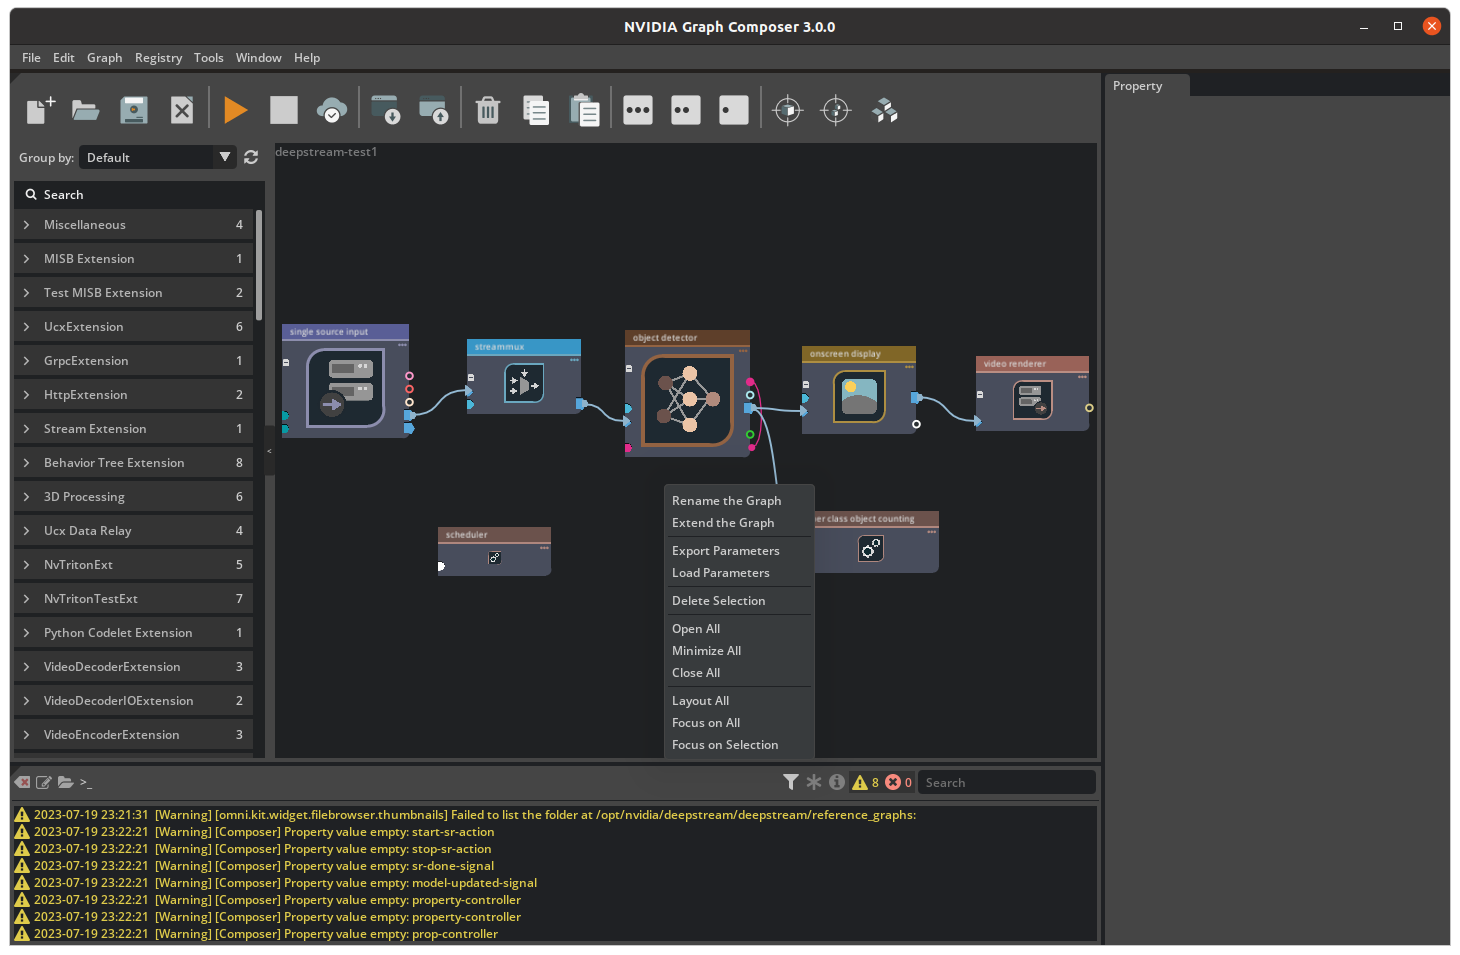
Browse to an appropriate parameters file for the currently open and visible graph, select it and click on
Okayto load parameter values from the file.
Rest of the steps to run the application or build container image are same as demonstrated earlier.