Manage Network Snapshots
Creating and comparing network snapshots can be useful to validate that the network state has not changed. Snapshots are typically created when you upgrade or change the configuration of your switches in some way. This section describes the Snapshot card and content, as well as how to create and compare network snapshots at any time. Snapshots can be automatically created during the upgrade process for Cumulus Linux or SONiC. Refer to Perform a Cumulus Linux Upgrade.
Create a Network Snapshot
It is simple to capture the state of your network currently or for a time in the past using the snapshot feature.
To create a snapshot:
From any workbench in the NetQ UI, click
 in the workbench header.
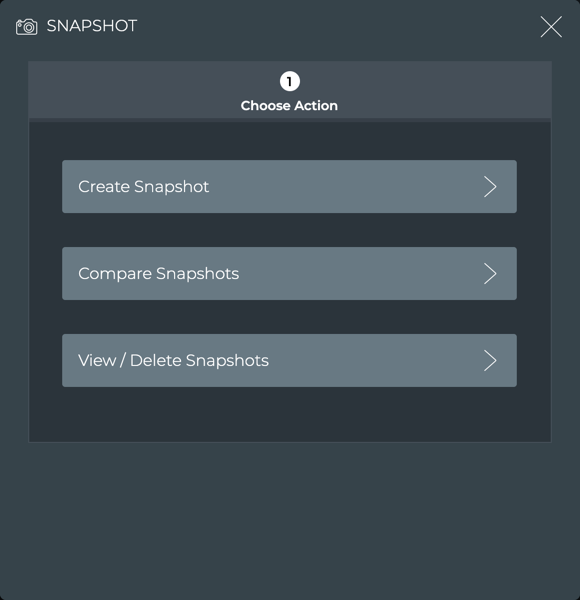
Click Create Snapshot.
Enter a name for the snapshot.
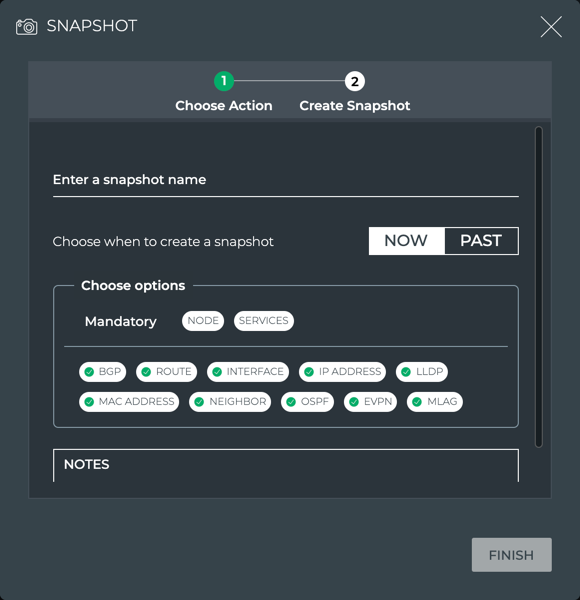
Choose the time for the snapshot:
For the current network state, click Now.

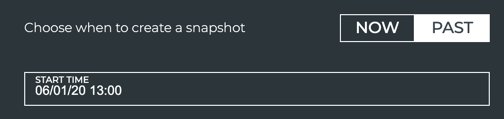
For the network state at a previous date and time, click Past, then click in Start Time field to use the calendar to step through selection of the date and time. You might need to scroll down to see the entire calendar.
Choose the services to include in the snapshot.
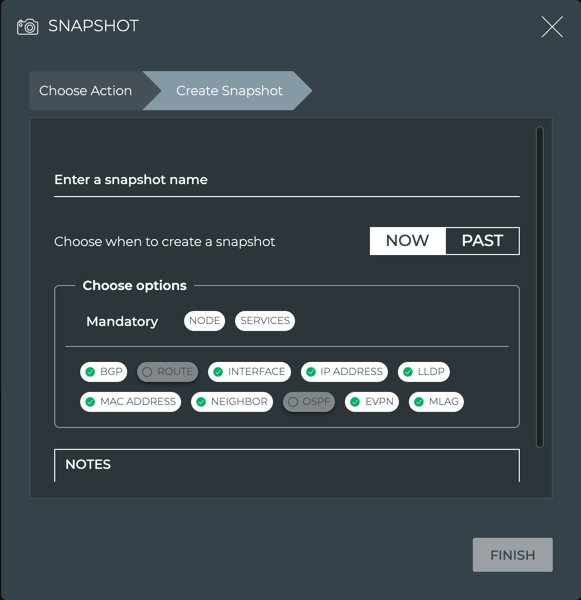
In the Choose options field, click any service name to remove that service from the snapshot. This would be appropriate if you do not support a particular service, or you are concerned that including that service might cause the snapshot to take an excessive amount of time to complete if included. The checkmark next to the service and the service itself is grayed out when the service is removed. Click any service again to re-include the service in the snapshot. The checkmark is highlighted in green next to the service name and is no longer grayed out.
The Node and Services options are mandatory, and cannot be selected or unselected.
If you remove services, be aware that snapshots taken in the past or future might not be equivalent when performing a network state comparison.
This example removes the OSPF and Route services from the snapshot being created.
Optionally, scroll down and click in the Notes field to add descriptive text for the snapshot to remind you of its purpose. For example: “This was taken before adding MLAG pairs,” or “Taken after removing the leaf36 switch.”
Click Finish.
A medium Snapshot card appears on your desktop. Spinning arrows are visible while it works. When it finishes you can see the number of items that have been captured, and if any failed. This example shows a successful result.
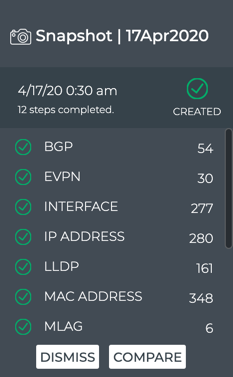
If you have already created other snapshots, Compare is active. Otherwise it is inactive (grayed-out).
When you are finished viewing the snapshot, click Dismiss to close the snapshot. The snapshot is not deleted, merely removed from the workbench.
Compare Network Snapshots
You can compare the state of your network before and after an upgrade or other configuration change to validate that the changes have not created an unwanted change in your network state.
To compare network snapshots:
Create a snapshot (as described in previous section) before you make any changes.
Make your changes.
Create a second snapshot.
Compare the results of the two snapshots.
Depending on what, if any, cards are open on your workbench:
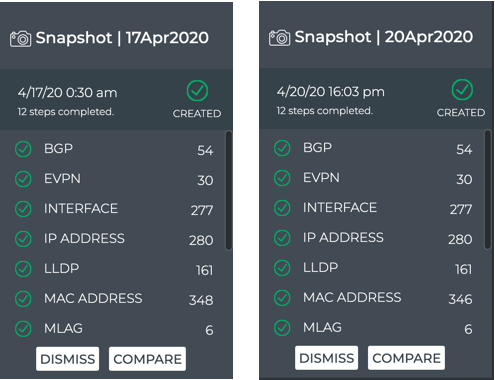
Put the cards next to each other to view a high-level comparison. Scroll down to see all of the items.
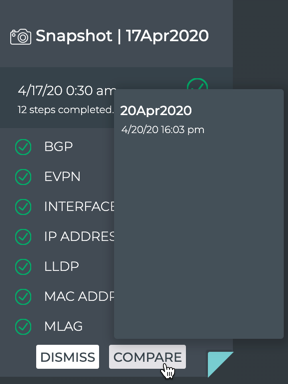
To view a more detailed comparison, click Compare on one of the cards. Select the other snapshot from the list.
Click Compare on the open card.
Select the other snapshot to compare.
Click
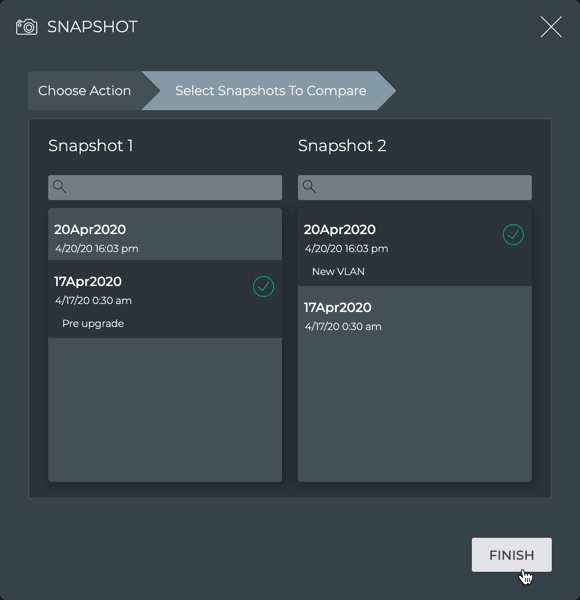
.Click Compare Snapshots.
Click on the two snapshots you want to compare.
Click Finish. Note that two snapshots must be selected before Finish is active.
In the latter two cases, the large Snapshot card opens. The only difference is in the card title. If you opened the comparison card from a snapshot on your workbench, the title includes the name of that card. If you open the comparison card through the Snapshot menu, the title is generic, indicating a comparison only. Functionally, you have reached the same point.
Scroll down to view all element comparisons.
Interpreting the Comparison Data
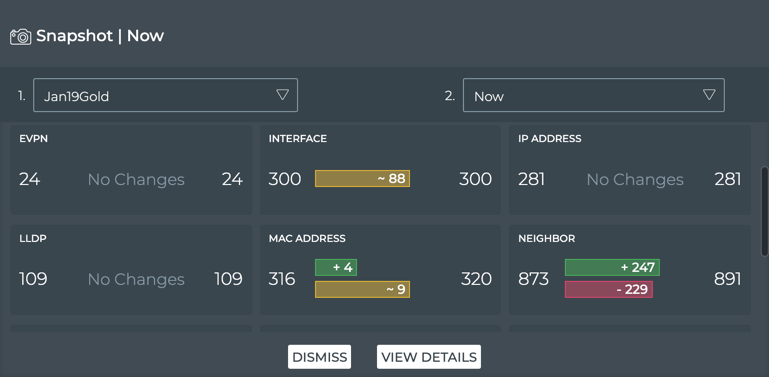
For each network element that is compared, count values and changes are shown:
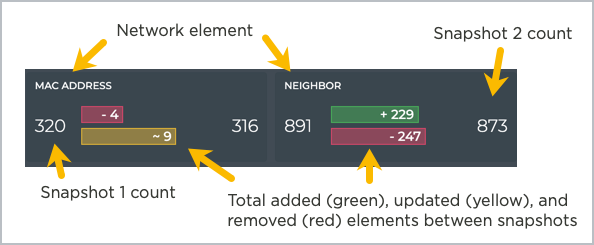
In this example, there are changes to the MAC addresses and neighbors. The snapshot taken before the change (19JanGold) had a total count of 316 MAC addresses and 873 neighbors. The snapshot taken after the changes (Now) has a total count of 320 MAC addresses and 891 neighbors. Between the two totals you can see the number of neighbors added, updated, and removed from one time to the next. This shows four MAC addresses have been added, 9 MAC addresses have been updated, and 18 neighbors have been added.
The coloring does not indicate whether the additional, removal, or update of items is bad or good. It only indicates that a change has occurred.
Be aware that depending on the display order of the snapshots determines what is considered added or removed. Compare these two views of the same data.
More recent snapshot on right
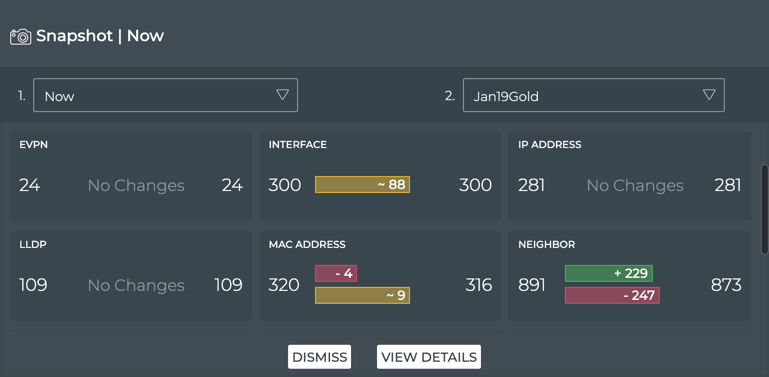
More recent snapshot on left
You can also change which snapshots to compare. Select an alternate snapshot from one or both of the two snapshot dropdowns and then click Compare.
View Change Details
You can view additional details about the changes that have occurred between the two snapshots by clicking View Details. This opens the full screen Detailed Snapshot Comparison card.
From this card you can:
- View changes for each of the elements that had added, updated, and removed items, and various information about each; only elements with changes are presented
- Filter the added and removed items by clicking

- Export all differences in JSON file format by clicking

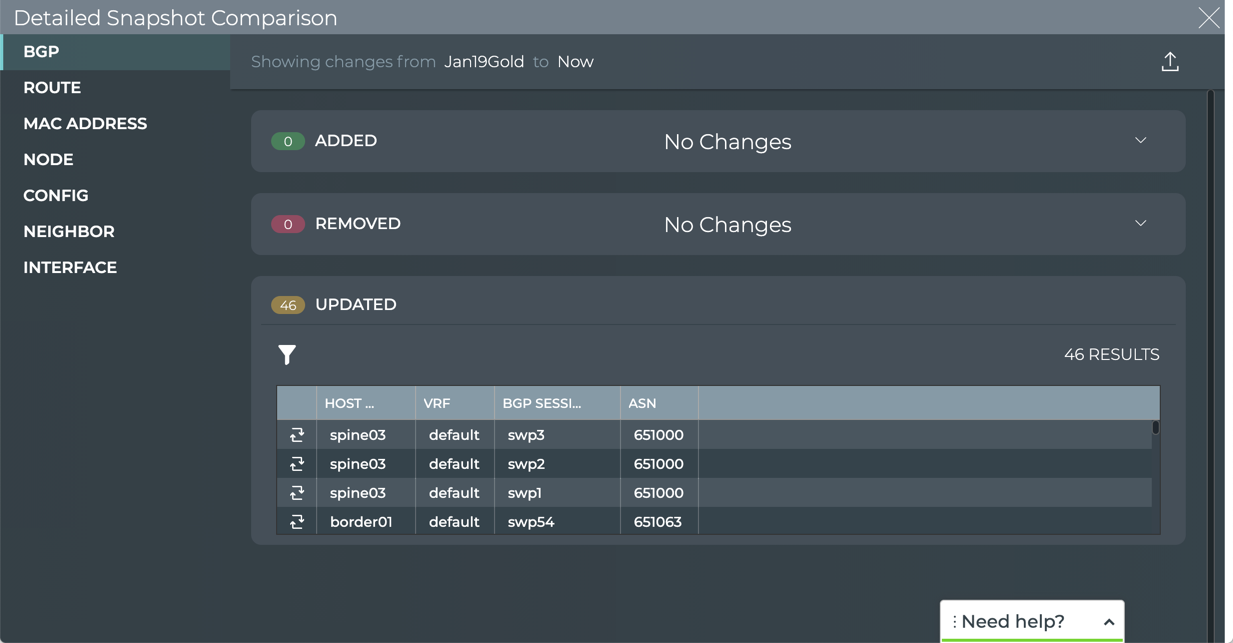
The following table describes the information provided for each element type when changes are present:
| Element | Data Descriptions |
|---|---|
| BGP |
|
| CLAG |
|
| Interface |
|
| IP Address |
|
| Links |
|
| LLDP |
|
| MAC Address |
|
| Neighbor |
|
| Node |
|
| OSPF |
|
| Route |
|
| Sensors |
|
| Services |
|
Manage Network Snapshots
You can create as many snapshots as you like and view them at any time. When a snapshot becomes old and no longer useful, you can remove it.
To view an existing snapshot:
From any workbench, click
in the workbench header.Click View/Delete Snapshots.
Click View.
Click one or more snapshots you want to view, then click Finish.
Click Choose Action to cancel viewing of your selected snapshot(s) and choose another action. Or close the network snapshot dialog by clicking
 .
.
To remove an existing snapshot:
From any workbench, click
in the workbench header.Click View/Delete Snapshots.
Click Delete.
Click one or more snapshots you want to remove, then click Finish.
Click Choose Action to cancel the deletion of your selected snapshot(s) and choose another action. Or close the network snapshot dialog by clicking
.