Focus Your Monitoring Using Workbenches
Workbenches are dashboards where you can visualize and curate data representing different aspects of your network. For example, you might create a workbench that:
- Shows network statistics for the past week alongside network statistics for the past 24 hours.
- Only displays data about virtual overlays.
- Displays switches that you are troubleshooting.
- Is focused on application or account management.
Get Started with Workbenches
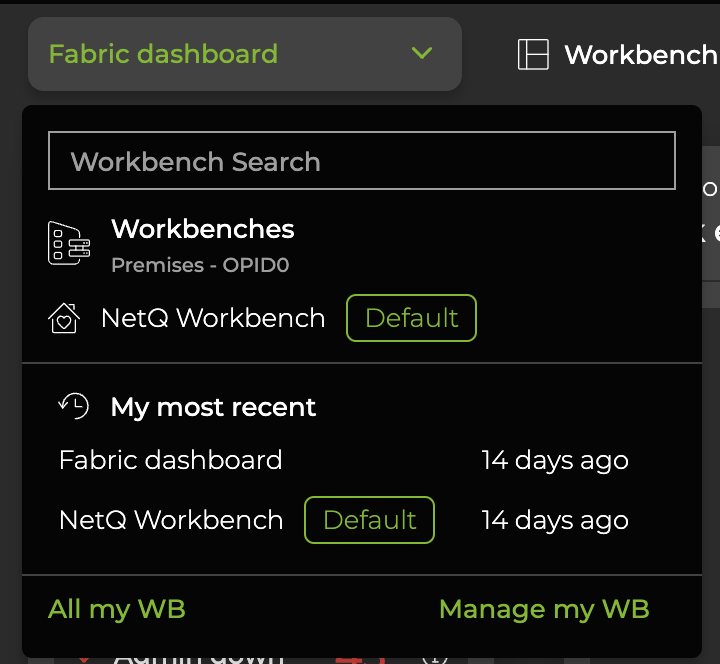
NVIDIA includes two example workbenches—NetQ Workbench and Fabric Dashboard—to help get you started with NetQ. To access these workbenches or switch between them, select the workbench’s name in the header. The menu displays recently accessed workbenches and the date at which they were created.

NetQ Workbench includes cards displaying your network’s device inventory, switch inventory, validation summary, What Just Happened events, host inventory, DPU inventory, and system events. This workbench is visible to all users within an organization and any changes to it will not be saved.
Fabric Dashboard includes cards displaying link status and events, sensor health, queue lengths, What Just Happened and system events, BGP and EVPN sessions, and device inventory. You can modify this workbench by adding or deleting cards and NetQ saves the changes automatically. This workbench is local to each premises, meaning that changes made to the workbench on one premises will not be reflected when you switch to a different premises.
Create a Custom Workbench
You can create an unlimited number of custom workbenches. These workbenches are only visible to the user who created them and changes are saved automatically.
To create a new workbench:
Select Workbench in the header, then select New.
Enter a name for the workbench and choose whether to restrict access to this workbench to a single premises (local) or make it available across all premises (global). You can modify this setting later if you change your mind.
(Optional) Set the workbench as your home workbench, which opens when you log in to NetQ from the premises where the workbench was created.
Select the cards you want to display on your new workbench, then click Create.
(Optional) To add cards that display data for individual switches, select Add card in the header, then Device card. Select a device and card size. Repeat these steps for each device you’d like to add to the workbench.
You can clone a workbench to quickly create a new workbench with the same cards as the one you're viewing. In the header, select Clone, modify the workbench settings, then click Clone.
Manage Workbenches
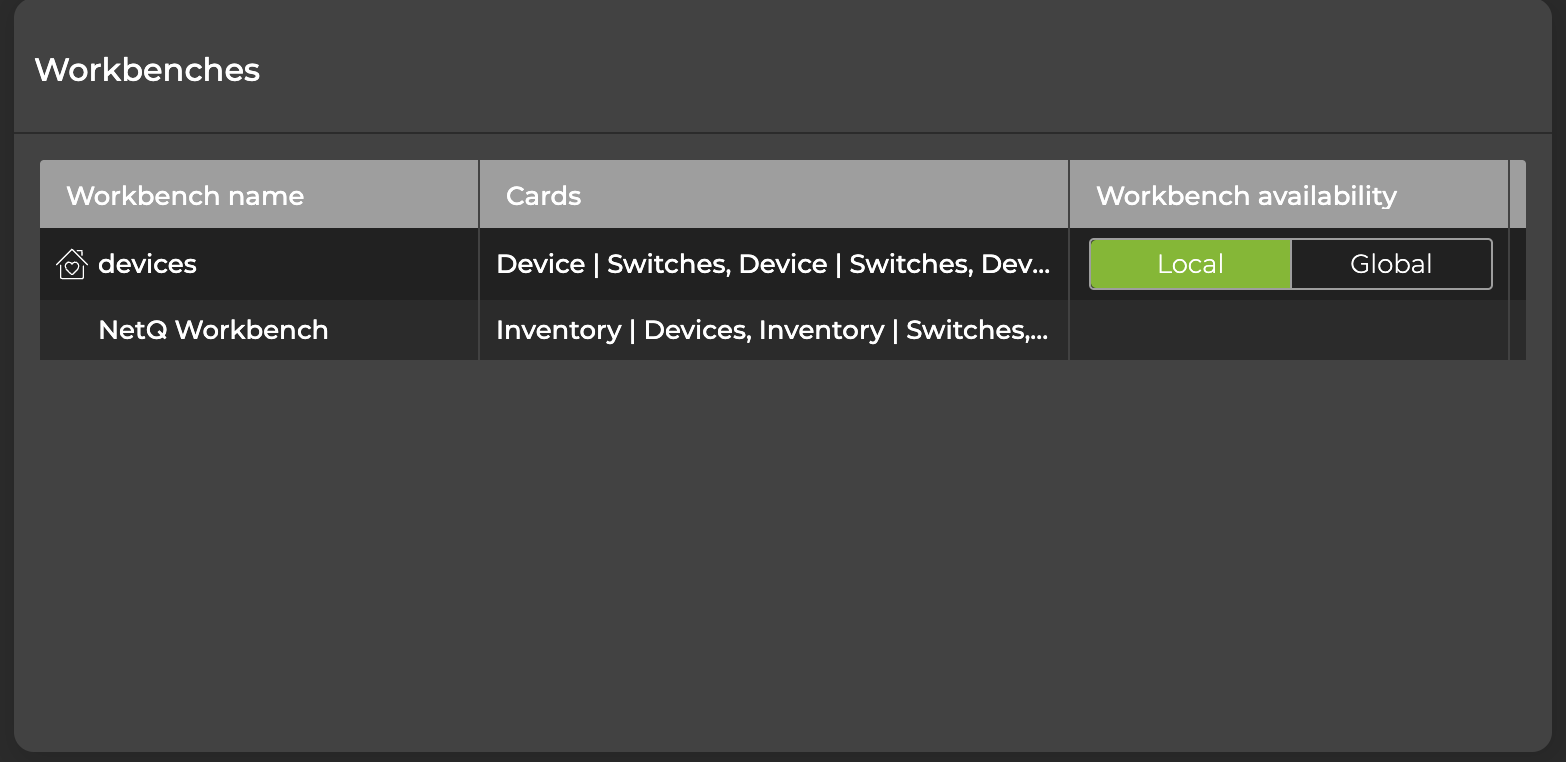
The changes you make to a custom workbench are saved automatically. To change a workbench from local to global (or global to local) availability, select the workbench’s name in the header and select Manage my WB. From the Workbenches card, locate the workbench whose availability you’d like to change and select Local or Global.
You can also change your home workbench (the workbench that loads when you log in to NetQ) from this view. Select the  house to the left of the workbench that you want to set as your home workbench. The next time you log in from this premises, the workbench you selected will be displayed.
Delete a Workbench
You can only delete workbenches that you created. The NVIDIA-supplied NetQ Workbench and Fabric Dashboard workbenches cannot be deleted. When you delete a workbench that you have designated as your home workbench, NetQ Workbench will replace it as the home workbench. To delete a workbench:
Select
User Settings > Profile & Preferences.
Locate the Workbenches card.
Hover over the name of the workbench you want to remove, and click Delete.
Manage Auto-refresh
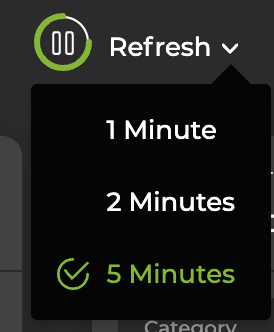
You can specify how often to update the data displayed on a workbench. By default, NetQ updates the data every five minutes. To alternately disable or re-enable auto-refresh, select Pause or
Play. Each workbench refreshes according to its respective refresh interval.
To modify the refresh rate:
In the header, select the dropdown next to Refresh.
Select the refresh rate. A check mark indicates the current selection. The new refresh rate is applied immediately.

To disable auto-refresh on individual cards, select the card’s three-dot menu and click Manual refresh.