User Accounts and Permissions
Sign in to NetQ as an admin to view and manage users' accounts. If you are a user and would like to set individual preferences, visit Set User Preferences.
NetQ Management Workbench
Navigate to the NetQ Management dashboard to complete the tasks outlined in this section. To get there, expand the menu ![]() on the NetQ dashboard and select Management.
on the NetQ dashboard and select Management.
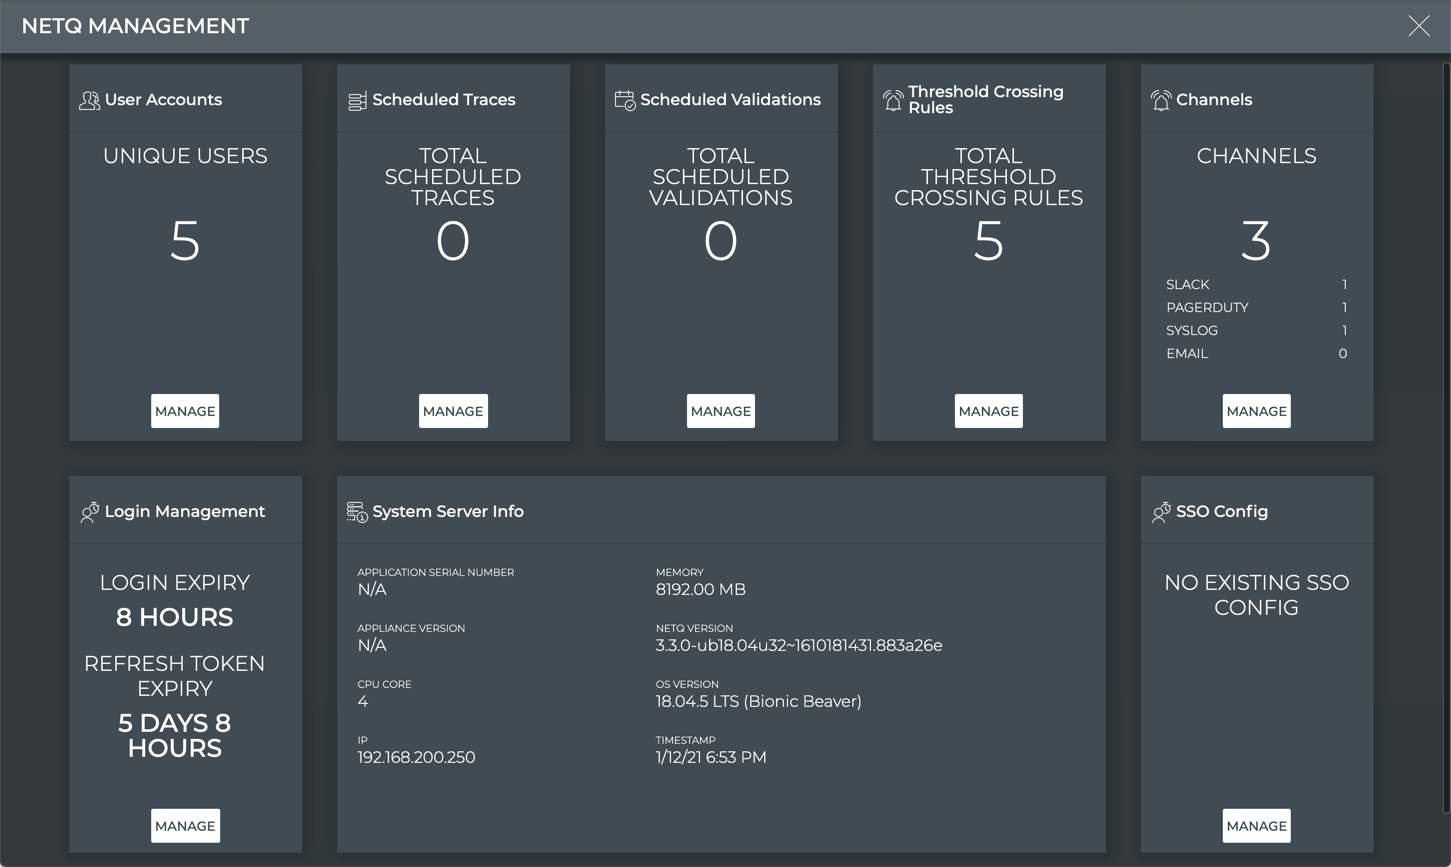
Cloud NetQ Management Dashboard
Add a User Account
This section outlines the steps to add a local user. To add an LDAP user, refer to LDAP Authentication.
To add a new account:
On the User Accounts card, select Manage to open a table listing all user accounts.
Above the table, select
 to add a user.
Enter the fields and select Save.
Be especially careful entering the email address as you cannot change it once you save the account. If you save a mistyped email address, you must delete the account and create a new one.
Edit a User Account
As an admin, you can:
- edit a user’s first or last name
- reset a user’s password
- change a user’s access type (user or admin)
You cannot edit a user’s email address, because this is the identifier the system uses for authentication. If you need to change an email address, delete the user and create a new one.
To edit an account:
On the User Accounts card, select Manage to open a table listing all user accounts.
Select the user whose account you’d like to edit. Above the table, click
 to edit the user’s account information.
Delete a User Account
To delete one or more user accounts:
On the User Accounts card, select Manage to open a table listing all user accounts.
Select one or more accounts. Above the table, click
 to delete the selected account(s).
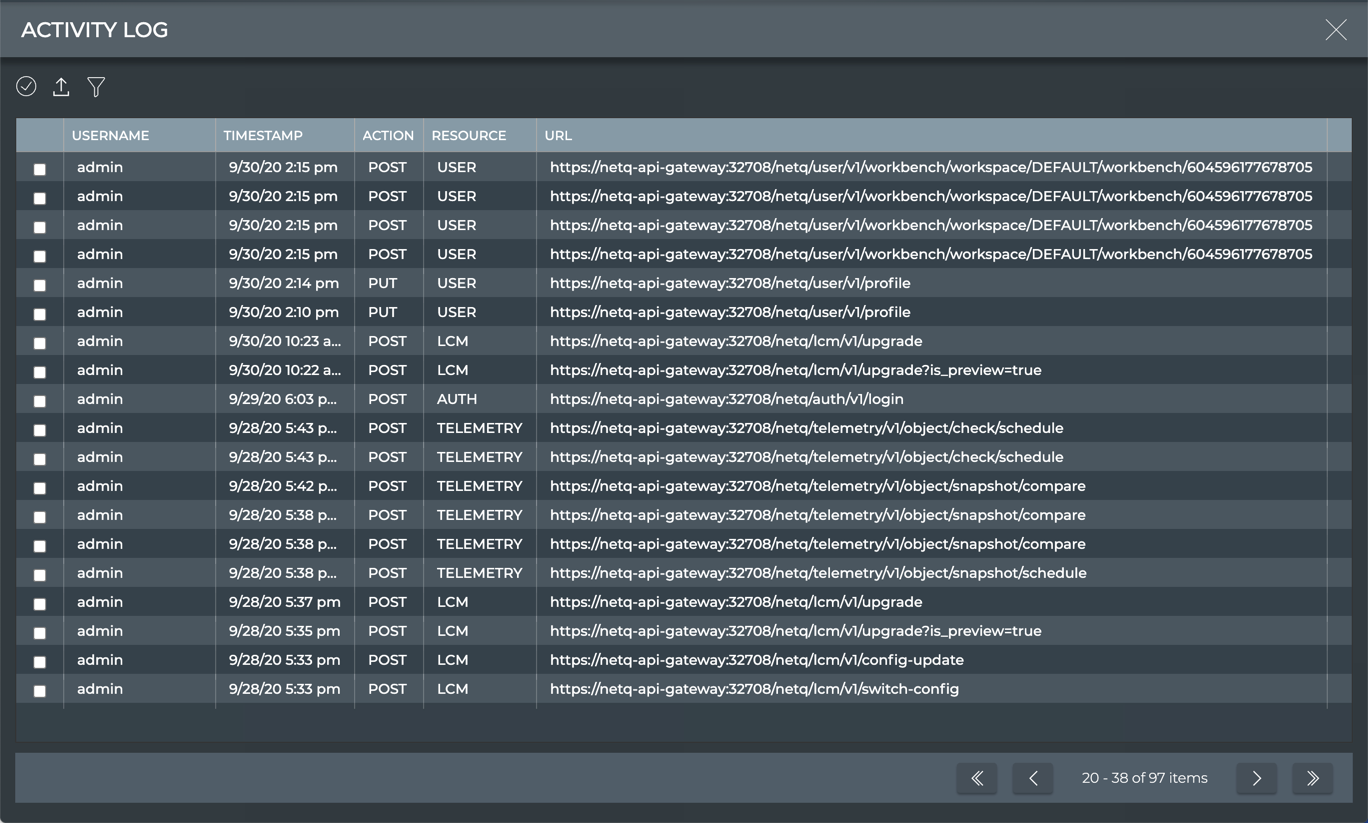
View User Activity
Administrators can view user activity in the activity log.
To view the log, expand the ![]() menu on the NetQ dashboard and select Management. Under Admin select Activity Log to open a table listing user activity. Use the controls above the table to filter or export the data.
menu on the NetQ dashboard and select Management. Under Admin select Activity Log to open a table listing user activity. Use the controls above the table to filter or export the data.
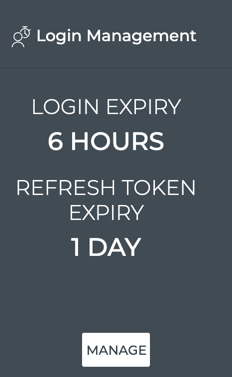
Manage Login Policies
Administrators can configure a session expiration time and the number of times users can refresh before requiring users to log in again to NetQ.
To configure these login policies:
On the Login Management card, select Manage.
Select how long a user can be logged in before logging in again.
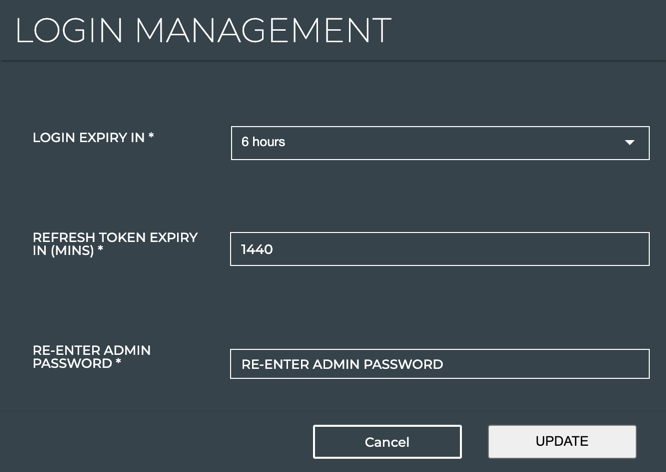
Click Update to save the changes.
The Login Management card shows the configuration.