Validate Network Protocol and Service Operations
NetQ lets you validate the operation of the protocols and services running in your network either on demand or according to a schedule. For a general understanding of how well your network is operating, refer to the Validate Overall Network Health.
On-demand Validations
When you want to validate the operation of one or more network protocols and services right now, you can create and run on-demand validations using the NetQ UI or the NetQ CLI.
Create an On-demand Validation
Using the NetQ UI, you can create an on-demand validation for multiple protocols or services at the same time. This is handy when the protocols are strongly related regarding a possible issue or if you only want to create one validation request.
To run on-demand validations with the CLI, use the netq check commands.
To create and run a request containing checks on one or more protocols or services within the NetQ UI:
In the workbench header, select
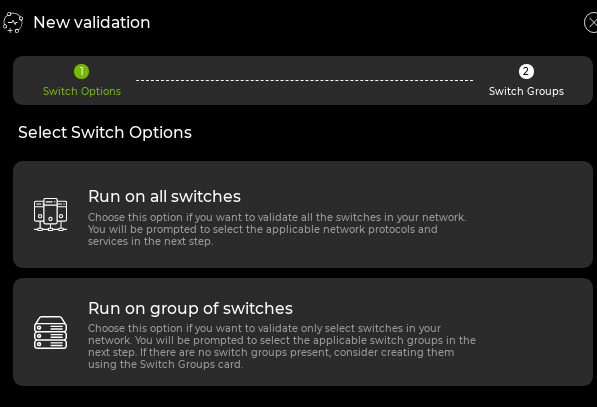
 Validation, then Create a validation. Choose whether the on-demand validation should run on all devices or on specific device groups.
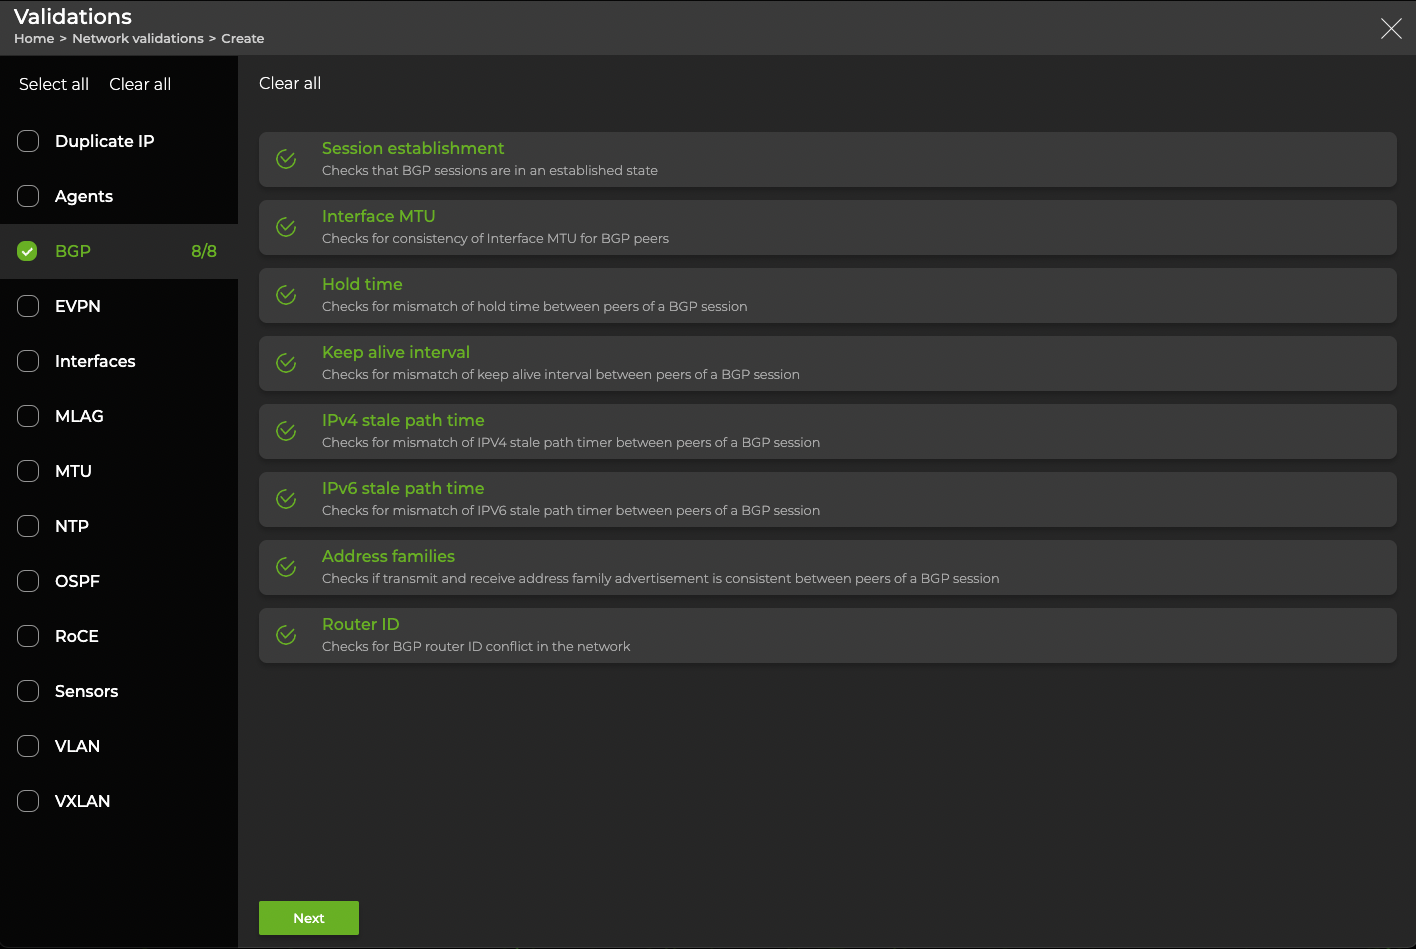
Select the protocols or services you want to validate, then click Next.
This example has BGP selected and displays the 8 checks that NetQ runs during a BGP validation:
- Select Now and specify a workbench:
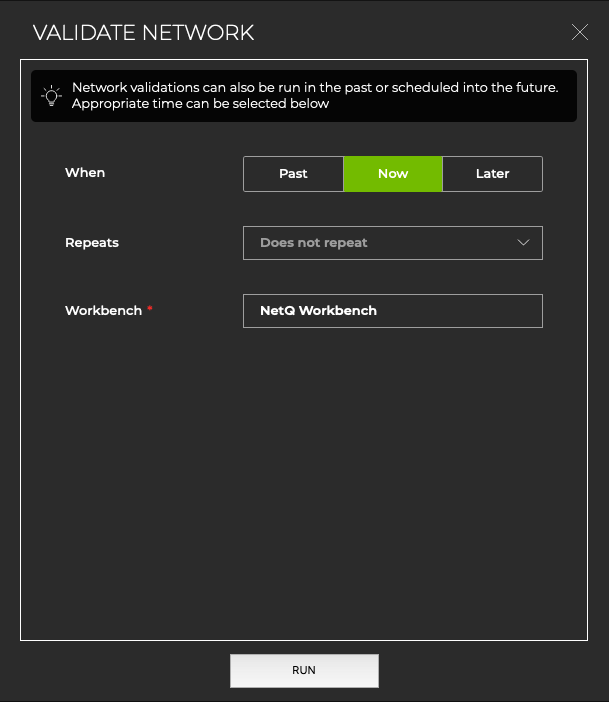
Click Run to start the validation. It might take a few minutes for results to appear.
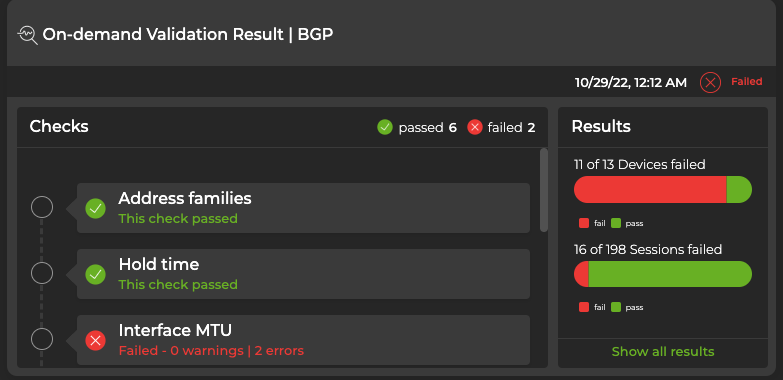
The respective On-demand Validation Result card opens on your workbench. If you selected more than one protocol or service, a card opens for each selection. To view additional information about the errors reported, hover over a check and click View details. To view all data for all on-demand validation results for a given protocol, click Show all results.
To create a request containing checks on a single protocol or service in the NetQ CLI, run:
netq add validation type (ntp | interfaces | license | sensors | evpn | vxlan | agents | mlag | vlan | bgp | mtu | ospf | roce | addr) [alert-on-failure]
The associated Validation Result card is accessible from the full-screen Validate Network card.
Run an Existing Scheduled Validation On Demand
To run a scheduled validation now:
Click
Validation, then click Existing validations.Select one or more validations, then click View results.
The associated Validation Result cards open on your workbench.
Scheduled Validations
By default, a scheduled validation for each protocol and service runs every hour. You can disable these validation checks in the UI, but you cannot edit them.
You can create and schedule up to 15 custom validation checks. The hourly, default validation checks do not count towards this limit.
Schedule a Validation
Click
Validation, then click Create a validation. Choose whether the scheduled validation should run on all devices or on specific device groups.Select the protocols or services you want to validate, then click Next.
Click Later then choose when to start the check and how frequently to repeat the check (every 30 minutes, 1 hour, 3 hours, 6 hours, 12 hours, or 1 day).
Click Schedule.
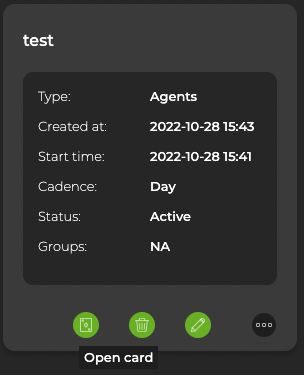
To see the card with the other network validations, click View. If you selected more than one protocol or service, a card opens for each selection. To view the card on your workbench, click Open card.
To create a scheduled request containing checks on a single protocol or service in the NetQ CLI, run:
netq add validation name <text-new-validation-name> type (addr | agents | bgp | evpn | interfaces | license | mlag | mtu | ntp | ospf | roce | sensors | vlan | vxlan) interval <text-time-min> [alert-on-failure]
The following example creates a BGP validation that runs every 15 minutes:
cumulus@switch:~$ netq add validation name Bgp15m type bgp interval 15m
Successfully added Bgp15m running every 15m
The associated Validation Result card is accessible from the full-screen Scheduled Validation Result card.
View Scheduled Validation Results
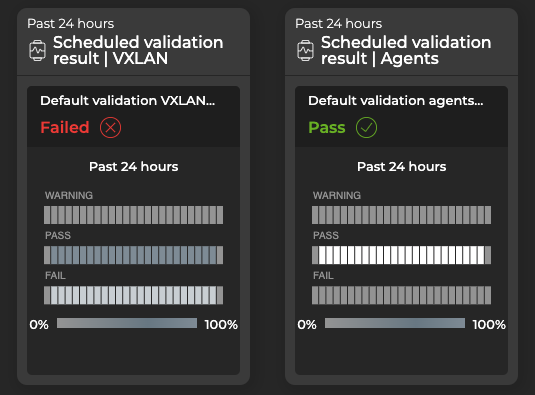
After creating scheduled validations with either the NetQ UI or the NetQ CLI, the results appear in the Scheduled Validation Result card. When a request has completed processing, you can access the Validation Result card from the full-screen Validations card. Each protocol and service has its own validation result card, but the content is similar on each.
Granularity of Data Shown Based on Time Period
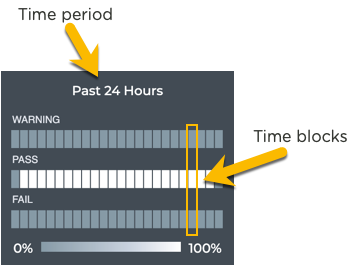
On the medium and large Validation Result cards, vertically stacked heat maps represent the status of the runs; one for passing runs, one for runs with warnings, and one for runs with failures. Depending on the time period of data on the card, the number of smaller time blocks indicate that the status varies. A vertical stack of time blocks, one from each map, includes the results from all checks during that time. The results appear by how saturated the color is for each block. If all validations during that time period pass, then the middle block is 100% saturated (white) and the warning and failure blocks are zero % saturated (gray). As warnings and errors increase in saturation, the passing block is proportionally reduced in saturation. The example heat map for a time period of 24 hours shown here uses the most common time periods from the table showing the resulting time blocks and regions.
| Time Period | Number of Runs | Number Time Blocks | Amount of Time in Each Block |
|---|---|---|---|
| 6 hours | 18 | 6 | 1 hour |
| 12 hours | 36 | 12 | 1 hour |
| 24 hours | 72 | 24 | 1 hour |
| 1 week | 504 | 7 | 1 day |
| 1 month | 2,086 | 30 | 1 day |
| 1 quarter | 7,000 | 13 | 1 week |
Access and Analyze the Scheduled Validation Results
After a scheduled validation request has completed, the results are available in the corresponding Validation Result card.
To access the results:
In the workbench header, select
Validation, then click Existing validations.Select the validation results you want to view, then click View results.
The medium Scheduled Validation Result card(s) for the selected items appear on your workbench.
To analyze the results:
Note the distribution of results. Are there many failures? Are they concentrated together in time? Has the protocol or service recovered after the failures?
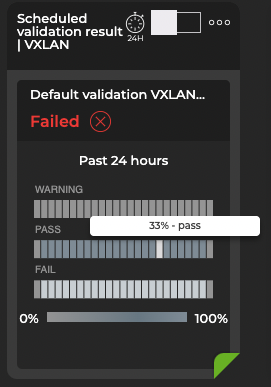
Hover over the heat maps to view the status numbers and what percentage of the total results that represents for a given region. The tooltip also shows the number of devices included in the validation and the number with warnings and/or failures. This is useful when you see the failures occurring on a small set of devices, as it might point to an issue with the devices rather than the network service.
Expand the card to display a chart alongside events metrics. Click
 to expand or collapse the chart.
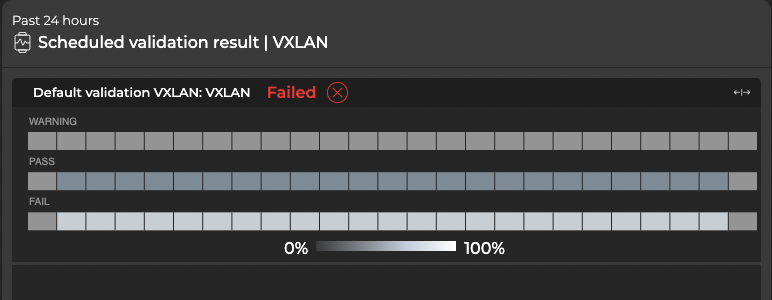
You can view the configuration of the request that produced the results shown on this card, by hovering over the card and selecting the
 Configuration tab.
To view all data available for all scheduled validation results for the given protocol or service, expand the card to full-screen.
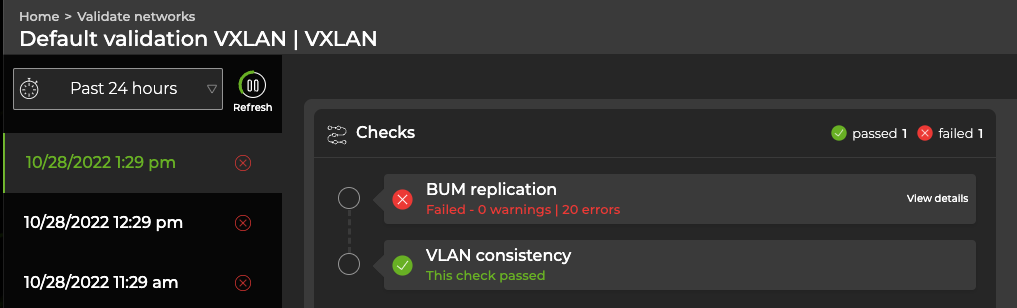
In the Checks box, hover over an individual check and select View details for additional information:
Manage Scheduled Validations
You can edit or delete any scheduled validation that you created. Default validations cannot be edited or deleted, but can be disabled.
Edit a Scheduled Validation
At some point you might want to change the schedule or validation types that are specified in a scheduled validation request. This creates a new validation request and the original validation has the (old) label applied to the name. The old validation can no longer be edited.
When you update a scheduled request, the results for all future runs of the validation will be different from the results of previous runs of the validation.
To edit a scheduled validation:
Click
Validation, then click Scheduled validations.Hover over the validation then click
 Edit.
Edit.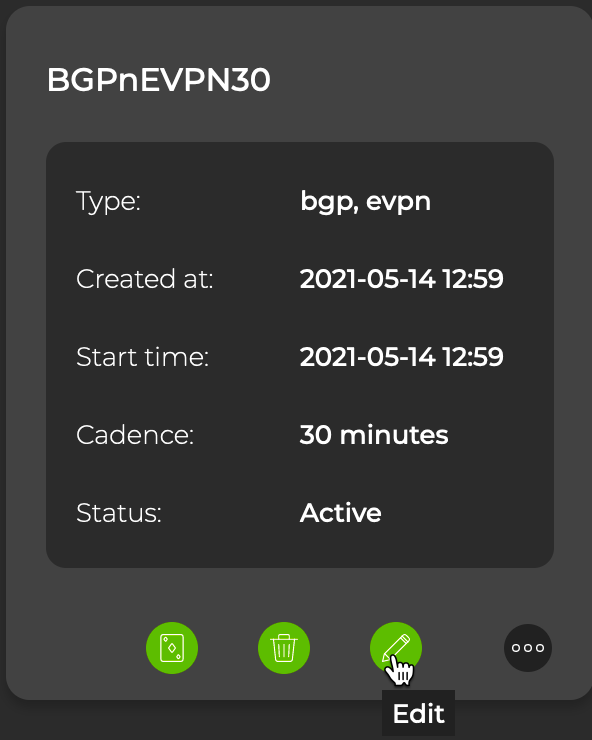
Select which checks to add or remove from the validation request, then click Update.
Change the schedule for the validation, then click Update.
You can run the modified validation immediately or wait for it to run according to the schedule you specified.
Delete a Scheduled Validation
You can remove a user-defined scheduled validation using the NetQ UI or the NetQ CLI. Default validations cannot be deleted, but they can be disabled.
Click
Validation, then click Scheduled validations.Hover over the validation you want to remove.
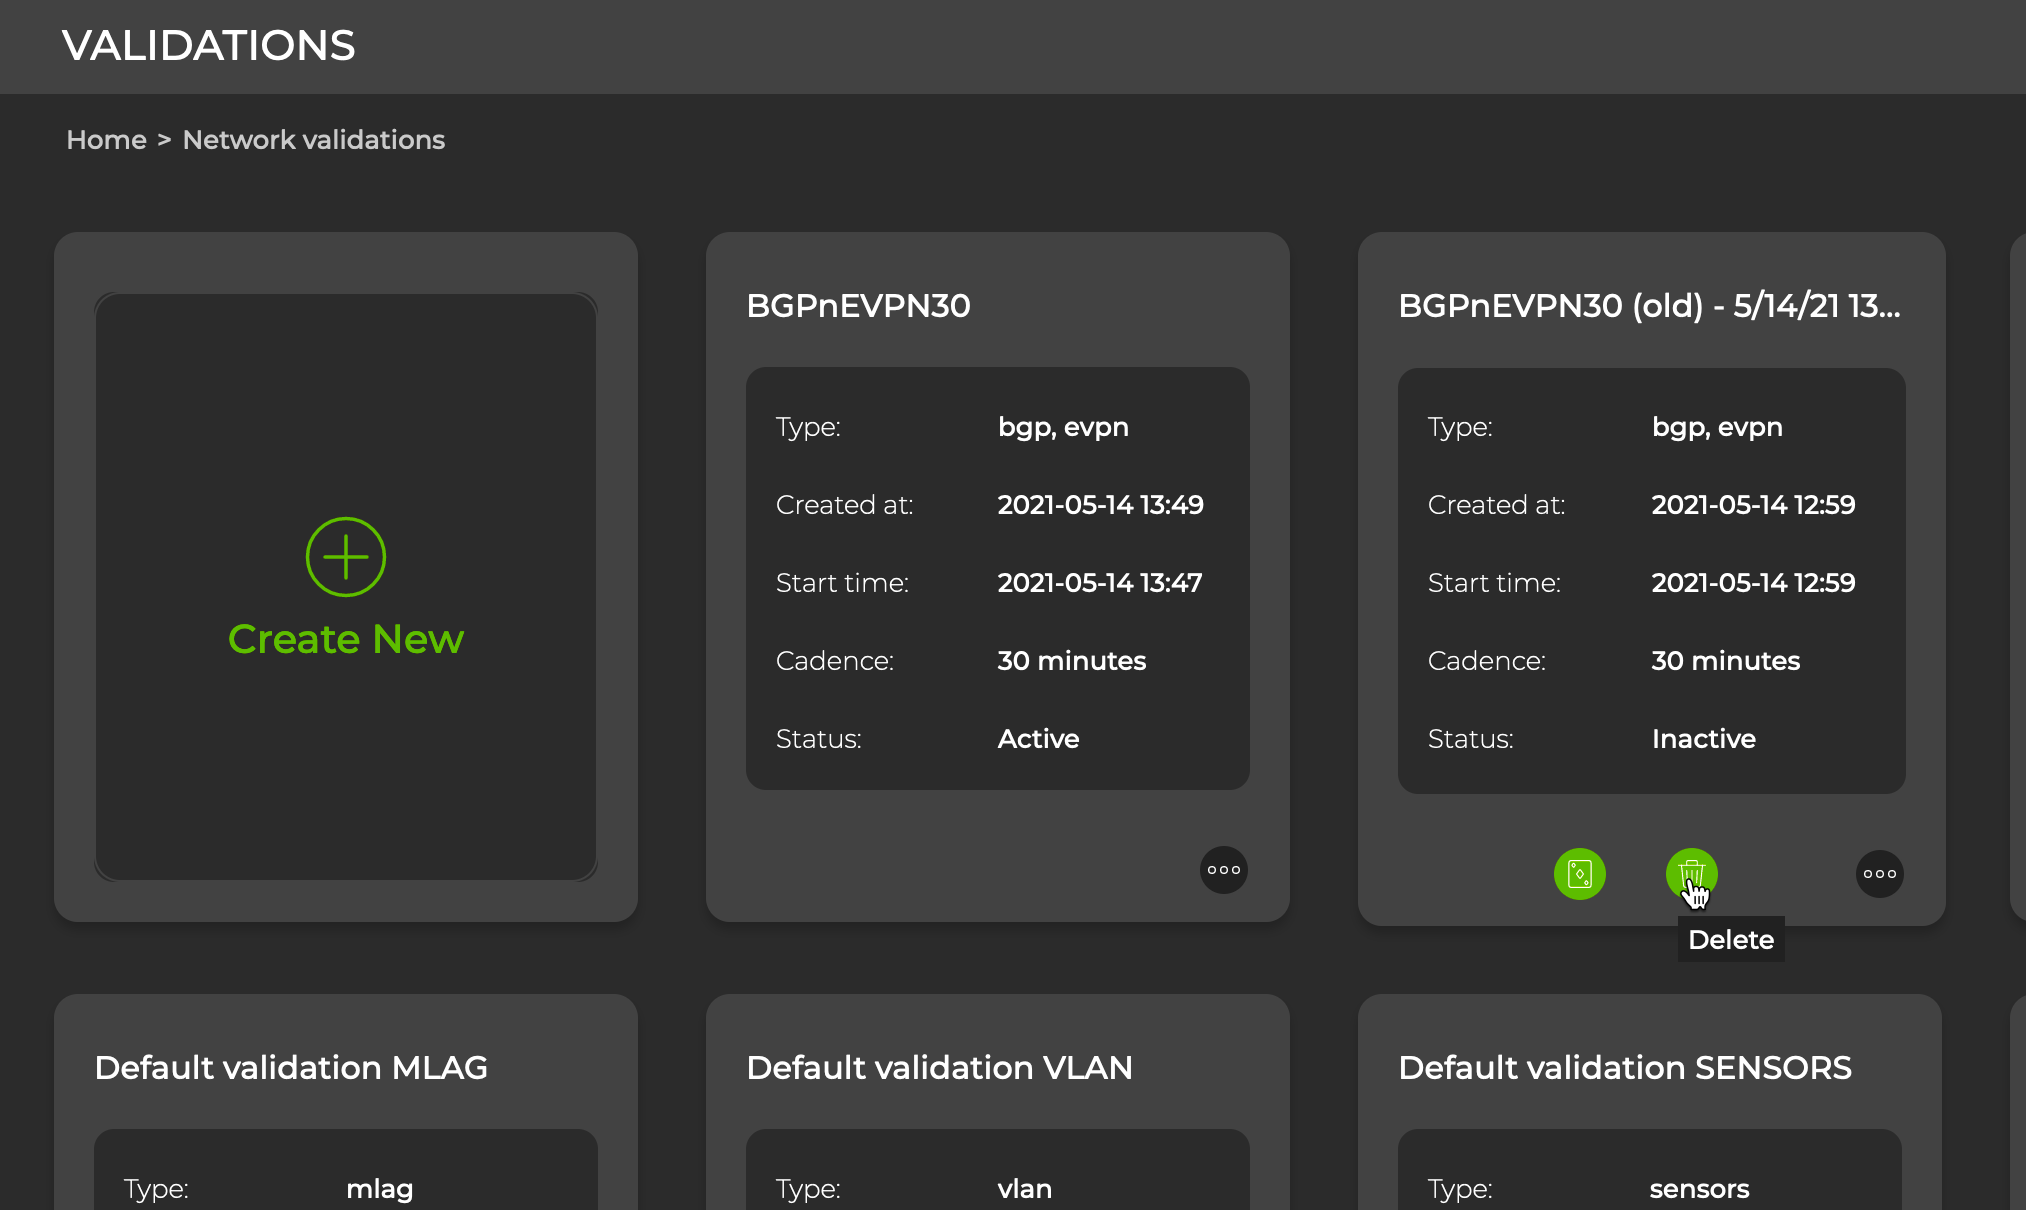
Click
 , then click Yes to confirm.
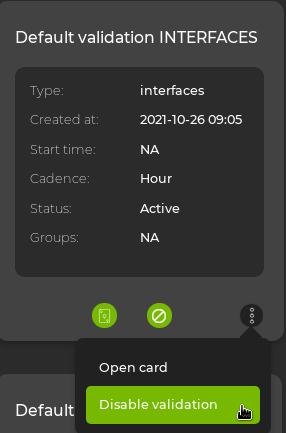
To disable a default validation, select the
 icon on the card for the desired validation and select Disable validation. Validation checks can be enabled from the same menu.
Determine the name of the scheduled validation you want to remove:
netq show validation summary [name <text-validation-name>] type (ntp | interfaces | license | sensors | evpn | vxlan | agents | mlag | vlan | bgp | mtu | ospf | roce | addr) [around <text-time-hr>] [json]This example shows all scheduled validations for BGP.
cumulus@switch:~$ netq show validation summary type bgp
Name            Type             Job ID       Checked Nodes              Failed Nodes             Total Nodes            Timestamp
--------------- ---------------- ------------ -------------------------- ------------------------ ---------------------- -------------------------
Bgp30m          scheduled        4c78cdf3-24a 0                          0                        0                      Thu Nov 12 20:38:20 2020
                                6-4ecb-a39d-
                                0c2ec265505f
Bgp15m          scheduled        2e891464-637 10                         0                        10                     Thu Nov 12 20:28:58 2020
                                a-4e89-a692-
                                3bf5f7c8fd2a
Bgp30m          scheduled        4c78cdf3-24a 0                          0                        0                      Thu Nov 12 20:24:14 2020
                                6-4ecb-a39d-
                                0c2ec265505f
Bgp30m          scheduled        4c78cdf3-24a 0                          0                        0                      Thu Nov 12 20:15:20 2020
                                6-4ecb-a39d-
                                0c2ec265505f
Bgp15m          scheduled        2e891464-637 10                         0                        10                     Thu Nov 12 20:13:57 2020
                                a-4e89-a692-
                                3bf5f7c8fd2a
...
To remove the validation, run:
netq del validation <text-validation-name>This example removes the scheduled validation named Bgp15m.
cumulus@switch:~$ netq del validation Bgp15m
Successfully deleted validation Bgp15m
Repeat these steps to remove additional scheduled validations.
Validate Device Groups
Both on-demand and scheduled validations can run on specific device groups. To create a validation for a device group rather than all devices:
- Click Validation, then click Create a validation. Choose Run on group of switches:
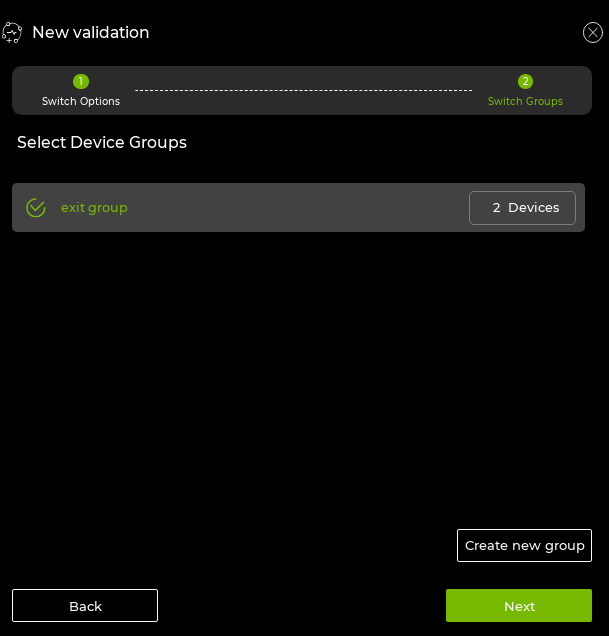
- Select which group to run the validation on:
Select the protocols or services you want to validate, then click Next.
Select which individual validations to run for each service. Individual checks can be disabled by clicking
 .
.Choose whether to run the validation now or schedule it for another time, then click Run.