Switch Inventory
With the NetQ UI and NetQ CLI, you can monitor your inventory of switches across the network or individually. NetQ displays operating system, motherboard, ASIC, microprocessor, disk, memory, fan, and power supply information.
You can access switch performance data for a given switch in the UI by right-clicking a switch and opening the dashboard in a new tab.
Switch Inventory Commands
- netq show inventory: view a comprehensive list of inventory components
- netq show cl-manifest: view Cumulus Linux OS versions supported on your switches
- netq show recommended-pkg-version: view recommended software package information for a switch
- netq show services: view a list of services
View Switch Inventory in the UI
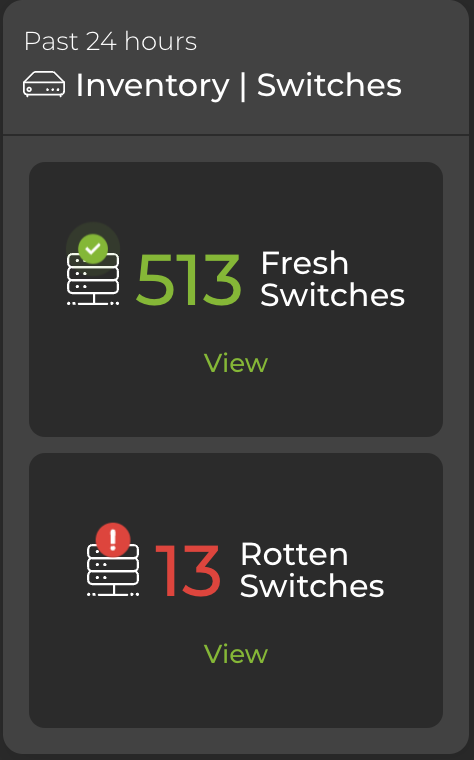
The NetQ header displays the number of switches in your network that are 'fresh' or reachable.
To view the hardware and software component inventory for switches running NetQ in your network, enter Inventory/Switches in the global search field. The card displays the total number of switches in your network, divided into the number of fresh and rotten switches.
View Distribution and Component Counts
Open the large Inventory/Switches card to display more granular information about software and hardware distribution. By default, the card displays data for fresh switches. Select Rotten switches from the dropdown to display information for switches that are in a down state. Hover over the top of the card and select a category to restrict the view to ASICs, platform, or software.
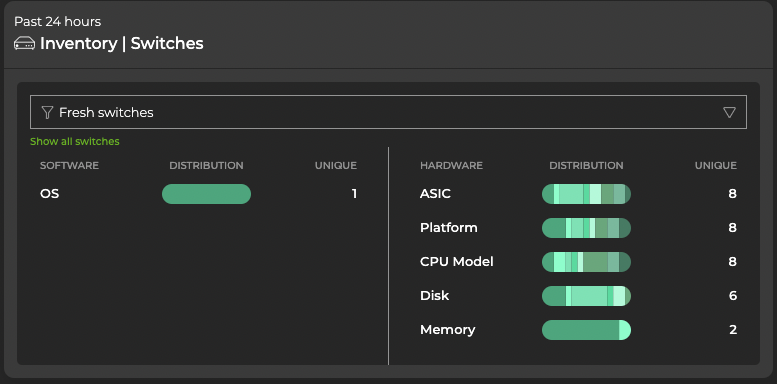
Expand the Inventory/Switches card to full-screen to view, filter or export information about ASICs, motherboards, CPUs, memory, disks, and operating system. You can right-click the hostname of a given switch to open a monitoring dashboard for that switch in a new tab.
Create and Assign Switch Labels
Labels are key-value pairs that you can assign to switches. You can use labels to group, filter, and organize switches. You can also run validations against a set of switches that share a common label. There are two types of labels: system-generated labels and user-generated, or custom, labels.
- System-generated labels reflect the static labels applied to switches using NVUE commands. System-generated labels include an icon in the NetQ UI. These labels can only be deleted using NVUE commands. These switches must be running the NetQ Agent for labels to appear in NetQ.
- User-generated labels can be created and deleted using the NetQ UI.
You can apply a maximum of 24 labels per hostname. From the menu, select Manage labels to view the label management dashboard.
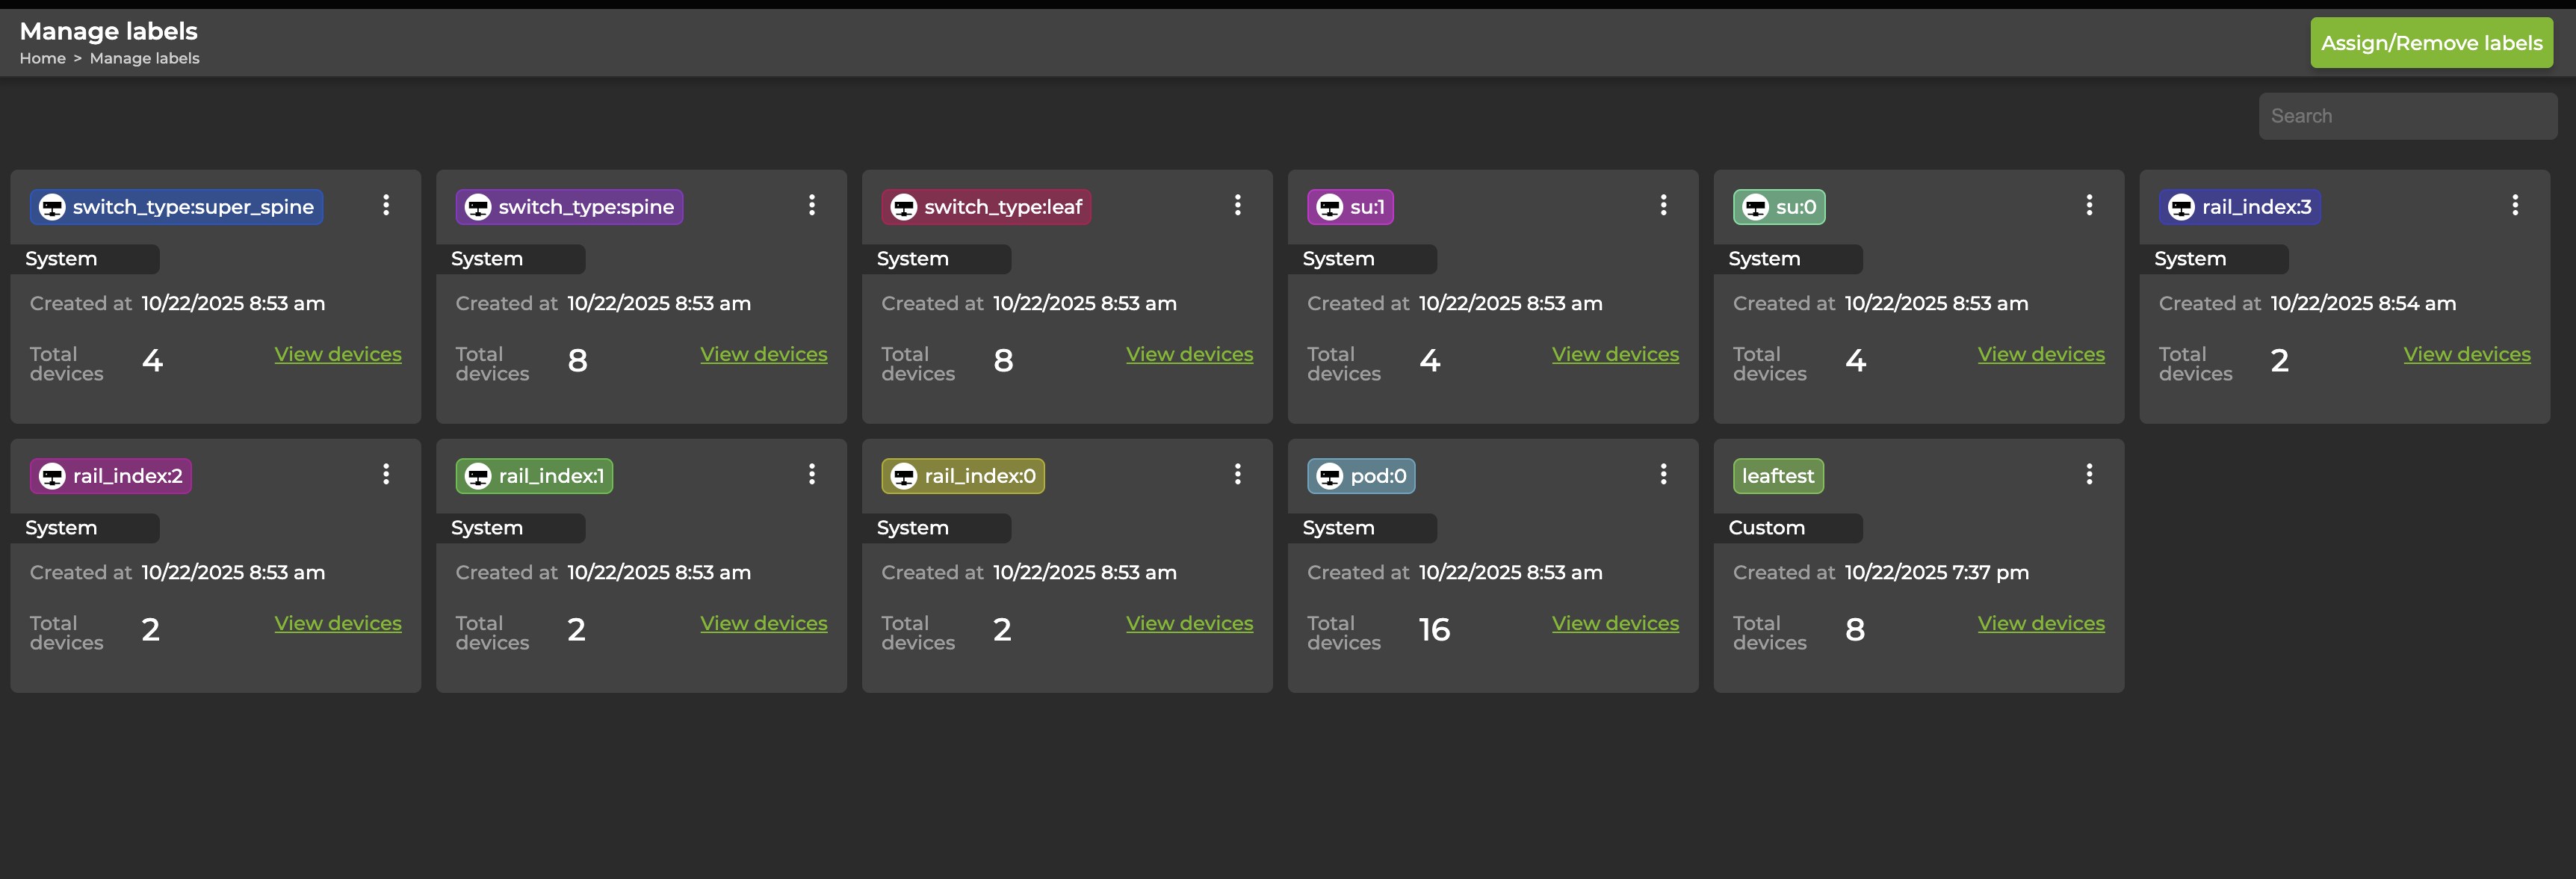
Assign a Custom Label
Expand the
 Menu and select Manage labels.
Select Assign/Remove labels.
From the Assign label tab, create at least one rule that reflects the devices that will receive a label.
Select Apply. The devices that match the rule are populated in the UI. You can continue to refine or add rules until the expected devices are displayed.
Enter the name of a new label or select an existing label to apply to the displayed devices.
Select Assign label.
Delete a Custom Label
Expand the
Menu and select Manage labels.Navigate to the label you would like to delete and select the three-dot menu. Select Delete.
Remove a Custom Label
You can change the devices that are assigned a certain label by modifying the rule that you created when you originally assigned the label.
Expand the
Menu and select Manage labels.Select Assign/Remove labels.
From the Remove label tab, create at least one rule that specifies the devices whose label you would like to remove.
Select Apply. The devices that match the rule are populated in the UI. You can continue to refine or add rules until the expected devices are displayed.
The labels that are assigned to the matched devices are displayed in the UI. Choose the labels you want removed, then select Remove label.
Decommission a Switch
Decommissioning a switch or host removes information about the device from the NetQ database. When the NetQ Agent restarts at a later date, it sends a connection request back to the database, so NetQ can monitor the switch or host again.
Locate the Inventory/Switches card on your workbench and expand it to full-screen.
Select the switches to decommission, then select Decommission device above the table.
If you attempt to decommission a switch that is assigned a default, unmodified access profile, the process will fail. Create a unique access profile (or update the default with unique credentials), then attach the profile to the switch you want to decommission.
Confirm the devices you want to decommission.
Wait for the decommission process to complete, then select Done.
To decommission a switch or host:
On the given switch or host, stop and disable the NetQ Agent service:
nvidia@switch:~$ sudo systemctl stop netq-agent
nvidia@switch:~$ sudo systemctl disable netq-agent
On the NetQ server or VM, decommission the switch or host:
nvidia@netq-server:~$ netq decommission <hostname-to-decommission>