Getting Started#
Setup and Prerequisites#
Hardware Requirements#
Minimum GPU memory (GB): 60 GB for generating images of size 512^3 or larger. Please refer to the required GPU memory for more details.
CPU x86-64 >= 8 core (Recommended)
Memory >= 32 GB (Recommended)
Minimum Storage: 50 GB (28 GB container size)
Software Requirements#
Minimum NVIDIA Driver Version: 535
Install Docker
Install the NVIDIA Container Toolkit
NGC (NVIDIA GPU Cloud) Account Setup#
Set
NGC_API_KEY:export NGC_API_KEY=<Your NGC API Key>
Docker log in with your NGC API key using
docker login nvcr.io --username='$oauthtoken' --password=$NGC_API_KEY
NGC CLI Tool Setup#
Download the NGC CLI tool for your OS.
Set up your NGC CLI Tool locally (You’ll need your API key for this!):
ngc config set
After you enter your API key, you may see multiple options for the org and team. Select as desired or hit enter to accept the default.
Usage Instructions#
Running NIM#
Pull the NIM container:
docker pull nvcr.io/nim/nvidia/maisi:1.0.1
Run the NIM container:
docker run --rm -it --name maisi \
   --runtime=nvidia -e CUDA_VISIBLE_DEVICES=0 \
   -p 8000:8000 \
   -e NGC_API_KEY=$NGC_API_KEY \
   nvcr.io/nim/nvidia/maisi:1.0.1
Monitor progress with docker logs:
docker logs --follow maisi
Health and Liveness Checks#
Readiness check:
curl localhost:8000/v1/health/readyLiveness check:
curl localhost:8000/v1/health/liveWait for the health check to return status code
200:Bash:
base_url="http://localhost:8000"
endpoint="/v1/health/ready"

response=$(curl -s -o /dev/null -w "%{http_code}" "$base_url$endpoint")

while [ "$response" -ne 200 ]; do
   echo "Waiting for the service to be ready..."
   sleep 5
   response=$(curl -s -o /dev/null -w "%{http_code}" "$base_url$endpoint")
done

echo "Service is ready!"
Python:
import requests
import time

base_url = "http://localhost:8000"
response = requests.get(f"{base_url}/v1/health/ready")

while response.status_code != 200:
   response = requests.get(f"{base_url}/v1/health/ready")

   time.sleep(5)
print(response.json())
Interacting with the API#
The MAISI API provides two main endpoints:
/v1/maisi/info: GET request to retrieve service information/v1/maisi/run: POST request to generate synthetic images
Here’s a Python script demonstrating how to use the MAISI NIM API to query service information:
import requests
import json

base_url = "http://localhost:8000"

# Query service info
info_response = requests.get(f"{base_url}/v1/maisi/info")
print("Service Info:", json.dumps(info_response.json(), indent=2))
And here’s a script to generate synthetic images, this script will POST a request to /v1/maisi/run with image generation parameters. It then handles the response, saving ZIP files or displaying JSON messages as appropriate.
import requests
from datetime import datetime

base_url = "http://localhost:8000"

# Generate synthetic image
payload = {
    "num_output_samples": 1,
    "body_region": ["abdomen"],
    "anatomy_list": ["liver", "spleen"],
    "output_size": [512, 512, 512],
    "spacing": [1.0, 1.0, 1.0],
    "image_output_ext": ".nii.gz",
    "label_output_ext": ".nii.gz",
}

generation_response = requests.post(f"{base_url}/v1/maisi/run", json=payload)

if generation_response.status_code == 200:
    print("Files generated successfully!")

    if generation_response.headers.get('Content-Type') == 'application/zip':
        # Save ZIP file with timestamp
        timestamp = datetime.now().strftime("%Y%m%d_%H%M%S")
        zip_filename = f"output_{timestamp}.zip"
        with open(zip_filename, "wb") as f:
            f.write(generation_response.content)
        print(f"Output saved as {zip_filename}")

    elif 'application/json' in generation_response.headers.get('Content-Type', ''):
        response_json = generation_response.json()
        print("Response:", response_json.get('message') or response_json.get('error'))

    else:
        print("Unexpected response format")
else:
    print(f"Error {generation_response.status_code}: {generation_response.text}")
Note
Generating a single 512x512x512 image can take approximately 1 to 2 minutes when using an NVIDIA A100 80GB GPU. The exact time may vary depending on the specific configurations of the system.
Stopping the Container#
To stop the container, run:
docker stop maisi
Visualizing the Output#
Example Output#
Visualization with 3D Slicer#
Users can visualize the MAISI NIM generated segmentation results by viewers of 3D Slicer. We show a few steps to get started with installing 3D Slicer and visualization of the MAISI segmentation.
Install 3D Slicer#
To install 3D Slicer, you’ll need to download and install stable and preview versions. For more information on installing 3D Slicer, please refer out the 3D Slicer Documentation.
Extract the compressed files, and double click “3D Slicer” application in the file system, select correct version based on different operation systems.
Visualization and Rendering#
Open the 3D Slicer app, under launchpad viewer:


Open the MAISI NIM generated CT volume and segmentation file, it can be either NRRD or NIFTI files. Drag the file or import from the menu. In the pop-up window, if you would like to load the file alone, go with the volume option. Or you can select “segmentation” mode.
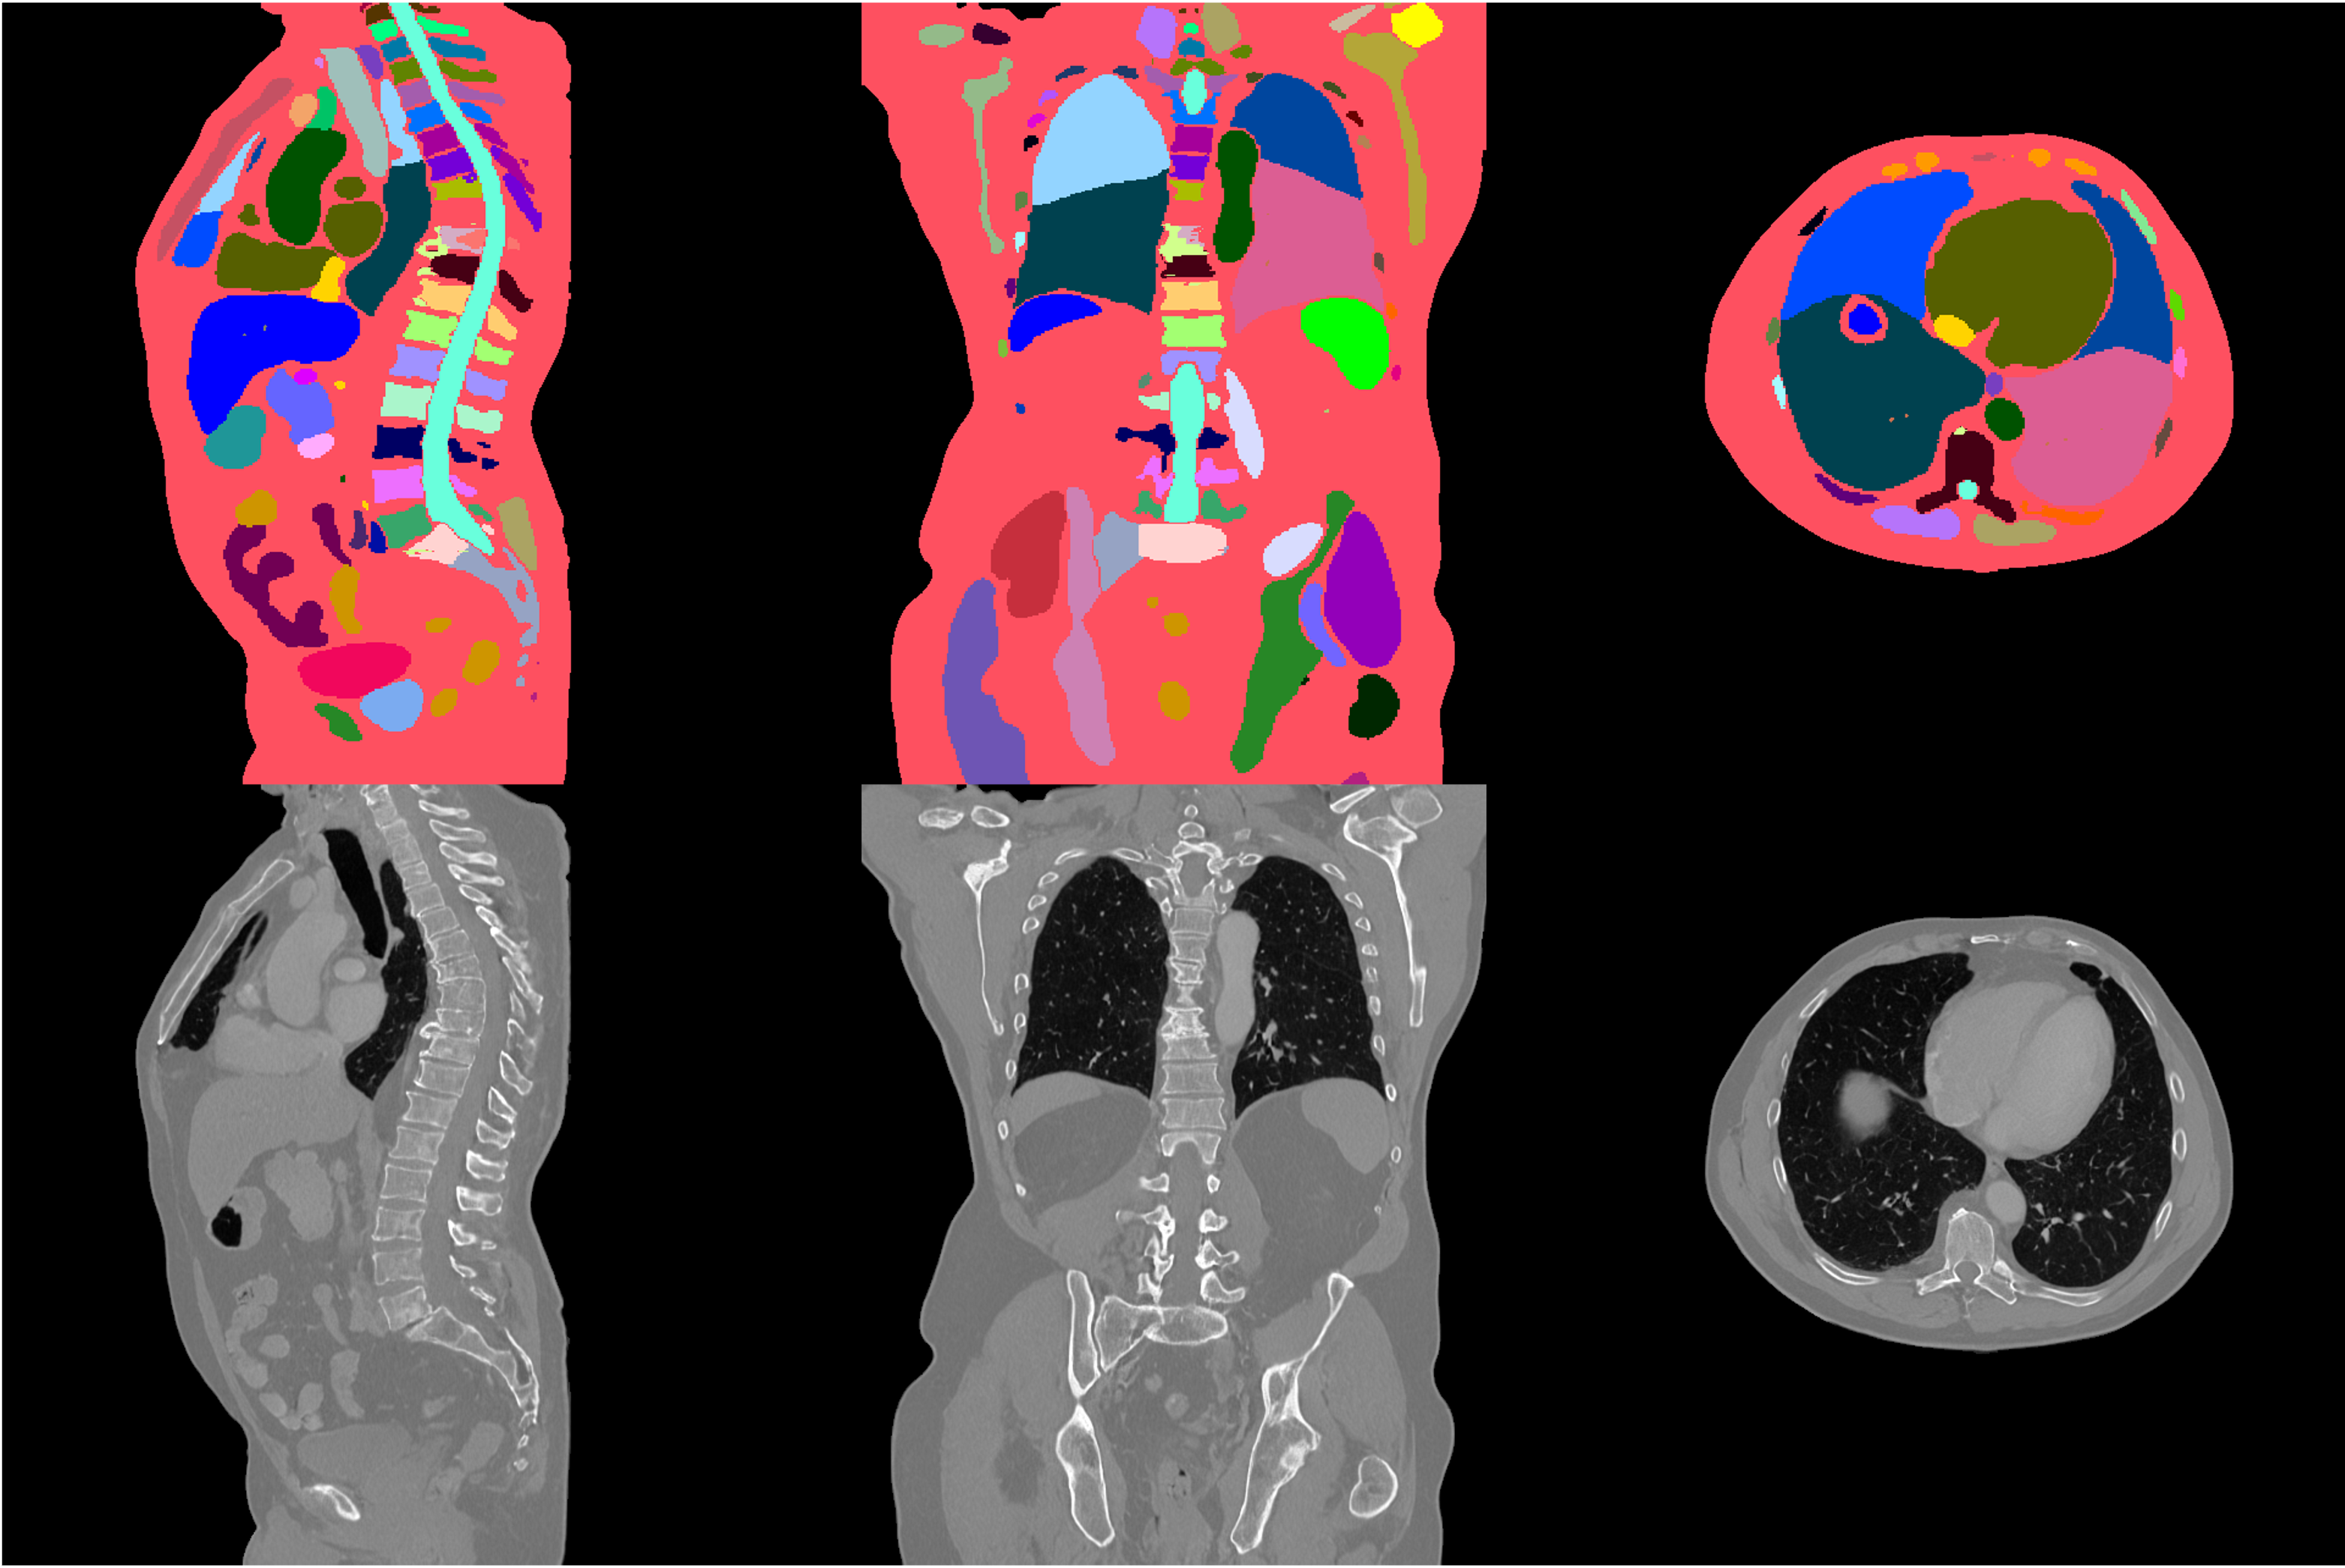
Here is an example of the generated CT volume:

Visualize the labels generated, all labels are shown.

Visualize both the CT image and its MAISI labels renderings at the same time. The above figure show the overlay.
FAQ (Frequently Asked Questions)#
Q: What is MAISI and what can it be used for?
A: MAISI (Medical AI for Synthetic Imaging) is a 3D Latent Diffusion Model for generating synthetic CT images. It’s primarily used for data augmentation in medical imaging research, helping to supplement limited datasets and enhance the performance of other medical AI models.Q: Can MAISI be used for clinical purposes?
A: No, MAISI is intended for research purposes only and should not be used for clinical diagnosis or treatment planning.Q: What are the minimum hardware requirements to run MAISI?
A: MAISI requires a GPU with at least 60 GB of memory for generating images of size 512^3. It has been validated on A100 80GB and H100 GPUs.Q: How do I specify the anatomical structures I want in the generated images?
A: You can use theanatomy_listparameter in the API payload to specify the desired anatomical structures. Refer to the Supported Anatomy table in the API Reference section for a complete list of available options.Q: Can I control the size of specific organs in the generated images?
A: Yes, you can use thecontrollable_anatomy_sizeparameter to adjust the size of up to 10 specific organs. The size can be set between 0.0 and 1.0, or -1 to remove the organ.Q: What output formats does MAISI support?
A: MAISI can output images in NIfTI, DICOM, and Nrrd formats. You can specify the desired format using theimage_output_extandlabel_output_extparameters.Q: How many images can I generate in a single API call?
A: You can specify the number of images to generate using thenum_output_samplesparameter. There’s no fixed limit, but generating a large number of images may take more time and resources.Q: Is it possible to generate images of different body regions?
A: Yes, you can specify one or more body regions using thebody_regionparameter. Available options include “head”, “chest”, “thorax”, “abdomen”, “pelvis”, and “lower”.Q: Why am I getting only a part of the body region?
A: This issue may occur if the requested Field of View (FOV) is smaller than the actual body size. Ensure that theoutput_sizeandspacingparameters are correctly set to cover the entire body region. Here you can find some recommended values foroutput_sizeandspacing.Q: Why am I getting additional body regions along with the requested one?
A: This issue may occur if the specified Field of View (FOV) is larger than the actual size of the requested body region. Ensure that theoutput_sizeandspacingparameters are accurately set to cover only the desired body region. Here you can find some recommended values foroutput_sizeandspacing.Q: How do I handle the API response when generating images?
A: The API response will either be a ZIP file containing the generated images (if successful) or a JSON message (if there’s an error or additional information). The provided Python script in the “Interacting with the API” section demonstrates how to handle both types of responses.Q: How can I report issues or security vulnerabilities related to MAISI?
A: You can report security vulnerabilities or other concerns through the NVIDIA AI Concerns portal at https://www.nvidia.com/en-us/support/submit-security-vulnerability/.Q: What should I do if the Docker container fails to start?
A: Ensure you have the correct NVIDIA drivers installed (minimum version 535) and the NVIDIA Container Toolkit is properly set up. Also, verify that your system meets the minimum hardware requirements, especially the GPU memory.Q: What if the health check fails?
A: Wait a few more seconds and try again. If the issue persists, check the docker logs usingdocker logs --follow maisifor any error messages. Ensure your system resources aren’t constrained and that the container has full access to the GPU.Q: What causes an “out of memory” error during image generation?
A: Ensure your GPU has at least 60GB of memory. If not, try reducing theoutput_sizeparameter or generating fewer samples at a time. You can also try reducing the number of anatomical structures in theanatomy_list.Q: How can I view the generated output files?
A: The output files are in NIfTI, DICOM, or Nrrd format, depending on what you specified. You can use medical imaging software like 3D Slicer, ITK-SNAP, or MRIcroGL to view these files. Ensure the output files were created in the expected location as specified in your API call.Q: What should I do if the NGC CLI tool setup fails?
A: Double-check that you’ve entered the correct API key. If issues persist, try regenerating a new API key from the NGC website. Also, ensure you have the latest version of the NGC CLI tool installed.Q: Can I adjust the generation timeout for large or complex images?
A: Yes, you can set a custom timeout for image generation using theGENERATE_IMAGE_TIMEOUTenvironment variable when starting the Docker container. The default is 1800 seconds (30 minutes).Q: Is it possible to use a different port for the API server?
A: Yes, you can specify a different API server port using theNIM_HTTP_API_PORTenvironment variable when launching the Docker container. The default port is 8000.
If you encounter any other issues, please refer to the NVIDIA MAISI documentation or reach out to NVIDIA for support.