Resources
The Resources View allows you to see all of the available resources in the scene.
To open the Resources page, go to Frame Debugger > Resources. There are two tabs available here:
- Graphical
- Memory
At the top of the Resources view, you'll find a toolbar:
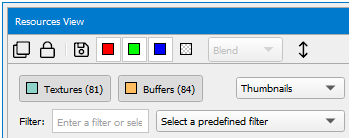
- Clone — makes a copy of the current view, so that you can open another instance.
- Lock — freezes the current view so that changing the current event does not update this view. This is helpful when trying to compare the state or a resource at two different actions.
- Save — saves the captured resources to disk.
- Red, Green, and Blue — toggles on and off specific colors.
- Alpha — enables alpha visualization. In the neighboring drop-down, you can select one of the following two options:
- Blend — blends the alpha with a checkboard background.
- Grayscale — alpha values are displayed as grayscale.
- Flip Image — inverts the image of the resource displayed.
Below the toolbar is a set of buttons, described below, for high-level filtering of the resources based on type. Next to that, there is a drop-down menu that allows you to select how you wish to view the resources: thumbnails, small thumbnails, tiles, or details.
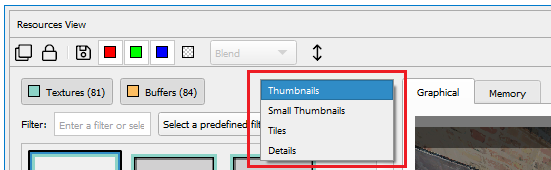
If you select the Details view, you can sort the resources by the available column headings (type, name, size, etc.).
Filtering Resources
There are three ways to filter the available resources.
- For high-level filtering, there are color coded buttons to filter based on resource type. All resource types are visible by default, and you can filter the resource list by de-selecting the button for the type you don't want to see. For example, if you'd like to see only textures, you can click the other buttons to de-select them and remove them from the list of resources.
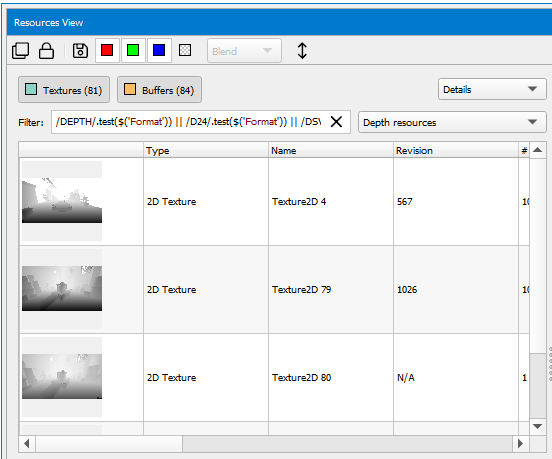
- You can manually type in a search string to filter the list of resources.
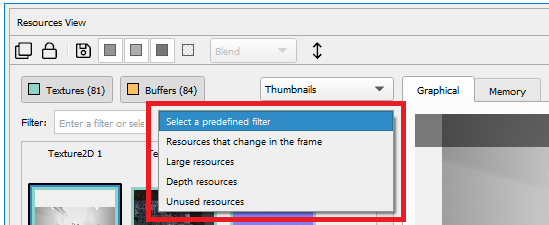
- You can choose from the drop-down of predefined filters to view only large resources, depth resources, unused resources, or resources that change in the frame. Selecting one of these will fill in the JavaScript string necessary for the requested filter, which is also useful as a basis to construct custom filters.
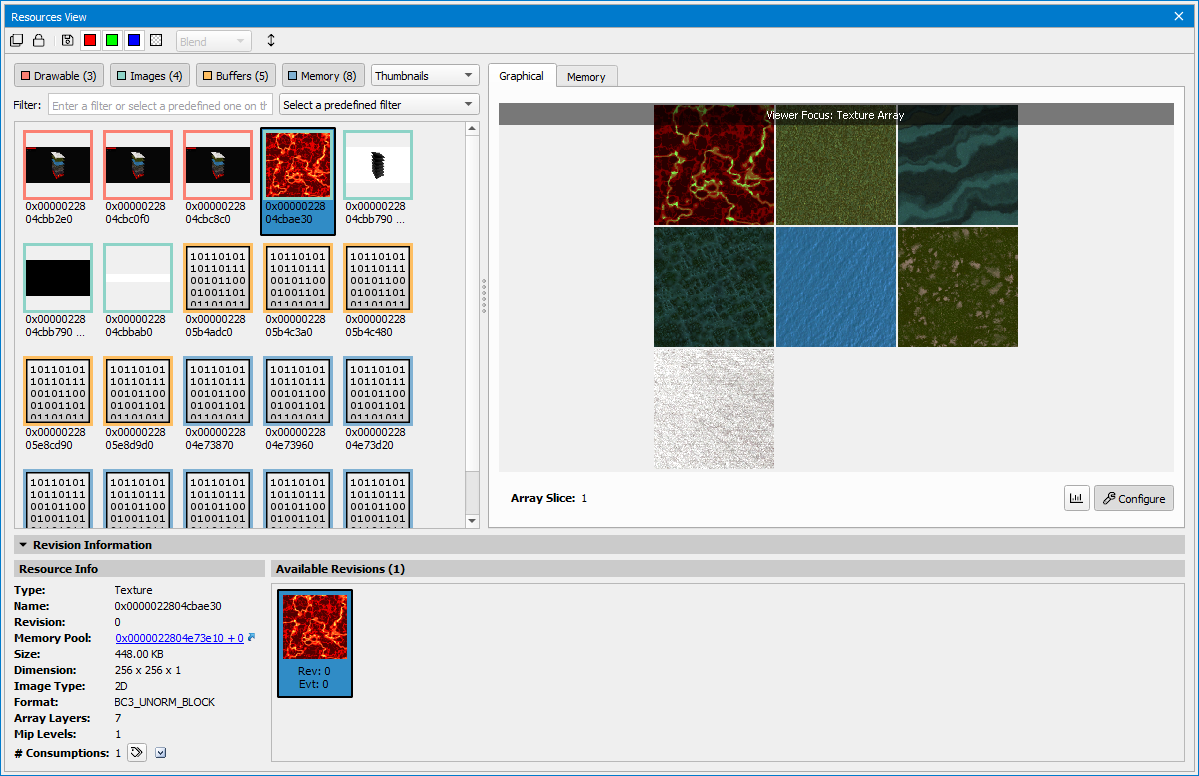
Graphical Tab
The Graphical tab allows you to inspect the resource, pan using the left mouse button to click and drag, zoom using the mouse wheel, and inspect pixel values. Also, this is where you can save the resource to disk. If supported on your GPU and API, this is also where you can initiate a Pixel History session to get all of the contributing fragments for a given pixel.
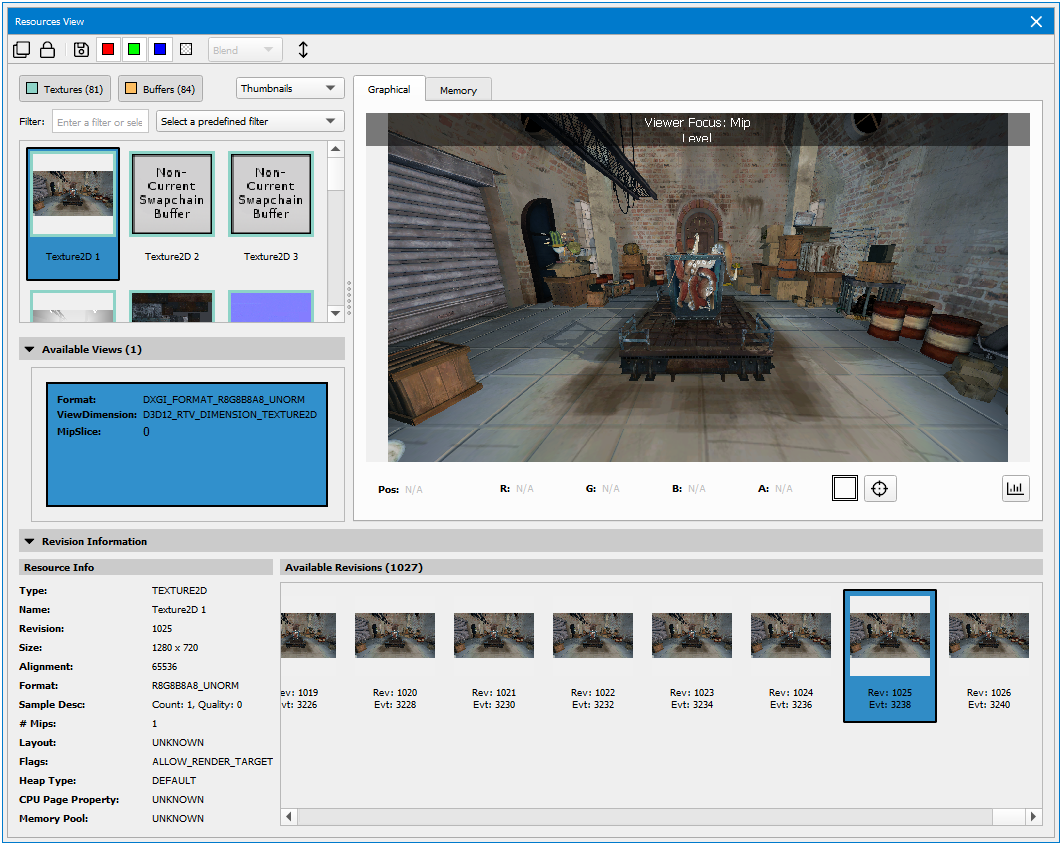
When you have selected a buffer from the left pane, the Show Histogram button will be available on the right side of the Graphical tab, which allows for remapping the color channels for the resource being viewed.
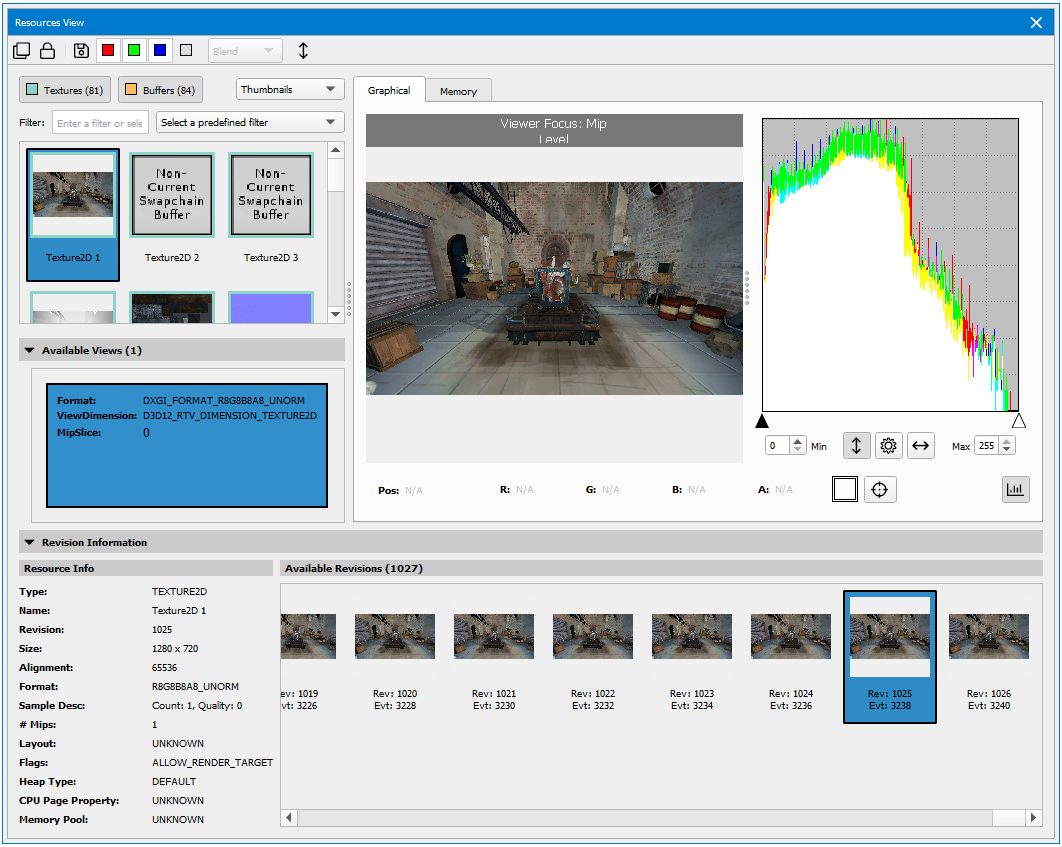
To modify the histogram view, the following options are available:

- You can set the minimum and maximum cutoff values via the sliders under the histograms, or by typing in values in the Minimum and Maximum boxes.
- You can change the scale by using the Log button.
- The Luminance button allows you to visualize luminance instead of color values.
- The Normalize button can preset the minimum and maximum values to the extents of the data in the resource.
Custom Shader Configuration
The Custom Shader Configuration dialog allows you to specify a custom texture display shader for viewing a texture resource. For example, you could author a shader to programmatically tone-map a high dynamic range render target with a custom tone-mapping operator.
To begin, click on the Configure button.
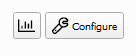
This will open the Custom Shader Configuration dialog.
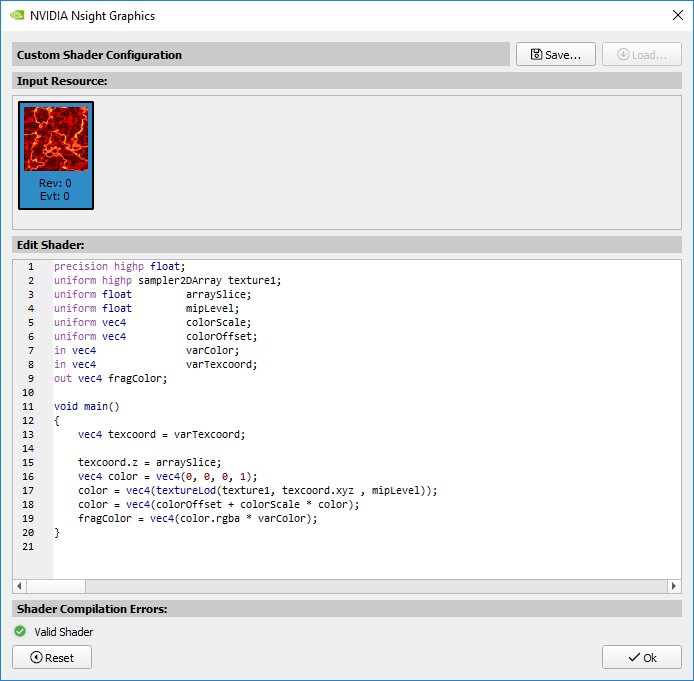
Editing a custom shader will automatically update the texture viewer to reflect the updated view shader. For example, as you can see below, if you edit the texture view source in the shader configuration dialog to view array slices less than four with 50% of the original red channel, it will appear as follows.
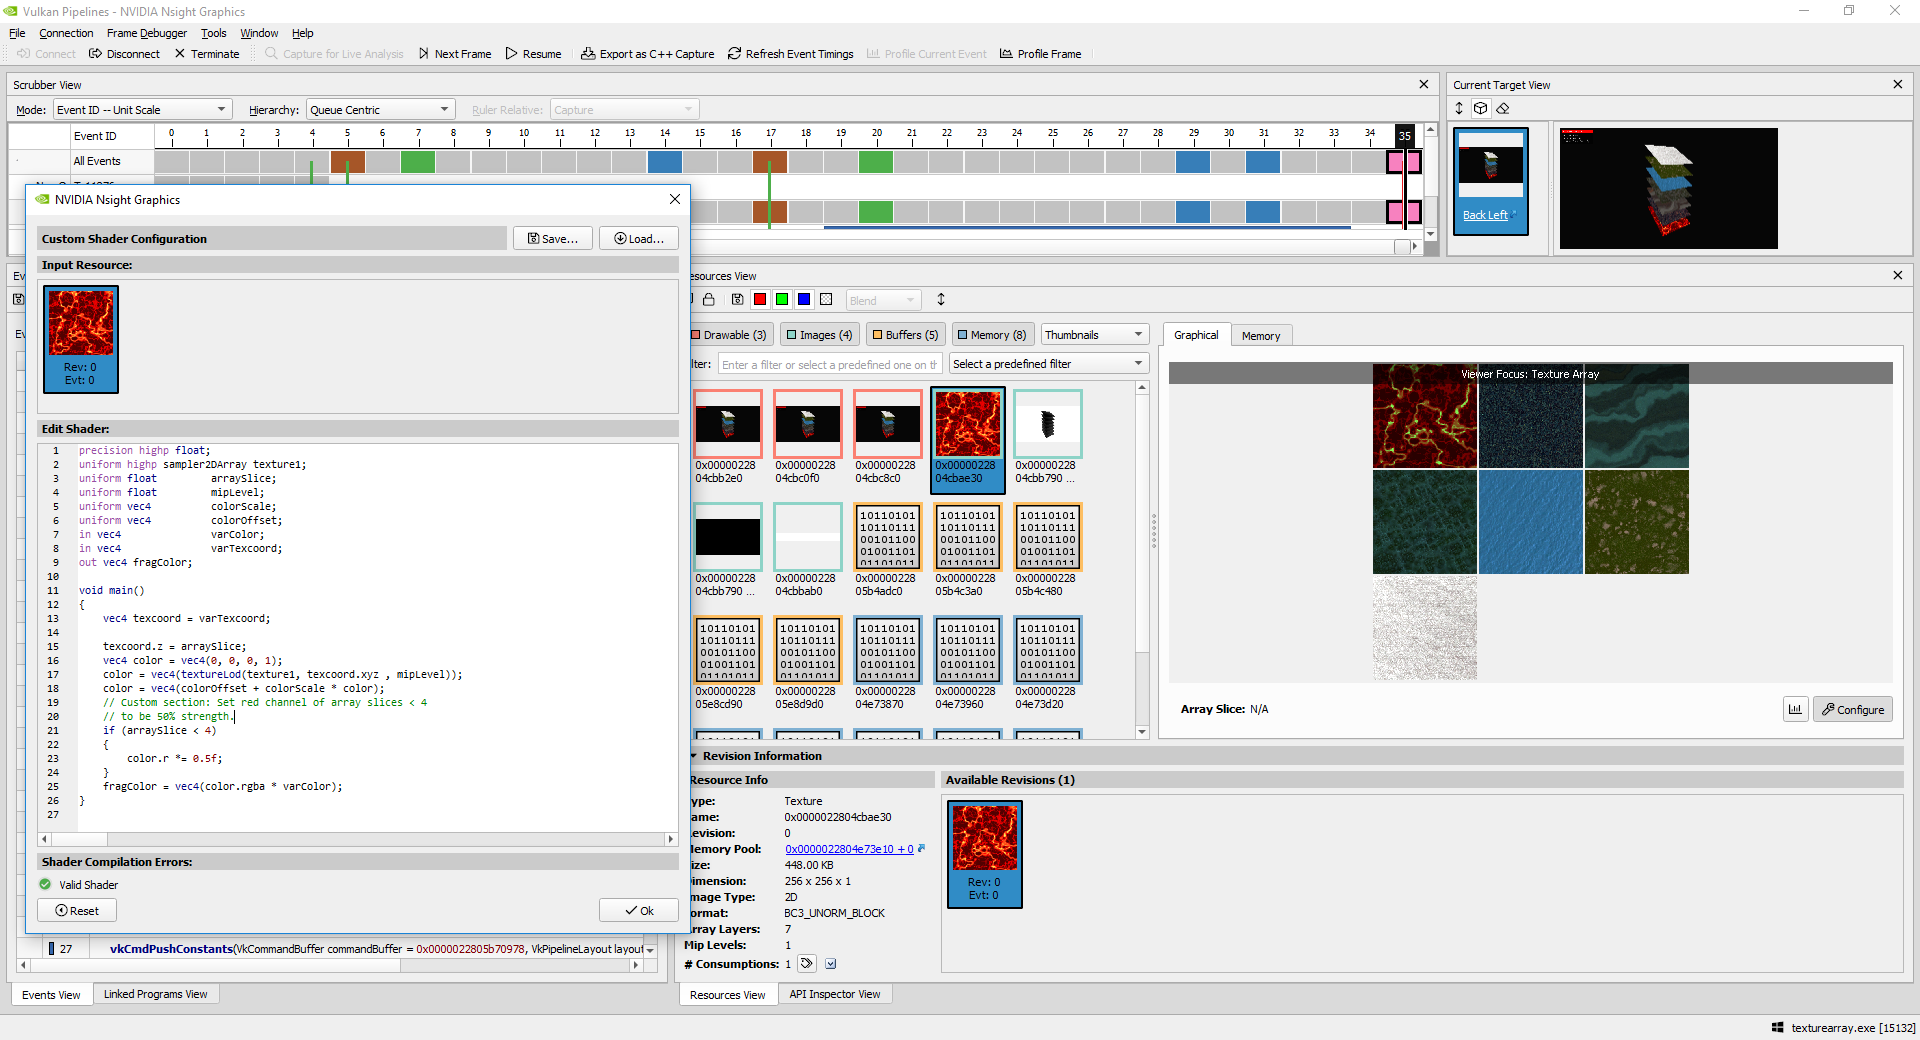
Here is a closer view of the custom shader dialog.

Here is a closer view of the resource view with the custom shader applied.
Available Features
The custom shader editor supports the native shader language of the application being debugged. In the case of Direct3D 12 or Direct3D 11, the texture view shader is authored in HLSL. In the case of Vulkan or OpenGL, the shader is authored in GLSL. We utilize the standard graphics API compilers for each shader language, and thus the languages are completely supported.
Note, however, that there is not currently a way to specify include directories and custom macro defines, so take care not to use these features.
Configuration Persistence Behavior
When clicking on a texture resource, the configuration is automatically populated with the most recently set configuration in the current session, specific to that resource. If no configuration has been set for the current session (for example, the first time selecting that specific resource), the configuration is populated by a default shader that simply draws the texture.
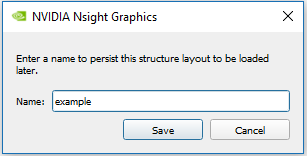
To persist a configuration across sessions, you can click on the Save... button to assign a name to this configuration.
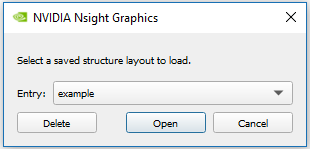
Later, you can restore this configuration by clicking on the Load... button.
Memory Tab
The Memory tab shows a dump of the resource data.
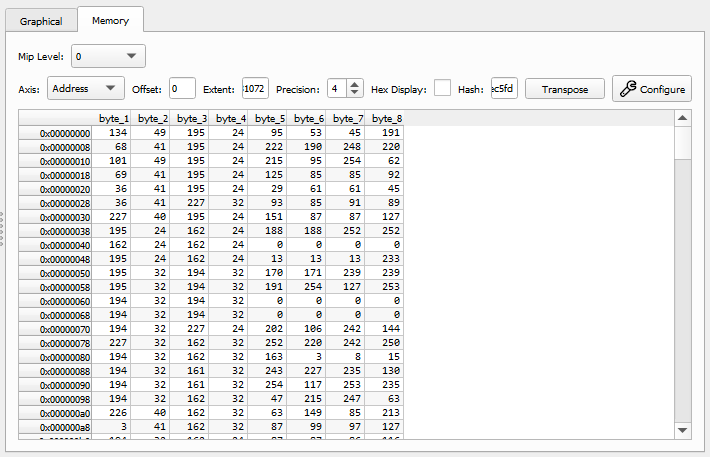
You can use multiple options to configure how this memory is displayed:
- The Axis drop-down changes between address (memory offset) and index (array element) views.
- The Offset entry limits the view to an offset within the given resource.
- The Extent entry limits the view to a maximum extent within the given resource.
- The Precision spin box controls the number of decimal places to show for floating point entries.
- The Hex Display toggles between decimal (base-10) and hex (base-8) display formats.
- Hash shows a hash value representative of the given memory resource within the current offset and extent. This is useful for comparing memory objects or sub-regions.
- The Transpose button swaps the rows and columns of the data representation.
- The Configure button opens the Structured Memory Configuration dialog.
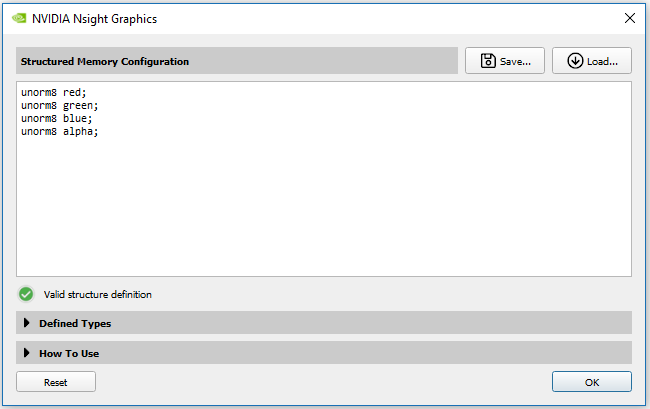
Structured Memory Configuration
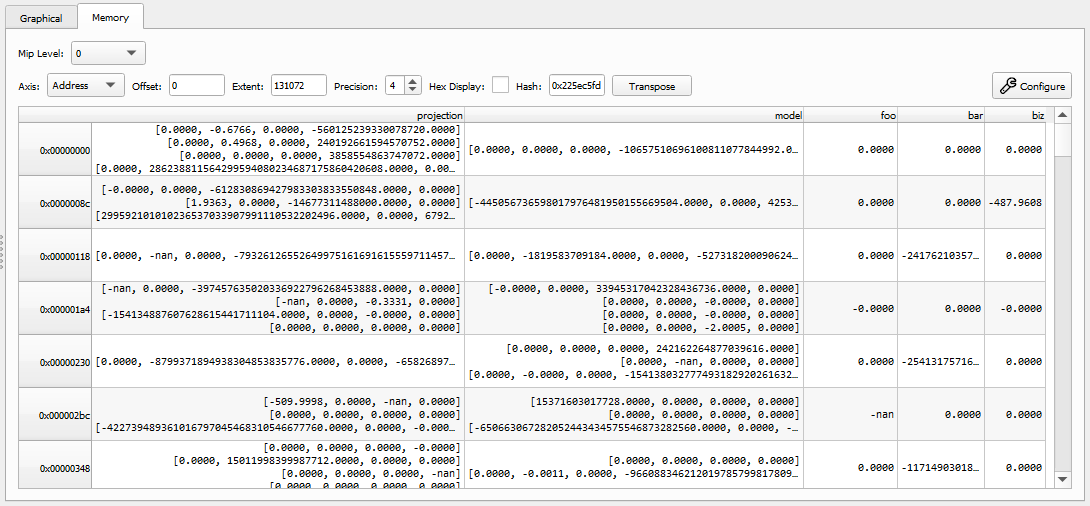
The Structured Memory Configuration dialog allows the user to specify a data layout to interpret the raw data backing the selected resource. For example, a texture may be represented by its colors channels or a uniform buffer may be represented by the various types packed within that buffer.
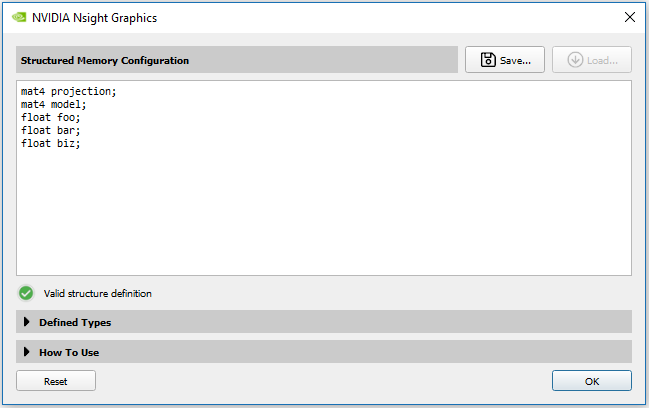
Typing in a valid structure definition will automatically update the viewer to respect the configuration.
New columns can be created using a simple C-like syntax.
int;      // creates a column with an anonymous int
int x;    // creates a second column with an int named x
float y;  // creates a third column with a float named y
Where additional user types can be defined like the following:
struct MyType
{
     int x;
     float y;
};

struct MyOtherType
{
     MyType z;
     double u;
};
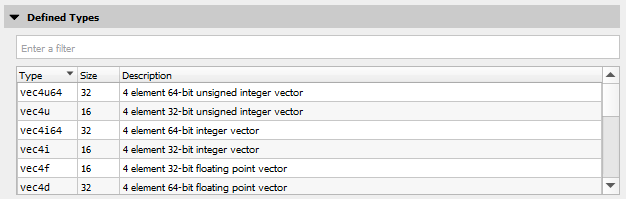
Many common sized, unsized, and normalized types are permitted as valid types. Vector and matrix types are provided in a similar syntax to HLSL and GLSL. The full list of supported types can be browsed and searched by clicking on the expandable "Defined Types" sub-section of the configuration dialog.
As some additional notes on the parser:
- Full C/C++ grammar is not supported.
- Single line comments are accepted; c-style block comments (
/* */) are not. - Macros are not currently supported.
- Alignments are not considered; all types are considered packed.
- To add explicit padding, use
padNwhere N is a multiple of 8. - Members can be selectively hidden as well, which can be useful for narrowing your data.
When clicking on a texture resource, the configuration is automatically populated to interpret the channels of that format.
Similarly, buffers are defaulted to a generic byte configuration. A user can typically interpret this buffer data by examining the specific use case. For example, the layout of a vertex buffer can be seen in the Input Assembler section of the API Inspector view, or a uniform buffer can be interpreted by looking at the data layout specified within the shader source.
To persist a configuration, you can click on the Save... button to assign a name to this configuration.
Later, you can restore this configuration by clicking on the Load... button.

NVIDIA® Nsight Graphics Documentation Rev. 2018.4.180813 ©2018. NVIDIA Corporation. All Rights Reserved.