> This page is for Self-Hosted, version v3.0 (default).
> For other versions, use one of these documentation indexes:
> - v3.0 (default): https://docs.nvidia.com/run-ai/self-hosted/v3.0/llms.txt
> - v2.26: https://docs.nvidia.com/run-ai/self-hosted/v2.26/llms.txt
> - v2.25: https://docs.nvidia.com/run-ai/self-hosted/v2.25/llms.txt
> - v2.24: https://docs.nvidia.com/run-ai/self-hosted/v2.24/llms.txt
> For clean Markdown of any page, append .md to the page URL.
> For a complete documentation index, see https://docs.nvidia.com/run-ai/llms.txt.
> For AI client integration (Claude Code, Cursor, etc.), connect to the MCP server at https://docs.nvidia.com/run-ai/_mcp/server.
# Service Accounts (formerly applications)
Service accounts are used for API integrations with NVIDIA Run:ai. A service account contains a client ID and a client secret. With the client credentials, you can obtain an access token as detailed in [API authentication](/run-ai/self-hosted/reference/rest-api/getting-started/how-to-authenticate-to-the-api) and use it within subsequent API calls.
Service accounts are assigned with [access rules ](/run-ai/self-hosted/documentation/platform-management/authentication/access-rules)to manage permissions. For example, service account **ci-pipeline-prod** is assigned with a **Researcher** role in **Cluster: A**.
**Note**
You can also create your own access keys for API integrations with NVIDIA Run:ai. See [User access keys](/run-ai/self-hosted/documentation/platform-management/settings/user-settings/user-access-keys) for more details.
## Service Accounts Table
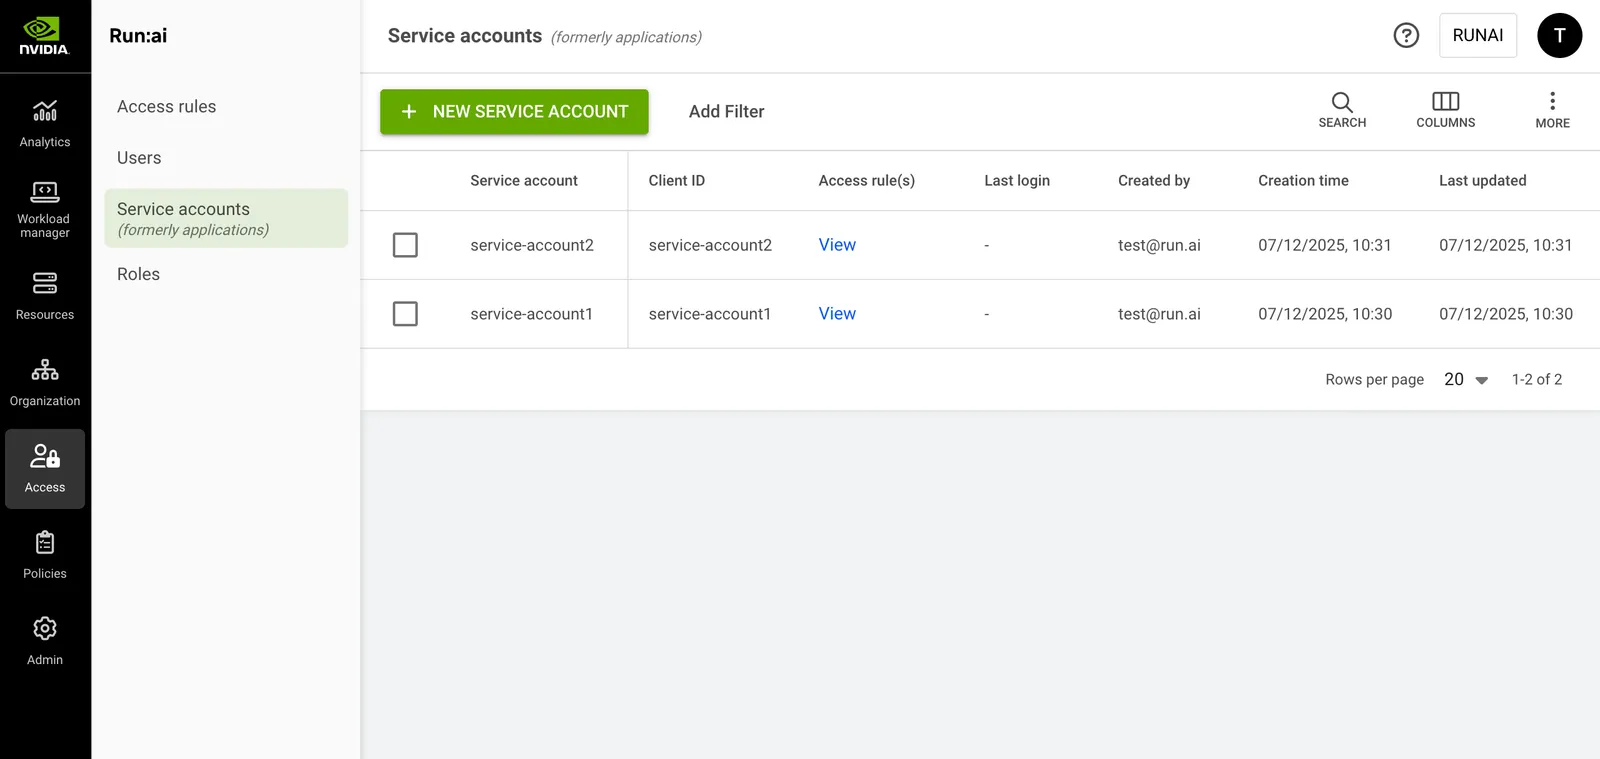
The Service accounts table can be found under **Access** in the NVIDIA Run:ai platform.
The Service accounts table provides a list of all the services accounts defined in the platform, and allows you to manage them.
The Service accounts table consists of the following columns:
| Column | Description |
| --------------- | ------------------------------------------------------ |
| Service account | The name of the service account |
| Client ID | The client ID of the service account |
| Access rule(s) | The access rules assigned to the service account |
| Last login | The timestamp for the last time the user signed in |
| Created by | The user who created the service account |
| Creation time | The timestamp for when the service account was created |
| Last updated | The last time the service account was updated |
### Customizing the Table View
* Filter - Click ADD FILTER, select the column to filter by, and enter the filter values
* Search - Click SEARCH and type the value to search by
* Sort - Click each column header to sort by
* Column selection - Click COLUMNS and select the columns to display in the table
* Download table - Click MORE and then Click Download as CSV. Export to CSV is limited to 20,000 rows.
## Creating a Service Account
To create a service account:
1. Click **+NEW SERVICE ACCOUNT**
2. Enter the service account's **name**
3. Click **CREATE**
4. Copy the **Client ID** and **Client secret** and store them securely
5. Click **DONE** or click **ADD ACCESS RULES** to proceed to the **Access rules** step
6. In the **Access rules** step:
* Select a **role**
* Select up to 10 **scopes** where the access rule will apply
* Click **SAVE RULE**
* Click **CLOSE**
**Note**
The client secret is visible only at the time of creation. It cannot be recovered but can be regenerated.
## Adding an Access Rule to a Service Account
To create an access rule:
1. Select the service account you want to add an access rule for
2. Click **ACCESS RULES**
3. Click **+ACCESS RULE**
4. Select a **role**
5. Select up to 10 **scopes** where the access rule will apply
6. Click **SAVE RULE**
7. Click **CLOSE**
## Deleting an Access Rule from a Service Account
To delete an access rule:
1. Select the service account you want to remove an access rule from
2. Click **ACCESS RULES**
3. Find the access rule assigned to the user you would like to delete
4. Click on the trash icon
5. Click **CLOSE**
## Regenerating a Client Secret
To regenerate a client secret:
1. Locate the service account you want to regenerate its client secret
2. Click **REGENERATE CLIENT SECRET**
3. Click **REGENERATE**
4. Copy the **New client secret** and store it securely
5. Click **DONE**
**Important**
Regenerating a client secret revokes the previous one.
## Deleting a Service Account
1. Select the service account you want to delete
2. Click **DELETE**
3. On the dialog, click **DELETE** to confirm
## Using API
Go to the [Service accounts](https://docs.nvidia.com/run-ai/multi-tenant/v3.0/reference/rest-api/endpoints/authentication-and-authorization/service-accounts/get-service-accounts), [Access rules](https://docs.nvidia.com/run-ai/multi-tenant/v3.0/reference/rest-api/endpoints/authentication-and-authorization/access-rules/get-access-rules) API reference to view the available actions.