Custom Avatar Creation
The advanced workflow starts with a ACE animation pipeline template scene. This scene is completely set up and can be run as-is in the ACE animation pipeline. In this section we walk you through the steps required to update this scene with a custom avatar model.
Custom Avatar Model Requirements
The custom avatar model needs to satisfy the following high-level requirements:
The avatar should be humanoid.
The avatar needs to be in the USD format.
The avatar should have less than 1 million triangles in total (for a A40 GPU or similar).
The avatar and its materials can be created with any DCC tool (e.g. Blender, Maya, Substance 3D etc.) or a any third-party avatar creators (e.g. Reallusion Character Creator, Ready Player Me, etc.) as long as they have a USD exporter or an Omniverse connector, and as long as the exported asset can be modified to fulfill the following requirements:
The avatar USD file and all it’s dependencies like textures must be placed in a self-contained directory. All references to textures and other resource must only use relative file paths.
The avatar scene contains several geometry prims of the type Mesh.
Ensure that the head is represented by a single mesh prim that is detached from the body. This head mesh needs to be single manifold, containing the eye sockets and the mouth cavity.
Ensure that eyeballs, lower teeth, upper teeth, gums, and tongue, are separate meshes and not part of the head mesh.
Several material prims associated with the various meshes should be set up.
A skeleton prim of type SkelRoot containing a skeleton prim of type Skeleton that in turn includes several SkelJoints with existing geometries skinned to them.
The SkelRoot prim must be named “character”.
A world transformation of type Xform, that is the parent of all the prims mentioned above.
Import the Avatar to the Template Scene
Once your model satisfies the requirements listed in the previous section, we can proceed with importing the custom avatar to the template scene.
Download the latest ACE template scene version here: https://github.com/NVIDIA/ACE/blob/main/tools/avatar_configurator/template_scene.zip.
Note
Make sure that you have enabled LFS if you have checked out the entire https://github.com/NVIDIA/ACE git repository. Otherwise, you will get an error when trying to unpack the template_scene.zip archive.
Note
Note that the template scene is similar to the scene generated by the avatar configurator. However, the scene generated by the avatar configurator contains many additional primitives, variants and logic that are specifically required for the avatar configurator and thus, such a scene should not be used as a basis to set up custom avatars.
Install Omniverse Launcher https://www.nvidia.com/en-us/omniverse/download/#ov-download
Install Omniverse USD Composer with the Omniverse Launcher.
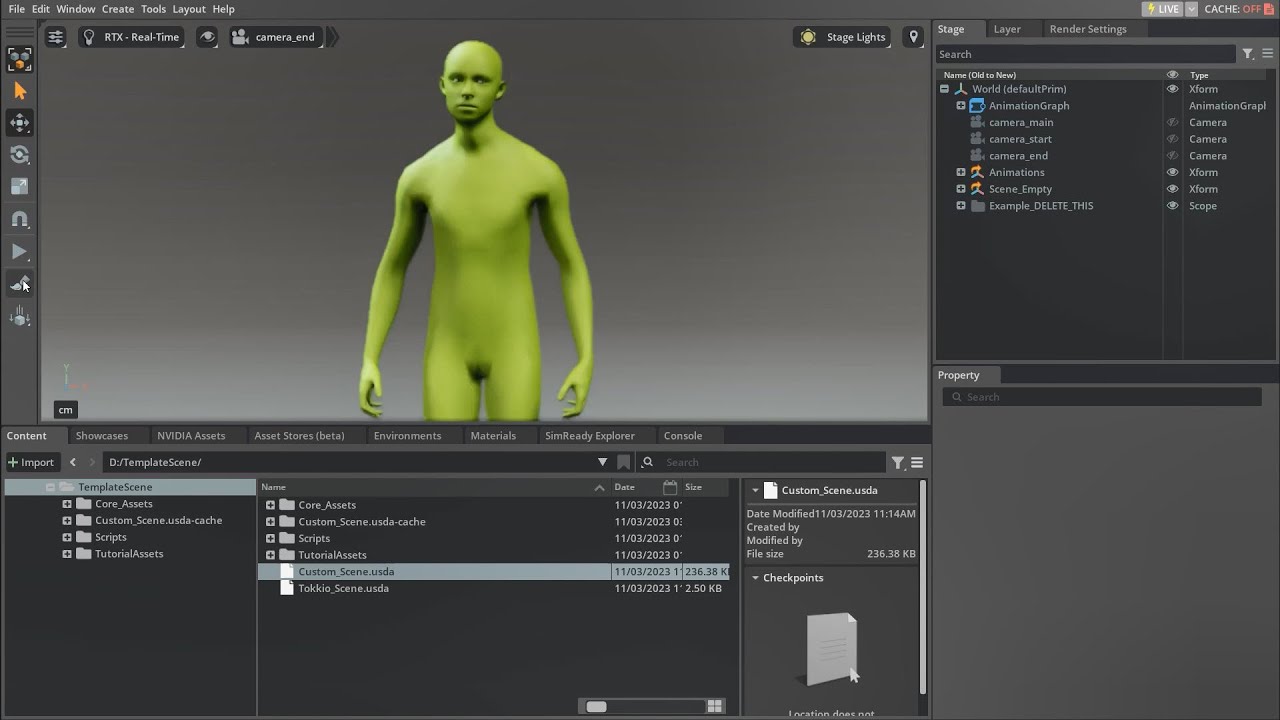
Open the template scene named
Custom_Scene.usdain USD Composer.Delete the example character named “Example_DELETE_THIS”.
Import your own character model into the scene. Do this by locating the USD file in the Content window, and dragging it into the scene.
Ensure that the position of the avatar is centered at (0, 0, 0). Rotate so they face the camera.
Set Up Animations
Video Tutorial: https://youtu.be/h2DPfDL-fv0
Note
The hieararchy of prims shown in the video is slightly out-dated and will look different in your scene. The “Rig_Retarget” and “main_camera” prims are also no longer in the positions shown in the video.
In the video the Retarget Rig is shown to the side of the character, but is now located in the center of the stage. That means turning on the skeleton visualization will reveal the “Retarget_Rig” in the same place as your character’s Skeleton. Do not be alarmed seeing two overlapping Skeletons, this is expected.
The demo animation no longer animates the eyes. The eyes still need to be tagged as shown in the video, but you may only see them moving before deploying.
Open the window Window/Animation/Retargeting. This will create a new tab in the UI named “Animation Retargeting”. Click on that tab.
From the drop-down “Skeleton”, select the new avatar’s Skeleton prim. Depending on your rig this will already automatically find most required joints of your character. But some will need to be added manually. Using the button “Add Tag” you can add more tags. These are the ones you’ll need from the “Body” list (Add the ones that weren’t found automatically): Head, Left_Hand, Right_Hand, Left_Foot, Right_Foot, Left_Shoulder, Left Elbow, Left Index, Left Thumb, Left_Middle, Left_Ring, Left_Pinky, Right_Hand, Right_Shoulder, Right Elbow, Right Index, Right Thumb, Right_Middle, Right_Ring, Right_Pinky. They will appear in the list and you can then assign the corresponding joint of your character. For the fingers you need to assign the finger tips.
Retarget Eyes: Using the “Add Tag” button select “Custom” twice. Two custom tags will have been added. Name these “Left_eye” and “Right_eye” (exact spelling is crucial), then assign your character’s eye joints. This will only work if your character has a joint in each eye placed at the pivot of the eyeball.
In the “Stage” tab, find and select your character’s skeleton. It will be a child prim of the type “Skeleton”. In the properties of this prim under “Animation and Pose Modes” you can assign an animation by clicking the folder icon. Find the one named “DemoAnimation”.
Press the play button on the left side of the screen and you should see the character moving. Should the retargeting result look bad, here are some known complications and how to fix them:
The character’s torso twists in unnatural ways: This means the retargeting is unsure how to resolve the spine. In the retargeting tab, add a custom tag and name it “Chest” (exact spelling). If the result still twists, add another tag named “Waist”.
The character’s eyes float out of the head. This likely means the eye joints are not directly parented to the head. Add a new retargeting tag to your character and name it “Head2”. Assign the parent joint of the eye joints.
The character’s arms clip inside their body. This will be because of the character’s retarget pose. In the retargeting tab under “Retarget Pose” click the “View” button. This will likely place your character in a T-pose. If not, you can select “Match with…”, select “biped_tpose.usd” and click “Apply”. If the retargeting pose is already a T-pose but the arms still clip into the body, it’s likely that your character’s hips or belly are wider than their shoulders. To compensate for this you will have to angle up the character’s arms in the retarget pose. If you don’t see a visualization of the character’s skeleton, you should enable this by clicking the eye icon in the top right of the viewport, and selecting “Show By Type/Skeletons”. In the retargeting tab click “View” again. Then click on the character’s upper arm joints in the viewport and rotate them upwards by a few degrees. Then click “Apply” in the retargeting tab. If the arms still clip into the hips while animating, adjust the pose again until they don’t.
The hand poses look odd. Using the same method as described in the point above, you can adjust the retarget pose of the fingers. The fingers should be stretched out with the thumbs lowered by about 15°.
When you’re happy with the retargeting you can once again select the skeleton of your character where you previously assigned the demo animation. Instead you’ll now want to assign the animation named “ACE_Animation_Target”. When this is assigned the character will be controlled by ACE once the scene is deployed.
Add Custom Animations
Video Tutorial: https://youtu.be/pqfm50e3hpA
Note
The animation graph has gotten more complex since this video. There are now three state machines that need to be deleted before re-generation.
Only Posture and Gesture animations can be added using this workflow. Other animations in the Graph have more specific requirements and should not be replaced.
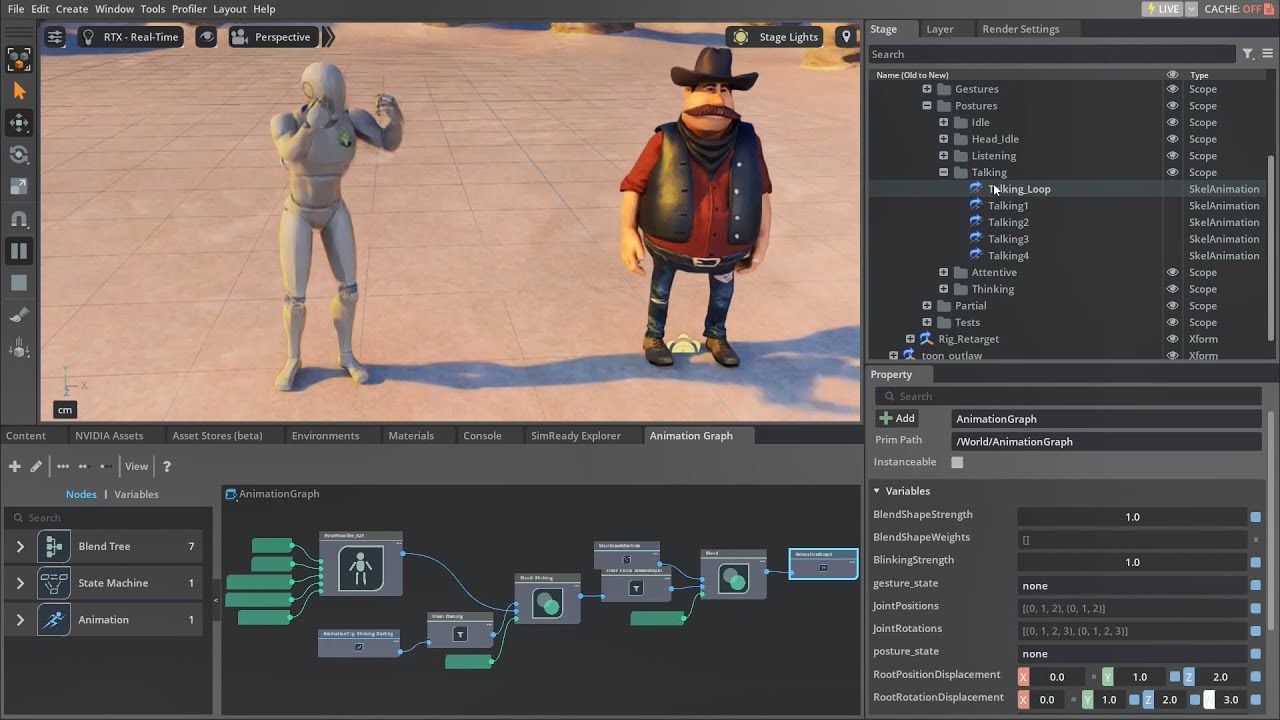
If you wish to add your own animations, you can add them or replace existing ones. However, this will be slightly more challenging. In the stage tab you can extend the prim “Animations”. There’s a child prim also named “Animations” under which you’ll find a list of animations placed in different scopes (folders). The scope in which they are placed decides what state each animation is assigned to. The states under “Postures” will play automatically when the avatar is interacting. Those listed under Gestures will have to be explicitly triggered. You can not simply add your own animation here. All of these animations need to use the default skeleton in order to be compatible. So any animation you wish to add will have to be converted first. You can convert your animations with the help of retargeting and a simple script.
Drag your animation into the scene. You’ll also need the skeleton of the character this animation is based on.
If this animation is not based on your custom character that you already retargeted, you will need to set up retargeting for whichever character this animation comes from. (See steps above)
Open the “Script Editor” window found in the “Windows” drop-down. Inside the script editor window click “File/Open” and open the file “animation_conversion.py” inside the scripts folder.
In the stag, select the prim of type “Skeleton” that belongs to your new animation. Right click, and select “Copy Prim Path”. Then paste this in the script where it says “YOUR_SKELETON_PATH”. Next find the prim of type “SkelAnimation”. Copy that prim path as well and use it to replace “YOUR_ANIMATION_PATH”. Last, you need to decide what state this should be used in. Click on the scope in the animation list where you wish to add this animation (e.g. “/World/Animations/Animations/Postures/Talking” or “/World/Animations/Animations/Gestures”). Copy the prim path of that scope and paste it where it says “TARGET_STATE_SCOPE”.
In the script editor window hit “run”. This might take a few seconds. After that the animation should have been converted and should now be inside the scope you selected.
Delete the following prims:
“/World/AnimationGraph/PositionsAndPosturesAndGesturesStateMachine/PositionState/PositionStateMachine”
“/World/AnimationGraph/PositionsAndPosturesAndGesturesStateMachine/PosturesAndGesturesState/PosturesAndGesturesStateMachine”
“/World/AnimationGraph/FacialPosturesAndGesturesStateMachine”
Save and re-open your scene in order for the State Machine to automatically be regenerated using the new animations. Save again.
If you’ve added your animation to one of the posture states it will automatically be used as part of those states. If you’ve added it to the gestures it will only play if it is specifically triggered by animation pipeline.
Set Up Audio2Face
The goal of this chapter is to generate ARKit BlendShapes for your character. If you’re using a third party model, these shapes may already exist. You can check this, by clicking on the head mesh of your character and see if it has child prims of type “Blendshape”. Audio2Face streaming relies on an exact naming of these shapes. If you use A2F to generate the shapes, this will be correct, but if you’re using the shapes of a third-party avatar following a different naming convention, you will have to translate them using a script.
Reassigning Existing Blendshapes
Video Tutorial: https://youtu.be/h2DPfDL-fv0?t=503
Note
The video example uses a Reallusion character which comes with ARKit BlendShapes. However, this would not produce satisfactory mouth movements for A2F, as the “jawOpen” BlendShape from Reallusion doesn’t actually open the jaw. For this reason, if you’re using a Reallusion character, you may want to create or find a different BlendShape to assign to jawOpen such as “Mouth_Open”. You will run into further trouble with Reallusion character’s as some don’t come with blendshapes for the teeth and don’t split upper an lower teeth into separate meshes. To prepare your Reallusion character correctly, please follow this tutorial (only part 1) https://www.youtube.com/watch?v=K2-lPje9T2A
Follow these steps if you’re using a model that already has ARKit compatible BlendShapes.
With your custom scene open, go to the “script editor” window.
In the script editor window open a file named “reassign_blendshapes.py” from the “DefaultAssets” folder.
In this script you will have to fill in some values: The list named “facial_meshes_paths” you should add the prim path to each of your character’s meshes that uses facial BlendShapes. You can find out which meshes this applies to, by checking if they have child prims of type “BlendShape”. Typical examples of this are: Head, eyebrows, facial hair, teeth, tongue etc. Once you found a prim of type “Mesh” which has child prims of type “BlendShape”, right-click on the mesh prim and select “Copy Prim Path”. Then you can paste this path into the script replacing the example string “World/YOUR_CHARACTERS_FACIAL_MESH_1” (keep the quotation marks). Complete this list with the paths to all your facial meshes.
The list named “blendshape_name_mapping” is a dictionary. In the right column are the required names of the BlendShapes, and in the left column you can write the corresponding name of your character’s BlendShapes.
Once you’ve filled in these values you can run the script using the “Run” button.
To test if your BlendShapes are recodnised now, assing the “DemoAnimation” to the Skeleton of your character and hit play. The face should now be changing its expression. After verifying, re-assign the “ACE_Animation_Target” animation to your character’s skeleton.
Generating Blendshapes using Audio2Face
Video Tutorial: https://youtu.be/8rwAs2q_DTE
Follow these steps if you want to generate new BlendShapes for your character model.
To set up A2F you’ll have to leave Omniverse Composer and use Omniverse Audio2Face 2023.1.1.
You can set up Audio2Face for your character following one of the online tutorials. Ideally, you should do this in a separate scene, so you don’t clutter your current one.
once you’re done with the character’s A2F setup, you can generate the BlendShapes using the “Blendshape Generation” feature in the “Character Transfer” tab. Select “52 ARKit Poses” and press “Export”.
This will save two files: One named *.usd and the other *_usdSkel.usd. The first is simply all the BlendShapes as individual Meshes, and the second one is already set up as a single mesh with BlendShapes.
You can assign the BlendShapes to your original character in two ways:
- No DCC tools
Import the *_usdSkel.usd file into your Custom_Scene file.
Open the Script Editor window under Window/Script Editor, and load the script named “transfer_blendshapes.py” from the Scripts folder.
In the stage window, find the head mesh in the meshes you just imported, right click on it and select “Copy Prim Path”. Paste this path into the script where it says “MESH 1 ORIGIN PATH”. Now find the corresponding head mesh of your original character, copy its prim path and paste it to the script where it says “MESH 1 TARGET PATH”. Do this for the rest of the imported meshes as well (you can add as many elements to the list as needed).
You should now have two list: “facial_meshes_origin_paths” should list all the paths of your imported meshes, “facial_meshes_target_paths” should list all corresponding paths of your original character’s meshes in the same order. If this is done, you can click on “Run” in the Script Editor Window. This might take a few seconds. Afterwards your original character meshes should have multiple child prims of type “BlendShape”. If this is the case, the transfer was successful.
You can delete what you imported from A2F.
You’re still missing BlendShapes for your eyes and jaw meshes. To generate these you’ll need to use yet another script called “generate_non-skin_blendshapes.py”. Open that script in your script editor window and fill in the following values:
In the list “eye_left_mesh_paths” fill in the Prim Paths for all meshes belonging to the left eye (e.g. left cornea, left eyeball). In the list “eye_right_mesh_paths” do the same for the right eye. In the list jaw_mesh_paths add paths for the meshes moving with the lower jaw (e.g. lower teeth and tongue).
For the variables “eye_left_pivot_path”, “eye_right_pivot_path” and “pivot_jaw_path” assign a prim in the scene that is placed at the rotational pivot of these shapes: For the eyes the pivot prim should be in the center of each eyeball, and the jaw pivot should be horizontally centered inside the head, slightly infront of the ears.
If your character was imported from a different coordinate system like Blender, you may need to adjust the values for “axis_forward”, “axis_up” and “axis_right” and “scale_factor”. Typcial settings for Blender models: axis_forward= (0, -1, 0), axis_up = (0, 0, 1), axis_right = (-1, 0, 0), scale_factor = 0.01.
Having set this up you can run the script.
- DCC tools
If you created your character in e.g. Maya or Blender you can add the BlendShapes in your original file.
Import the *.usd file that was created by A2F into your original character file, assign the meshes as BlendShapes (or “Shape Keys” in Blender) to your character.
You might have to rename them to follow the exact naming convention listed below. If the names are different they won’t be recognized.
For your eyes and jaw meshes, you’ll still have to make BlendShapes manually. d. Then re-export the model. Make sure you export it exactly like you did the first time, but enable the setting to export BlendShapes. It’s important to stay consistent with your export settings, so you don’t change the naming, orientation or hierarchy of your character potentially breaking your previous retarget setup.
To check if your BlendShapes are working, you can assign the “DemoAnimation” to your character’s Skeleton and their face emote when you hit play. Don’t forget to assign “ACE_Animation_Target” again after testing.
Note
There has been an update in later versions of A2F: The “mouthOpen” blendshape is now used differently and needs to be adjusted. You can make this change automatically by using the script “correct_mouthClose_blendshape.py”. Under “target_mesh_paths” fill in the paths to the meshes that use this shape and run the script.
Custom Blendshapes
If you’re an experienced 3D modeler you may wish to create your own BlendShapes. This can make more sense if your character is too far removed from a realistic face for the A2F transfer to produce the desired results results. You can do this in a third party application. Both Maya and Blender support exporting BlendShapes to USD using the Omniverse Connector, if the option is enabled in the export settings.
BlendShape Naming and Ordering Convention
(without the numbers)
eyeBlinkLeft
eyeLookDownLeft
eyeLookInLeft
eyeLookOutLeft
eyeLookUpLeft
eyeSquintLeft
eyeWideLeft
eyeBlinkRight
eyeLookDownRight
eyeLookInRight
eyeLookOutRight
eyeLookUpRight
eyeSquintRight
eyeWideRight
jawForward
jawLeft
jawRight
jawOpen
mouthClose
mouthFunnel
mouthPucker
mouthLeft
mouthRight
mouthSmileLeft
mouthSmileRight
mouthFrownLeft
mouthFrownRight
mouthDimpleLeft
mouthDimpleRight
mouthStretchLeft
mouthStretchRight
mouthRollLower
mouthRollUpper
mouthShrugLower
mouthShrugUpper
mouthPressLeft
mouthPressRight
mouthLowerDownLeft
mouthLowerDownRight
mouthUpperUpLeft
mouthUpperUpRight
browDownLeft
browDownRight
browInnerUp
browOuterUpLeft
browOuterUpRight
cheekPuff
cheekSquintLeft
cheekSquintRight
noseSneerLeft
noseSneerRight
tongueOut
Set Up Camera
The camera “camera_main” will be used as the view of your scene. To see this view, click on the button with the camera icon near the top of the viewport. From the drop down select “Camera/camera_main”. You’ll notice there is a lock symbol next to the name. You can unlock this camera if you wish to adjust its position. Now you can move the camera. If you change the distance to the character, you may also wish to adjust the “Focus Distance” in the camera’s properties to make sure the character is in focus. But be careful to not stay in this view and accidentally change it again. Once you’re happy with the framing of your view you can switch back to the “Perspective” camera.
Run the Scene
To run and test the scene you have to upload the entire asset directory including the USD scene file and all its dependencies to an binary artifact storage. Then update the UCS application YAML file to reference your new scene. See more information here: Resource Downloader.