Overview
The ACE animation pipeline comes with a template scene file that is used to configure the animation microservice. This scene is set up to update the avatar animation based on the following inputs:
Audio stream from Riva TTS to control the facial animation of the avatar through A2F.
State triggers originating at the BotMaker bot controller that control the animation state machine.
Dialog manager command triggers to play specific animations (e.g. a welcome animation).
This scene file is also set up to handle other animation related functionality:
Switching between several animation variants (e.g. several different speaking animations)
Animation transitions
Eye blinking animations
Camera position animation
Workflows
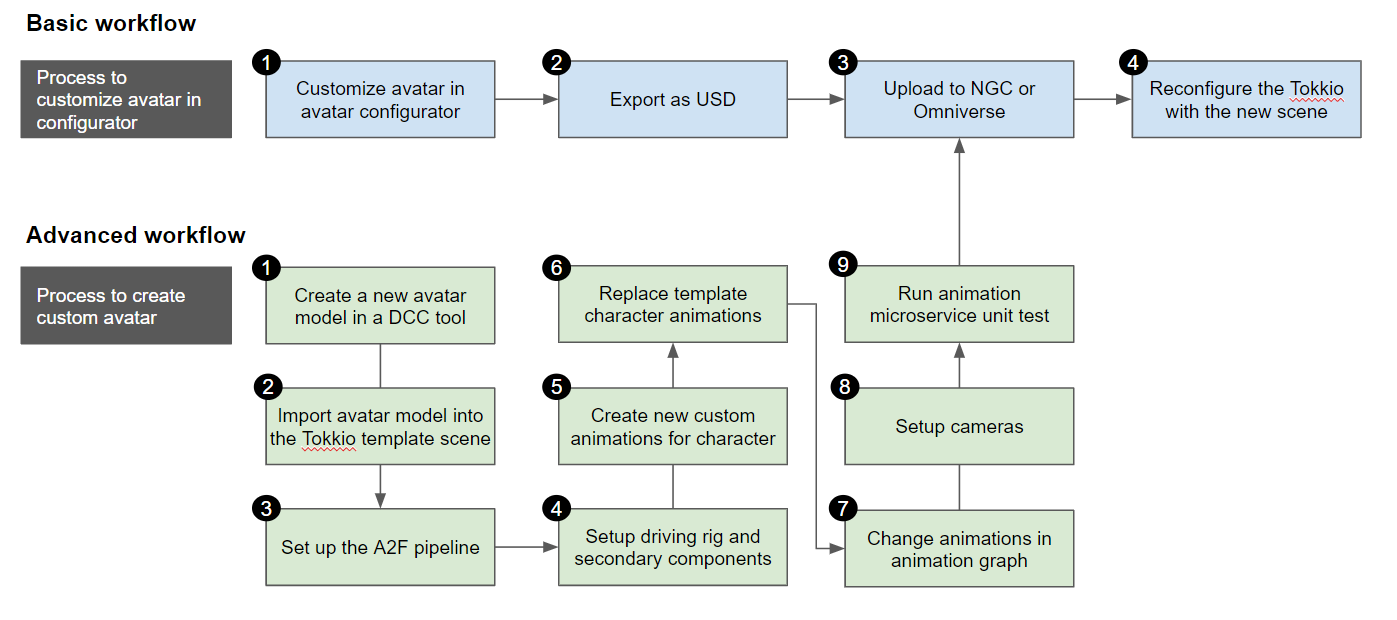
There are two workflows to customize the ACE scene file. The basic workflow based on the Avatar Configurator allows you to quickly and easily customize a base avatar and pick a set of accent colors and accessories with a graphical user interface. This workflow is indented to be used for proof-of-concepts projects, minimum viable products, or simply to have a great looking avatar to get started with ACE.
If this workflow is too limited you can fall back to the advanced workflow. This workflow requires more expertise, but it allows for full control over the created scene file. This workflow is used to import an existing avatar model (e.g. a brand mascot) or it can be used to import an avatar that has been created with an external DCC tool or a third-party avatar creator.
The following figure illustrates the main steps of both workflows.

The basic and advanced avatar configuration workflows
For the avatar configurator, follow this link Avatar Configurator.
For the advanced workflow, follow this link Custom Avatar Creation.