ACE Configurator Method#
The ACE Configurator based developer workflow is designed to enable seamless debugging and streamlined iterative development for Tokkio Digital Human Agents. For more details regarding the ACE Configurator, please refer to the ACE Configurator
The workflow satisfies the following use cases:
Modify the agent pipeline during live deployment and instantly view the updated changes.
Changes remain persistent even after pod reboot.
No need to rebuild or redeploy the app for changes supported by the ACE Configurator.
Pre-requisites:#
Tokkio application deployed in a Kubernetes cluster.
VSCode IDE.
Setup#
Follow the steps listed in Use VS Code Extension to setup and launch the ACE Configurator VSCode extension.
In the “ACE Configurator” panel you can set the ACE Configurator URL,
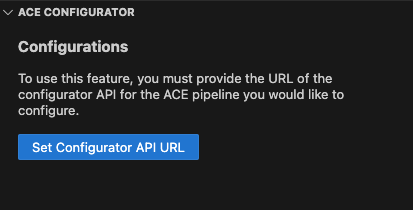
Set the URL to match the IP of the Tokkio deployment and the port exposed by the ACE Configurator svc. Example: http://10.103.2.23:30180. Refer to FAQ for more information on finding the URL.
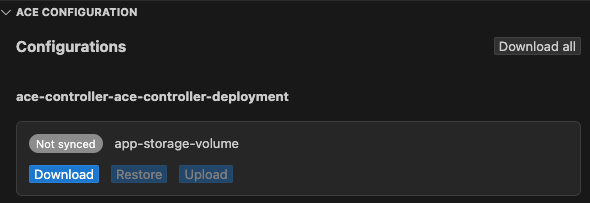
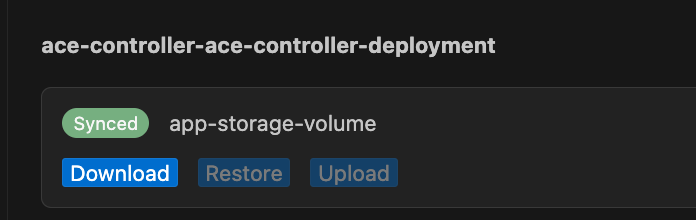
Download the ace controller configuration
Navigate to the downloaded asset (that contains the code for the ace controller)
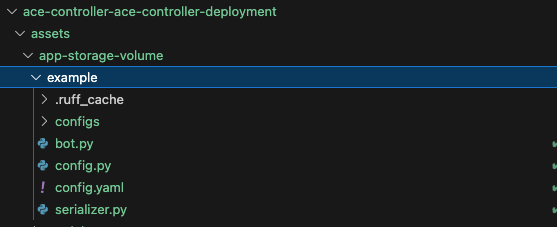
Make the necessary changes and click on upload to upstream the changes in the live deployment.
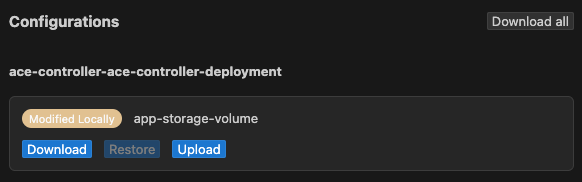
Wait till the changes are reflected in the live deployment. The changes will be reflected in the live deployment within a few seconds. The green indicator with Synced indicates that the changes have been successfully uploaded.
FAQ#
How to find the Configurator API URL?
The Configurator API URL is the IP address of the k8s cluster where the Tokkio application is deployed. The ace configurator URL is also output when you run the deployment script for Tokkio as an output similar to the one shown below.
access_urls:
   app:
      ace_configurator_endpoint: https://<application-instance-ip>:<ace-configurator-port-number>/
      api_endpoint: https://<application-instance-ip>:30888/
      ui_endpoint: https://<application-instance-ip>:30111/
      grafana_endpoint: http://<application-instance-ip>:32300/
    turn: {}
    ....
Troubleshooting#
The ACE Configurator plugin can throw an error like: “An error occurred while updating configurations: TypeError: fetch failed” if the extension is not able to connect to the Tokkio deployment.
Also, editing the files while they are still being downloaded can lead to errors thrown by the ACE Configurator plugin. A quick fix is to wait for the files to be downloaded and then edit them.
One can reload the ACE Configurator plugin in order to refresh the connection if any of the above issues are encountered or if one wants to refresh the connection. Please press CTRL+SHIFT+P (Or CMD + SHIFT + P on Mac) and select “Developer: Reload Window” option to reload the plugin.
Limitations#
The workflow might work a bit slow with uploading changes in a multi-stream deployment.
For this workflow, the ACE Configurator has been set up only for a subset of relevant Tokkio microservices. For more details on how to use the ACE Configurator for arbitrary deployments, please refer to ACE Configurator
The changes made via this workflow need to manually copied over to the user repository in order to be persistent across deployments. In the case of the ACE Controller, one needs to (1) Copy over the changes to the ace controller repository (2) Publish a new container with the updated code and use it with Tokkio helm chart. Please refer to Updating ACE Controller container for more details.