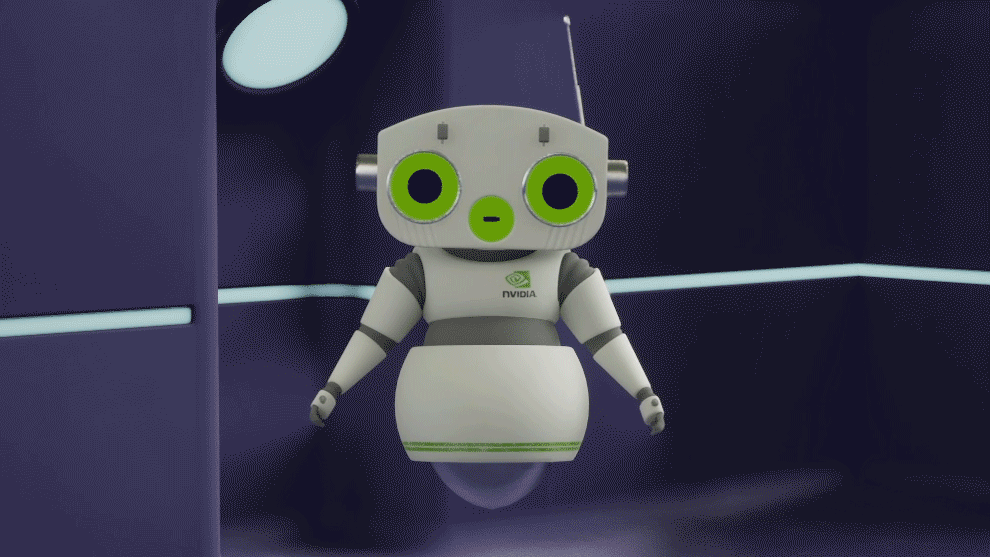
Custom Avatar: Arbitrary Asset#
The goal of this process is to integrate your own custom character into the ACE pipeline. This documentation is for a humanoid avatar, but depending on your proficiency in Unreal Engine and 3rd party 3D tool(s), you can view this guide more as a hint, rather than strict requirements. Ultimately the ACE pipeline drives an avatar based on the 52 ARKit shapes. Everything else is only limited by your creativity.
Asset requirements#
For your own character to work with the pipeline you should have:
Shaded, textured and rigged 3D avatar with a face rig (simplest are 52 ARKit face blendshapes)
An idle animation
An ARKit face animation:
This animation will allow us to translate the Audio2Face-3D inputs to your character’s face rig in a later step.

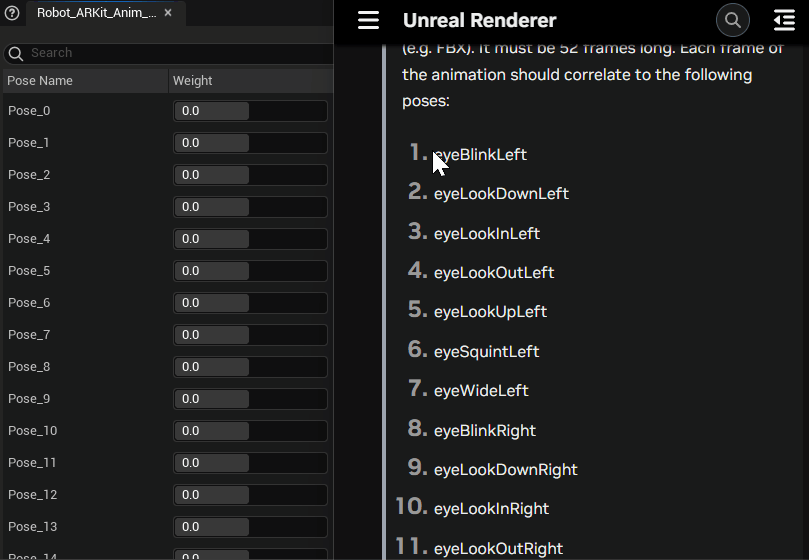
The animation can be created in Unreal or any 3D software that exports files compatible with Unreal (e.g. FBX). It must be 52 frames long. Each frame of the animation should correlate to the following ARKit poses. The order is important!
eyeBlinkLeft
eyeLookDownLeft
eyeLookInLeft
eyeLookOutLeft
eyeLookUpLeft
eyeSquintLeft
eyeWideLeft
eyeBlinkRight
eyeLookDownRight
eyeLookInRight
eyeLookOutRight
eyeLookUpRight
eyeSquintRight
eyeWideRight
jawForward
jawLeft
jawRight
jawOpen
mouthClose
mouthFunnel
mouthPucker
mouthLeft
mouthRight
mouthSmileLeft
mouthSmileRight
mouthFrownLeft
mouthFrownRight
mouthDimpleLeft
mouthDimpleRight
mouthStretchLeft
mouthStretchRight
mouthRollLower
mouthRollUpper
mouthShrugLower
mouthShrugUpper
mouthPressLeft
mouthPressRight
mouthLowerDownLeft
mouthLowerDownRight
mouthUpperUpLeft
mouthUpperUpRight
browDownLeft
browDownRight
browInnerUp
browOuterUpLeft
browOuterUpRight
cheekPuff
cheekSquintLeft
cheekSquintRight
noseSneerLeft
noseSneerRight
tongueOut
Setup in Unreal#
Make sure you followed the Unreal Prerequisites guide closely.
Create a new Unreal project. A blank Blueprint project is the recommended starting point.
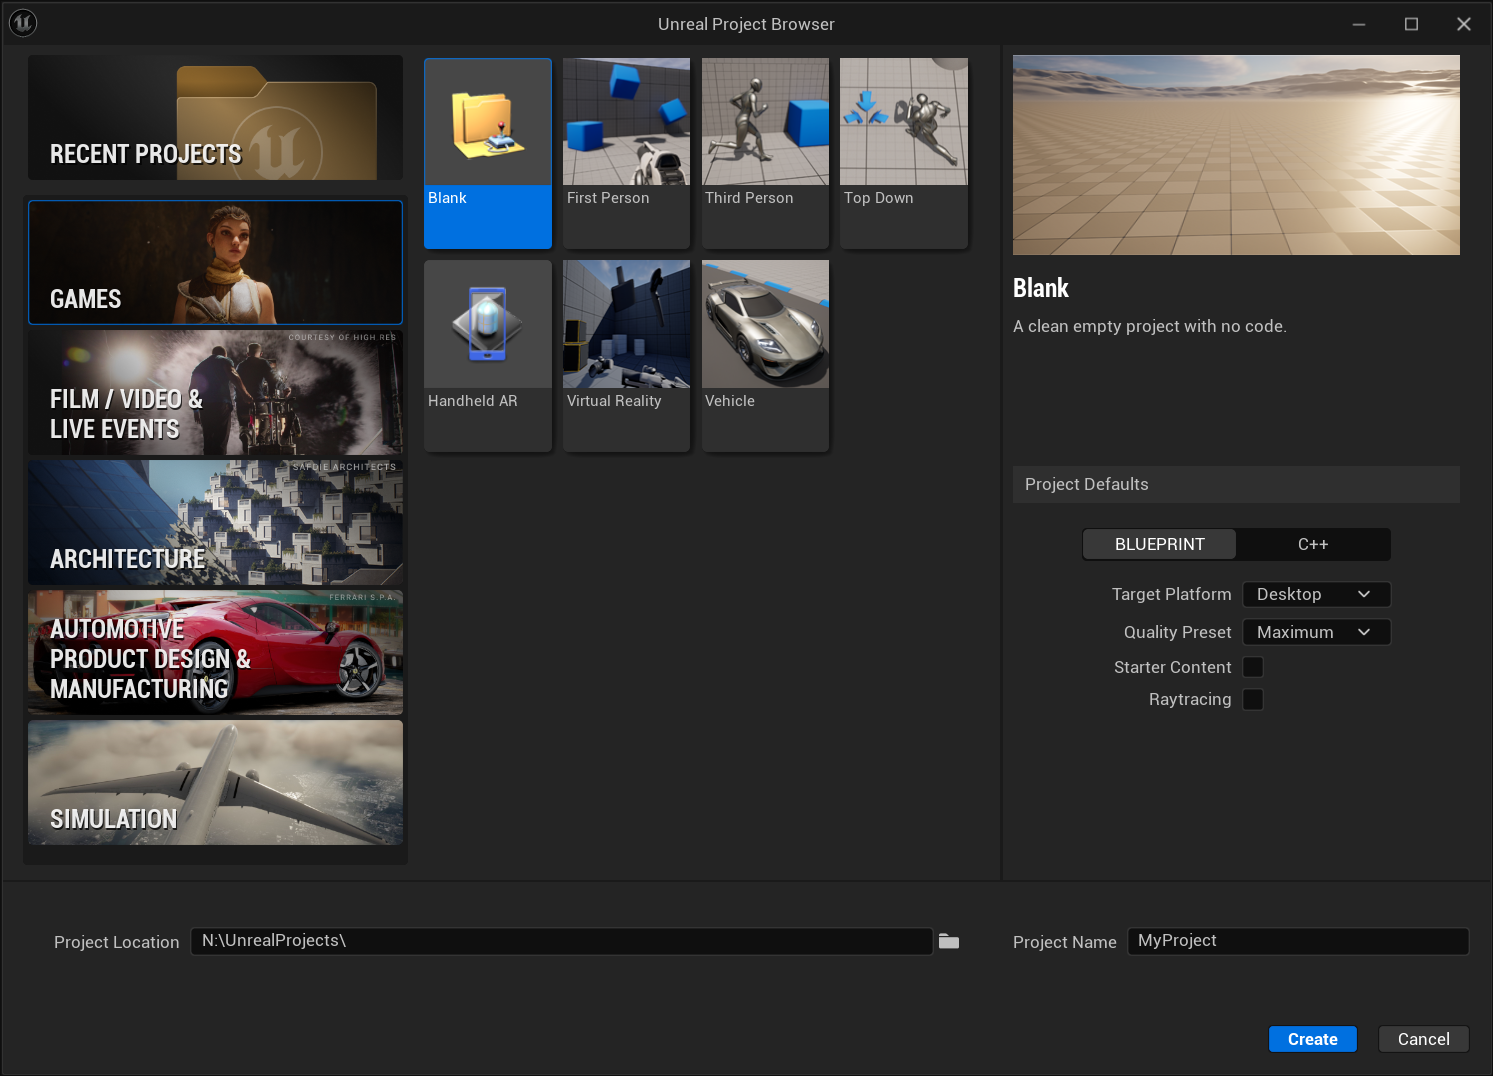
Note
Windows has issues with paths longer than 256 characters. To keep the paths short, save your project in a location like:
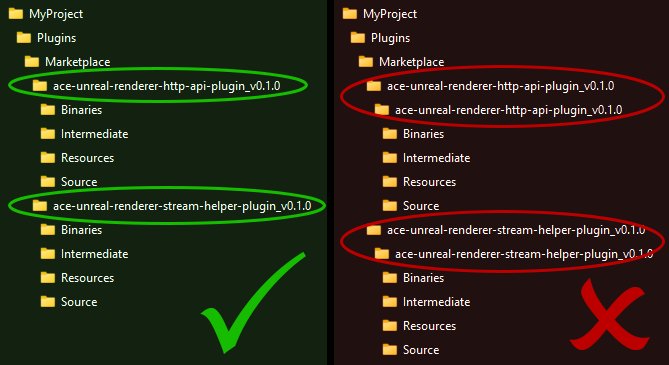
C:\UnrealProjects\MyProject.For the project to run, you’ll first need to install 2 plugins. Make sure to close the Unreal Editor before doing so. Use the NGC CLI to download these resources:
ngc registry resource download-version "nvidia/ace/ace-unreal-renderer-http-api-plugin:0.1.0"
ngc registry resource download-version "nvidia/ace/ace-unreal-renderer-stream-helper-plugin:0.1.0"
Then place these plugins in a folder named “Marketplace” under the Plugins-folder of the project (e.g.
C:\<PATH_TO_YOUR_UNREAL_PROJECT>\Plugins\Marketplace). If the “Marketplace” and “Plugins” folders don’t exist, create them.Note
Beware of nested folders when unzipping:
The plugins are written and built for Unreal Engine 5.3. If you are using a different version, you will need to build the plugins yourself. There is also a chance, that some interfaces changed, so you might need to adapt the code to the new interfaces.
# Windows example for compiling the plugin for Unreal 5.5
"C:\Program Files\Epic Games\UE_5.5\Engine\Build\BatchFiles\RunUAT.bat" -NoP4 BuildPlugin -Plugin="C:\UnrealPlugins\src\ace-unreal-renderer-stream-helper-plugin_v0.1.0\ACEUnrealRendererStreamHelper.uplugin" -Package="C:\UnrealPlugins\dist\ace-unreal-renderer-stream-helper-plugin_v0.1.0_UE5.5" -TargetPlatforms=Win64

# Linux example for compiling the plugin for Unreal 5.5
/home/ue4/UnrealEngine/Engine/Build/BatchFiles/RunUAT.sh -NoP4 BuildPlugin -Plugin="/tmp/UnrealPlugins/src/ace-unreal-renderer-stream-helper-plugin_v0.1.0/ACEUnrealRendererStreamHelper.uplugin" -Package="/tmp/UnrealPlugins/dist/ace-unreal-renderer-stream-helper-plugin_v0.1.0_UE5.5" -TargetPlatforms=Linux
Open your project.
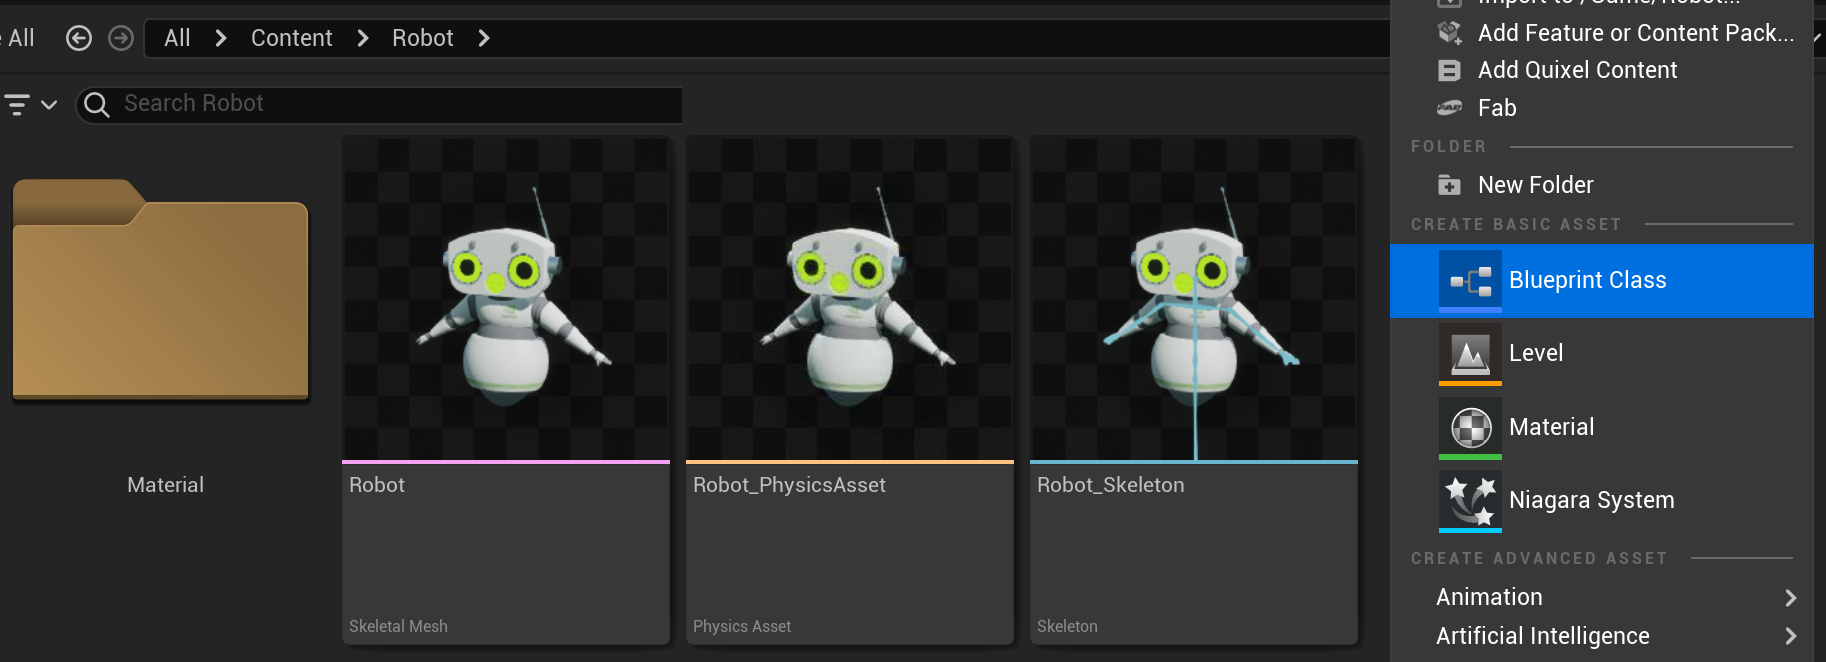
Import your rigged character from an FBX or GLB file. You should get a “Skeleton”, at least one “Skeletal Mesh” and possibly other physics, material and texture assets.

Create a Blueprint Actor for your avatar. In our case “BP_Robot” seemed fitting.
Open the new Blueprint and drag in your avatar’s Skeletal Mesh.
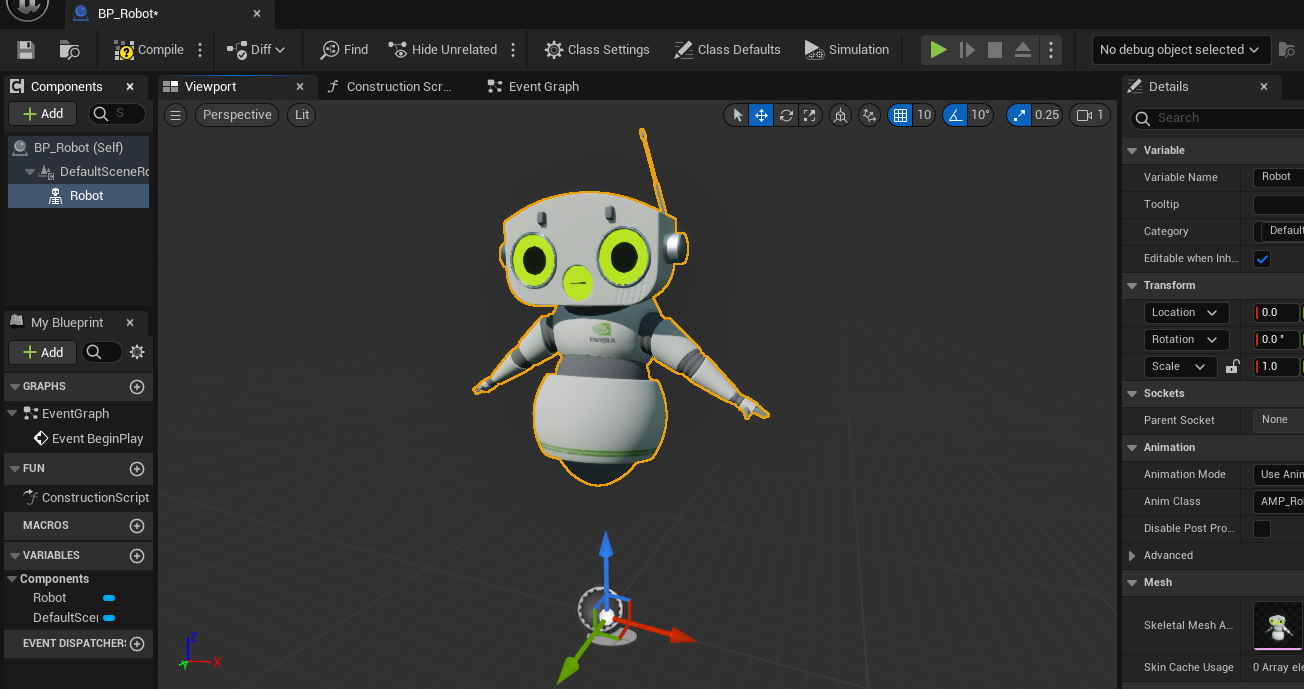
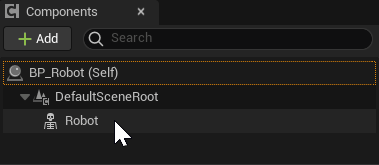
In the same Blueprint, add an ACEAudioCurveSource to your avatar. This is where the audio from the ACE pipeline will be heard from.
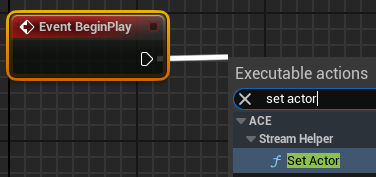
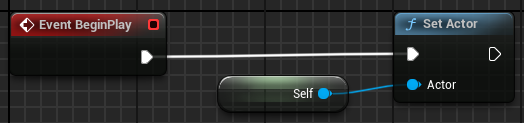
In the Event Graph of this Blueprint, drag out from the “Event BeginPlay” pip and create a “Set Actor” node from the ACE plugin. If you don’t see this option, double check that all plugins are installed correctly.
Drag out from the “Actor” pip of the “Set Actor” node and create a reference to “Self”. This small node network allows the ACE pipeline to find your avatar when the game starts.
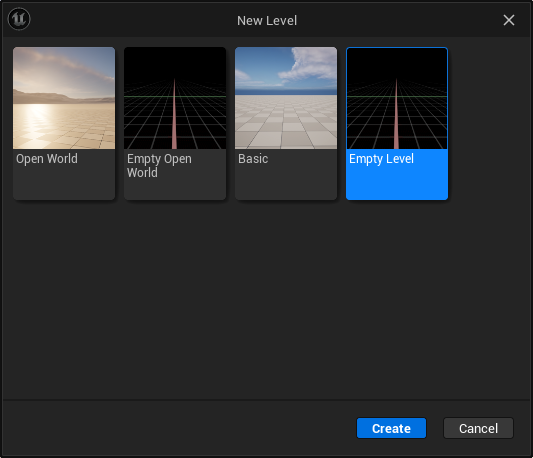
Create a new Empty Level.
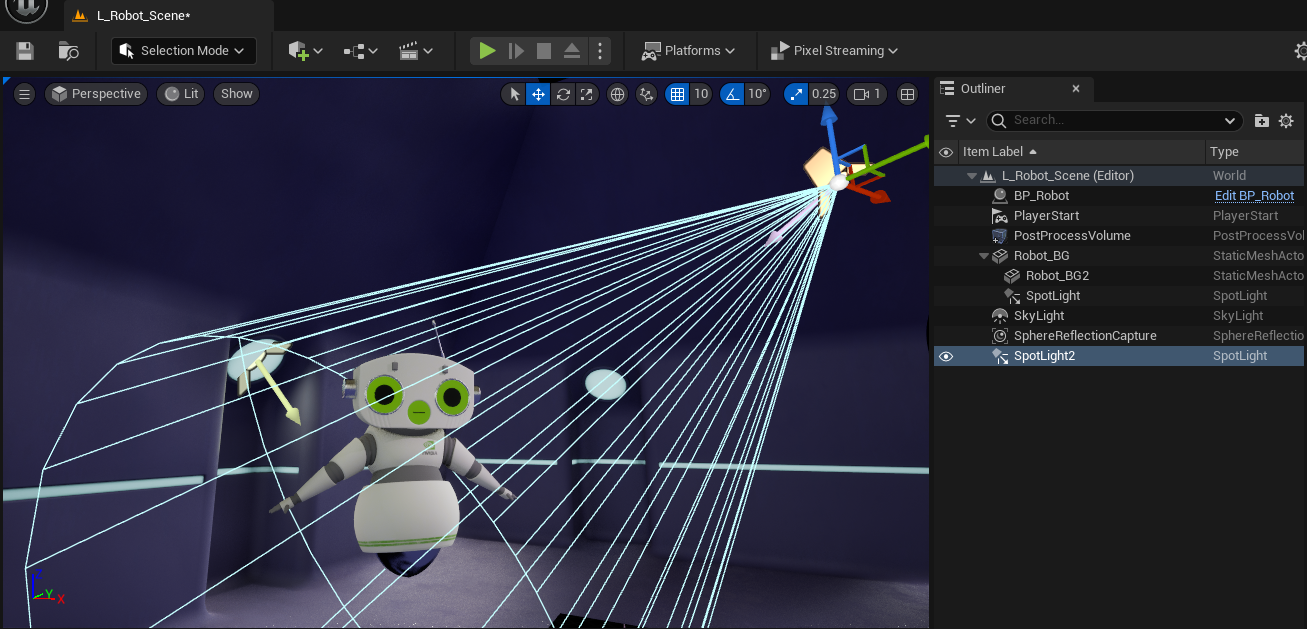
Add your avatar blueprint to it and set up the environment to your liking.
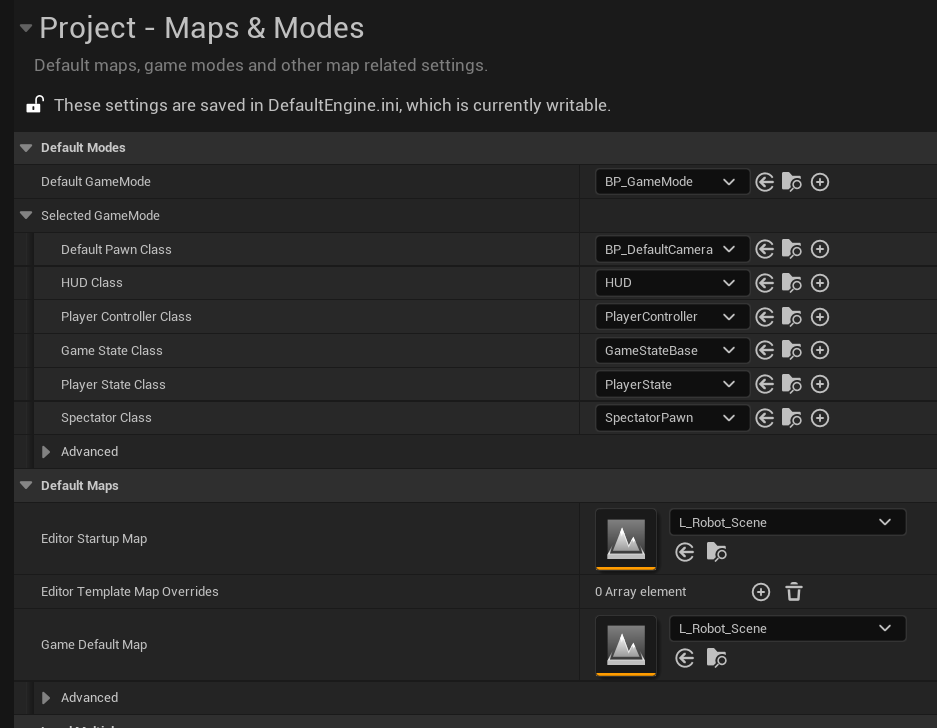
Set your new level as the default Level in the project settings. You can also assign custom Blueprints for the default Game Mode and Pawn in order to not use the standard first person character as an interface. We recommend a static camera instead.
Import your idle animation into the project. Uncheck “Import Mesh” and make sure to specify your avatar’s skeleton asset as the “Skeleton”.

Setting up Face Retargeting using a Pose Asset.
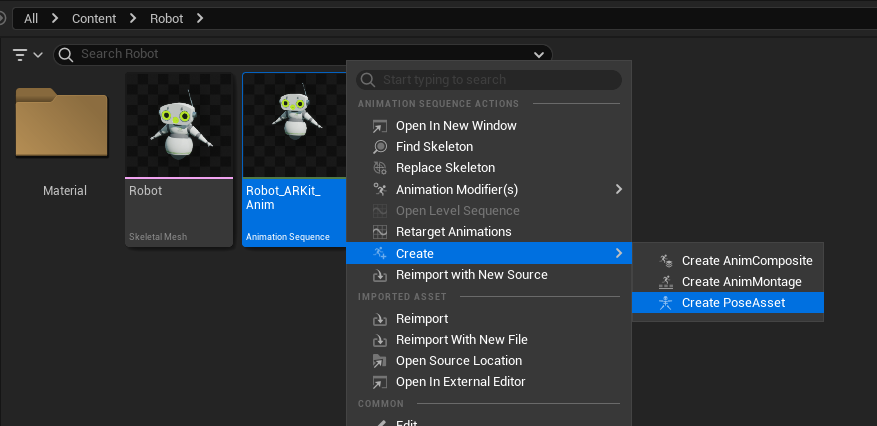
Import your ARKit face animation the same as you just imported the idle animation.
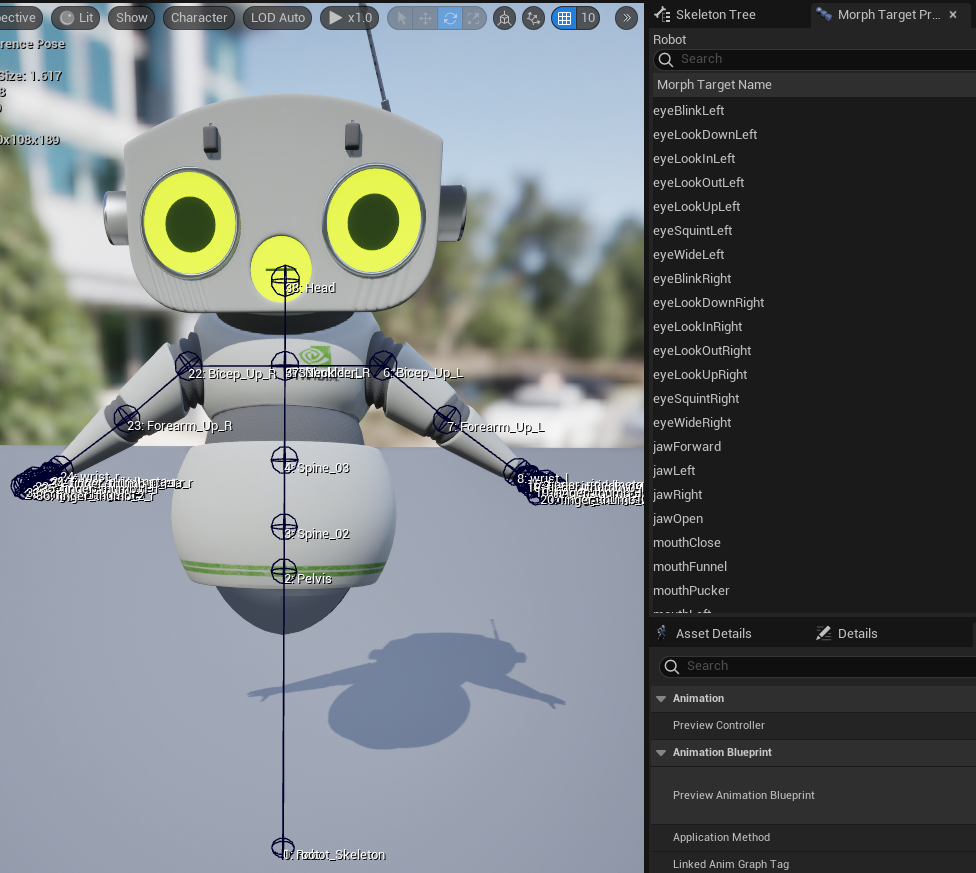
Based on this ARKit face animation, you can create a Pose Asset.
Open the generated Pose Asset. It should have 52 values, each corresponding to a frame of the animation. Name these values according to the list of face poses mentioned in the requirements. You can do this quickly by copying the list of names from this page and pasting them to the list of poses in Unreal:
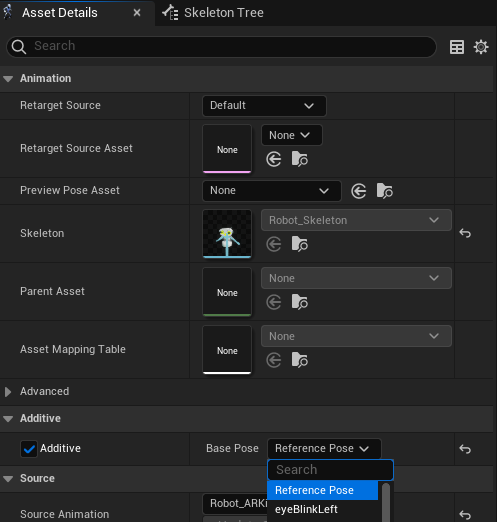
In the Asset Details of this Pose Asset, activate the “Additive” mode and make sure you are using the “Reference Pose”. Save the Pose Asset and close it.
Note
If you do not switch to Additive mode, you will run into a double transform issue later on.
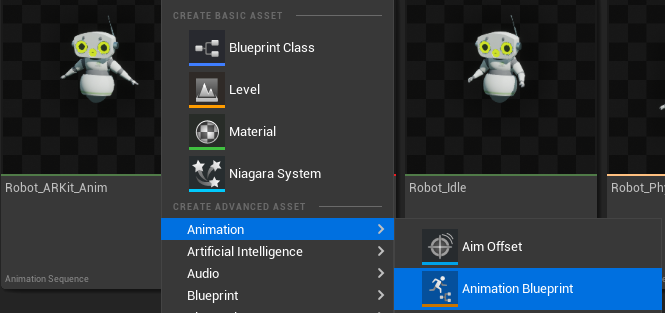
Create a new Animation Blueprint using your avatar’s skeleton and open it.
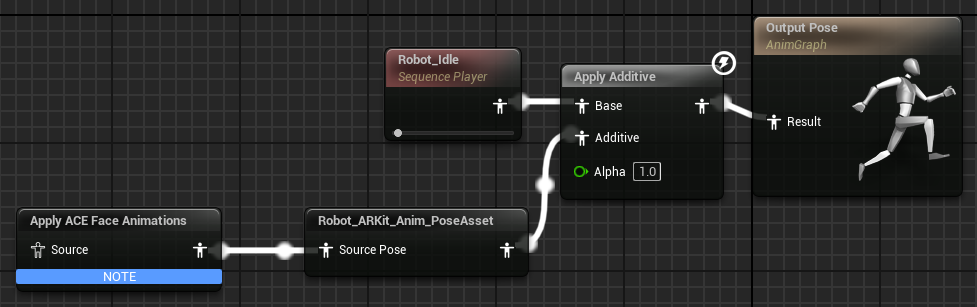
In the AnimGraph tab, create an “Apply ACE Face Animations” node and get a reference to the Pose Asset we created earlier. Connect the output of the Apply ACE Face Animations into the Pose Asset. Get a reference to the imported idle animation and create an “Apply Additive” node. Using your idle animation as the base and the output of the pose asset as the additive, combines the ACE face animations with your idle animation. Connect the output of the Apply Additive node into the Output Pose.
Hit compile and save the Animation Blueprint.
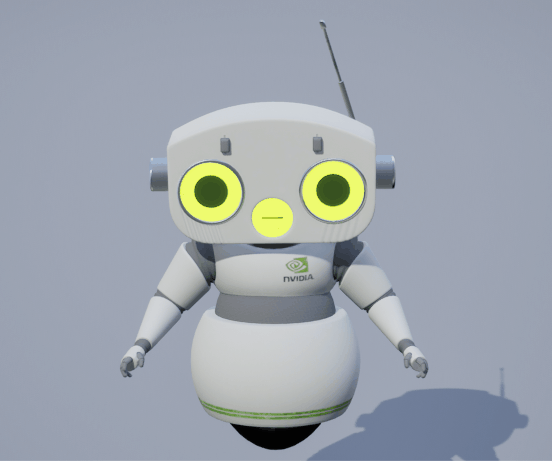
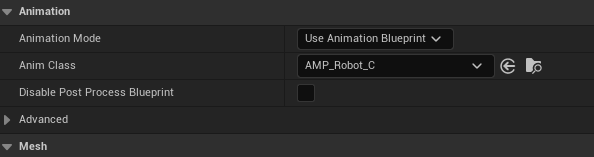
Open the blueprint of your avatar and assign the Animation Blueprint you just created to your Skeletal Mesh.
Now your character’s face can be controlled by the ACE animation pipeline.