Deploy GPU Operators in a disconnected or airgapped environment
Introduction
This page describes how to successfully deploy the NVIDIA GPU Operator on a Openshift Container Platform cluster in a disconnected or airgapped environment.
For an OpenShift Container Platform cluster that is installed on a disconnected cluster, the Operator Lifecycle Manager (OLM) by default cannot access the Red Hat-provided OperatorHub sources hosted on remote registries because those remote sources require full Internet connectivity.
However, as a cluster administrator you can still enable your cluster to use the OLM in a disconnected network if you have a workstation that has full Internet access. The workstation, which requires full Internet access to pull the remote OperatorHub content, is used to prepare local mirrors of the remote sources, and push the content to a mirror registry.
This workstation for the purposes of the remainder of this document is referred to as the jump host. The mirror registry for the purposes of this illustrated example is located on the jump host, with connectivity to both your internet and the disconnected cluster.
In a completely disconnected (airgapped) environment a second jump host is needed. In this environment you need to:
Fetch all the resources on a removable disk
Move the disk to a second jump host
Set up the services from the second jump host
This guide describes how to prune the Operator catalog to the subset that enables the installation of the NVIDIA GPU Operator in a disconnected environment.
The OpenShift Container Platform documentation provides generic guidance on using Operator Lifecycle Manager on restricted networks.
Prerequisites
A working OpenShift cluster up and running with a GPU worker node. See, OpenShift Container Platform installation for guidance on installing OpenShift Container Platform.
Note
If installing the NVIDIA GPU Operator on OpenShift Container Platform version <
4.9.9you need to carry out the steps highlighted as Optional below. For more information see broken driver toolkit.Access to the cluster as a user with the
cluster-adminrole.Access to a registry that supports Docker v2-2. A private registry must be configured on the jump host. This can be one of the following registries:
Create a private registry using
podmanand guidance on this can be found here and in the section Creating a private registry.If you have an entitlement to Red Hat Quay, see the documentation on deploying Red Hat Quay for proof-of-concept purposes or by using the Quay Operator. If you need additional assistance selecting and installing a registry, contact your sales representative or Red Hat support. For more information, see about the mirror registry.
Note
When creating a self-signed certificate and if you enable HTTPS for the local registry, ensure you have appended
-addext "subjectAltName=DNS:${JUMP_HOST}"to youropensslcommand, otherwise OpenShift Container Platform cannot pull images from the private registry.If you do not set a Subject Alternative Name, before running the
occommands in the subsequent sections export the environment variableGODEBUG=x509ignoreCN=0. If you do not set this variable, theoccommands will fail with the following error:$ x509: certificate relies on legacy Common Name field, use SANs or temporarily enable Common Name matching with ``GODEBUG=x509ignoreCN=0``.
Note
If you use HTTP, in Openshift Container Platform add
insecureRegistriestoimage.config.openshift.io/cluster. Guidance on that configuration is provided here.
On the jump host:
Optional: Install
yum-utils. This provides thereposyncscript and is only required if installing the NVIDIA GPU Operator on OpenShift Container Platform version4.8.19,4.8.21or4.9.8.
yum-utils is required for the package mirror while the remaining prerequisites (listed below) are required for the image mirroring.
Set up a basic HTTP Server
Image mirroring require a simple HTTP server, follow the guidance below to setup a basic web server:
Install Apache
httpd:$ yum install httpd -yStart the Apache web server for the first time:
$ systemctl restart httpdEnable the Apache web server to start automatically at system boot:
$ systemctl enable httpd
Open port 80 and 443 to allow web traffic to the Apache web server service, update the system firewall rules allowing inbound packets on HTTP and HTTPS using the commands below:
$ firewall-cmd --zone=public --permanent --add-service=http
$ firewall-cmd --zone=public --permanent --add-service=https
$ firewall-cmd --reload
Optional: Check the version of RHEL being used in the cluster
These steps only need to be carried out if installing the NVIDIA GPU Operator on OpenShift Container Platform version 4.8.19, 4.8.21 or 4.9.8.
Before mirroring the RPM packages check the version of RHEL being used in the cluster.
To determine the RHEL version running on the cluster use the OpenShift CLI and run the following:
$ oc debug $(oc get nodes -oname -lnode-role.kubernetes.io/worker | head -1) -- cat /host/etc/os-release | grep RHEL
Starting pod/openshift-worker-0openshiftpool2practiceredhatcom-debug ...
To use host binaries, run `chroot /host`
RHEL_VERSION="8.4"

Removing debug pod ...
This gives you the releasever to supply as a command line argument to reposync.
For guidance on logging in to the OpenShift CLI see, here.
Optional: Mirror the RPM packages
These steps only need to be carried out if installing the NVIDIA GPU Operator on OpenShift Container Platform version 4.8.19, 4.8.21 or 4.9.8.
Follow the guidance below to sync the required yum repositories:
Note
The size of the whole yum repository is huge, make sure there is enough space on your jump host. At least 50GB is required.
If you have access to the GPG public key, use the following command to manually import a key:
$ rpm --import /etc/pki/rpm-gpg/RPM-GPG-KEY-redhat-releaseCreate a directory to store the downloaded repos:
$ mkdir -p /opt/mirror-repos/List all available repositories enabled for the system:
$ subscription-manager repos --list-enabled+----------------------------------------------------------+ Available Repositories in /etc/yum.repos.d/redhat.repo +----------------------------------------------------------+ Repo ID: rhel-8-for-x86_64-appstream-rpms Repo Name: Red Hat Enterprise Linux 8 for x86_64 - AppStream (RPMs) Repo URL: https://cdn.redhat.com/content/dist/rhel8/$releasever/x86_64/appstream/os Enabled: 1 Repo ID: rhel-8-for-x86_64-baseos-rpms Repo Name: Red Hat Enterprise Linux 8 for x86_64 - BaseOS (RPMs) Repo URL: https://cdn.redhat.com/content/dist/rhel8/$releasever/x86_64/baseos/os Enabled: 1
This supplies you with the
repoidyou need in step 4 and 5.Run
reposyncto synchronize the BaseOS repos to the locally created directory:$ reposync --gpgcheck --repoid=rhel-8-for-x86_64-baseos-rpms \ --releasever=8.4 \ --download-path=/opt/mirror-repos/ \ --downloadcomps \ --download-metadata \ --nodocs
Run
reposyncto synchronize the AppStream repos to the locally created directory:$ reposync --gpgcheck --repoid=rhel-8-for-x86_64-appstream-rpms \ --releasever=8.4 \ --download-path=/opt/mirror-repos/ \ --downloadcomps \ --download-metadata \ --nodocs
Create a directory to host and serve the AppStream RPM packages:
mkdir -p /var/www/html/content/dist/rhel8/8/x86_64/appstream/Create a directory to host and serve the BaseOS RPM packages:
$ mkdir -p /var/www/html/content/dist/rhel8/8/x86_64/baseos/Create symbolic links between the downloaded repos and the document root directory on the jump host used to serve the RPMs.
$ ln -s /opt/mirror-repos/rhel-8-for-x86_64-baseos-rpms/ /var/www/html/content/dist/rhel8/8/x86_64/baseos/os$ ln -s /opt/mirror-repos/rhel-8-for-x86_64-appstream-rpms /var/www/html/content/dist/rhel8/8/x86_64/appstream/os
Creating a private registry
Create a private registry to host the mirrored content that you require for mirroring the Operator Catalog. The target registry must support Docker v2-2. For a cluster on a restricted network, this registry can be one that the cluster has network access to.
Note
Deploying a disconnected registry host based on the docker.io/library/registry:2 API for is not officially supported by Red Hat. You can create a mirror host based on the docker.io/library/registry:2 API with the following unsupported procedure.
Note
The following procedure creates a simple registry that stores data in the /opt/registry folder and runs in a podman container. You can use a different
registry solution, such as Red Hat Quay.
Configure a private registry on the the jump host, using the following steps:
Install the required packages:
$ yum -y install podman httpd httpd-toolsThe
podmanpackage provides the container package that you run the registry in. Thehttpd-toolspackage provides thehtpasswdutility, which you use to create users.Create folders for the registry:
$ mkdir -p /opt/registry/{auth,certs,data}
These folders are mounted inside the registry container.
Set the following environment variable:
$ export JUMP_HOST=<Your_jump_hostname>
Provide a certificate for the registry. If you do not have an existing, trusted certificate authority, you can generate a self-signed certificate:
$ cd /opt/registry/certs
$ openssl req -addext "subjectAltName=DNS:${JUMP_HOST}" -newkey rsa:4096 -nodes -sha256 -keyout domain.key -x509 -days 365 -out domain.crt
Note
OpenSSL version 1.1.1 or higher is required.
At the prompts, provide the required values for the certificate:
Field
Description
Country Name (2 letter code)
Specify the two-letter ISO country code for your location. See the ISO 3166 country codes standard.
State or Province Name (full name)
Enter the full name of your state or province.
Locality Name (eg, city)
Enter the name of your city.
Organization Name (eg, company)
Enter your company name.
Organizational Unit Name (eg, section)
Enter your department name.
Common Name (eg, your name or your server’s hostname)
Enter the hostname for the registry host. Ensure that your hostname is in DNS and that it resolves to the expected IP address.
Email Address
For more information, see the req description in the OpenSSL documentation.
Generate a
user nameand apasswordfor your registry that uses thebcrptformat:$ htpasswd -bBc /opt/registry/auth/htpasswd <user_name> <password>Replace
<user_name>and<password>with a user name and a password.Create the mirror-registry container to host your registry:
$ podman run --name mirror-registry -p $JUMP_HOST_PORT:5000 \
          -v /opt/registry/data:/var/lib/registry:z \
          -v /opt/registry/auth:/auth:z \
          -e "REGISTRY_AUTH=htpasswd" \
          -e "REGISTRY_AUTH_HTPASSWD_REALM=Registry Realm" \
          -e REGISTRY_AUTH_HTPASSWD_PATH=/auth/htpasswd \
          -v /opt/registry/certs:/certs:z \
          -e REGISTRY_HTTP_TLS_CERTIFICATE=/certs/domain.crt \
          -e REGISTRY_HTTP_TLS_KEY=/certs/domain.key \
          -e REGISTRY_COMPATIBILITY_SCHEMA1_ENABLED=true \
          -d docker.io/library/registry:2
The details of the options are:
--namemirror-registry gives the container the namemirror-registry.-p $JUMP_HOST_PORT:5000for example-p 5000:5000exposes port5000in the container as port5000on the host.-v
/opt/registry/data:/var/lib/registry:zmounts/opt/registry/dataon the host as/var/lib/registryin the container with the correct SELinux context-v
/opt/registry/auth:/auth:zmounts/opt/registry/authon the host as`/authin the container with the correct SELinux context.-v
/opt/registry/certs:/certs:zmounts/opt/registry/certson the hosts as/certsin the container with the correct SELinux context.-e
REGISTRY_AUTH=htpasswduses anbcryptencryptedhtpasswdfile for authentication. File location set by container’sREGISTRY_AUTH_HTPASSWD_PATHenvironment variable.-e
REGISTRY_AUTH_HTPASSWD_REALM=Registry Realmspecifies the realm to use forhtpasswd.-e
REGISTRY_AUTH_HTPASSWD_PATH=/auth/htpasswduses the bcrypt-encrypted/auth/htpasswdfile in the container.-e
REGISTRY_HTTP_TLS_CERTIFICATE=/certs/domain.crtsets path to certificate file.-e
REGISTRY_HTTP_TLS_KEY=/certs/domain.keysets path to private key.-e
REGISTRY_COMPATIBILITY_SCHEMA1_ENABLED=trueprovides backward compatibility for schema1 manifests.-d means
--detachwhich runs the pod in the background.docker.io/library/registry:latestis a registry application that allows for the storage and distribution of images.
Example:
$ podman run --name mirror-registry -p 5000:5000 \
   -v /opt/registry/data:/var/lib/registry:z \
   -v /opt/registry/auth:/auth:z \
   -e "REGISTRY_AUTH=htpasswd" \
   -e "REGISTRY_AUTH_HTPASSWD_REALM=Registry Realm" \
   -e REGISTRY_AUTH_HTPASSWD_PATH=/auth/htpasswd \
   -v /opt/registry/certs:/certs:z \
   -e REGISTRY_HTTP_TLS_CERTIFICATE=/certs/domain.crt \
   -e REGISTRY_HTTP_TLS_KEY=/certs/domain.key \
   -e REGISTRY_COMPATIBILITY_SCHEMA1_ENABLED=true \
   -d docker.io/library/registry:2
Open the required ports for your registry:
$ firewall-cmd --add-port=$JUMP_HOST_PORT/tcp --zone=internal --permanent
$ firewall-cmd --add-port=$JUMP_HOST_PORT/tcp --zone=public --permanent
$ firewall-cmd --reloadNote
For
$JUMP_HOST_PORT, specify the port that your mirror registry uses to serve content shown in the examples below as 5000.
Example:
$ firewall-cmd --add-port=5000/tcp --zone=internal --permanent$ firewall-cmd --add-port=5000/tcp --zone=public --permanent$ firewall-cmd --reload
Add the self-signed certificate to your list of trusted certificates:
$ cp /opt/registry/certs/domain.crt /etc/pki/ca-trust/source/anchors/Trust your certificate to log in to your registry during the mirror process:
$ update-ca-trustVerify the certificate.
$ openssl verify /etc/pki/ca-trust/source/anchors/domain.crtConfirm that the registry is available:
$ curl -u <user_name>:<password> -k https://$JUMP_HOST:JUMP_HOST_PORT/v2/_catalog
For
<user_name>and<password>, specify the user name and password for your registry. Theexport JUMP_HOST=<Your_jump_hostname>ensures the correct$JUMP_HOSTis set. ForJUMP_HOST_PORT, specify the port that your mirror registry uses to serve content.Note
If the command output displays an empty repository, your registry is available.
Authenticate the mirror registry
For authenticating your mirror registry, you need to configure additional trust stores for image registry access in your Openshift Container Platform cluster. You can create a ConfigMap in the openshift-config namespace and use its name in AdditionalTrustedCA in the image.config.openshift.io resource. This provides additional CAs that should be trusted when contacting external registries.
Set the following environment variable:
$ export JUMP_HOST=<Your_jump_hostname>
Create a ConfigMap in the
openshift-confignamespace:$ oc create configmap registry-config \ --from-file=${JUMP_HOST}..5000=/etc/pki/ca-trust/source/anchors/domain.crt \ -n openshift-config
Update
AdditionalTrustedCAin theimage.config.openshift.ioresource:$ oc patch image.config.openshift.io/cluster \ --patch '{"spec":{"additionalTrustedCA":{"name":"registry-config"}}}' --type=merge \ --type=merge
Configuring credentials that allow images to be mirrored
Create a container image registry credentials file that allows mirroring images from Red Hat to your mirror registry.
Warning
Do not use this image registry credentials file as the pull secret when you install a cluster. If you provide this file when you install cluster, all of the machines in the cluster will have write access to your mirror registry.
Warning
This process requires that you have write access to a container image registry on the mirror registry and adds the credentials to a registry pull secret.
Download your pull secret from the Pull Secret page on the Red Hat OpenShift Cluster Manager site.
Generate the base64-encoded user name and password or token for your mirror registry:
$ echo -n '<user_name>:<password>' | base64 -w0
BGVtbYk3ZHAtqXs=Note
For the
<user_name>and<password>, specify the user name and password that you configured for your registry.Make a copy of your pull secret in JSON format:
$ cat <path_to_pull_secret>/pull-secret.text | jq . > <path>/<pull-secret-file>
Note
Specify the path to the folder to store the pull secret in and a name for the JSON file that you create.
The contents of the file resemble the following example:
{
   "auths": {
     "cloud.openshift.com": {
       "auth": "b3BlbnNo...",
       "email": "you@example.com"
    },
    "quay.io": {
      "auth": "b3BlbnNo...",
      "email": "you@example.com"
    },
    "registry.connect.redhat.com": {
      "auth": "NTE3Njg5Nj...",
      "email": "you@example.com"
    },
    "registry.redhat.io": {
      "auth": "NTE3Njg5Nj...",
      "email": "you@example.com"
    }
   }
}
Edit the new file and add a section that describes your registry to it:
"auths": {
  "<mirror_registry>:5000": {
    "auth": "<credentials>",
    "email": "you@example.com"
}
Note
For <mirror_registry>, specify the registry domain name, and optionally the port, that your mirror registry uses to serve content. Following the logic of this example with the registry being setup on the hump host this is
jump_hostnameorjump_hostname:5000. For <credentials>, specify the base64-encoded user name and password for the mirror registry.The file resembles the following example:
{
  "auths": {
    "jump_hostname:5000": {
      "auth": "BGVtbYk3ZHAtqXs=",
      "email": "you@example.com"
    },
    "cloud.openshift.com": {
      "auth": "b3BlbnNo...",
      "email": "you@example.com"
    },
    "quay.io": {
      "auth": "b3BlbnNo...",
      "email": "you@example.com"
    },
    "registry.connect.redhat.com": {
      "auth": "NTE3Njg5Nj...",
      "email": "you@example.com"
    },
    "registry.redhat.io": {
      "auth": "NTE3Njg5Nj...",
      "email": "you@example.com"
    }
  }
}
Update the global pull secret for your cluster by either replacing the current pull secret or appending a new pull secret. For more information and generic instructions see, here.
Warning
Cluster resources must adjust to the new pull secret, which can temporarily limit the usability of the cluster.
Append a new pull secret to the existing pull secret by completing the following steps:
Enter the following command to download the pull secret:
$ oc get secret/pull-secret -n openshift-config --template='{{index .data ".dockerconfigjson" | base64decode}}' >/tmp/pull-secret.json
Enter the following command to add the new pull secret:
$ oc registry login --registry="${JUMP_HOST}:5000" --auth-basic="<username>:<password>" --to=/tmp/pull-secret.json
Enter the following command to update the global pull secret for your cluster:
$ oc set data secret/pull-secret -n openshift-config --from-file=.dockerconfigjson=/tmp/pull-secret.json
Mirror the Operator catalogs on a disconnected cluster
You can mirror all operators of a certain index image into your disconnected cluster, but the image may be huge, so you can prune an index image to keep only a few of the operators you want to use.
This guide demonstrates how to mirror specific Operators namely the Node Feature Discovery and the NVIDIA GPU Operator. For more general information, see Using Operator Lifecycle Manager on restricted networks.
Disabling the default OperatorHub sources
Operator catalogs that source content provided by Red Hat and community projects are configured for OperatorHub by default during an OpenShift Container Platform installation. In a restricted network environment, you must disable the default catalogs as a cluster administrator. You can then configure OperatorHub to use local catalog sources.
Disable the sources for the default catalogs by adding
disableAllDefaultSources: trueto the OperatorHub object:$ oc patch OperatorHub cluster --type json \ -p '[{"op": "add", "path": "/spec/disableAllDefaultSources", "value": true}]'
Pruning an index image
An index image, based on the Operator bundle format, is a containerized snapshot of an Operator catalog. You can prune an index of all but a specified list of packages, which creates a copy of the source index containing only the Operators that you want.
When configuring Operator Lifecycle Manager (OLM) to use mirrored content on restricted network OpenShift Container Platform clusters, use this pruning method to only mirror the subset of Operators from the default catalogs required to successfully install the NVIDIA GPU Operator.
Determine the Operators of interest
The four primary official indexes the OpenShift Container Platform 4.9 uses are:
registry.redhat.io/redhat/certified-operator-index:v4.9
registry.redhat.io/redhat/redhat-operator-index:v4.9
registry.redhat.io/redhat/community-operator-index:v4.9
registry.redhat.io/redhat/redhat-marketplace-index:v4.9
The four primary official indexes the OpenShift Container Platform 4.10 uses are:
registry.redhat.io/redhat/certified-operator-index:v4.10
registry.redhat.io/redhat/redhat-operator-index:v4.10
registry.redhat.io/redhat/community-operator-index:v4.10
registry.redhat.io/redhat/redhat-marketplace-index:v4.10
The four primary official indexes the OpenShift Container Platform 4.11 uses are:
registry.redhat.io/redhat/certified-operator-index:v4.11
registry.redhat.io/redhat/redhat-operator-index:v4.11
registry.redhat.io/redhat/community-operator-index:v4.11
registry.redhat.io/redhat/redhat-marketplace-index:v4.11Note
The procedure refers to OpenShift Container Platform 4.9. For 4.10 replace references to 4.9 with 4.10 and similarly for 4.11.
This table provides the relevant information extracted from the steps below for the Operators of interest to this procedure.
CatalogSource Name |
Operator Name |
Index Image Name |
|---|---|---|
certified-operators |
gpu-operator-certified |
registry.redhat.io/redhat/certified-operator-index:v4.9 |
redhat-operators |
nfd |
registry.redhat.io/redhat/redhat-operator-index:v4.9 |
How these are determined is illustrated below in steps 2,3 and 4.
Authenticate with
registry.redhat.ioand your target registry as follows:$ export REGISTRY_AUTH_FILE=<path_to_pull_secret>/pull-secret.json
Run the source index image that you want to prune in a container. For example:
$ podman run -p50051:50051 \
   -it registry.redhat.io/redhat/redhat-operator-index:v4.9
Trying to pull registry.redhat.io/redhat/redhat-operator-index:v4.9...
Getting image source signatures
Copying blob ae8a0c23f5b1 done
...
INFO[0000] serving registry                              database=/database/index.db port=50051
In a separate terminal session, use the
grpcurlcommand to get a list of the packages provided by the index:$ grpcurl -plaintext localhost:50051 api.Registry/ListPackages > packages.outInspect the
packages.outfile and identify which package names from this list you want to keep in your pruned index. For example:{ "name": "advanced-cluster-management" } ... { "name": "jaeger-product" } ... { { "name": "quay-operator" }
Pruning index images
Use this pruning method to mirror only the subset of Operators required.
Authenticate with
registry.redhat.ioand your target registry as follows:$ export REGISTRY_AUTH_FILE=<path_to_pull_secret>/pull-secret.json
Set the following environment variable:
$ export JUMP_HOST=<Your_jump_hostname>
For the NVIDIA GPU Operator run the following command to prune the source index of all but the specified packages:
$ opm index prune -f registry.redhat.io/redhat/certified-operator-index:v4.9 -p gpu-operator-certified -t ${JUMP_HOST}:5000/catalog/certified-operator-index:v4.9
For the Node Feature Discovery Operator run the following command to prune the source index of all but the specified packages:
$ opm index prune -f registry.redhat.io/redhat/redhat-operator-index:v4.9 -p nfd -t ${JUMP_HOST}:5000/catalog/redhat-operator-index:v4.9
Run the following command to push the NVIDIA GPU Operator index image to your target registry:
$ podman push ${JUMP_HOST}:5000/catalog/certified-operator-index:v4.9
Run the following command to push the Node Feature Discovery Operator index images to your target registry:
$ podman push ${JUMP_HOST}:5000/catalog/redhat-operator-index:v4.9
Mirror Node Feature Discovery and the NVIDIA GPU Operator Catalog
You can mirror the Operator content of a Red Hat-provided catalog, or a custom catalog, into a container image registry using the oc adm catalog mirror command. The target registry must support Docker v2-2. For a cluster on a restricted network, this registry can be one that the cluster has network access to, such as a mirror registry created during a restricted network cluster installation.
The oc adm catalog mirror command also automatically mirrors the index image specified during the mirroring process, whether it be a Red Hat-provided index image or your own custom-built index image, to the target registry. You can then use the mirrored index image to create a catalog source that allows Operator Lifecycle Manager (OLM) to load the mirrored catalog onto your OpenShift Container Platform cluster.
Set the following environment variable:
$ export REGISTRY_AUTH_FILE=<path_to_pull_secret>/pull-secret.json
$ export JUMP_HOST=<Your_jump_hostname>
Note
Specify the fully qualified domain name (FQDN) for <Your_jump_hostname>.
Run the following command to mirror the GPU content:
Note
The assumption here is your mirror registry is on the same network.
$ oc adm catalog mirror \
   --insecure=true \
   --index-filter-by-os='linux/amd64' \
   -a ${REGISTRY_AUTH_FILE} \
   ${JUMP_HOST}:5000/catalog/certified-operator-index:v4.9 ${JUMP_HOST}:5000/operators
Note
The namespace on your mirror registry used to store the mirrored Operator content is called operators above.
Run the following command to mirror the Node Feature Discovery Operator:
Note
The assumption here is your mirror registry is on the same network.
$ oc adm catalog mirror \
   --insecure=true \
   --index-filter-by-os='linux/amd64' \
   -a ${REGISTRY_AUTH_FILE} \
   ${JUMP_HOST}:5000/catalog/redhat-operator-index:v4.9 ${JUMP_HOST}:5000/operators
After mirroring the content to your registry, inspect the manifests directory that is generated in your current directory.
The manifest directory format is:
manifests-<index_image_name>-<random_number>
Example:
manifests-certified-operator-index-1634633799manifests-redhat-operator-index-1634633663Repeat the steps below for the different index images.
On a host with access to the disconnected cluster, create the ImageContentSourcePolicy (ICSP) object by running the following command to specify the
imageContentSourcePolicy.yamlfile in your manifests directory:$ oc create -f <path/to/manifests/dir>/imageContentSourcePolicy.yamlwhere
<path/to/manifests/dir>is the path to the manifests directory for your mirrored content.Note
Applying the ICSP causes all worker nodes in the cluster to restart. You must wait for this reboot process to finish cycling through each of your worker nodes before proceeding.
Customize the
mapping.txtfile with theREGISTRY_AUTH_FILE.$ oc image mirror -f <path/to/manifests/dir>/mapping.txt -a ${REGISTRY_AUTH_FILE} --insecure
Creating a catalog from an index image
You can create an Operator catalog from an index image and apply it to an OpenShift Container Platform cluster for use with Operator Lifecycle Manager (OLM).
Create a CatalogSource object that references your Node Feature Discovery Operator index images. Previously you used the oc adm catalog mirror command to mirror your catalog to a target registry, so you can use the generated catalogSource.yaml file in manifests-redhat-operator-index-<random_number> as a starting point.
Modify the following to your specifications and save it as a
catalogSource_redhat_operator.yamlfile:apiVersion: operators.coreos.com/v1alpha1 kind: CatalogSource metadata: name: redhat-operator-index namespace: openshift-marketplace spec: image: ${JUMP_HOST}:5000/operators/catalog-redhat-operator-index:v4.9 sourceType: grpc displayName: My Operator Catalog publisher: <publisher_name> updateStrategy: registryPoll: interval: 30m
Use the file to create the
CatalogSourceobject:$ oc apply -f catalogSource_redhat_operator.yaml
Create a CatalogSource object that references your NVIDIA GPU Operator index image. Previously you used the oc adm catalog mirror command to mirror your catalog to a target registry, so you can use the generated catalogSource.yaml file in manifests-certified-operator-index-<random_number> as a starting point.
Modify the following to your specifications and save it as a
catalogSource_certified_operator.yamlfile:apiVersion: operators.coreos.com/v1alpha1 kind: CatalogSource metadata: name: certified-operator-index namespace: openshift-marketplace spec: image: ${JUMP_HOST}:5000/operators/catalog-certified-operator-index:v4.9 sourceType: grpc displayName: My Operator Catalog publisher: <publisher_name> updateStrategy: registryPoll: interval: 30m
Use the file to create the
CatalogSourceobject:$ oc apply -f catalogSource_certified_operator.yaml
Verify the mirrored catalog source
Verify the following resources are successfully created.
Check the pods:
$ oc get pods -n openshift-marketplaceNAME READY STATUS RESTARTS AGE certified-operator-index-bq7bt 0/1 Running 0 17h marketplace-operator-d65d479cc-7zblj 1/1 Running 1 (23d ago) 23d redhat-operator-index-725tv 0/1 Running 0 17h
Check the package manifest:
$ oc get packagemanifest -n openshift-marketplaceNAME DISPLAY TYPE PUBLISHER AGE certified-operator-index Openshift Telco Docs grpc Openshift Docs 20h redhat-operator-index Openshift Telco Docs grpc Openshift Docs 20h
Check the catalogsource:
$ oc get catalogsource -n openshift-marketplace$ oc get pods -n openshift-marketplaceLog in to the OpenShift Container Platform web console and click Operators → OperatorHub.
You can find the mirrored operator after you login to the OpenShift Container Platform console. You can get started deploying operators in your disconnected cluster now!
Install the Node Feature Discovery Operator
Follow the guidance here to install the Node Feature Discovery (NFD) Operator. If you are installing on any Openshift Container Platform version other than 4.8.19, 4.8.21 or 4.9.8 proceed to Install the NVIDIA GPU Operator.
Optional: Configure repoConfig using Local Yum Repository
These steps only need to be carried out if installing the NVIDIA GPU Operator on OpenShift Container Platform version 4.8.19, 4.8.21 or 4.9.8.
Carry on the following steps on the jump host when it is connected to the cluster.
Create a Local-Base.repo as below:
$ export JUMP_HOST=<Your_jump_hostname>
$ cat <<EOF >Local-Base.repo
[rhel-8-for-x86_64-baseos-rpms]
name=Red Hat Enterprise Linux 8 for  - BaseOS from RHUI (RPMs)
baseurl= http://${JUMP_HOST}:8080/content/dist/rhel8/8/x86_64/baseos/os
gpgcheck=1
gpgkey=file:/etc/pki/rpm-gpg/RPM-GPG-KEY-CentOS-6
protect=1
priority=1
enabled=1

[rhel-8-for-x86_64-appstream-rpms]
name=Red Hat Enterprise Linux 8 for  - AppStream from RHUI (RPMs)
baseurl= http://${JUMP_HOST}:8080/content/dist/rhel8/8/x86_64/appstream/os
enabled=1
gpgcheck=0
gpgkey=file:///etc/pki/rpm-gpg/RPM-GPG-KEY-redhat-release
protect=1
priority=1
EOF
Optional: Installing the NVIDIA GPU Operator on OpenShift version 4.8.19, 4.8.21, 4.9.8
These steps only need to be carried out if installing the NVIDIA GPU Operator on OpenShift Container Platform version 4.8.19, 4.8.21 or 4.9.8.
With the Node Feature Discovery Operator installed you can continue with the final step and install the NVIDIA GPU Operator.
In the OpenShift Container Platform web console from the side menu, select Operators > OperatorHub, then search for the NVIDIA GPU Operator. For additional information see the Red Hat OpenShift Container Platform documentation.
Select the NVIDIA GPU Operator, click Install. In the subsequent screen click Install.
Note
Here, you can select the namespace where you want to deploy the GPU Operator. The suggested namespace to use is the
nvidia-gpu-operator. You can choose any existing namespace or create a new namespace under Select a Namespace.If you install in any other namespace other than
nvidia-gpu-operator, the GPU Operator will not automatically enable namespace monitoring, and metrics and alerts will not be collected by Prometheus. If only trusted operators are installed in this namespace, you can manually enable namespace monitoring with this command:$ oc label ns/$NAMESPACE_NAME openshift.io/cluster-monitoring=true
Back in the Installed Operators menu option select the NVIDIA GPU Operator and the ClusterPolicy tab, then click Create ClusterPolicy. The platform assigns the default name gpu-cluster-policy.
Edit the
Config Map Namefield entering the valueyum-repos-d.Edit the
Destination Dirfield entering the value/etc/yum.repos.d.Click Create.
At this point, the GPU Operator proceeds and installs all the required components to set up the NVIDIA GPUs in the OpenShift 4 cluster. This may take a while so be patient and wait at least 10-20 minutes before digging deeper into any form of troubleshooting.
The status of the newly deployed ClusterPolicy gpu-cluster-policy for the NVIDIA GPU Operator changes to
State:readyonce the installation succeeded.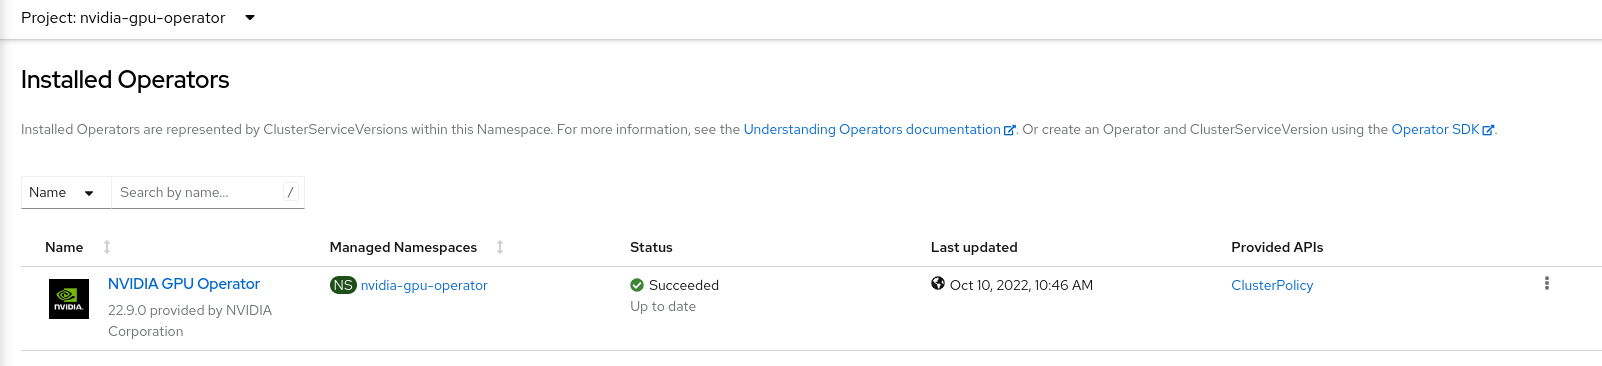
You can now proceed to install and verify the NVIDIA GPU Operator.
Install the NVIDIA GPU Operator
You can now proceed to install and verify the NVIDIA GPU Operator.