Distributed training with MPI
MPI(Message Passing Interface) is a standard for parallel computing. It is a message passing library that allows for the communication and coordination of processes in a distributed environment.
Lepton supports MPI for distributed training. Here is an example for running a distributed MPI job with 2 workers on Lepton.
Prepare the Python script for distributed training
As an example, this script implements distributed training of a convolutional neural network (CNN) on the MNIST dataset using PyTorch's DistributedDataParallel (DDP) to leverage multiple GPUs in parallel.
import torch
import torch.nn as nn
import torch.optim as optim
import torch.nn.functional as F
import torch.distributed as dist
import os
from torchvision import transforms
from torch.nn.parallel import DistributedDataParallel as DDP
from torch.utils.data import DataLoader, DistributedSampler
from datasets import load_dataset
class MNISTModel(nn.Module):
def __init__(self):
super(MNISTModel, self).__init__()
self.conv1 = nn.Conv2d(1, 32, 3, 1)
self.conv2 = nn.Conv2d(32, 64, 3, 1)
self.dropout1 = nn.Dropout(0.25)
self.dropout2 = nn.Dropout(0.5)
self.fc1 = nn.Linear(9216, 128)
self.fc2 = nn.Linear(128, 10)
def forward(self, x):
x = self.conv1(x)
x = F.relu(x)
x = self.conv2(x)
x = F.relu(x)
x = F.max_pool2d(x, 2)
x = self.dropout1(x)
x = torch.flatten(x, 1)
x = self.fc1(x)
x = F.relu(x)
x = self.dropout2(x)
x = self.fc2(x)
return F.log_softmax(x, dim=1)
def train():
master_addr = os.environ.get("MASTER_ADDR", "localhost")
master_port = os.environ.get("MASTER_PORT", "29500")
world_size = int(os.environ["OMPI_COMM_WORLD_SIZE"])
rank = int(os.environ["OMPI_COMM_WORLD_RANK"])
local_rank = rank % torch.cuda.device_count()
# Initialize process group
dist.init_process_group(
backend="nccl",
init_method=f"tcp://{master_addr}:{master_port}",
world_size=world_size,
rank=rank
)
# Set device
torch.cuda.set_device(local_rank)
device = torch.device("cuda", local_rank)
print(f"Running on rank {rank} (local_rank: {local_rank})")
def transform(example):
imgs = [transforms.ToTensor()(img) for img in example["image"]]
imgs = [transforms.Normalize((0.1307,), (0.3081,))(img) for img in imgs]
example["image"] = torch.stack(imgs)
example["label"] = torch.tensor(example["label"])
return example
dataset = load_dataset("mnist", split="train")
dataset = dataset.with_transform(transform)
sampler = DistributedSampler(dataset, num_replicas=world_size, rank=rank)
train_loader = DataLoader(dataset, batch_size=64, sampler=sampler)
model = MNISTModel().to(device)
model = DDP(model, device_ids=[local_rank])
optimizer = optim.Adam(model.parameters(), lr=0.001)
model.train()
for epoch in range(1, 11):
sampler.set_epoch(epoch)
for batch_idx, batch_data in enumerate(train_loader):
data, target = batch_data["image"].to(device), batch_data["label"].to(device)
optimizer.zero_grad()
output = model(data)
loss = F.nll_loss(output, target)
loss.backward()
optimizer.step()
dist.all_reduce(loss, op=dist.ReduceOp.AVG)
if rank == 0 and batch_idx % 10 == 0:
print(f"Train Epoch: {epoch} [{batch_idx * len(data)}/{len(train_loader.dataset)} ({100. * batch_idx / len(train_loader):.0f}%)]\tLoss: {loss.item():.6f}")
if rank == 0:
torch.save(model.module.state_dict(), "mnist_model.pth")
print("Model saved as mnist_model.pth")
dist.barrier()
dist.destroy_process_group()
if __name__ == "__main__":
train()
The file has been saved at the Github Repo here.
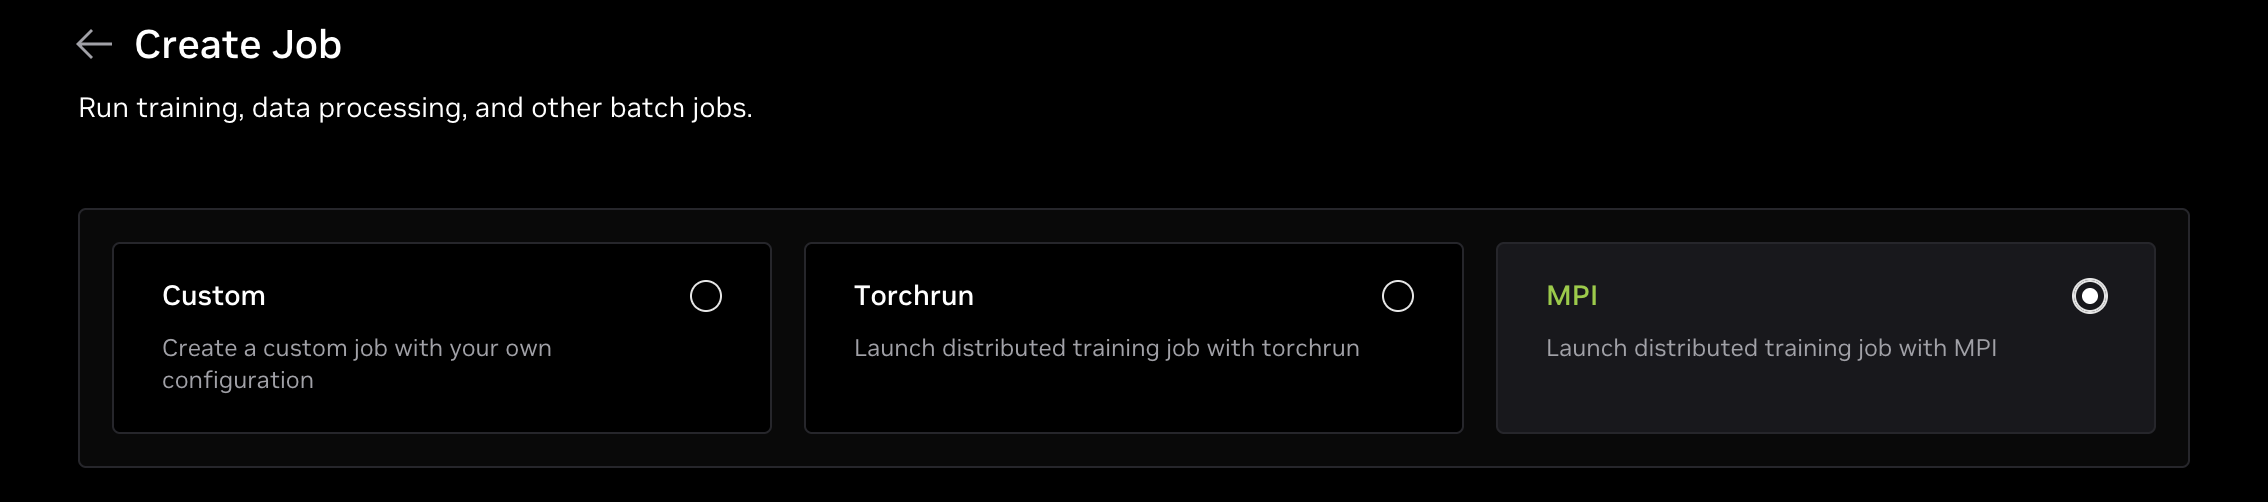
Create Job through Dashboard
Head over to the Batch Jobs page, and follow the steps below to create a job.
Set up the job
Resource
In the resource section, first, you can select which node group do you want to use.
Select the resource type you want to use, for example, gpu.8xh100-sxm
, and set the number of workers to the desired number.
In this guide, we want to use 2 replicas, so we set the number of workers to 2.
Container
In the container section, use the default image (default/lepton:photon-py3.11-runner-0.21.0) and paste the following command as the start command to run the job:
############ auto generated by lepton ############
set -euo pipefail
trap -- 's=$?; echo >&2 "$0: Error on line "$LINENO": $BASH_COMMAND"; exit $s' ERR
export DEBIAN_FRONTEND=noninteractive
export DEBIAN_PRIORITY=critical
apt-get -y -qq update
apt-get install -y -qq libibverbs-dev infiniband-diags openmpi-bin openmpi-doc libopenmpi-dev net-tools openssh-server openssh-client git
# Setup SSH
cat << EOF > /etc/ssh/sshd_config.d/lep.conf
PermitRootLogin yes
PubkeyAuthentication yes
Port 2222
StrictModes no
EOF
cat << EOF > /etc/ssh/ssh_config.d/lep.conf
Port 2222
StrictHostKeyChecking no
UserKnownHostsFile /dev/null
EOF
service ssh restart
# Setup the environment variables
export MASTER_ADDR=${LEPTON_JOB_WORKER_PREFIX}-0.${LEPTON_SUBDOMAIN}
export NNODES=${LEPTON_JOB_TOTAL_WORKERS}
export NODE_RANK=${LEPTON_JOB_WORKER_INDEX}
export NGPUS=${LEPTON_RESOURCE_ACCELERATOR_NUM}
HOSTFILE=/tmp/hostfile.txt
rm -f $HOSTFILE
# Make sure all workers are ready
for i in $(seq 0 $((LEPTON_JOB_TOTAL_WORKERS - 1))); do
NODE_NAME=${LEPTON_JOB_WORKER_PREFIX}-$i.${LEPTON_SUBDOMAIN}
NODE_IP=""
while [ -z "$NODE_IP" ]; do
NODE_IP=$(getent hosts -- $NODE_NAME | awk '{ print $1 }' || echo "")
if [ -z "$NODE_IP" ]; then
sleep 5
fi
done
WAIT_RETRY=60
while ! ssh $NODE_IP -- echo ok 2>&1; do
echo "waiting for server ping ..."
WAIT_RETRY=$((WAIT_RETRY-1))
if [ $WAIT_RETRY -eq 0 ]; then
echo "timed out waiting host $NODE_IP to be ready"
exit 1
fi
sleep 5
echo "retry ssh to $NODE_IP"
done
if [ i == 0 ]; then
export MASTER_IP=$NODE_IP
fi
echo $NODE_IP >> $HOSTFILE
done
function barrier() {
# ssh based barrier
local barrier_dir="/tmp"
local barrier_ctx="$1"
mkdir -p ${barrier_dir}/${barrier_ctx}
ssh ${MASTER_ADDR} mkdir -p ${barrier_dir}/${barrier_ctx}
ssh ${MASTER_ADDR} touch ${barrier_dir}/${barrier_ctx}/worker-${NODE_RANK}
if [ "$NODE_RANK" = "0" ]; then
for i in $(seq 0 $(("$LEPTON_JOB_TOTAL_WORKERS" - 1))); do
while ! [ -e "${barrier_dir}/${barrier_ctx}/worker-$i" ]; do
echo "waiting file ${barrier_dir}/${barrier_ctx}/worker-$i written by worker $i"
sleep 1
done
done
# Rank0 send ack
for i in $(seq 0 $(("$LEPTON_JOB_TOTAL_WORKERS" - 1))); do
ssh ${LEPTON_JOB_WORKER_PREFIX}-${i}.${LEPTON_SUBDOMAIN} touch "${barrier_dir}/${barrier_ctx}/complete"
done
fi
# All workers check ack
while ! [ -e "${barrier_dir}/${barrier_ctx}/complete" ]; do
echo "waiting file ${barrier_dir}/${barrier_ctx}/complete written by worker 0"
sleep 1
done
# Clean barrier ctx
rm -rf ${barrier_dir}/${barrier_ctx}
echo "${NODE_RANK} exit barrier ${barrier_ctx}"
}
# Adjust environment variables
if [ ${NGPUS} != 8 ]; then
# There are no ib devices for this resource shape, so we need to unset NCCL_SOCKET_IFNAME, GLOO_SOCKET_IFNAME
unset NCCL_SOCKET_IFNAME
unset GLOO_SOCKET_IFNAME
fi
########## end auto generated by lepton ##########
# Prepare environment
cd /workspace
git clone https://github.com/leptonai/examples.git
cd examples/advanced/pytorch-example
source /opt/lepton/venv/bin/activate
pip install -r /workspace/examples/advanced/pytorch-example/requirements.txt
barrier "prepare-finished"
# Rank0 is the head node, and other workers will wait for it to complete
COMPLETE_FILE="/tmp/lepton-mpi-complete"
if [[ $LEPTON_JOB_WORKER_INDEX -eq 0 ]]; then
# Rank0 starts mpirun
mpirun --map-by ppr:${NGPUS}:node -hostfile $HOSTFILE --allow-run-as-root \
-x MASTER_ADDR=$MASTER_ADDR \
-wdir /workspace/examples/advanced/pytorch-example \
/opt/lepton/venv/bin/python main_with_mpi.py
mpi_ret_code=$?
# Rank0 notifies other workers the job is done
mpirun --map-by ppr:1:node -hostfile $HOSTFILE --allow-run-as-root touch ${COMPLETE_FILE}
if [ $mpi_ret_code -ne 0 ]; then
echo "MPI job failed with exit code $mpi_ret_code"
exit $mpi_ret_code
else
echo "MPI job completed!"
fi
else
# Other workers wait for rank0 to complete
while true; do
[ ! -f "${COMPLETE_FILE}" ] || break
sleep 5
done
exit 0
fi
Create and Monitoring
Now you can click on the Create button to create and run the job. After that, you can go to check the job logs or details to monitor the job.
Within the job details page, you can see the status of each worker and the logs of each worker. You can also use Web Terminal to connect to the worker node and check the status of the worker as well. Once the job is finished, you can see the job with a "Completed" state.