RayCluster on DGX Cloud Lepton
DGX Cloud Lepton supports the creation of RayClusters to manage the scheduling and scaling of machine learning workloads using the open source Ray framework.
A RayCluster is a dedicated reservation of resources on DGX Cloud Lepton with one head node and at least one worker. Users can connect to the RayCluster and submit RayJobs which will be scheduled and run directly on the resources in the RayCluster. Users can choose to run a single, large job on the RayCluster, or run multiple smaller jobs assuming resources are available.
RayCluster supports heterogeneous compute types, allowing users to run a head node on a CPU-only instance and workers on GPU nodes. Additionally, the head node can include GPUs and optionally run jobs as well.
A running RayCluster will continue to reserve the requested resources until it is torn down. To use the resources for other workflows, such as standard batch jobs, the RayCluster will need to be stopped. Instructions on doing so are documented below.
The high level steps for running jobs with Ray on DGX Cloud Lepton are as follows:
- Create a RayCluster
- Submit tasks to the RayCluster
This document shows how to set up a RayCluster and how to launch a basic Ray job on the running Cluster.
Prerequisites
- A DGX Cloud Lepton workspace with available node group to create a RayCluster
- At least one GPU node and one CPU resource
- Basic understanding of Ray distributed computing framework
Steps
Creating a RayCluster
To create a RayCluster, navigate to the RayCluster creation page and click the green Create Cluster button in the top right of the page. This will open a new form for creating the cluster.
Enter in the following details on the form:
- Ray Cluster Name: Specify a name for the RayCluster, such as
demo-ray-cluster. - Container: The RayCluster will run a container on the head node and each worker. The container specified in this field will run on all nodes in the RayCluster.
To use one of the official Ray images, select the specific tag in the Built-in drop-down list. The format of the tag isray:<ray version>-<python version>-<gpu>where<ray version>is the version of Ray to run,<python version>is the Python version, and<gpu>is to include GPU support.
To use a custom container, select Custom under Image and specify a custom image ID. Please note that Ray will need to be installed inside this container in order for it to work with RayCluster on DGX Cloud Lepton. Select the corresponding Ray version installed in the containers in the Ray Version list. - Private Image Registry Authentication: Optionally add a private registry key for authenticating with a container registry.
- Head Node: Select the Node Group and the resource shape for the head node to run on. The head node can either be CPU-only and be used just for scheduling jobs, or it can include GPU resources to run workloads as well. Additionally, specify any storage to mount on the head node using the + Mount Storage button.
- Worker Group: Select the Node Group and the resource shape for the worker(s). It is highly recommended to use the same node group as the head node. The workers will primarily run the workloads for submitted jobs. To request multiple workers, increase the Min Replicas value to the desired number of workers to allocate. Add a storage mount using the + Mount Storage button. You can optionally specify a Group Name or a randomly-generated one will be created for you.
Once the form is complete, click the green Create button at the bottom of the page. This will take you back to the list of RayClusters currently running in the workspace. Once resources are available, the specified containers will be launched on each resource and the RayCluster will start. Depending on the size of the container and how many resources are requested, this can take a while for the RayCluster to transition to the Ready state. Once started, the list will look similar to the following:

Connecting to the RayCluster
With a RayCluster started, you can connect to the head node to submit jobs or view the dashboard.
To connect to the head node, click the Terminal button to the right of the RayCluster as highlighted in the image below.

This will open a bash session on the head node in a virtual terminal on the bottom of the page. You can validate the RayCluster by running ray status in the terminal. The output should look similar to the following, depending on the number of resources selected:
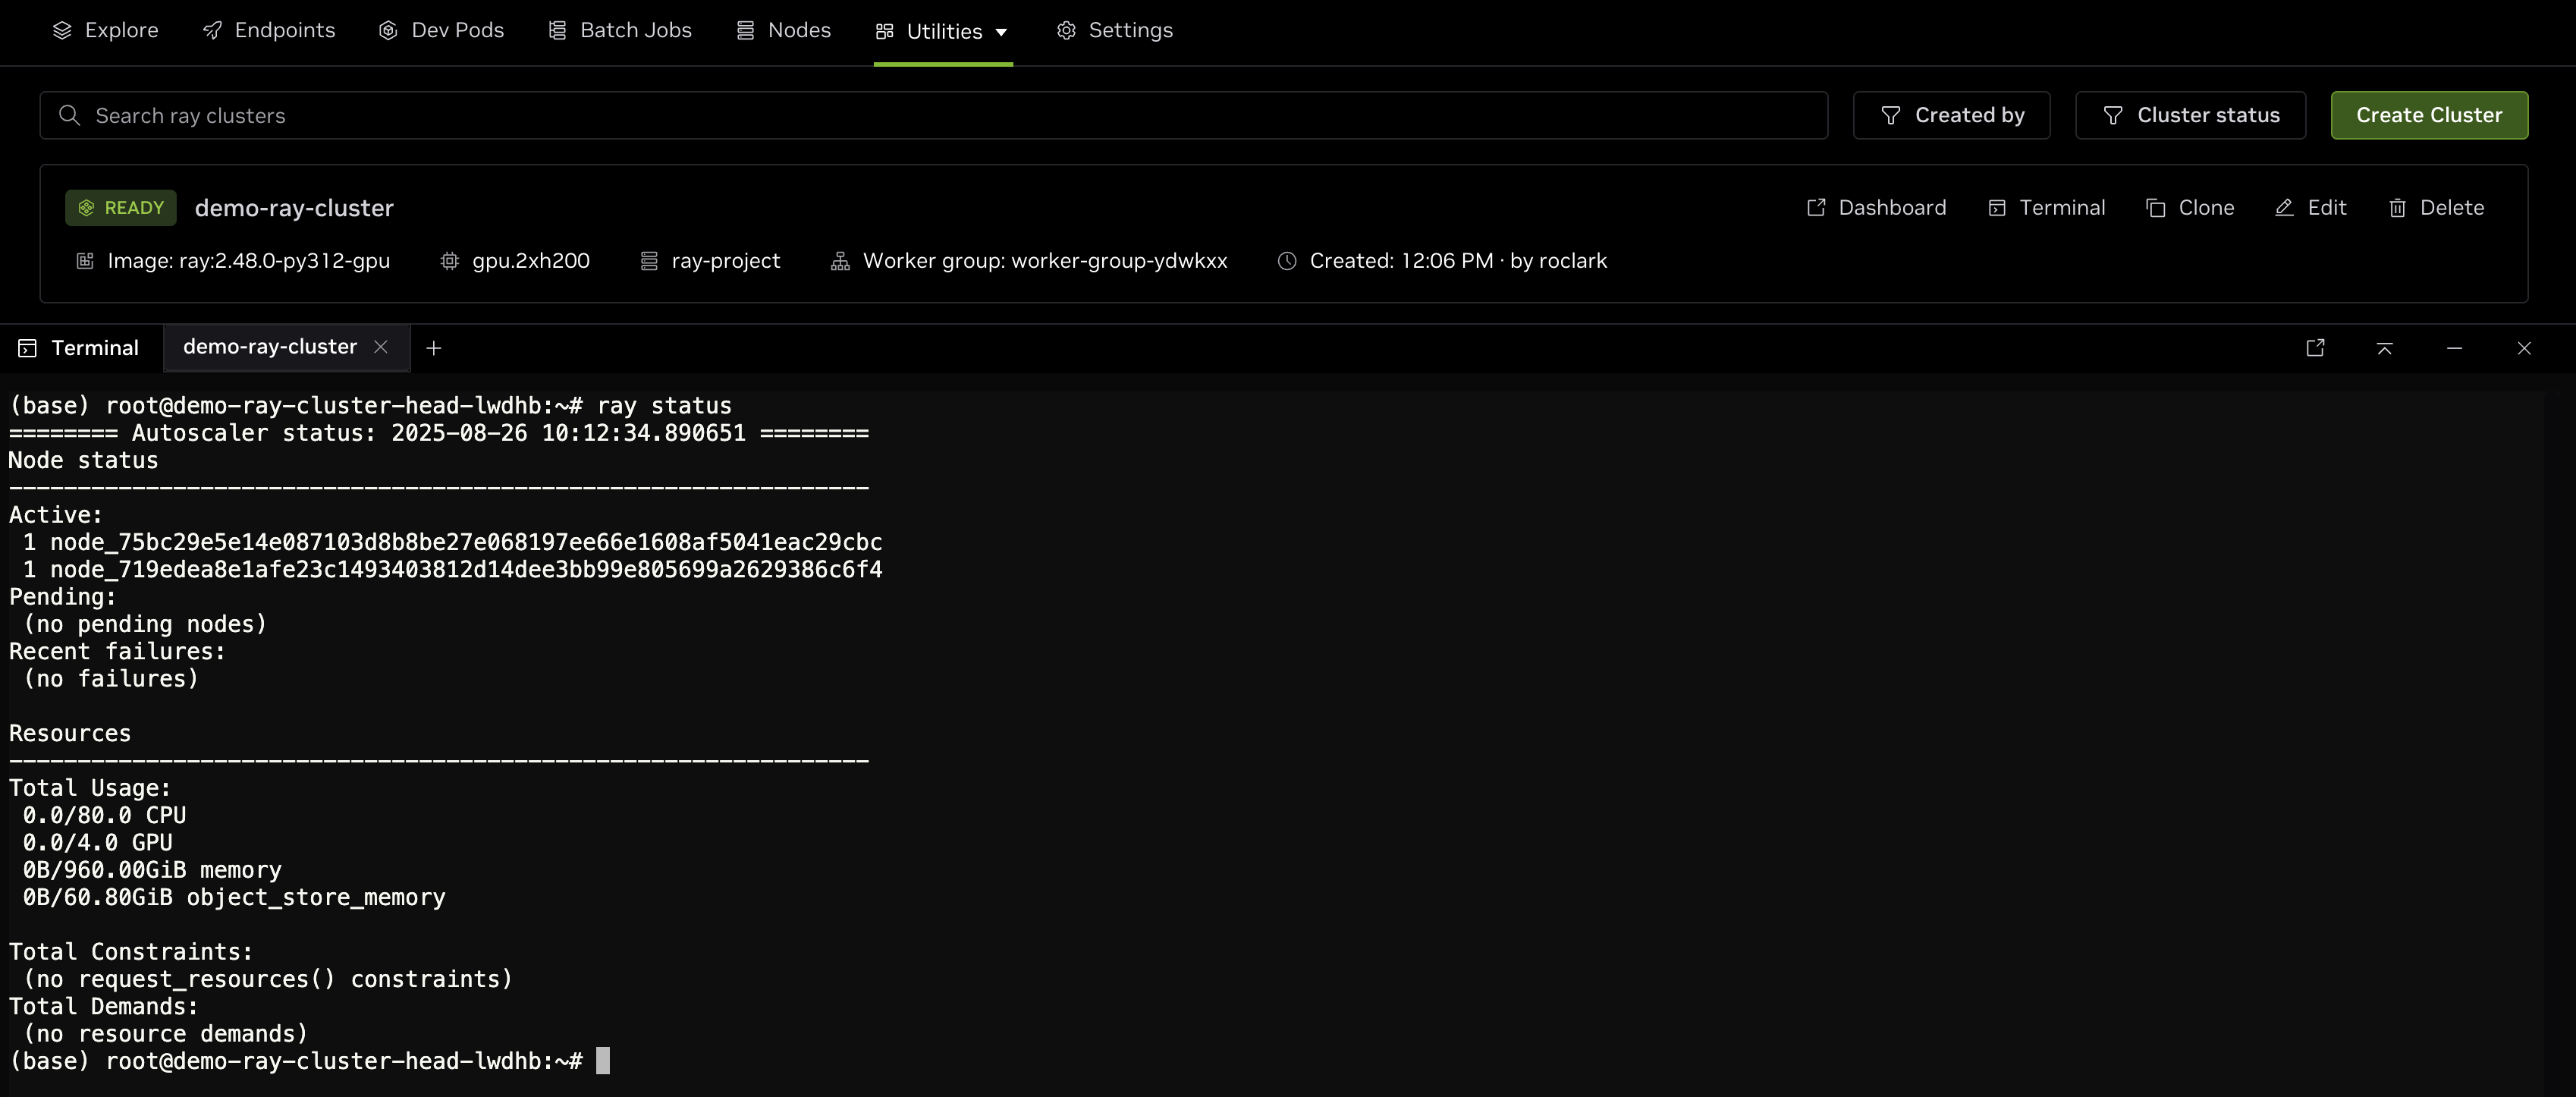
As shown in the output, there are two nodes in the cluster with a total of 80 CPU cores and 4 GPUs which can be used to schedule jobs.
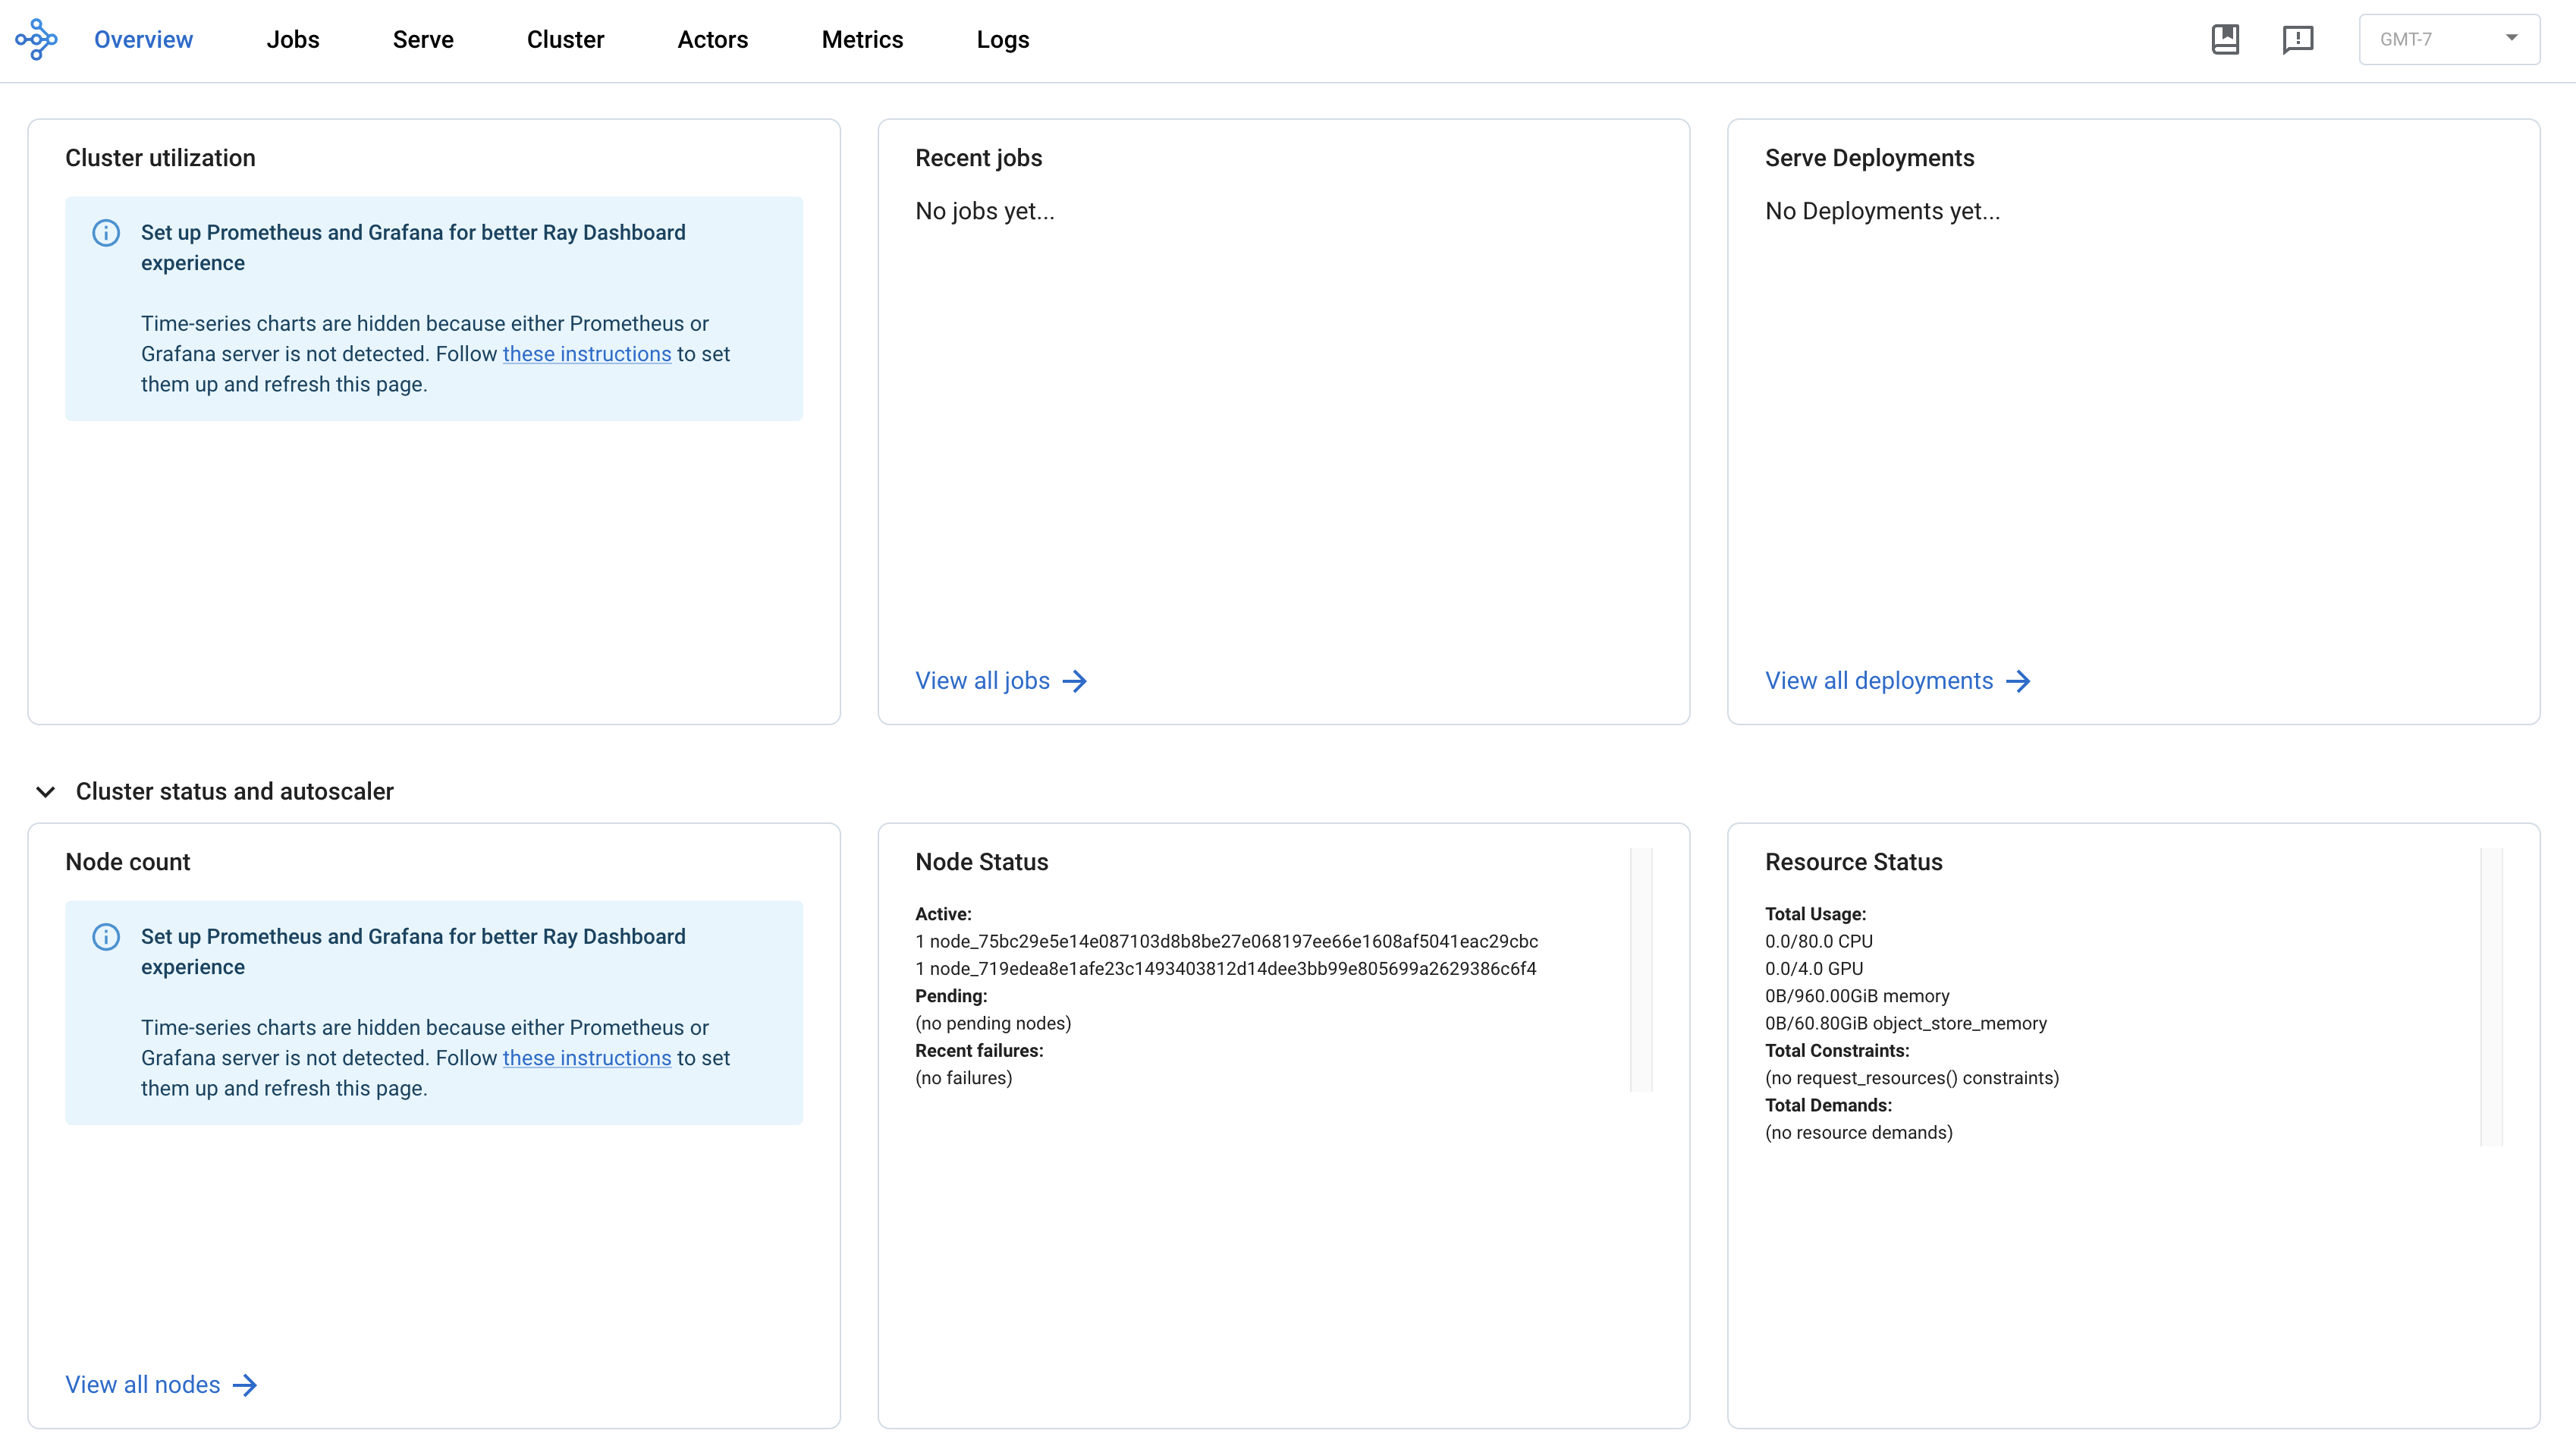
Additionally, clicking the Dashboard button will open a new tab displaying the Ray dashboard for the cluster. Here you can view recent jobs, cluster utilization, resource availability, and more.
Launching a RayJob
To launch a job with Ray, open the terminal on the head node again and open a new file named train.py with the following contents:
import ray
import torch

# Initialize Ray cluster
ray.init(runtime_env={"pip": ["torch"]})

@ray.remote(num_gpus=1)
def compute_task(node_id, data):
    """Simple GPU task that performs matrix multiplication"""
    # Get GPU info
    device = torch.cuda.current_device()
    gpu_name = torch.cuda.get_device_name(device)

    print(f"Node {node_id}: Using GPU {device} ({gpu_name}) with data: {data}")

    # Simple GPU computation - matrix multiplication
    size = 1000
    a = torch.randn(size, size, device='cuda')
    b = torch.randn(size, size, device='cuda')
    c = torch.matmul(a, b)

    # Get result summary
    result_sum = c.sum().item()

    return f"Node {node_id} on GPU {device}: Matrix sum = {result_sum:.2f}"

def main():
    # Submit tasks to 2 nodes
    tasks = []
    for i in range(2):
        task = compute_task.remote(i, f"data_chunk_{i}")
        tasks.append(task)

    # Collect results
    results = ray.get(tasks)
    for result in results:
        print(result)

if __name__ == "__main__":
    main()
    ray.shutdown()
This is a very simple script which will run on two nodes with one GPU per node. It will print the name of the node and the GPU index used for each worker as well as the output of a simple mathematical equation.
The job requires PyTorch which is not installed in the base Ray containers. We need to install it on the head node and point Ray to use the package on all workers. In the terminal for the head node, run:
pip3 install torch
This will install PyTorch on the head node which can be used on workers via a Ray runtime environment. To install and use different dependencies which aren't available in the base container, install the packages on the head node with pip3 and update the following line with additional package names by updating the ["torch"] list:
ray.init(runtime_env={"pip": ["torch"]})
To launch the job, run python3 train.py in the terminal. This will allocate two workers and a single GPU per worker in the RayCluster and run the script. The output should look similar to the following:
2025-08-27 08:41:27,150 INFO worker.py:1606 -- Using address 127.0.0.1:6379 set in the environment variable RAY_ADDRESS
2025-08-27 08:41:27,153 INFO worker.py:1747 -- Connecting to existing Ray cluster at address: 10.0.152.79:6379...
2025-08-27 08:41:27,165 INFO worker.py:1918 -- Connected to Ray cluster. View the dashboard at http://10.0.152.79:8265
(compute_task pid=12914) Node 0: Using GPU 0 (NVIDIA H200) with data: data_chunk_0
Node 0 on GPU 0: Matrix sum = 36016.11
Node 1 on GPU 0: Matrix sum = 15289.25
(compute_task pid=12913) Node 1: Using GPU 0 (NVIDIA H200) with data: data_chunk_1
The job will also be viewable in the Recent Jobs list in the dashboard to show status, nodes, usage, and more.
While this is a very simple job, it shows how to use the allocated RayCluster to run a multi-node job which runs on GPUs. For more complex examples, refer to the Ray documentation which includes several tutorials covering a wide range of tasks.
Scaling the RayCluster
The RayCluster supports manually scaling the workers up and down to handle additional capacity as needed. To add additional resources to an existing RayCluster, click the Edit button next to the cluster and set the desired number of replicas. This will update the number of workers to match the replica levels specified in the form. For example, if updating the previous example with one worker to use a minimum of two replicas, the RayCluster will add an additional worker to the cluster. This may take some time to complete as it pulls the container and launches the replica. After the additional worker is added, it can be verified in the terminal by running ray status again:
======== Autoscaler status: 2025-08-27 07:50:48.695873 ========
Node status
---------------------------------------------------------------
Active:
 1 node_67a500a2c6785c4213ae83fe94aa2b1c52b9cf43d5aed6cb2939d38c
 1 node_75261b31ecd3c3f5cf2ee4ba2921bb5e60555e9d3d010ccc85e2ce1e
 1 node_f80e891259bfae3e6fbe81ebe8f6c51903e9081bfcd20f2dfe9dcff4
Pending:
 (no pending nodes)
Recent failures:
 (no failures)

Resources
---------------------------------------------------------------
Total Usage:
 0.0/120.0 CPU
 0.0/6.0 GPU
 0B/1.41TiB memory
 0B/91.20GiB object_store_memory

Total Constraints:
 (no request_resources() constraints)
Total Demands:
 (no resource demands)
The output indicates we now have an additional node in the cluster and 2 extra GPUs which can be used for jobs.
Additionally, you can scale down resources to use fewer workers if you do not need all of the existing capacity. When scaling down the cluster, any extra workers will be deleted and Ray will be updated automatically to reflect the desired number of workers.
Shutting down the RayCluster
As mentioned earlier, the RayCluster will continue to hold resources until it is shut down, allowing users to submit as many jobs as desired in a persistent environment. To free up resources for other tasks, or when the RayCluster is no longer needed, it needs to be shut down. To do so, click the Delete button next to the cluster as shown in the image below.
