Registry
Learn how to connect private image registries to your DGX Cloud Lepton workspace, enabling secure deployment of custom container images for your applications.
Besides public registries like Docker Hub, you can also bind your private registries to your workspace. This allows you to store and deploy your custom images in a private space.
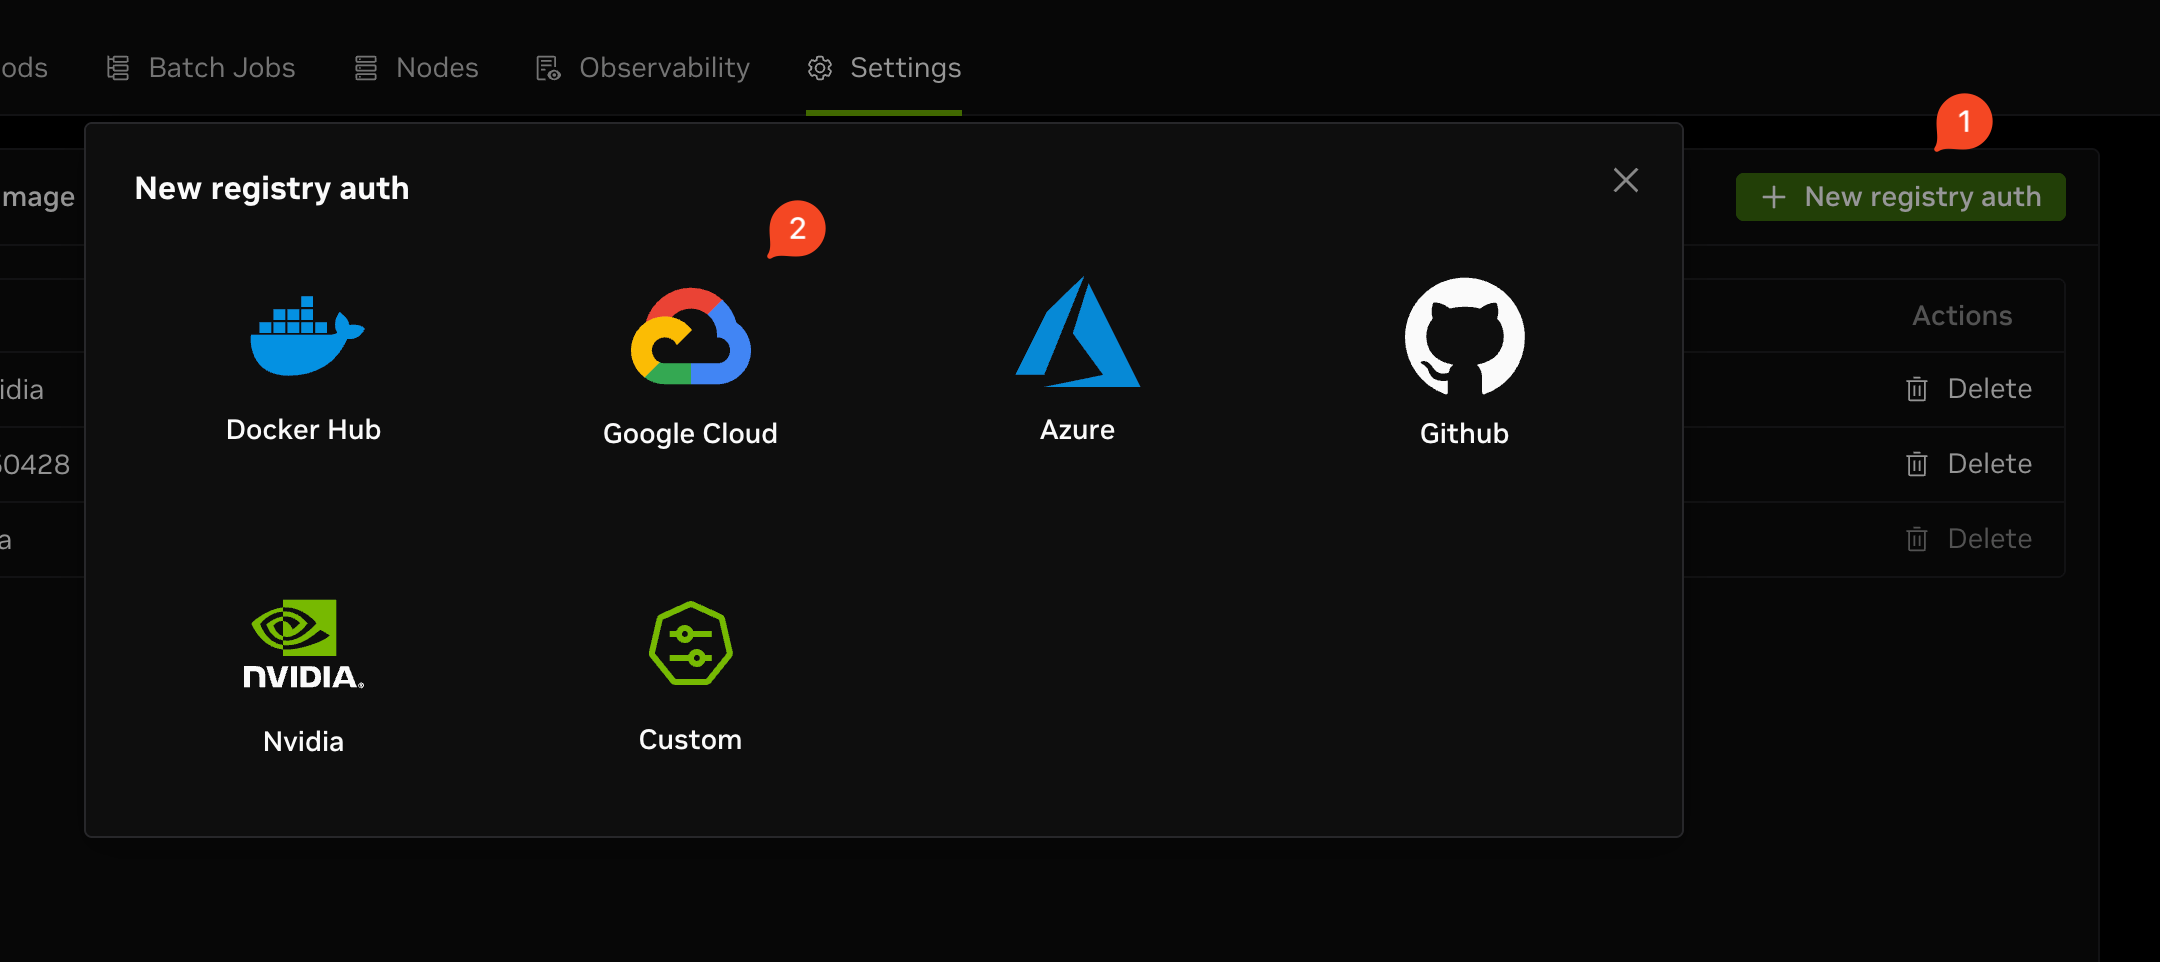
Create New Registry Auth
Navigate to the registries tab in the settings page of your workspace, then click the New registry auth button in the top right corner. You can choose a registry source from the list.
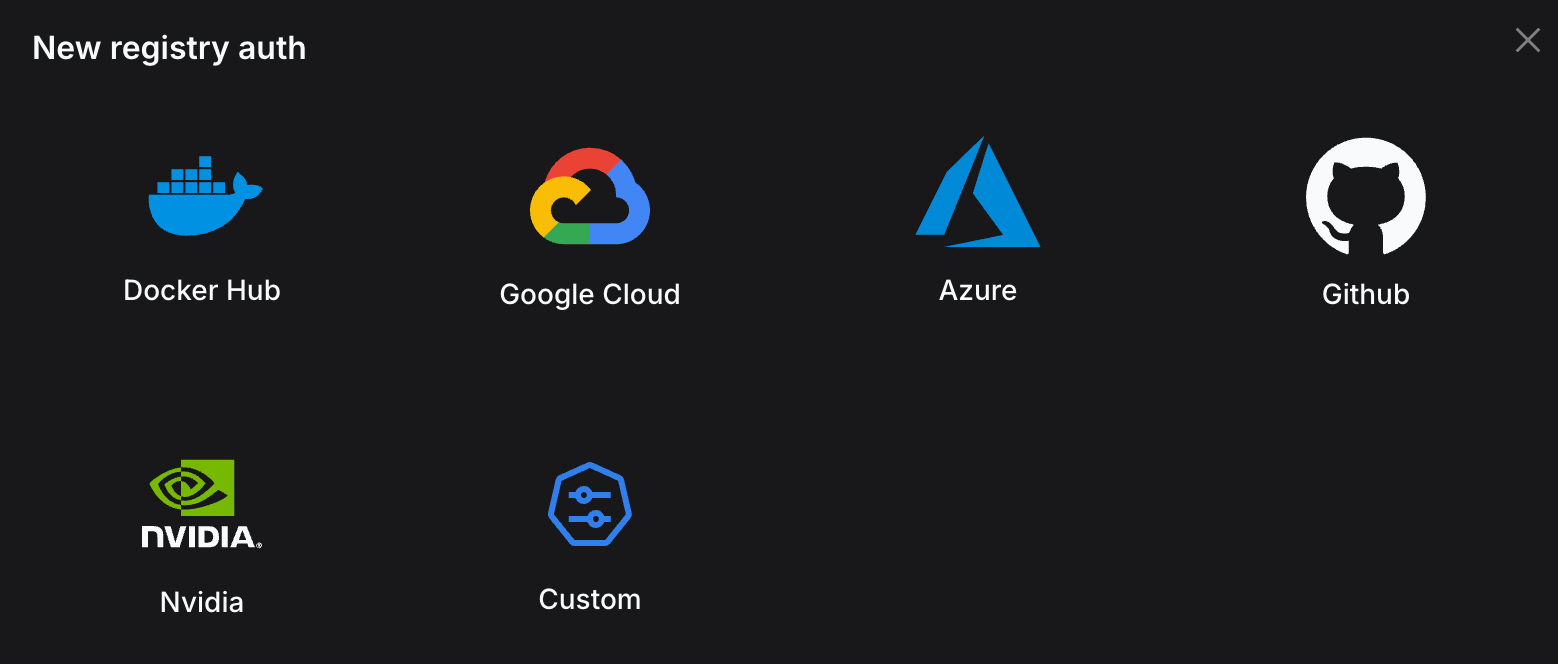
Currently, we support the following private registry presets:
- Docker Hub
- Google Container Registry (GCR)
- Azure Container Registry (ACR)
- GitHub Container Registry (GHCR)
- NVIDIA Container Registry (NCR)
You can also create a custom registry auth by providing the registry URL, username, and password.
Use a Private Registry
After you create a registry auth successfully, you can use it to access your private images for workload creation.
For example, to use a Dev Pod with a Docker Hub registry, navigate to the pod creation page, and in the Container configuration section, select custom image. Input the image address in the Image field, and select the registry auth you created in the Private image registry auth field.
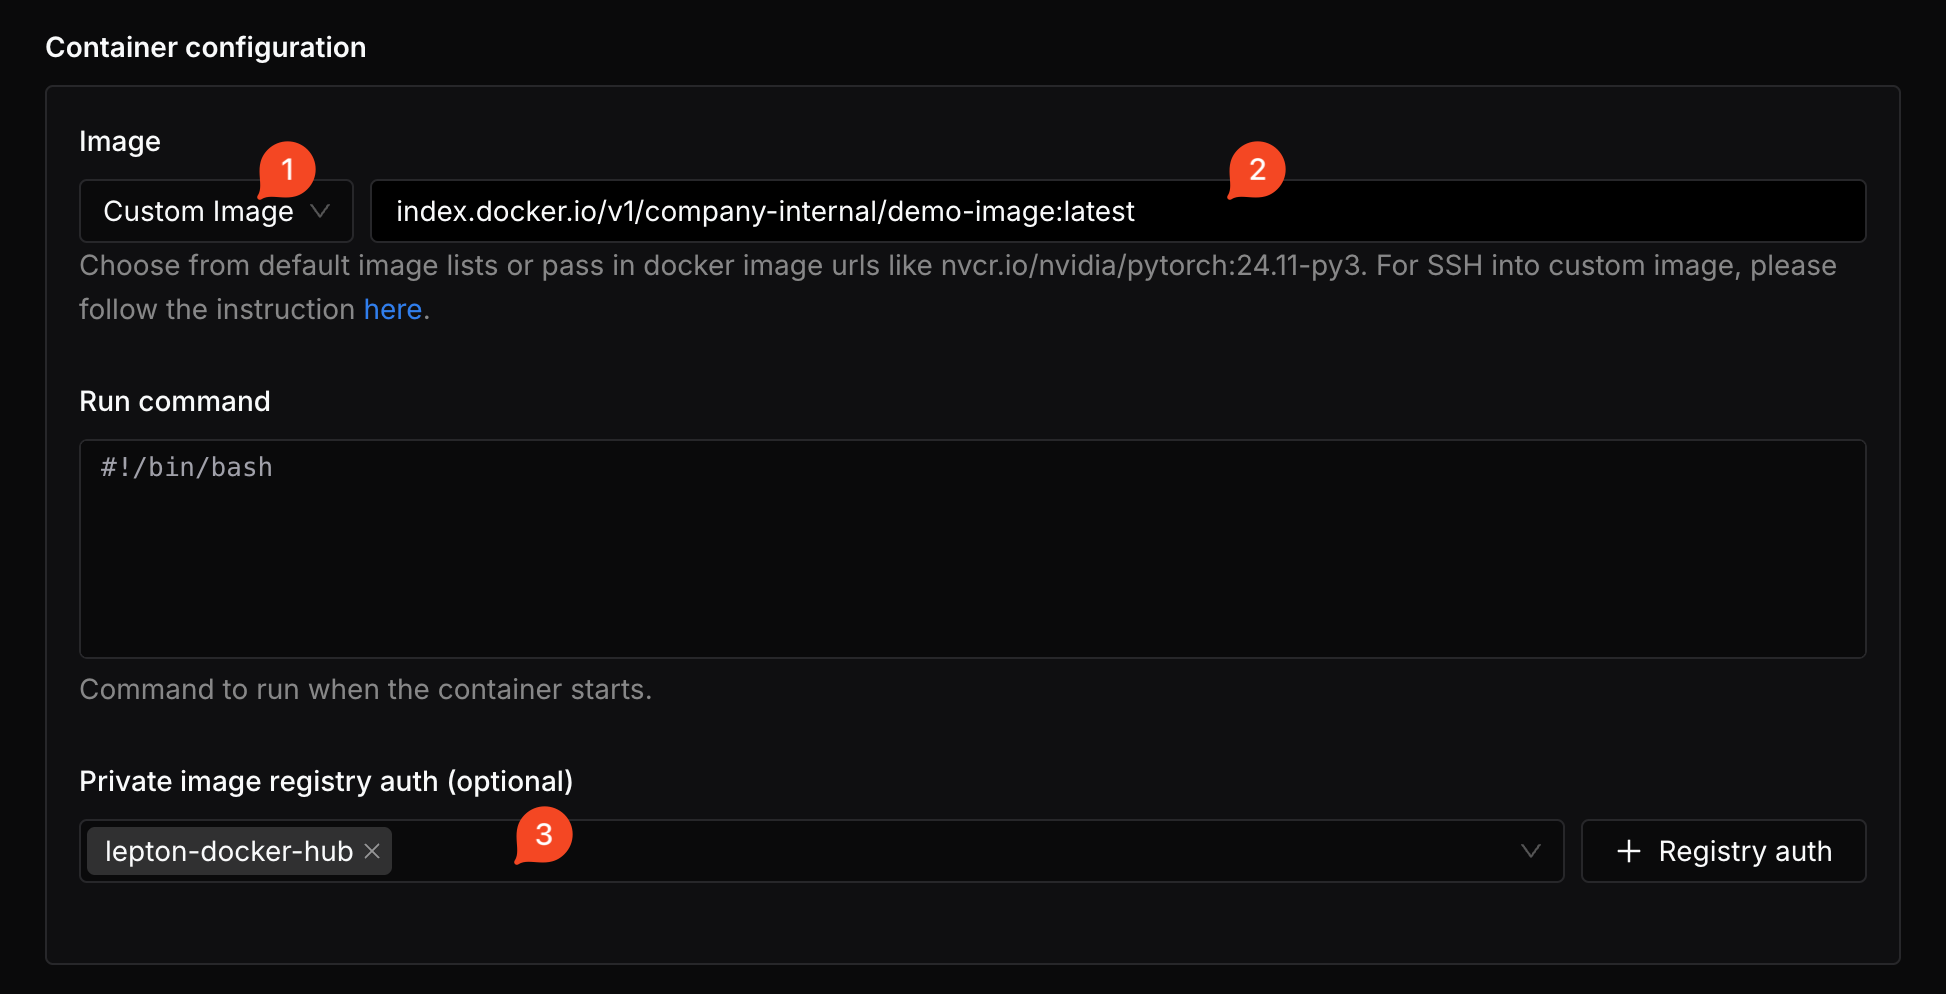
With these configurations, you can launch your Dev Pod with a private image.
Docker Hub
This section guides you through setting up a Docker Hub registry for your workspace.
Create Access Token
Navigate to the personal access tokens page and click Generate New Token. In the creation form, you need to fill in the following fields:
- Token description: A short description for the new access token.
- Expiration date: Default is None, which means the token will never expire.
- Access permissions: Select Read-only.
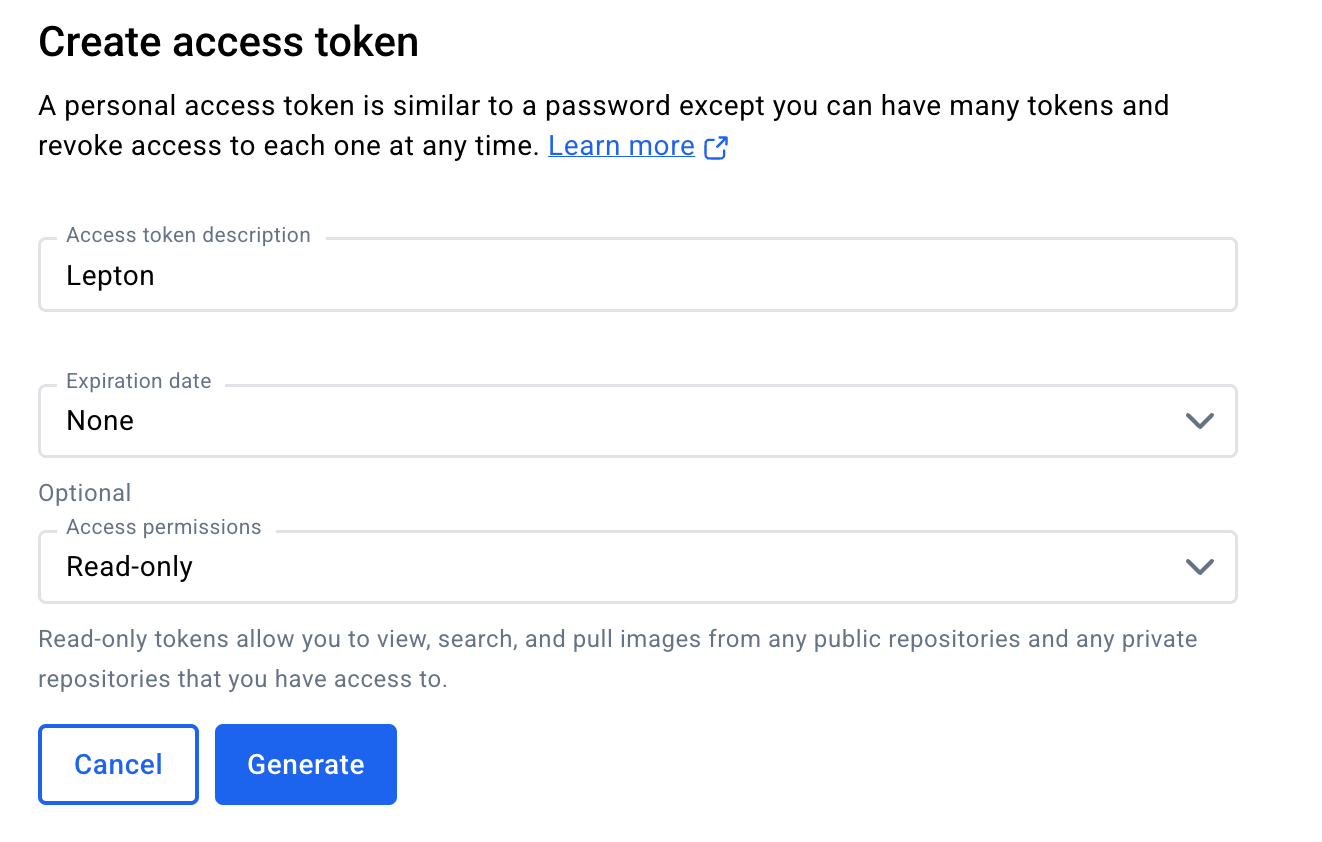
Click Generate Token to create the new access token successfully. Copy and save the token securely. You will not be able to access it after closing the page.
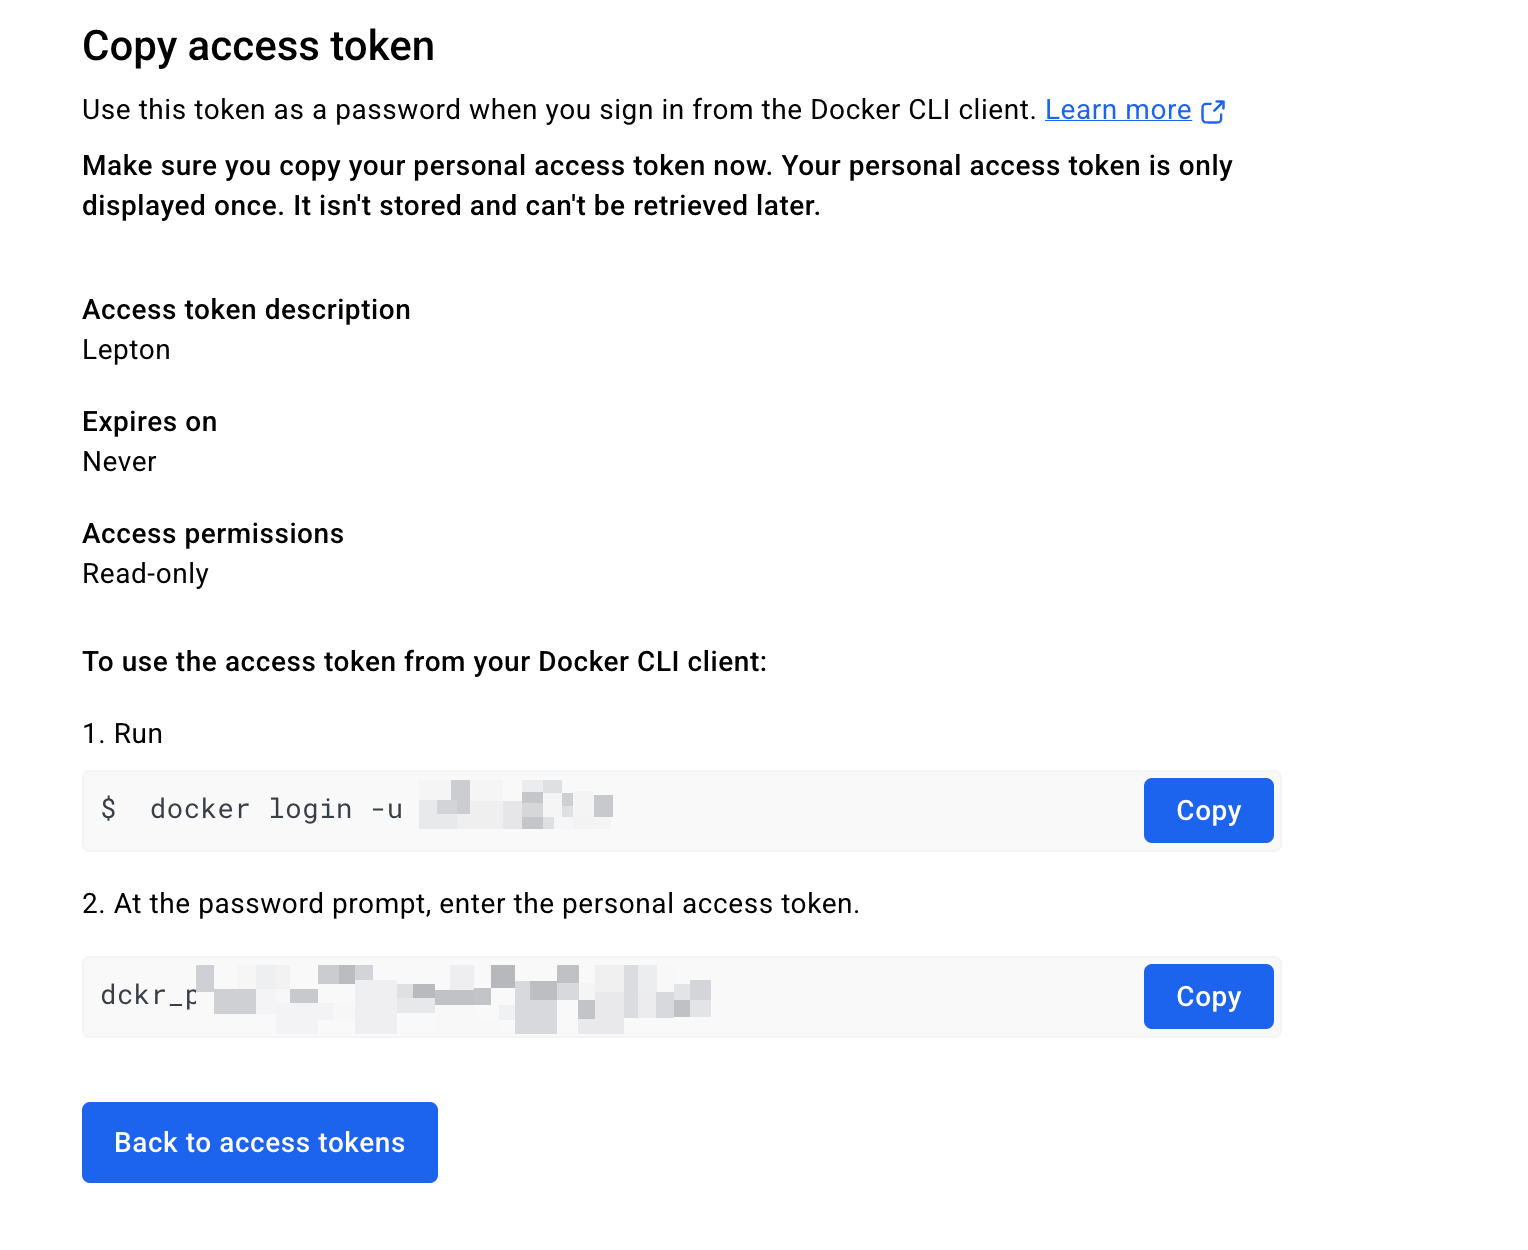
You can learn more in the official documentation.
Create Registry Auth
Navigate to the registry settings page, click on New registry auth, and select Docker Hub as the source.
You need to fill in the following fields:
- Username: Your Docker Hub username.
- Access Token: The personal access token you just created.
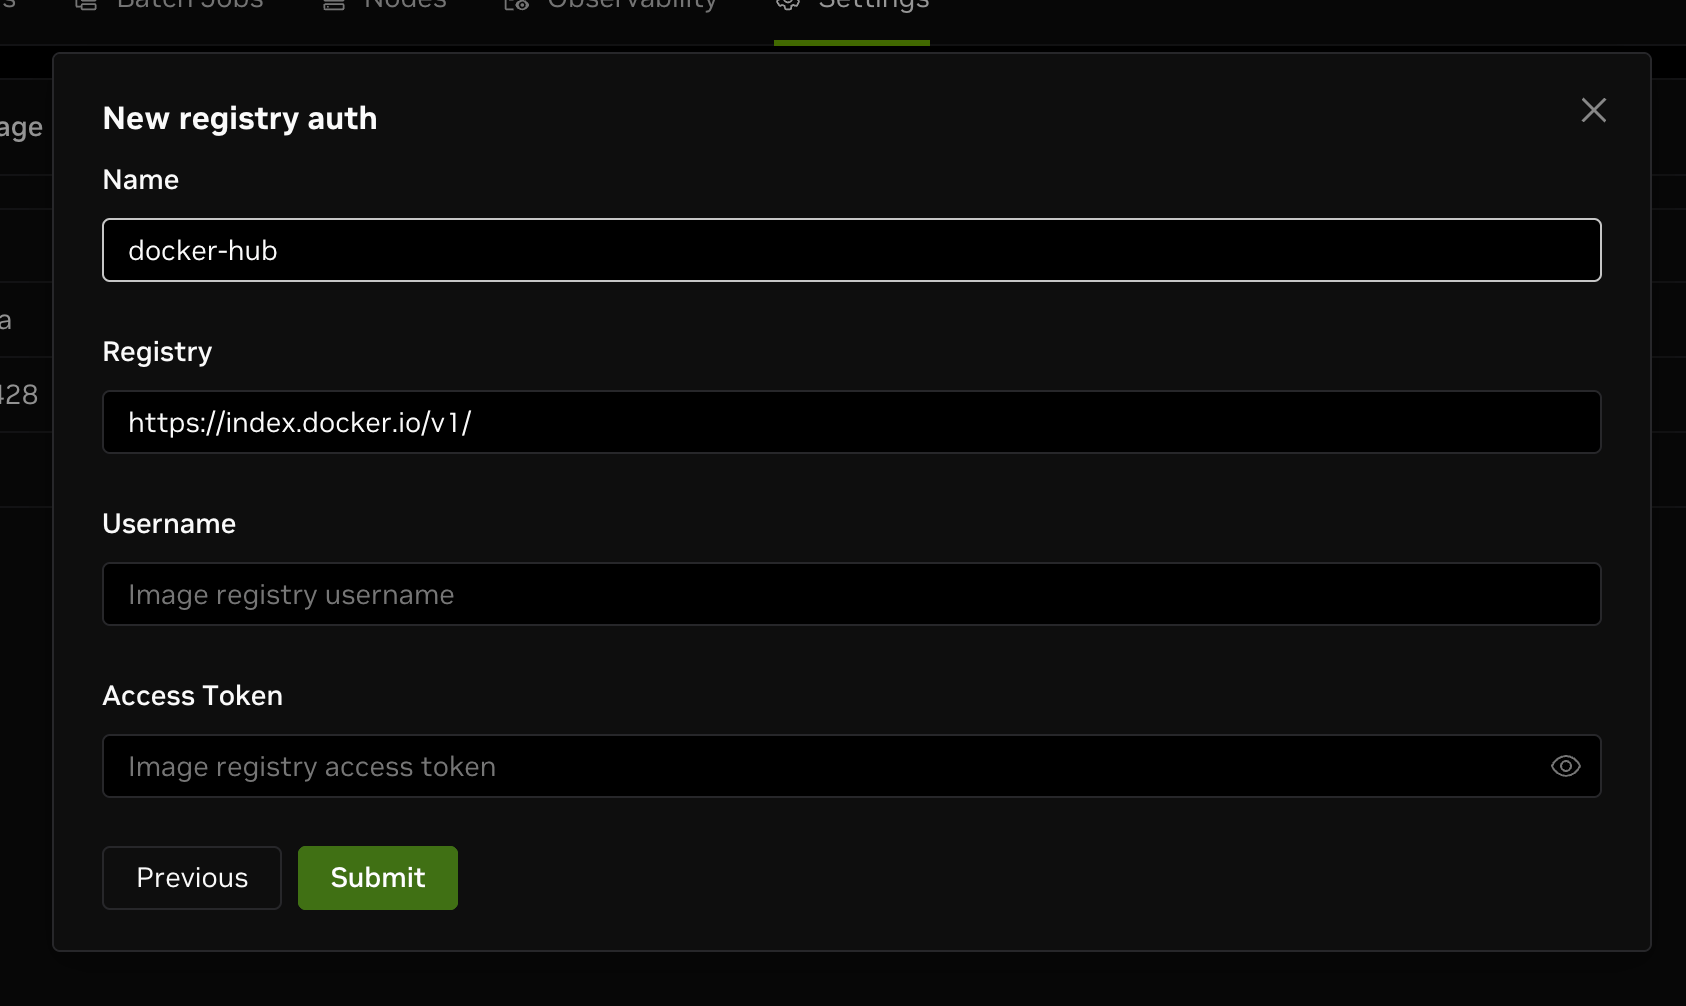
After filling in the form, click Submit to create the new registry auth successfully.
GCP
This section guides you through setting up a GCP Registry for your workspace.
Get Service Account Key JSON File
Before creating the registry auth on DGX Cloud Lepton, you need to obtain the service account key JSON file.
Create Service Account for Registry Auth
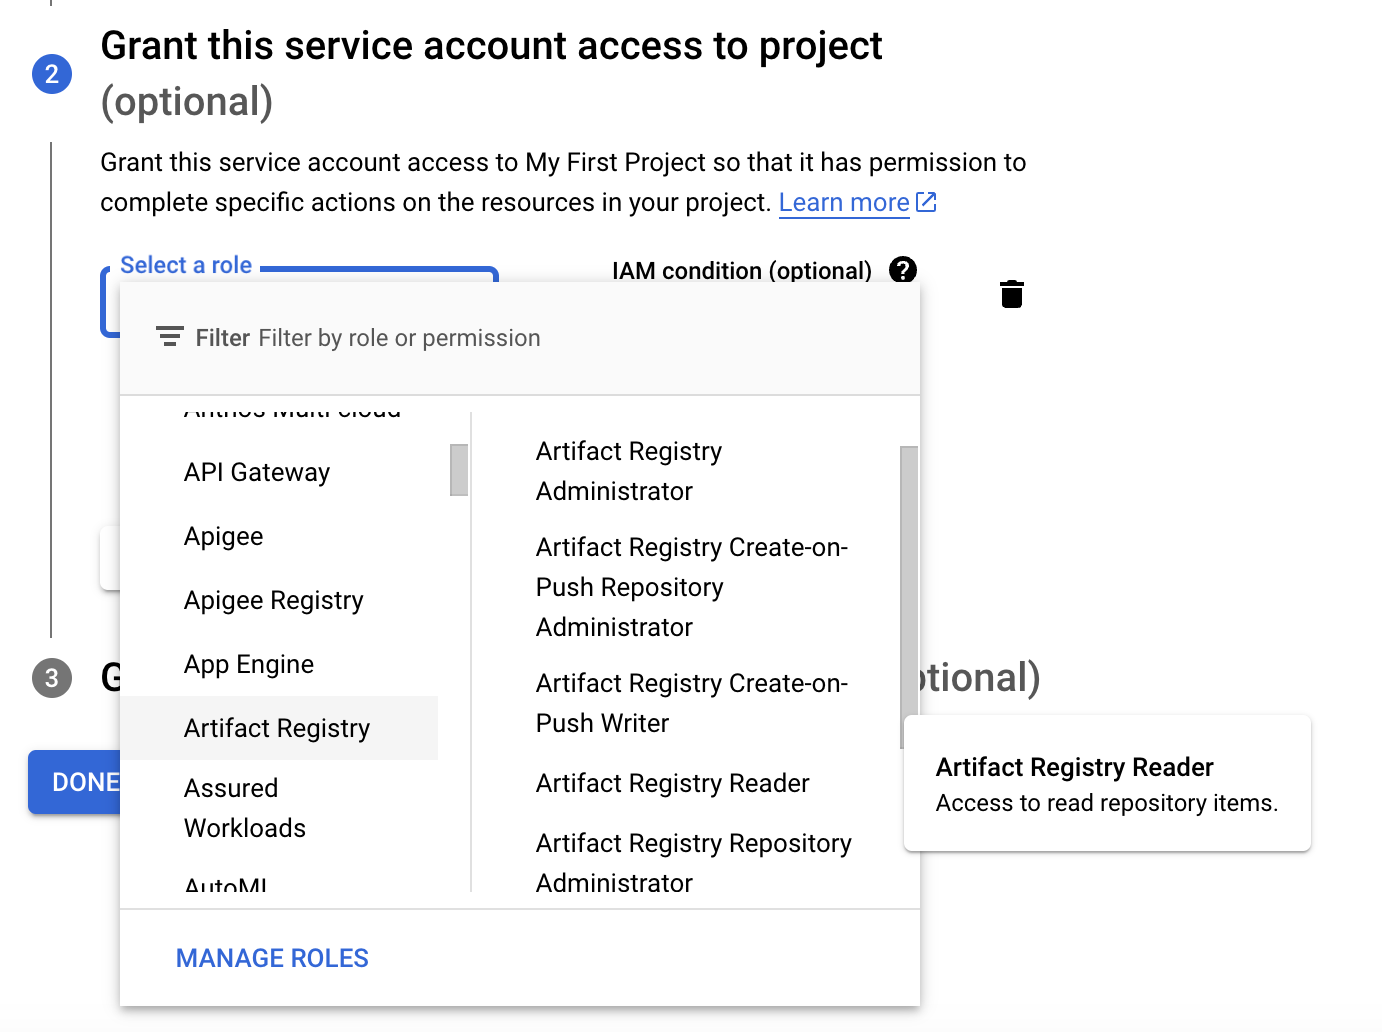
Navigate to the service accounts page in the GCP console, select the target project, then click the Create service account button.
In the second step, you need to grant registry auth role to the service account. In this case, you need to grant Artifact Registry Reader role so that the service account can access the Artifact Registry and pull images.
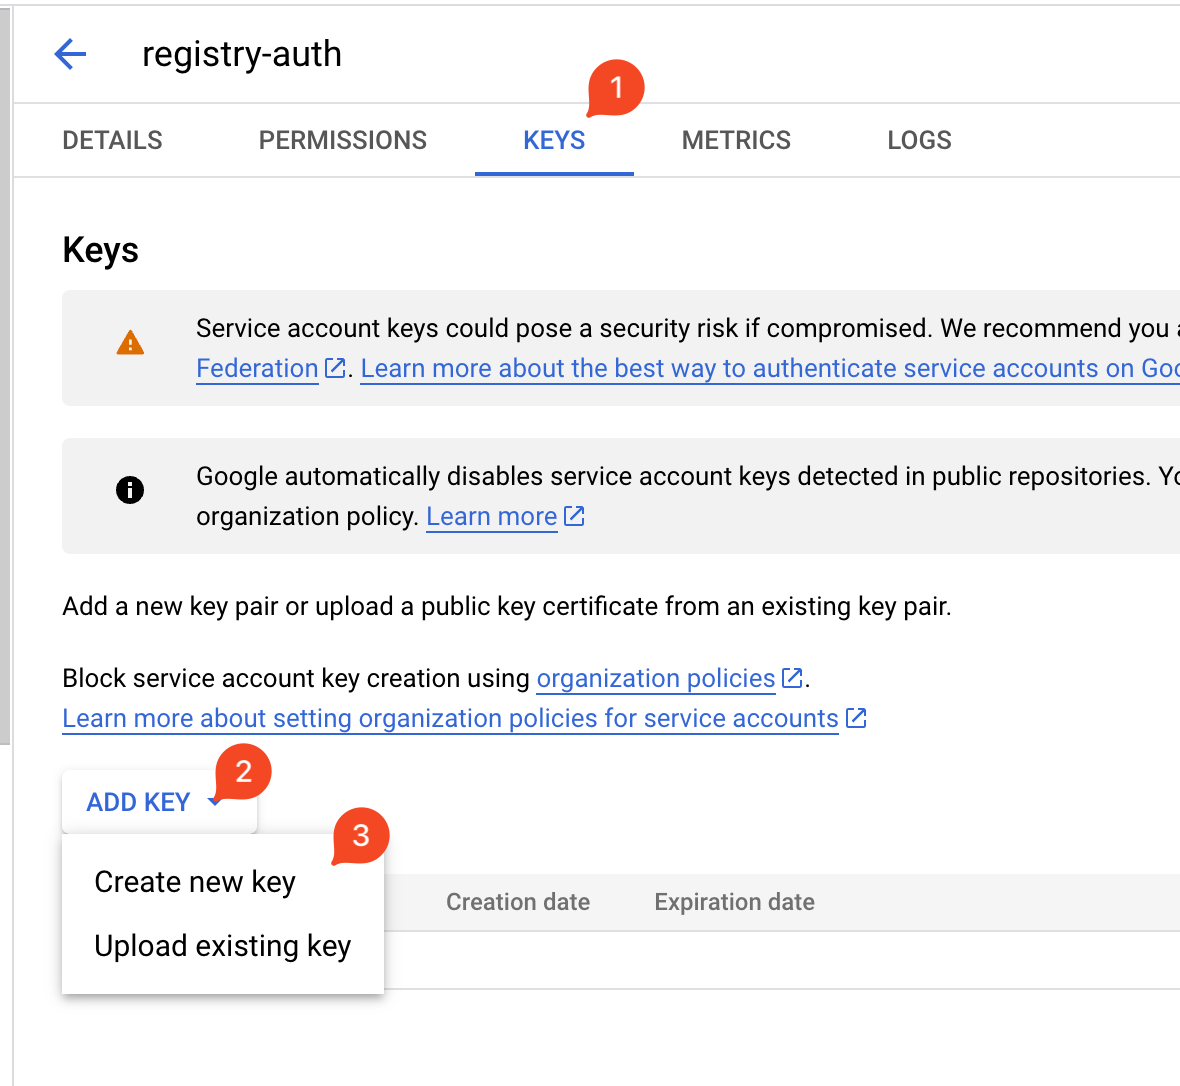
Create Service Account Key
After creating the service account, you need to create a key for it. Navigate to the service account page, switch to the KEYS tab, click the ADD KEY button, and select JSON as the key type.
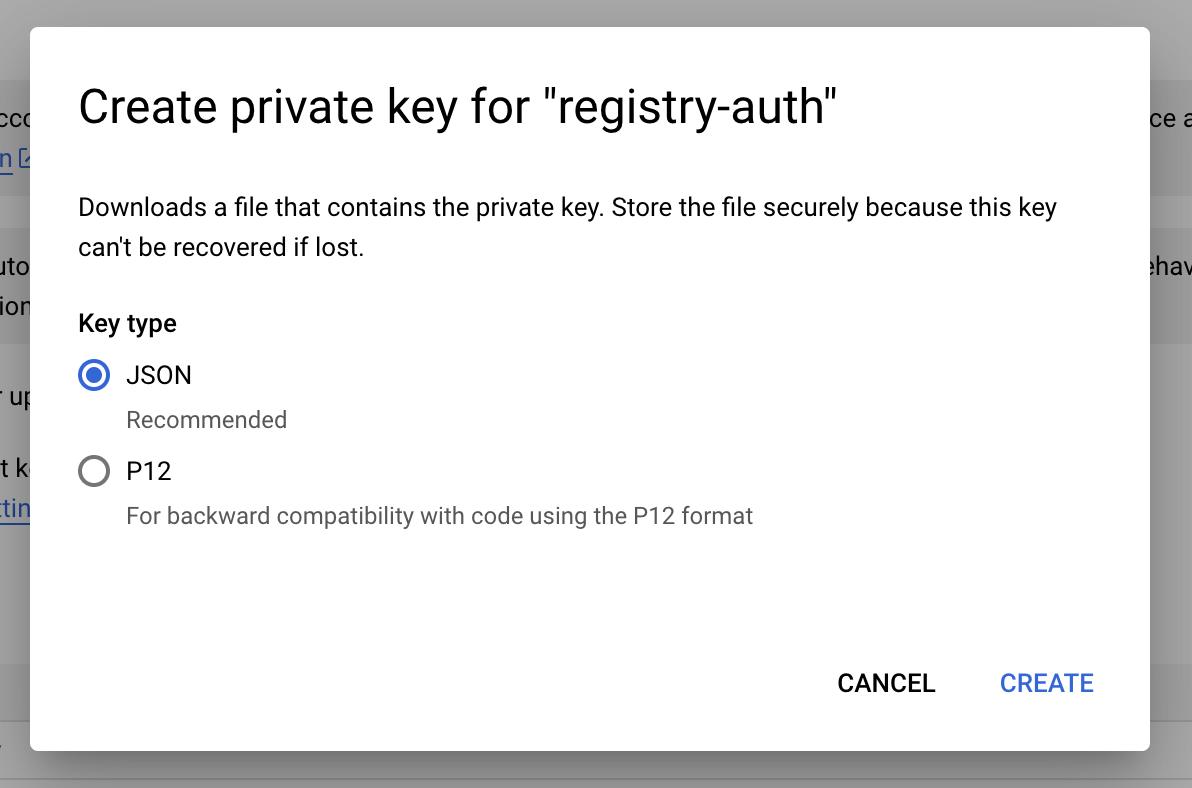
Click CREATE to automatically download the JSON file.
Create New Registry Auth on DGX Cloud Lepton
Now that you have the service account key JSON file, you can create a new registry auth for GCP on DGX Cloud Lepton.
Navigate to the registry settings page, click on New registry auth, and select GCP as the source.
In the creation form, you need to fill in the following fields:
- Name: The name for the new registry, to help you manage registries on DGX Cloud Lepton.
- Registry: The URL of the GCP Artifact Registry, for example,
https://us-west1-docker.pkg.dev. - Json Key: The JSON key file for the service account. You can upload the file by clicking the Upload Service Account Key button.
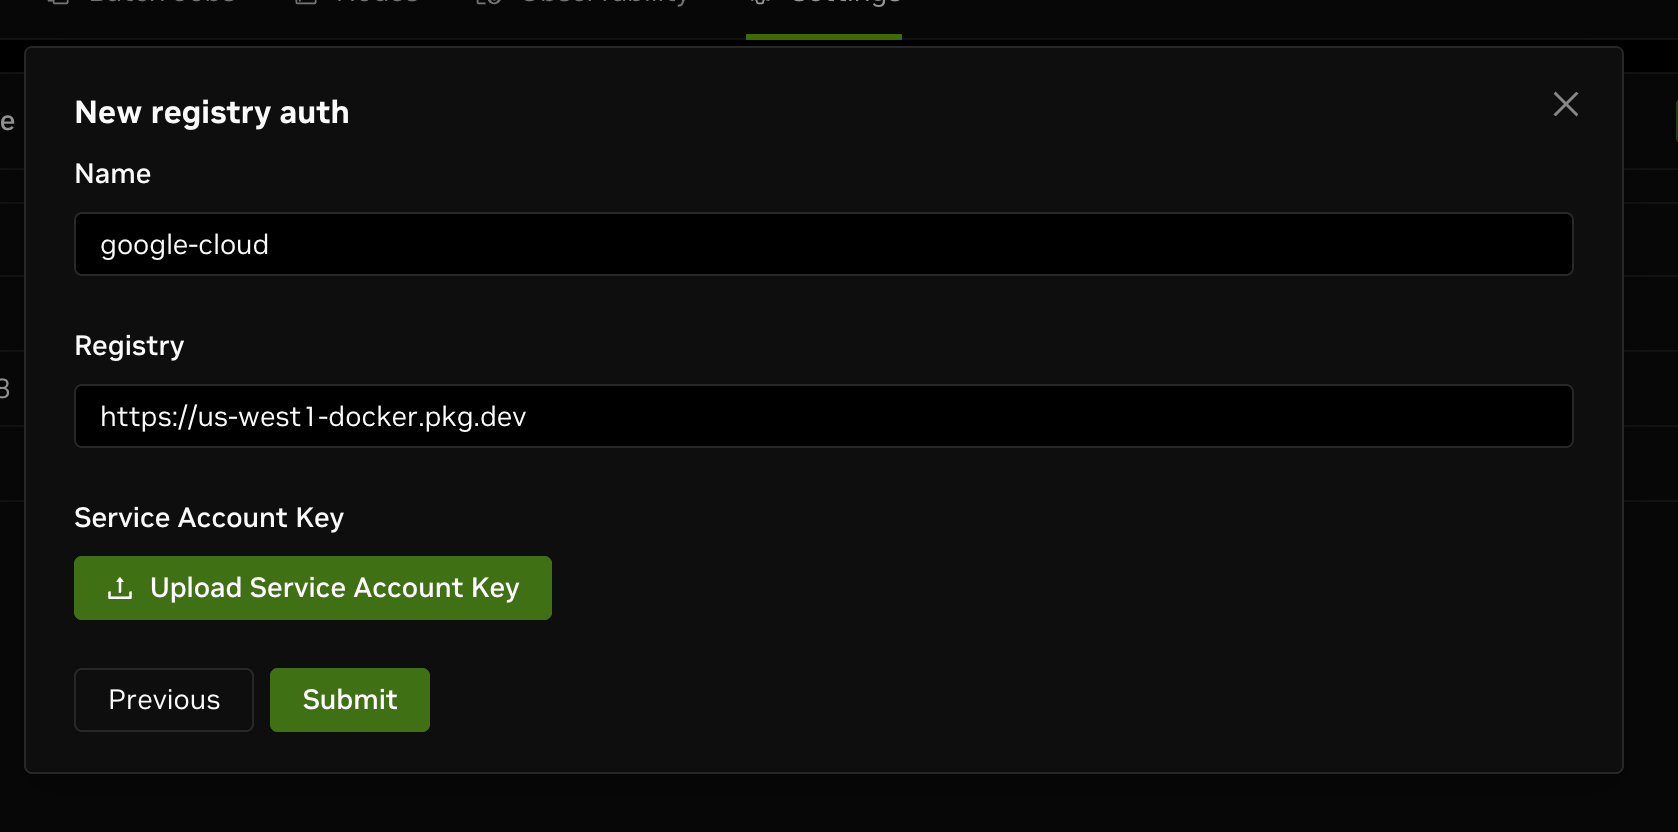
After filling in the form, click Submit to create the new registry auth successfully.
Azure
This section guides you through setting up an Azure Registry for your workspace.
Obtain Registry Credentials
Navigate to your Azure portal and locate your Azure Container Registry page. If there are no registries in your Azure account yet, you need to create one first.
Open the Access keys tab under Settings and toggle the Admin user switch to on. Copy the password and save it securely.

You can learn more about Azure access tokens in the official documentation.
Create Azure Registry Auth
Navigate to the registry settings page, click on New registry auth, and select Azure as the source.
You need to fill in the following fields:
- Registry: The login server URL of your Azure Container Registry, e.g.,
myregistry.azurecr.io. - Username: Your Registry username shown in the Azure portal.
- Password: Your Registry password just copied.
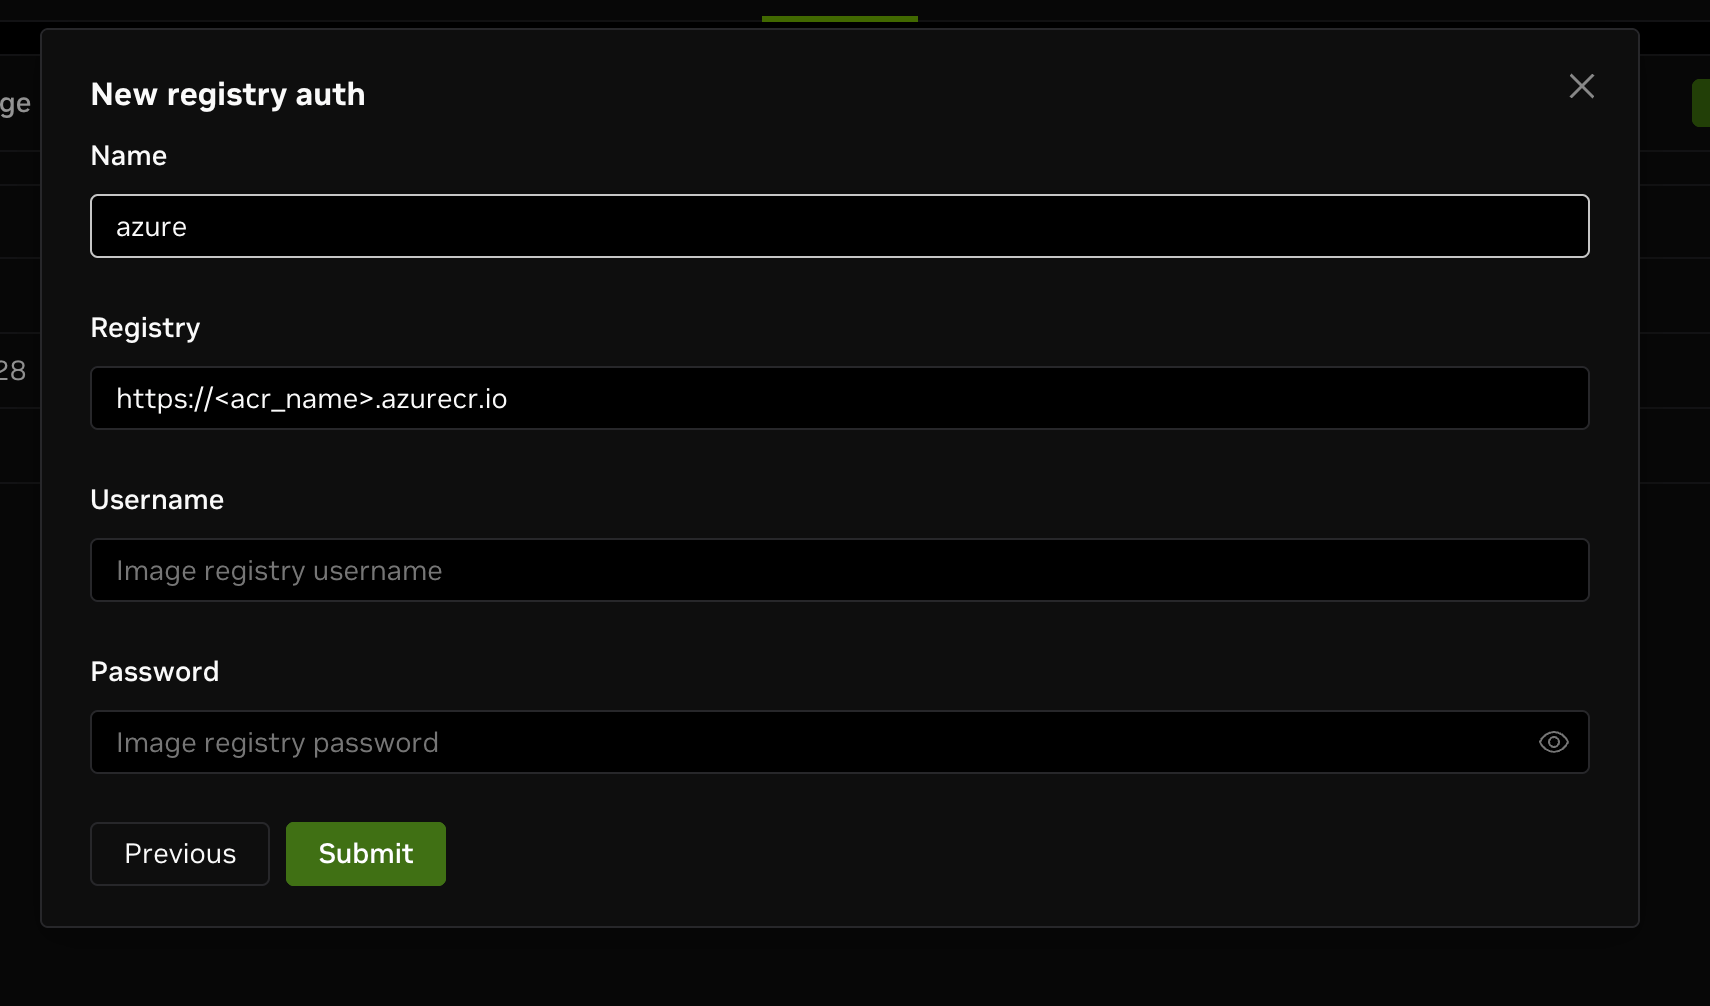
After filling in the form, click on Submit, and you will see the new Azure registry auth created successfully.
GitHub
This section guides you through setting up a GitHub registry for your workspace using an access token.
Create Access Token
First, you need to create an access token with the appropriate scopes. Navigate to your GitHub tokens page, click on the Generate new token button.
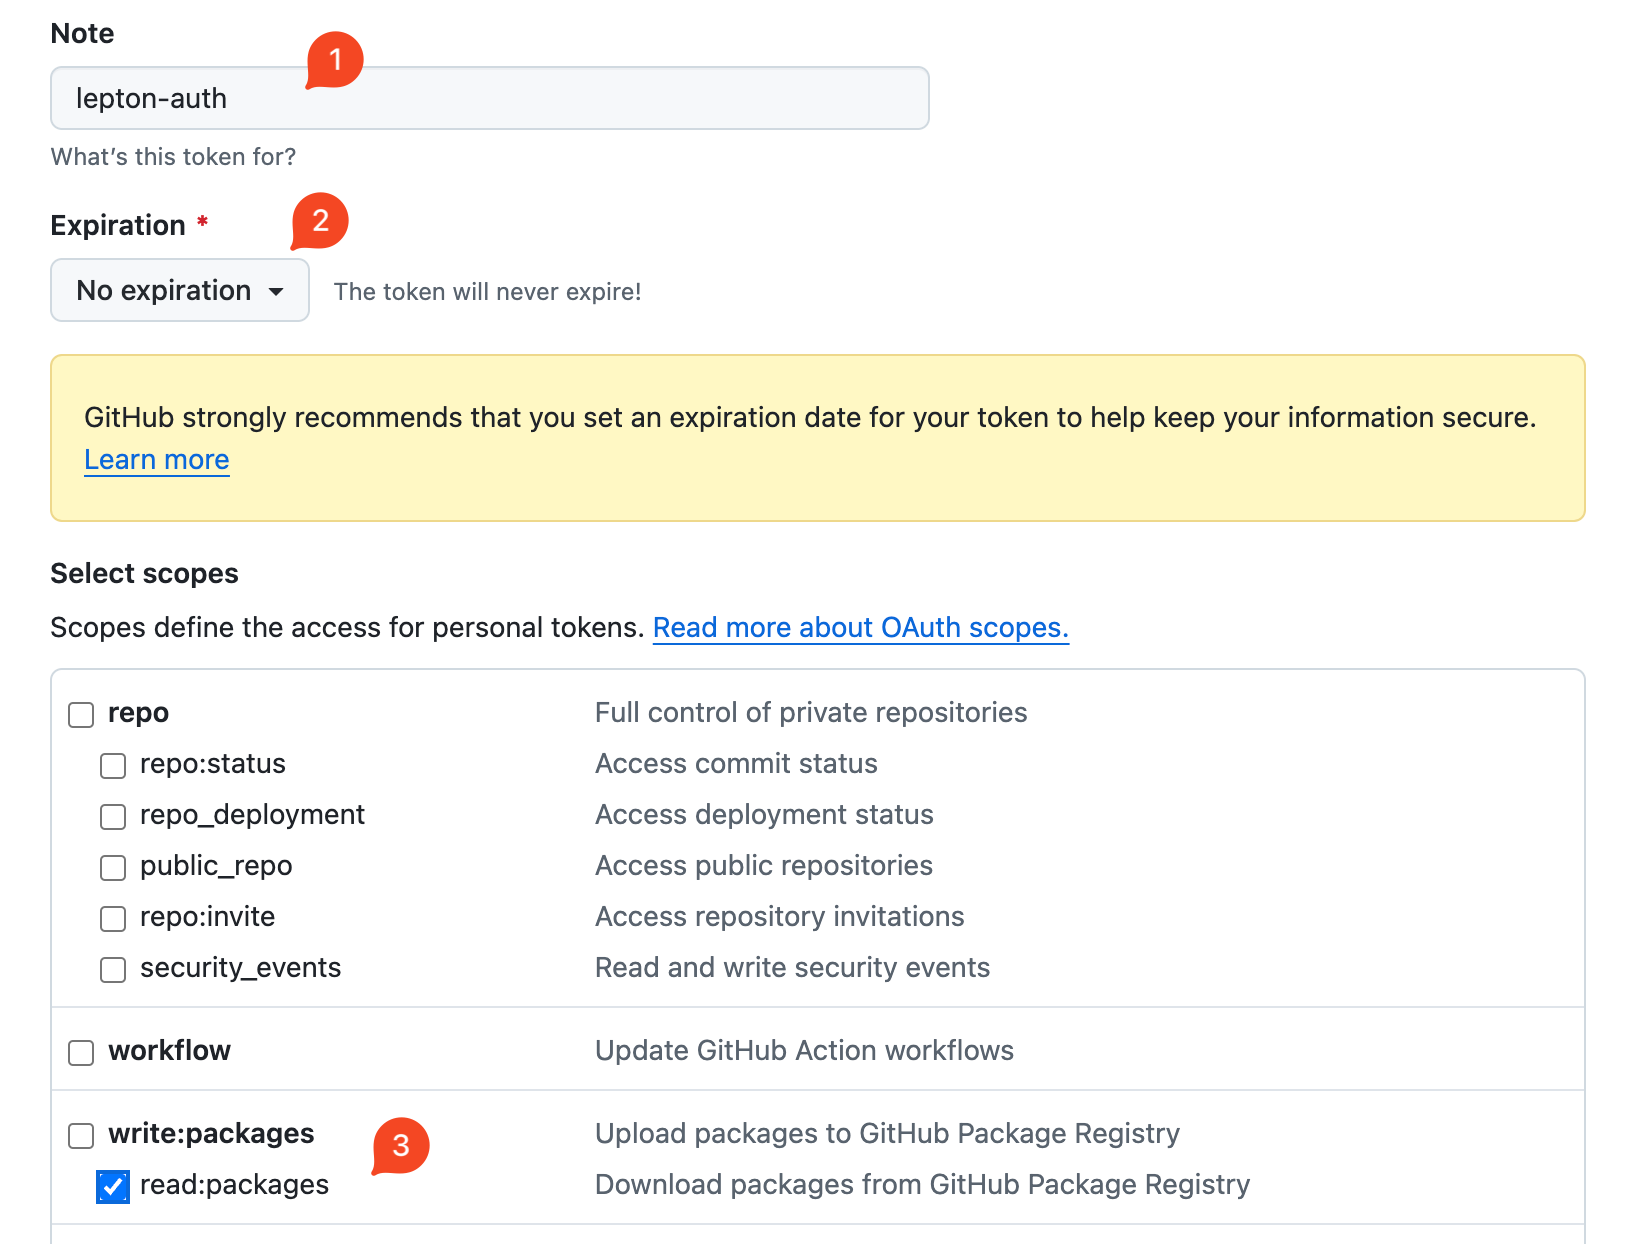
Complete the following fields:
- Note: A note for you to identify the token usage.
- Expiration: Recommended to set as No expiration.
- Scopes: In this case, we only need the
read:packagesscope.
Click on the Generate token button to create the access token.
Copy and save the token securely. You will no longer be able to access it after closing this page.
You can read more in the official documentation.
Create New Registry Auth
Now that you have the personal access token from GitHub, you can create a new registry auth.
Navigate to the registry settings page, click on New registry auth, and select GitHub as the source.
You need to fill in the following fields:
- GitHub Username: Your GitHub username.
- Access Token: The personal access token you just created.
After filling in the form, click Submit to create the new registry auth successfully.
NVIDIA
This section guides you through setting up an NVIDIA registry for your workspace.
Create API Key
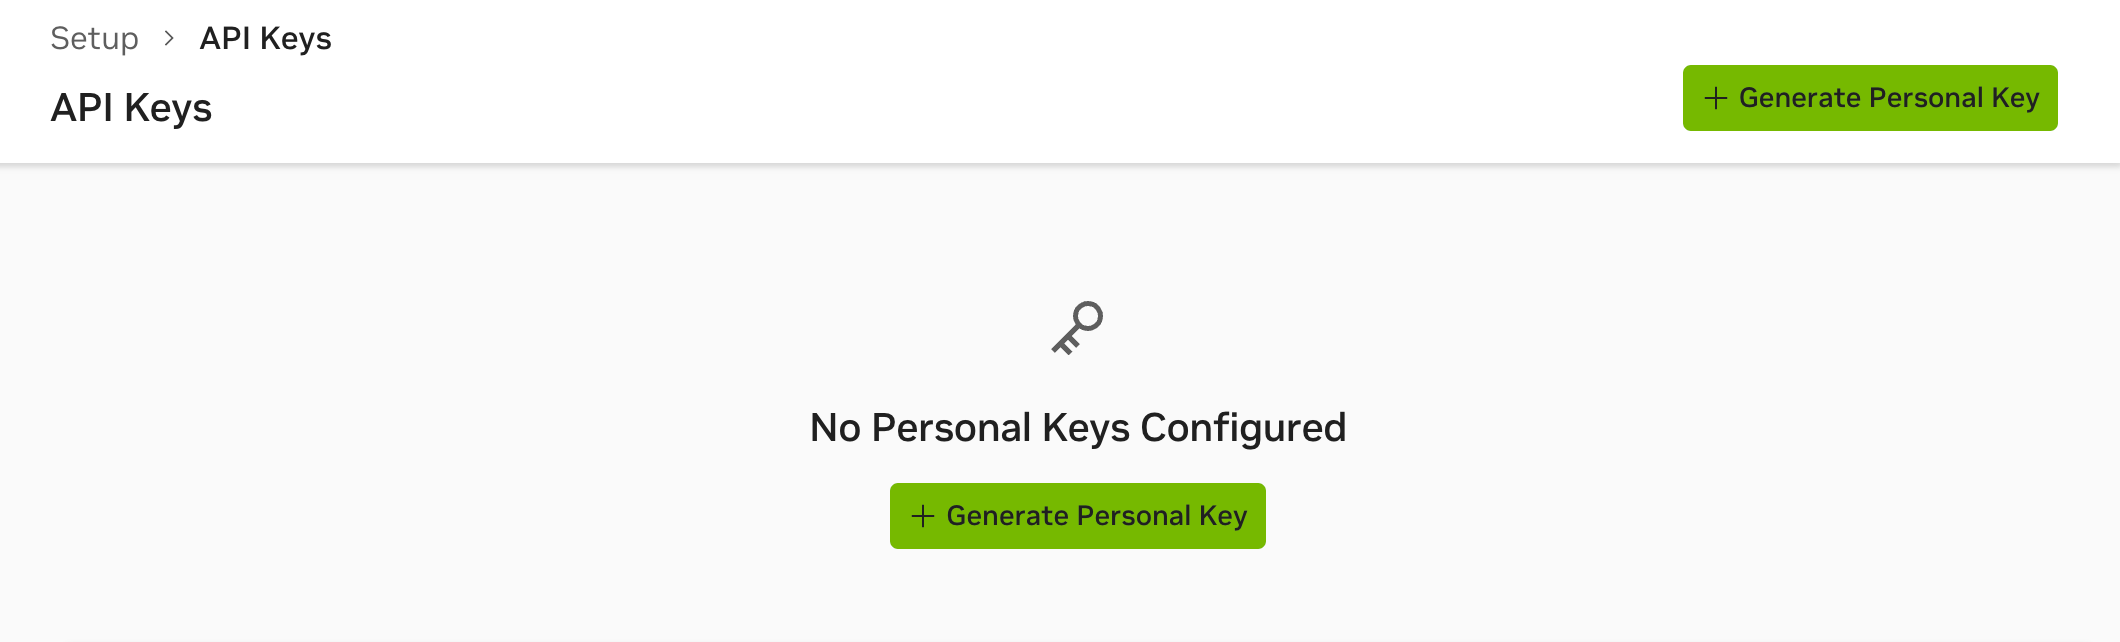
Before creating the registry auth on DGX Cloud Lepton, you need to create an API key for your NVIDIA account. Navigate to the API Keys page, click on Generate Personal Key.
In the creation form, you need to fill in the following fields:
- Key Name: The name for the new API key.
- Expiration: The expiration date for the new API key.
- Services Included: The services included in the new API key, select Private Registry here.
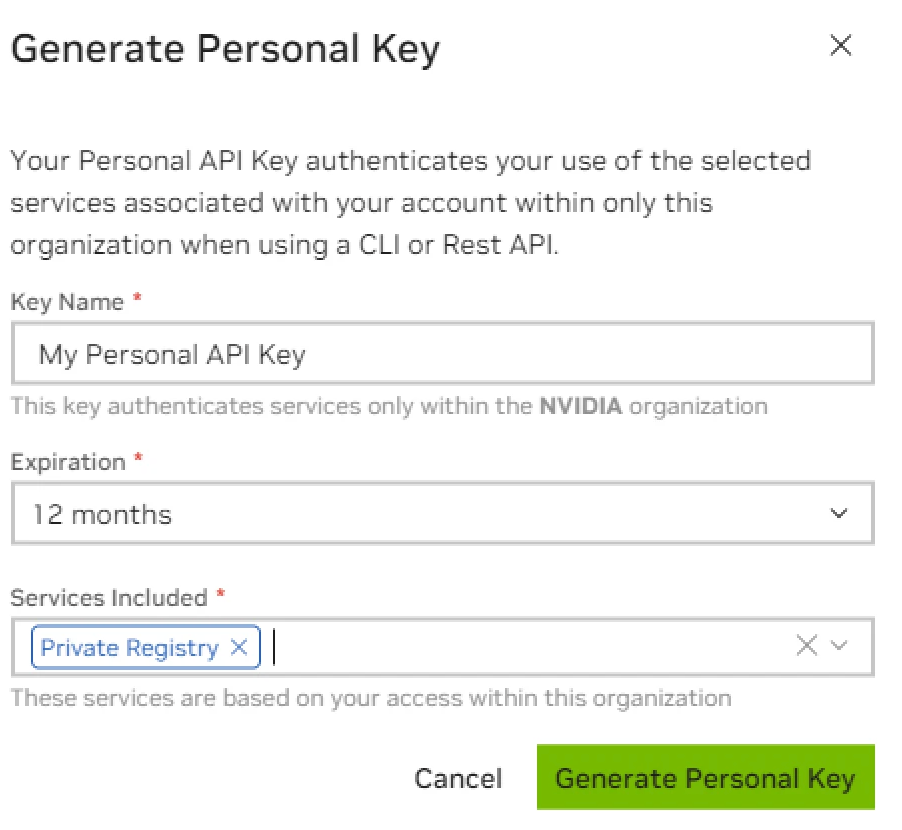
You can only include Private Registry when you are using Enterprise account on NVIDIA NGC.
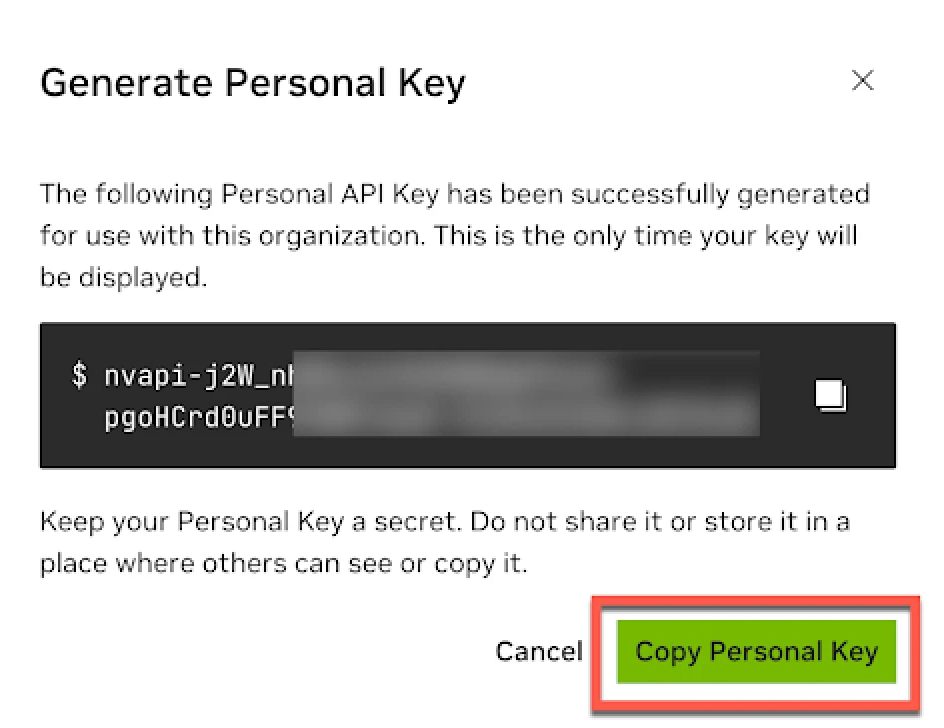
Click Generate Personal Key to create the API key successfully. Copy and save the API key securely. You will not be able to access it after closing the page.
You can learn more details in the official documentation.
Create Registry Auth
Navigate to the registry settings page, click on New registry auth, and select NVIDIA as the source. You need to fill in the following fields:
- API Key: The API key you just copied.
After filling in the form, click Submit to create the new registry auth successfully.
Custom
Besides the presets, you can also configure a custom registry for your workspace.
Create Custom Registry Auth
Navigate to the registry settings page, click on New registry auth, and select Custom as the source.
You need to fill in the following fields:
- Name: A name for your registry.
- Registry: The URL of your registry.
- Username: Your Registry username.
- Password: Your Registry password.