Installing Linux#
Installing Linux#
Most Linux distributions support several installation methods. This section describes how to initiate an installation on the Grace system remotely through facilities hosted on the BMC. Before you install, review platform-dependent workarounds to determine whether any modifications are required for your environment. That section is also a good place to start troubleshooting if you experience issues getting your Linux distribution running on the Grace platform.
Obtaining a Linux ISO#
Obtain the ISO for Arm® image (aarch64) for your Linux distribution and store it on the local disk of the system that will be serving the media. To support different installation strategies and preferences, many Linux distributions offer a full DVD ISO and a network-based ISO. Where possible, NVIDIA recommends using network-based installations because the storage footprint is smaller and these installations are typically faster. Although the virtual media installation method described in this section is convenient, it sometimes has difficulty serving large ISO images. This can cause issues for some installers, for example Ubuntu, that might be selective for latency and timeouts.
Remotely Booting a Linux ISO Image#
Attention
Here is some important information to know before you begin:
The Grace BMC comes with default login credentials, and NVIDIA recommends that you create a unique user ID and password.
Contact the system vendor if you have issues logging into the BMC.
As a performance consideration, for networks that are distributed across a wide geographical area, such as a corporate VPN, NVIDIA recommends that you use a browser from a host near the target server.
This can be accomplished by using a remote application software solution, for example VNC, or by exporting the application X session and tunneling over SSH.
This sequence is intended for the NVIDIA reference BMC, and your results might vary when using an IBV BMC.
Connect to the BMC.
Open a browser in your LAN, navigate to https://<BMC-IP-address>/, and log in.
Download the ISO image to a location that can be accessed by the browser.
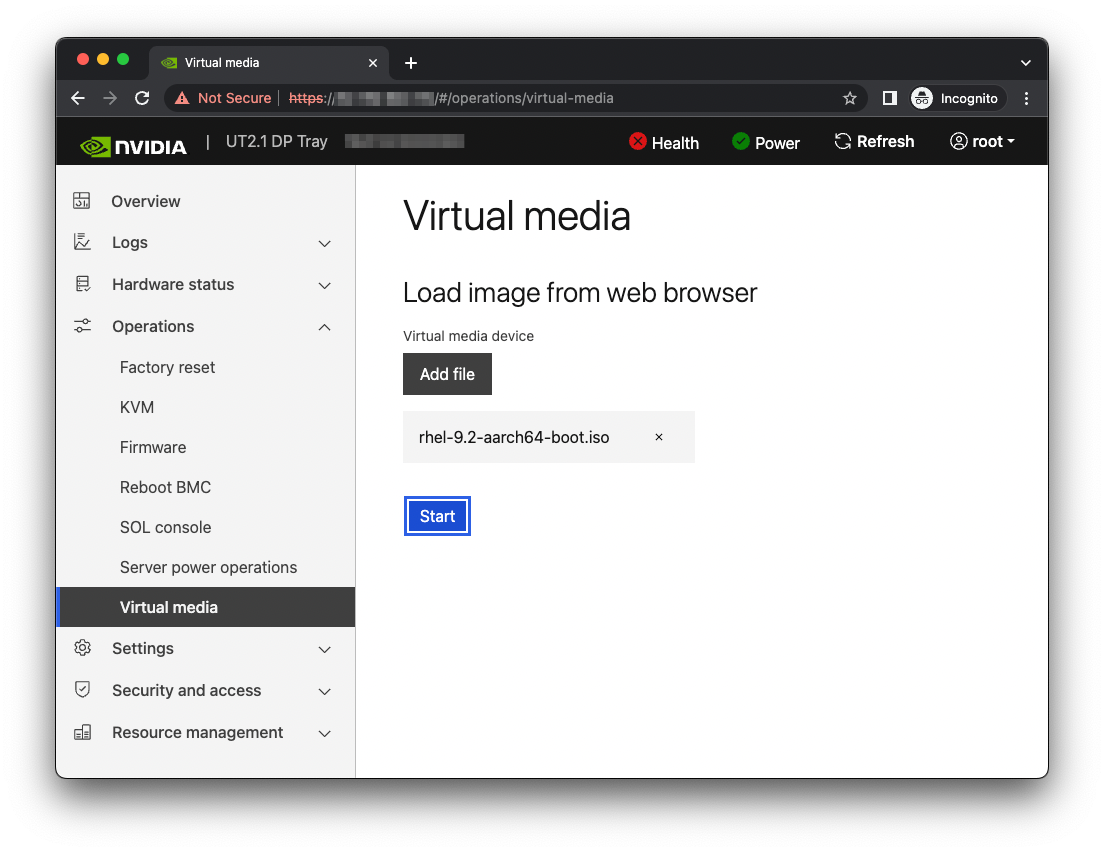
Set up the ISO image as virtual media.
From the left hand menu, expand Operations.
Select Virtual media.
Click Add file, navigate to the downloaded ISO image, and select it.
To begin serving the ISO image to the target server, click Start.
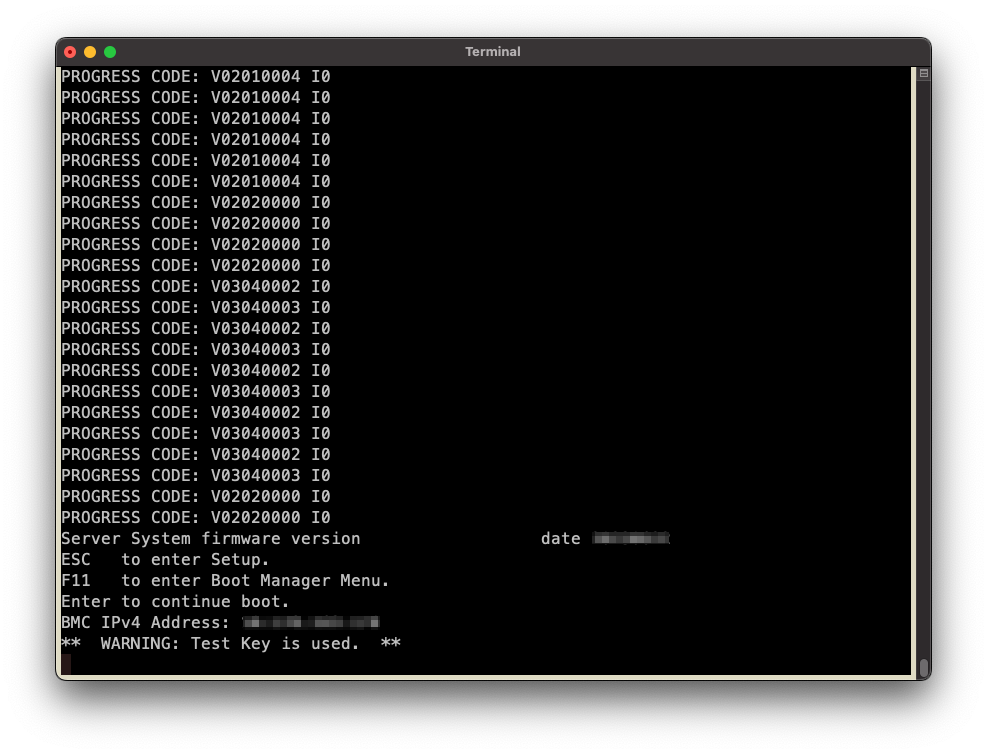
Boot from the virtual media.
Typically, the default boot order does not boot the CD-ROM image. You can change this in the BIOS or as a one-time option in the boot menu.
Connect to the console.
From the left hand menu, expand Operations, and select the SOL console.
Alternatively, SSH to the BMC from a terminal emulator, log in, and at the prompt, run the obmc-console-client command.
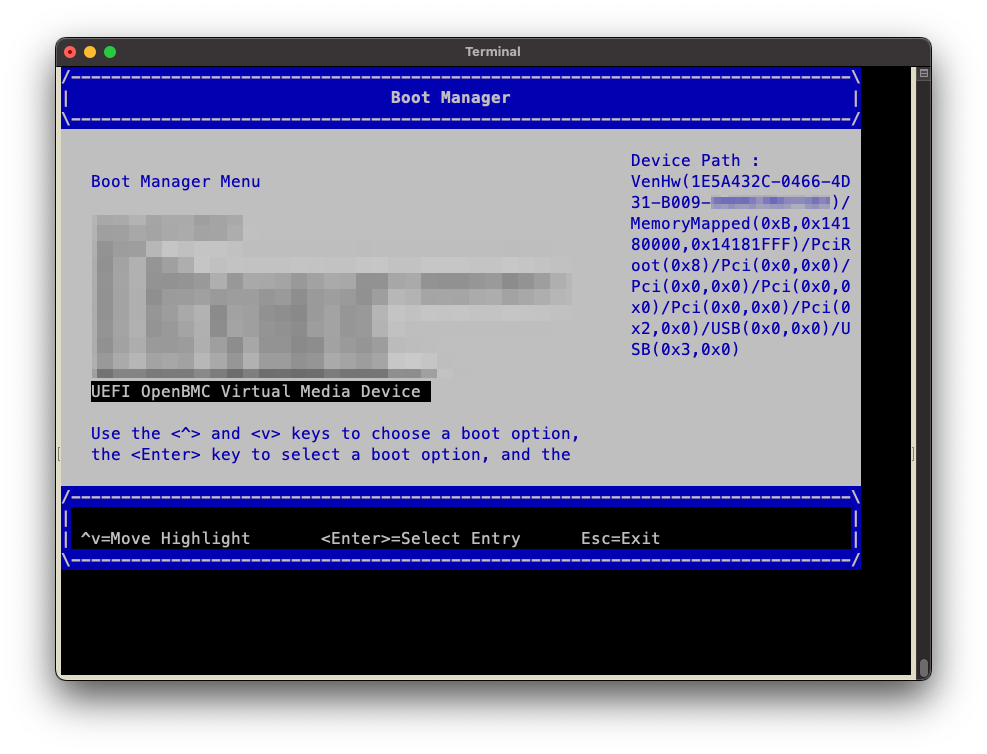
b. To bring up the boot menu, press Escape or F11 at the beginning of the boot process.
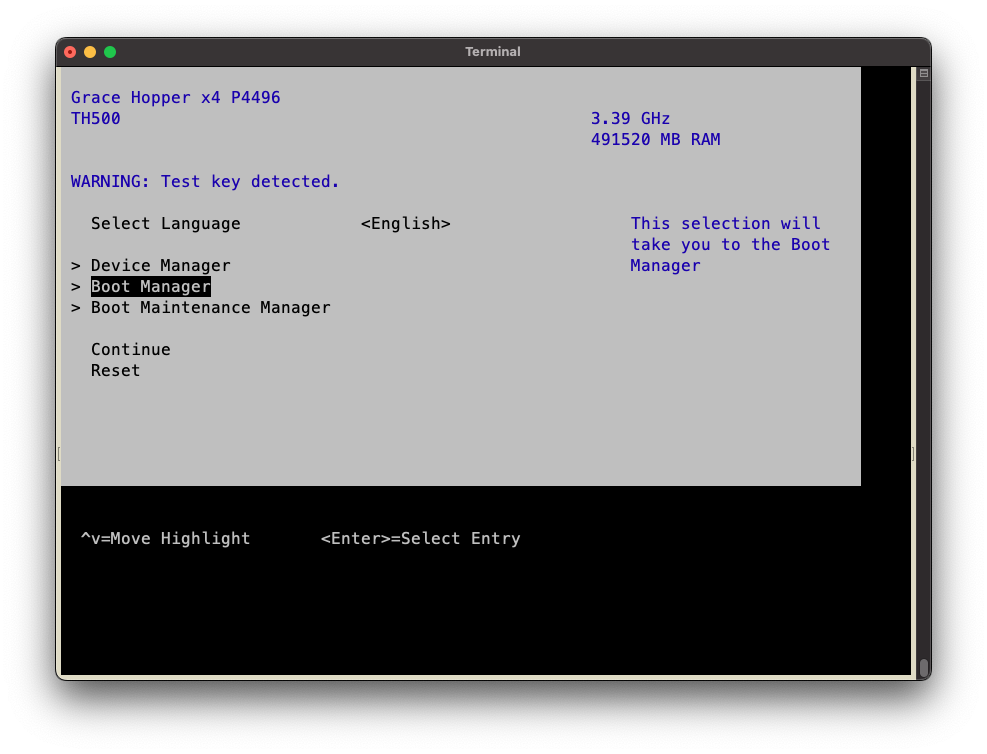
In the boot menu, select UEFI OpenBMC Virtual Media Device as the boot device and press Enter.
Follow the instructions in Installing Linux.
Installing Linux#
Prerequisites: This section assumes you have already booted the Linux ISO image.
After booting the ISO image, most Linux distributions will display the GRUB menu for the installer and select a default option after a timeout period.
While the menu entries will vary, there is typically an Install entry and a Rescue entry. The contents of these entries dictate the kernel to load and which boot options to enable. These can be viewed and/or modified by pressing the e key.
The kernel parameters for workarounds and tunables can be applied during the installation by modifying the Install GRUB entry.
Caution
Linux distros will often carry these parameters forward to the installed system, which you might (or might not) want. Advanced installers might also interpret the kernel parameters that were specified at install time and carry them forward in a different manner. For example, the module_blacklist kernel parameter might continue as a kernel parameter while other, more advanced installers, might move this behavior to a
/etc/modprobe.d/*.confscript.Some implementations of the BMC virtual media interface suffer from slow performance, which can increase the installation process and possibly cause some Linux installers to experience timeout failures.
NVIDIA recommends using a network installation method where possible. This can include a hybrid approach, where the initrd and kernel are loaded from virtual media and the appropriate parameters are applied at the Install GRUB entry to complete the installation over the network directly from the ISO or from a repository hosted on the network. For example, Ubuntu supports accessing an ISO using HTTP with the
url=http://path-to-image.isoparameter and RHEL support accessing an ISO using NFS with theinst.repo=nfs:[options:]<server>:/<path>parameter.Note
The UEFI shell supports the ifconfig and ping network utilities. These can be helpful when troubleshooting network configuration issues.