NVStreamer on Jetson Orin#
Overview#
NVStreamer is an NVIDIA developer software that enables storing and serving of video files that can then be streamed using the RTSP protocol. It is particularly useful for testing with VST, as it provides an alternative means to cameras for creating video sources as input to VST. Specifically, it provides a mechanism to test specific video files as VST inputs. VST can be configured to receive RTSP streams as if they were originating from an ONVIF-S camera.
Setup and Launch NVStreamer#
Download the application bundle from NGC to your Jetson using this NGC link. You will need to enter your NGC credentials. On the page, use one of the options available in the Download menu (top right).
Extract the files on your Jetson using the following commands:
unzip files.zip [if used direct download option]
tar -xvf nvstreamer-2.0.0.tar.gz
Run below commands to increase the OS socket buffer sizes. This is to avoid packet loss in case of videos with high-bitrate or large IDR-frames. You could see blocky artifacts sometimes for few video files if these buffer sizes are not increased.
sudo sysctl -w net.core.wmem_max=2000000
sudo sysctl -w net.core.rmem_max=2000000
Launch NVStreamer using command line such as below:
cd nvstreamer
sudo docker compose -f compose_nvstreamer.yaml up -d --force-recreate
Uploading Videos to NVStreamer#
Now that you are able to setup NVStreamer you may try uploading videos in NVStreamer. Open a web browser (we suggest Chrome) and navigate to this address (on the same system or another one on the same network):
http://[NVStreamer-IP]:31000
Note
HTTP, not HTTPS) where [NVStreamer-IP] is the host IP address on the local network (you can use ifconfig on the terminal to verify the IP).
The following UX will open:
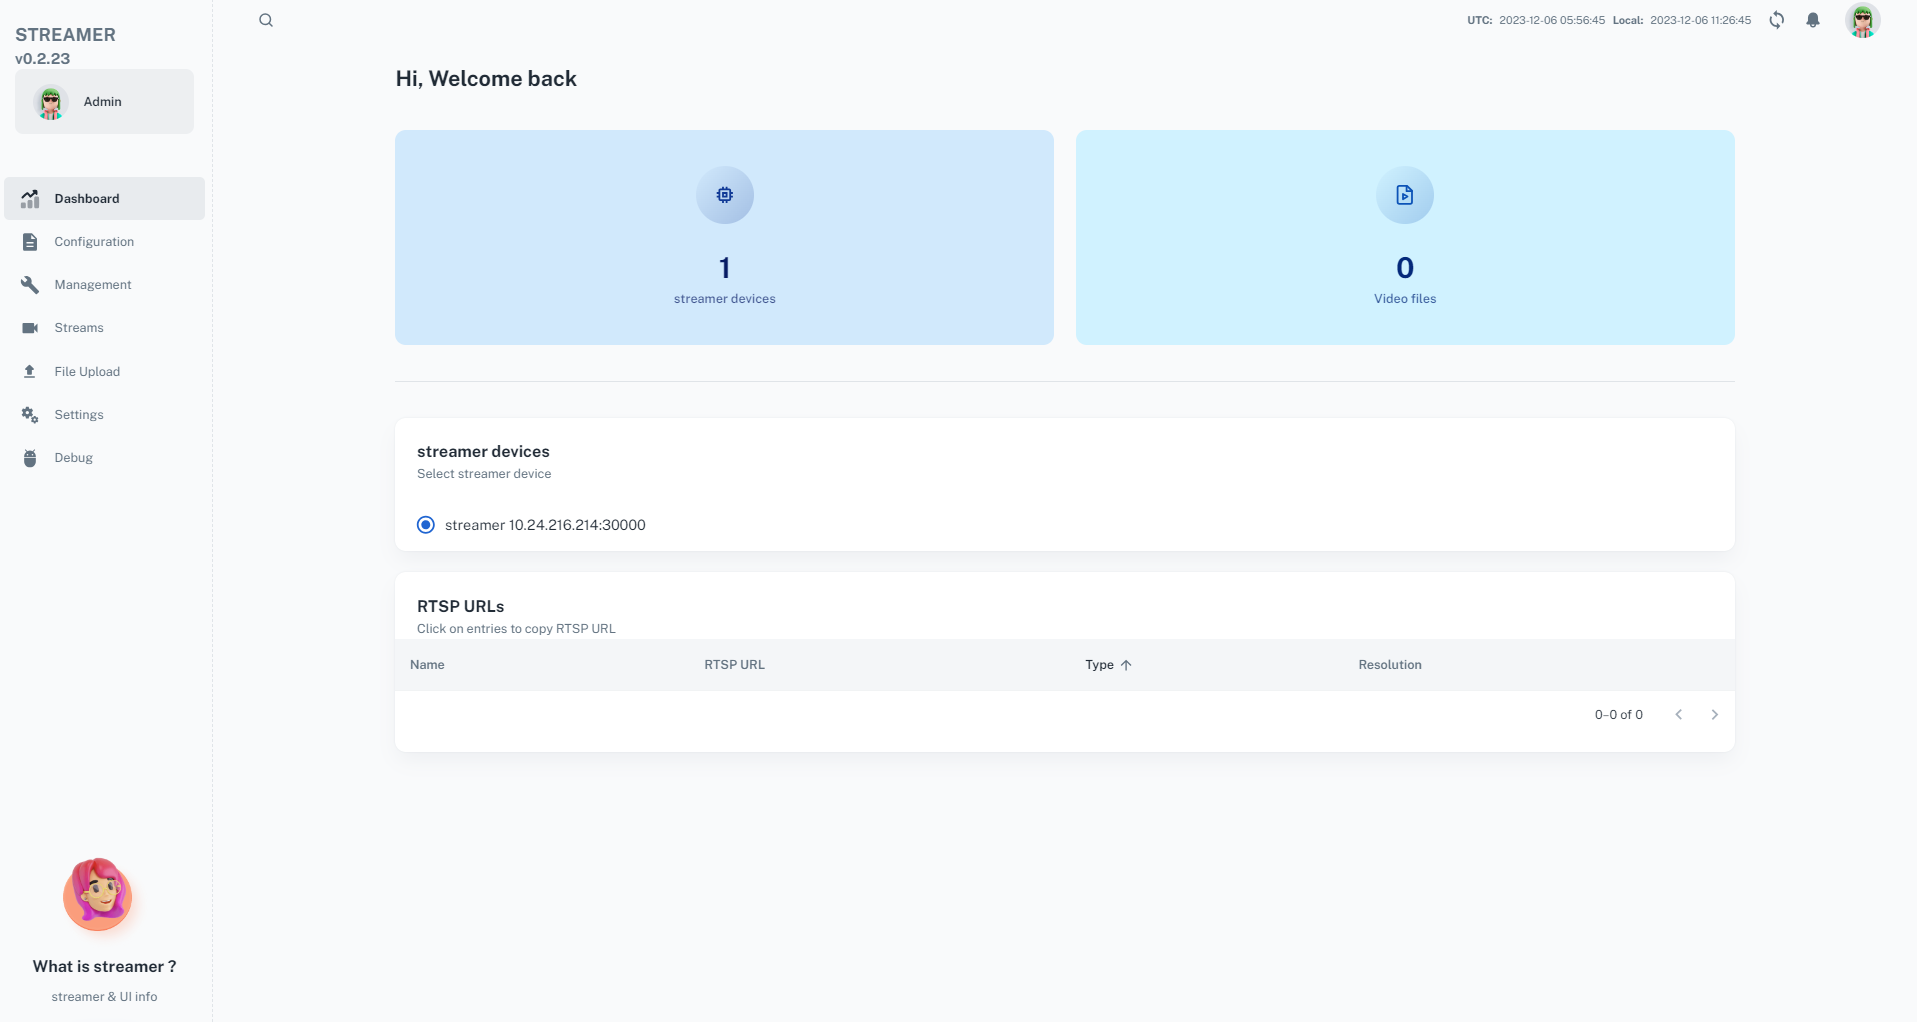
If video file contains the B-frames, NVStreamer will auto transcode the file and depending upon the file size it may take few minutes to transcode the file.
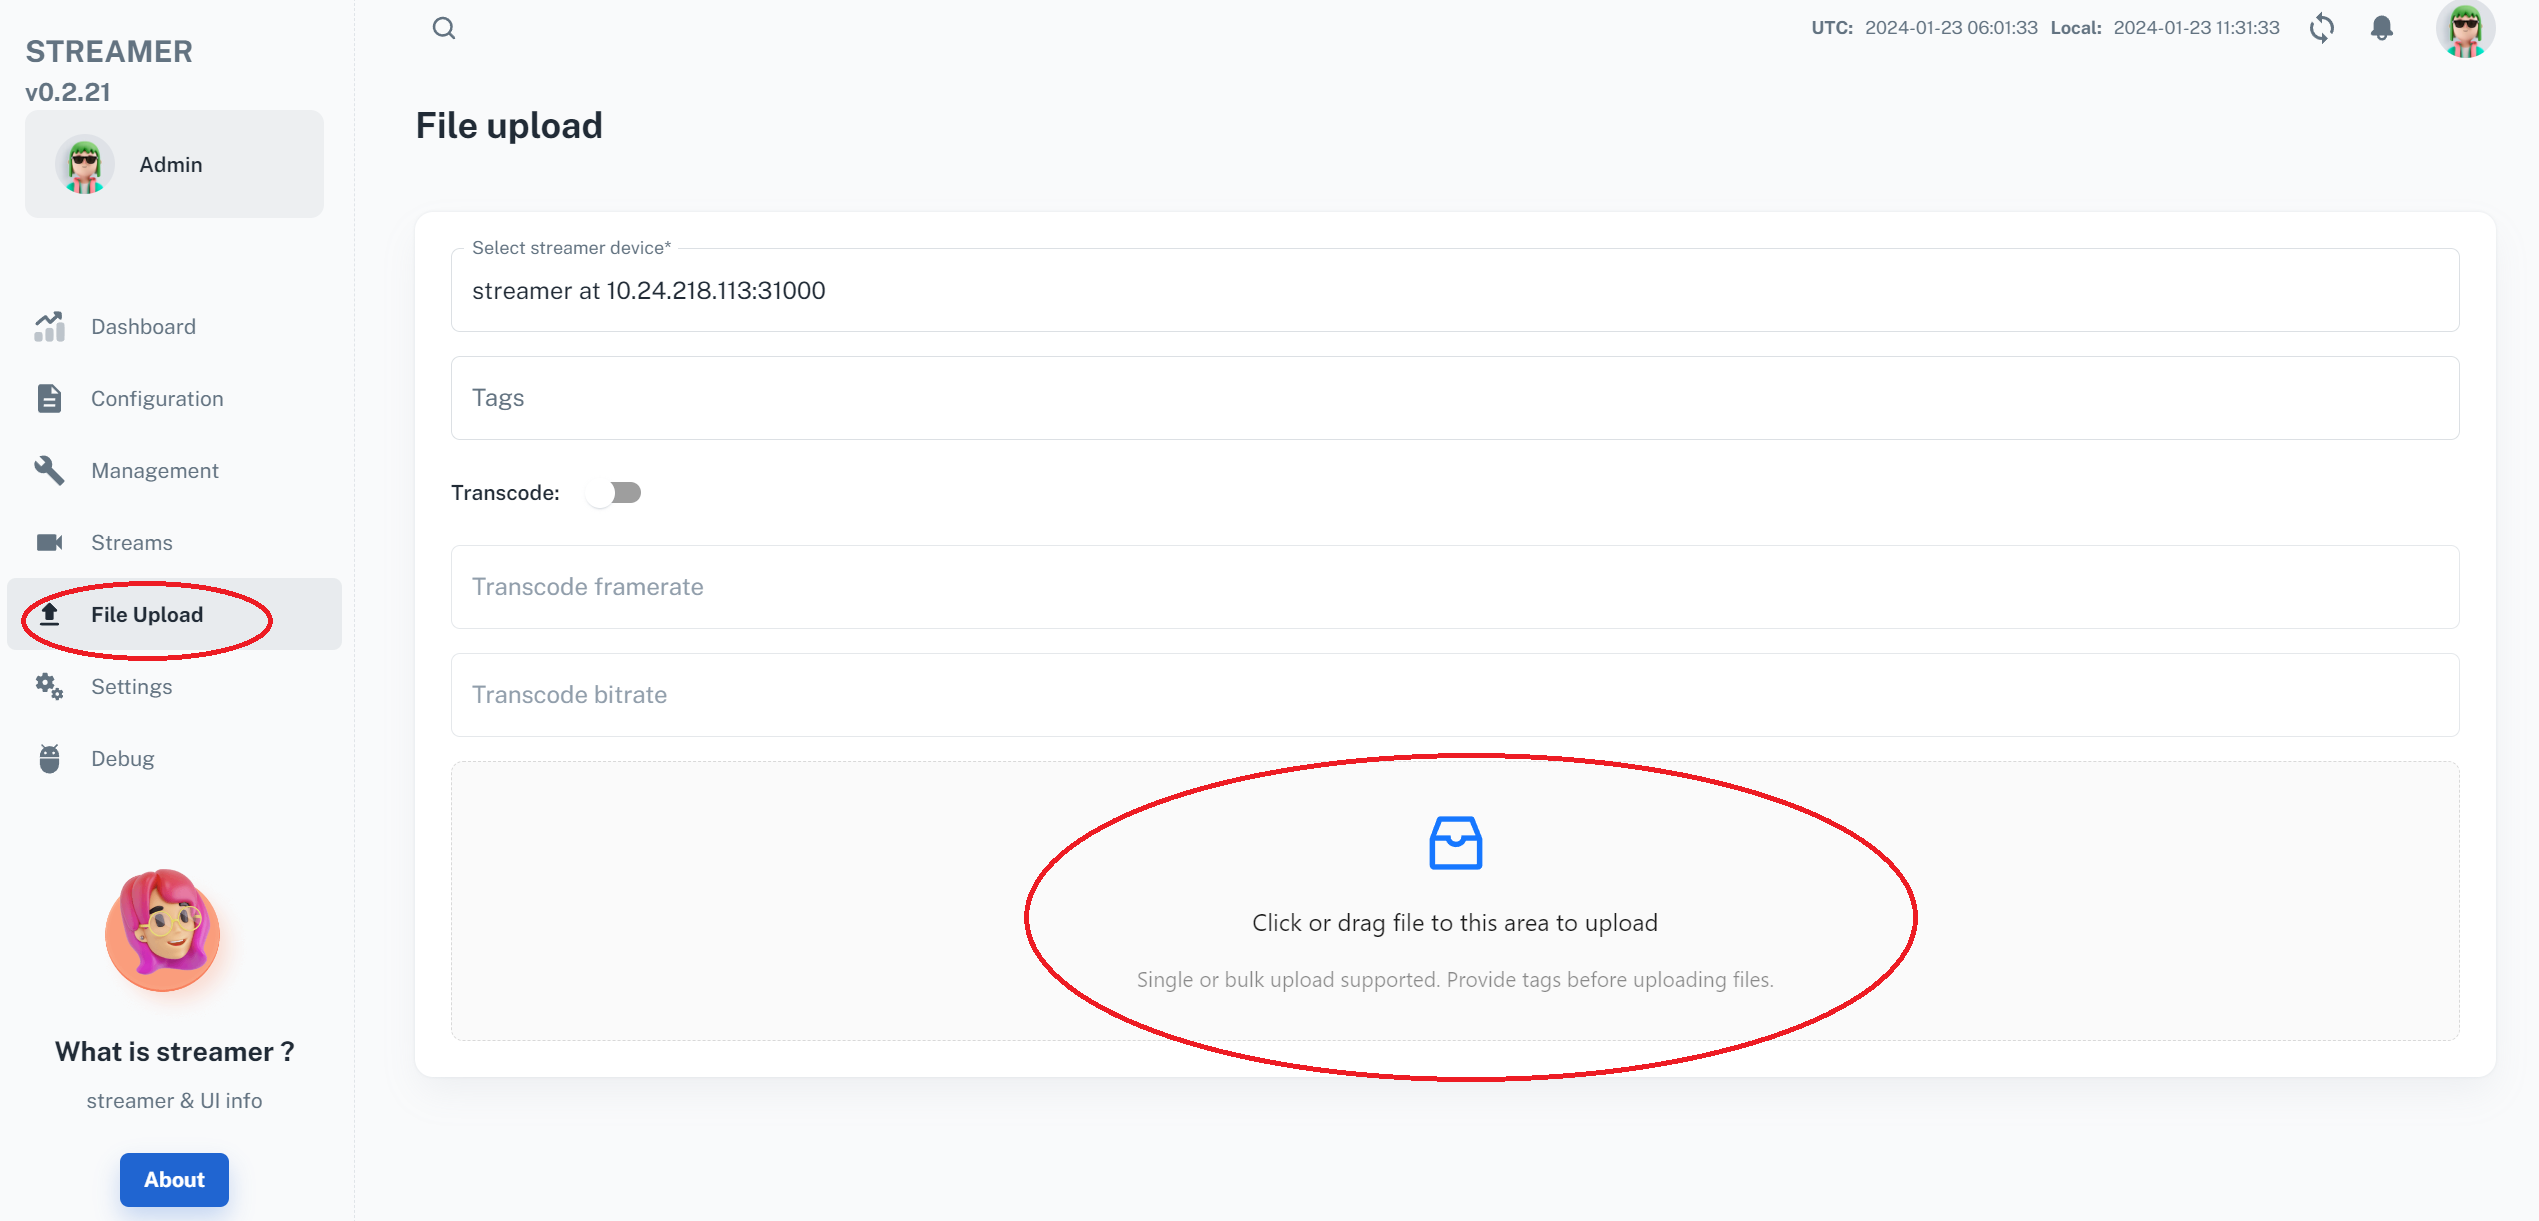
Select ‘File Upload’ and select a video disk file (Supported codec: h264/h265 container: mp4/mkv) you wish to test as if it were a camera, then drag-and-drop it on the area depicted:
Once the file is successfully uploaded, a green line progress will terminate at the bottom left, after which time the transcoding process will take place. Once done, The file name will appear in gray and RTSP stream with the file name will be automatically created:
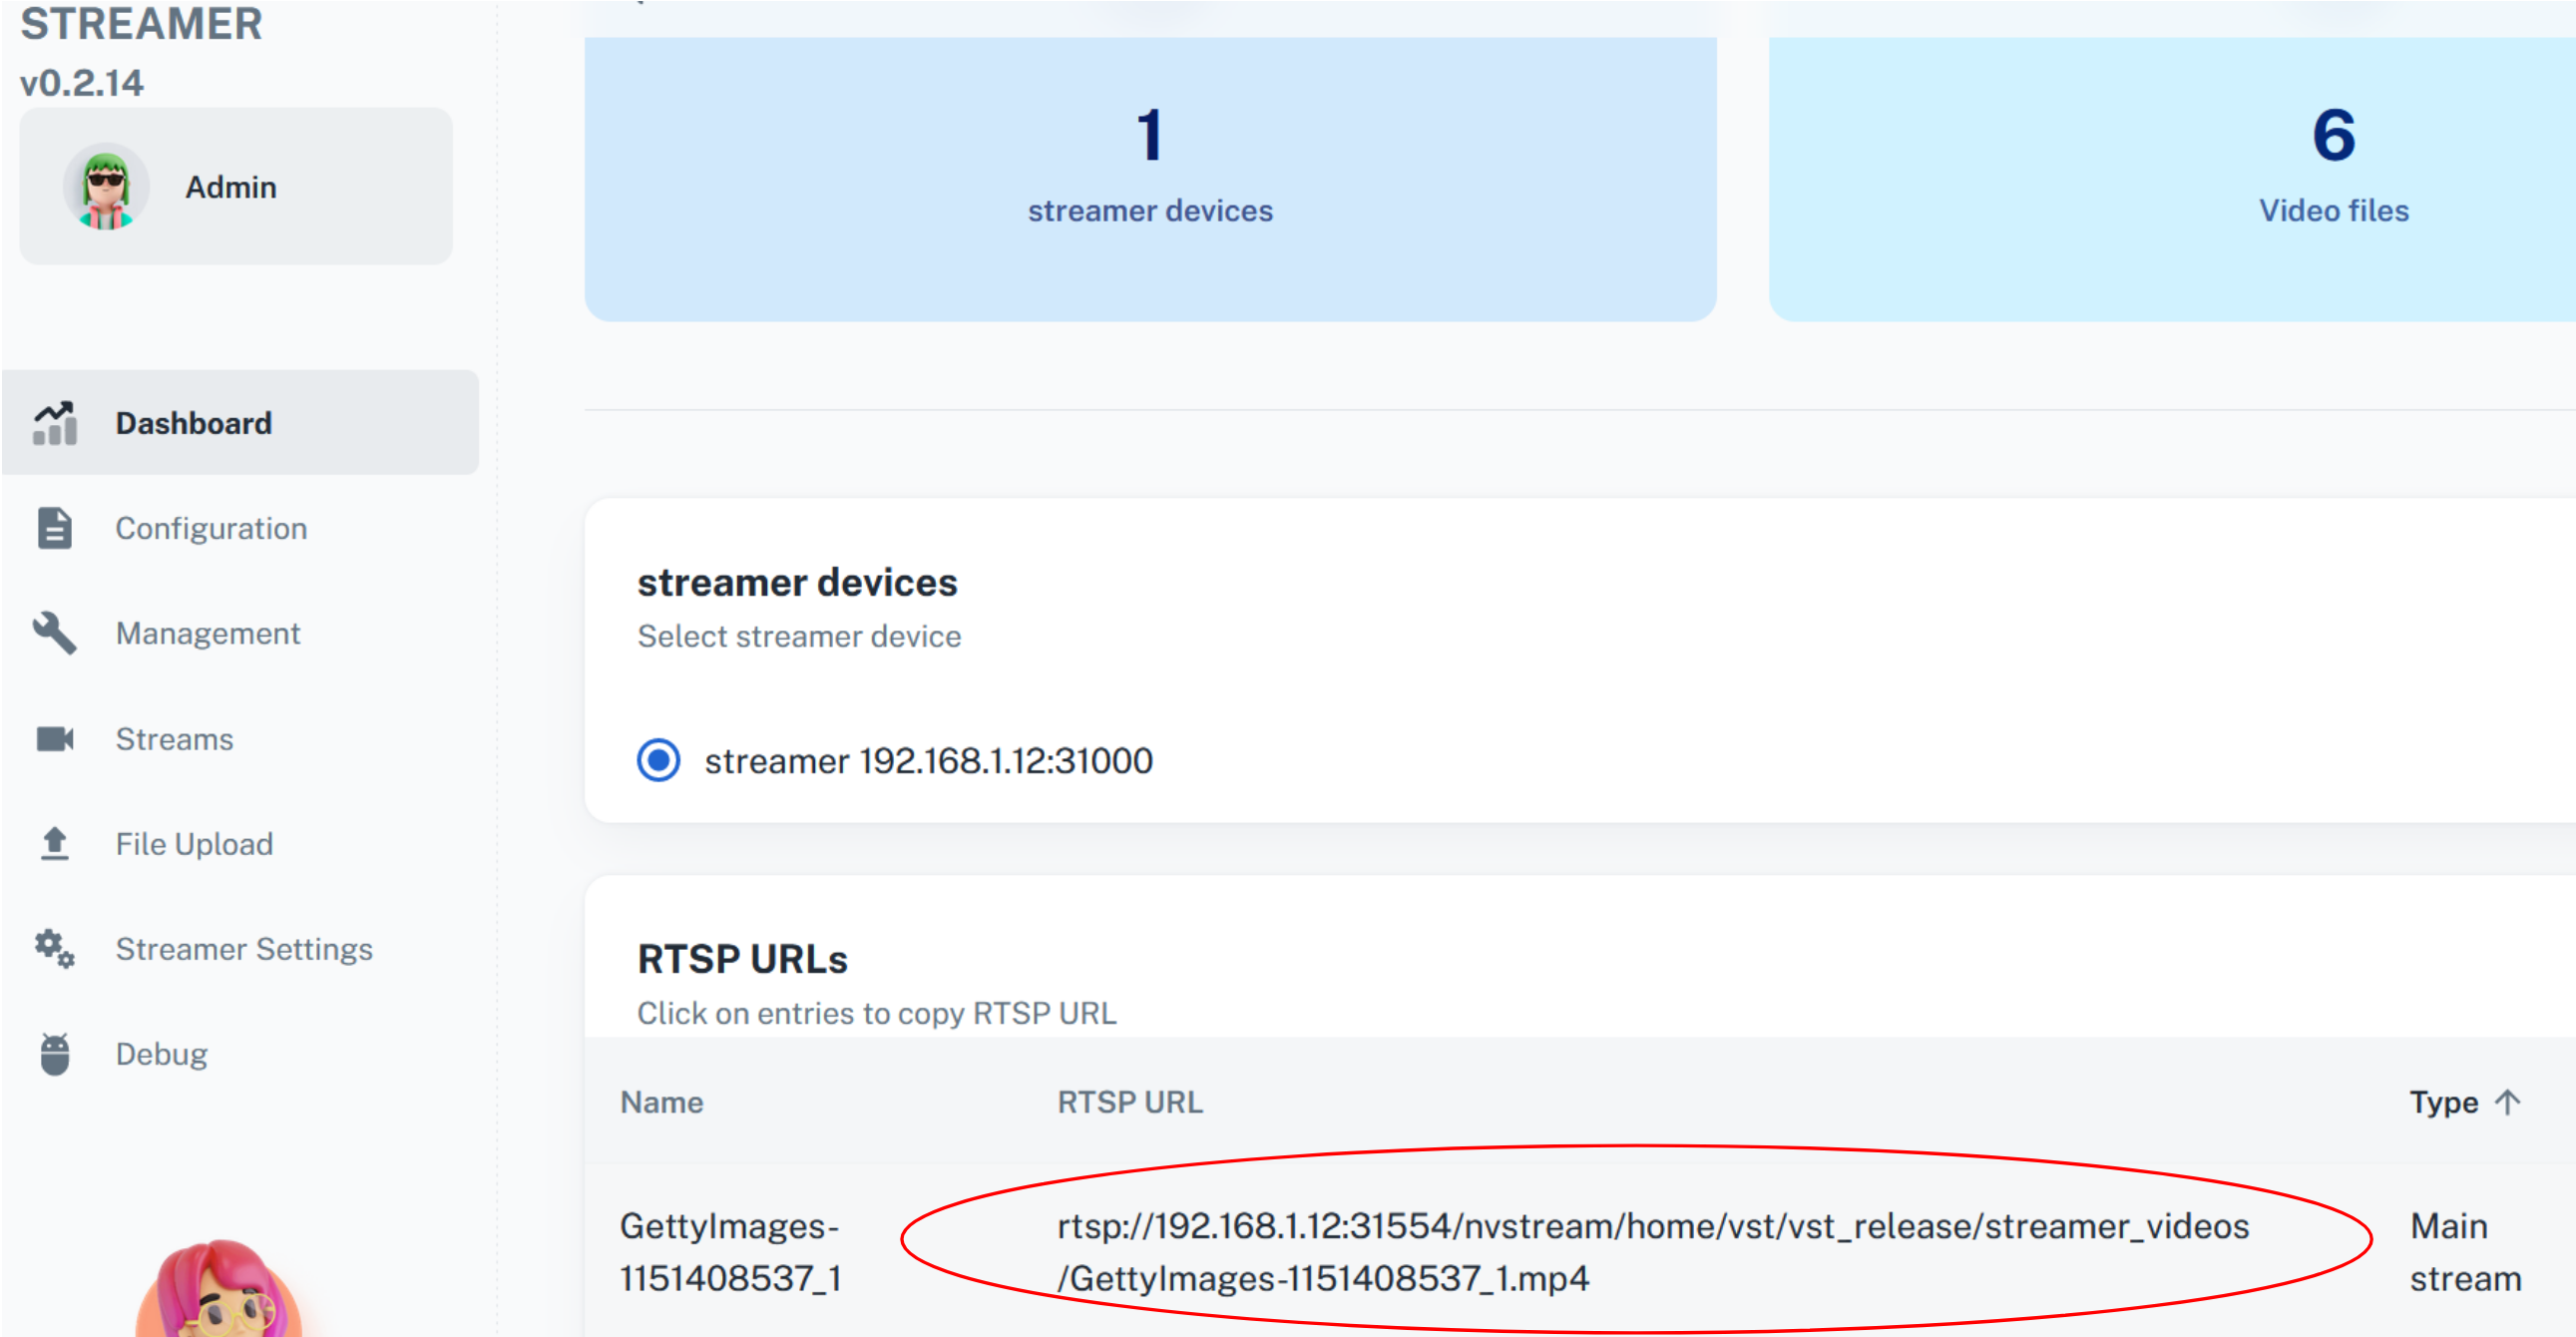
Copy or take the note of the RTSP address (including ‘rtsp://’; make sure there are no spaces in front). You will need to input that address into another UX we will discuss in the next step.
Adding RTSP Stream to VST#
Access VST web server here: http://[JETSON-IP]:30080/vst/. (Note: HTTP, not HTTPS) where [JETSON-IP] is the IP address of the Jetson device on which you are running the docker container.
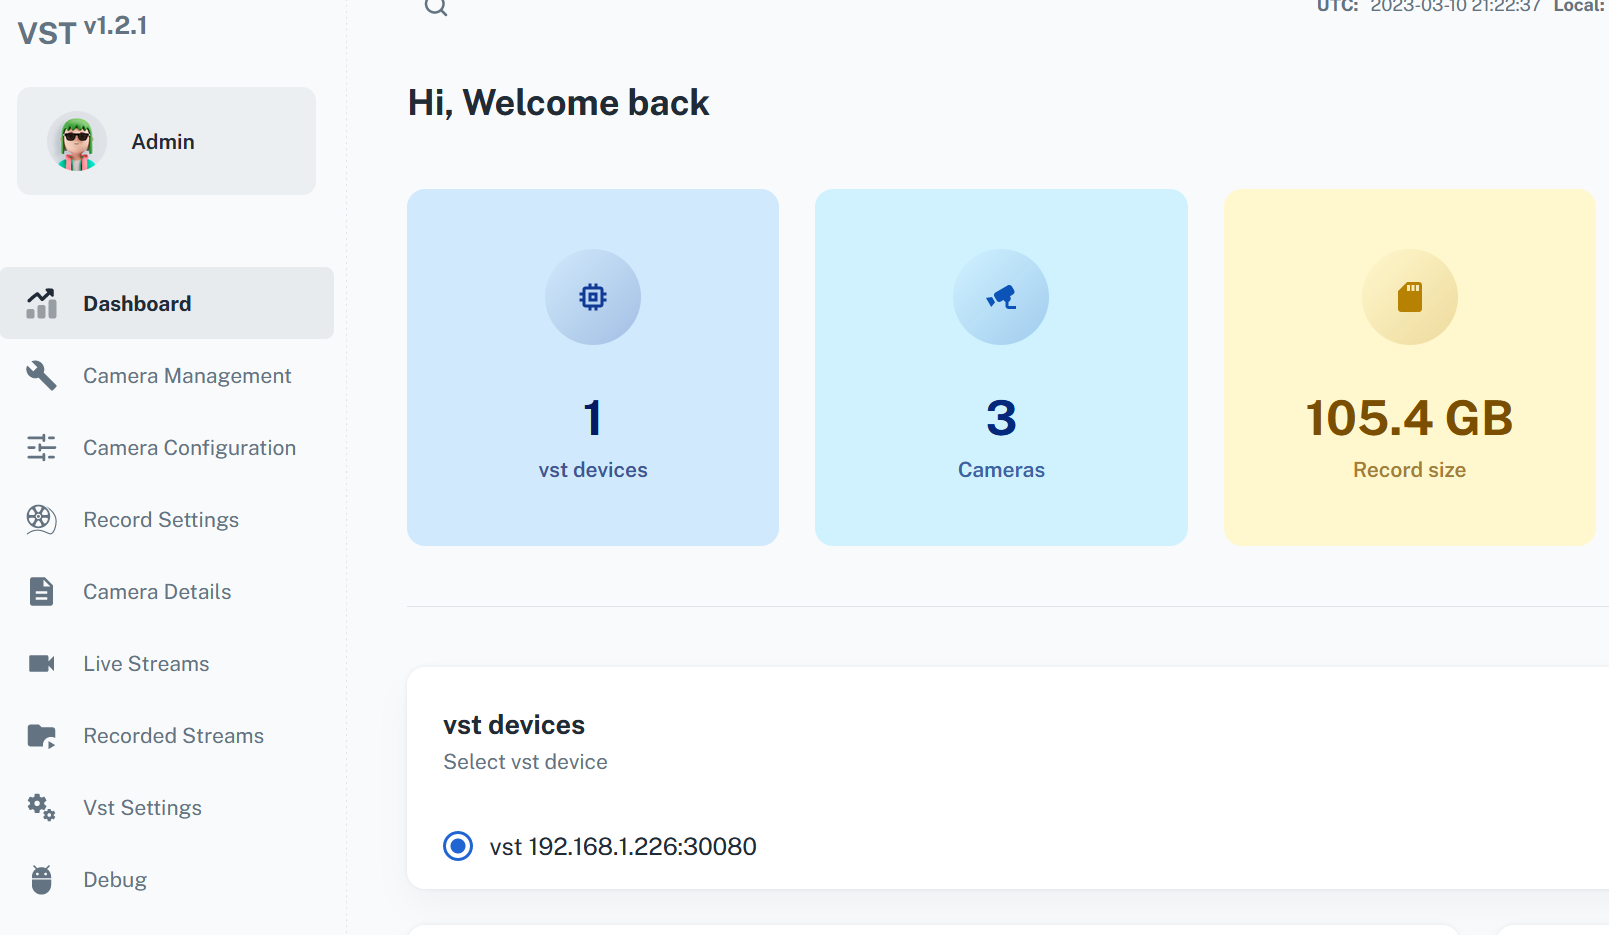
You will see a UI similar to this:
Click the ‘Sensor Management’ tab:
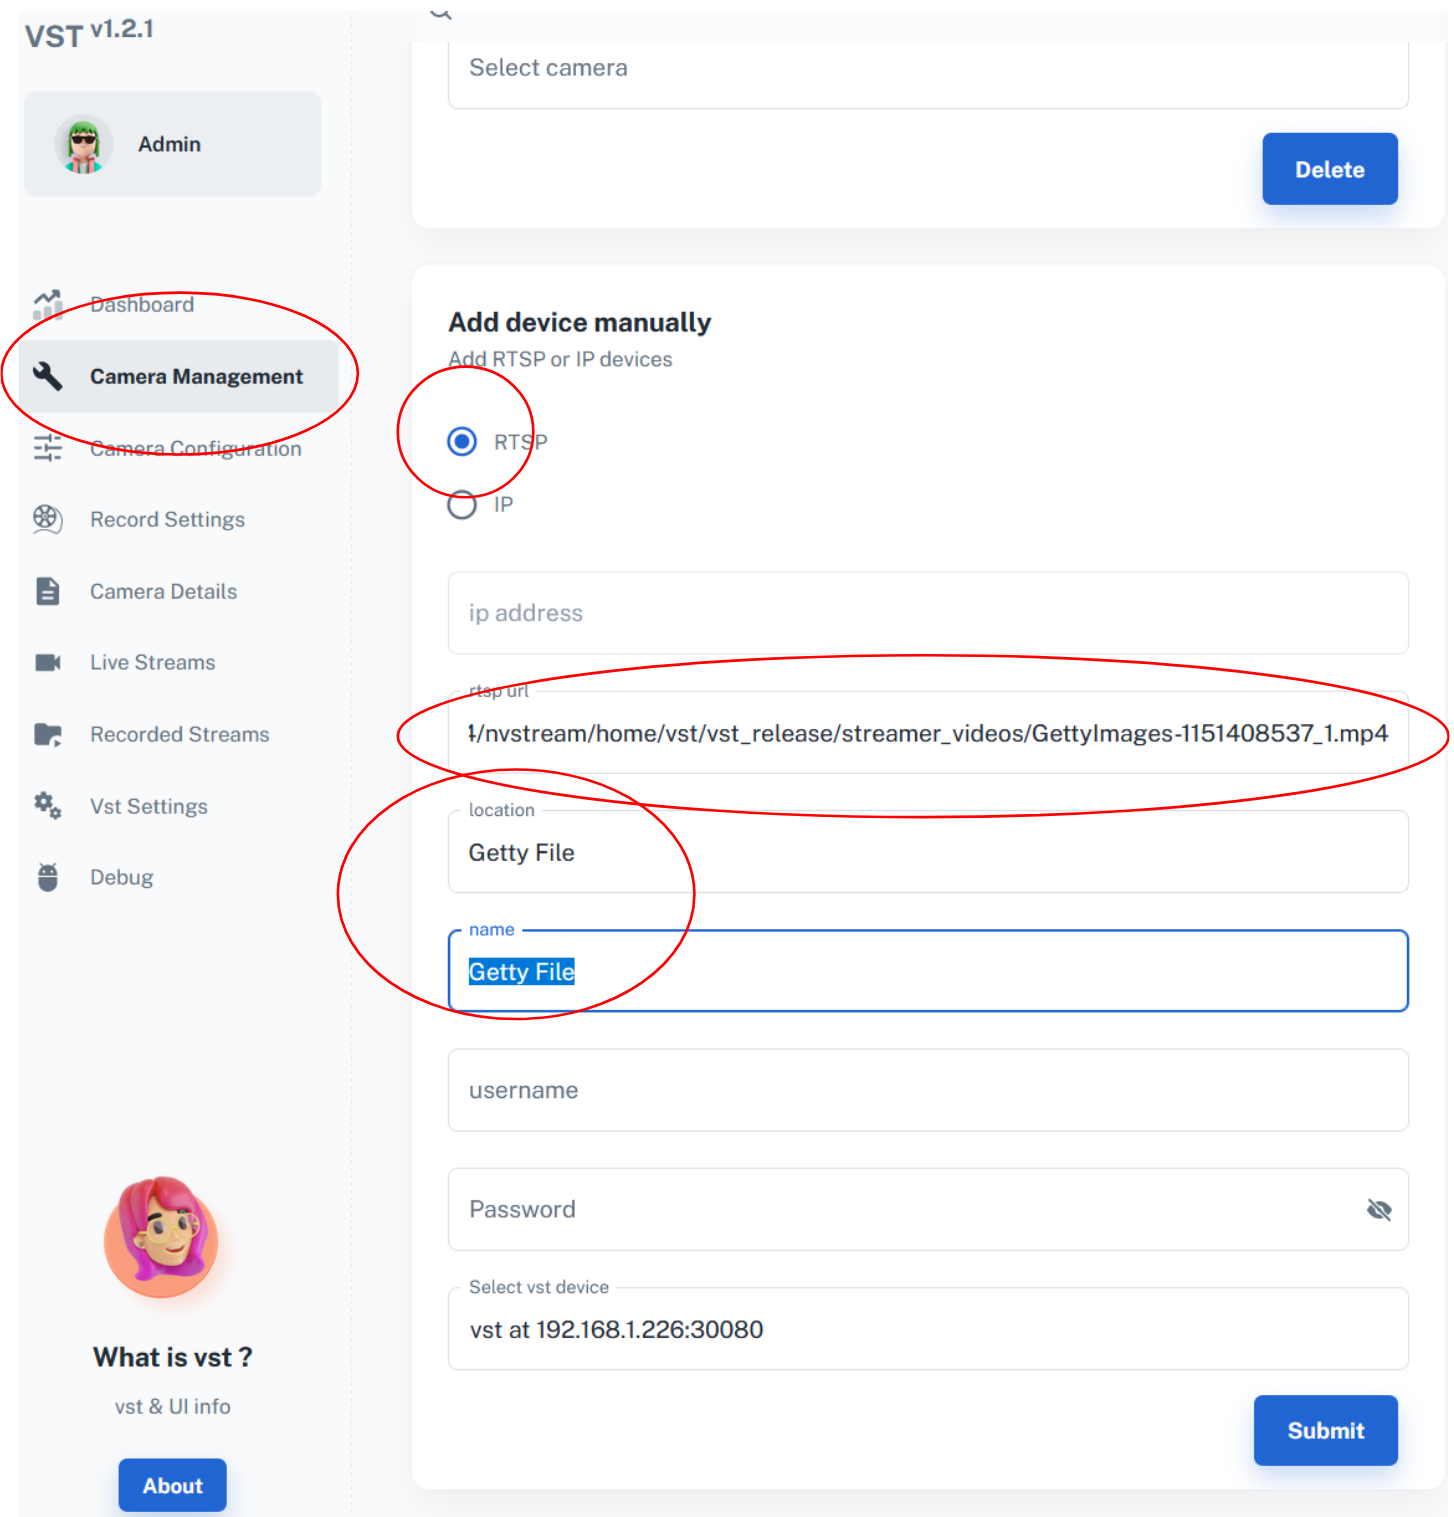
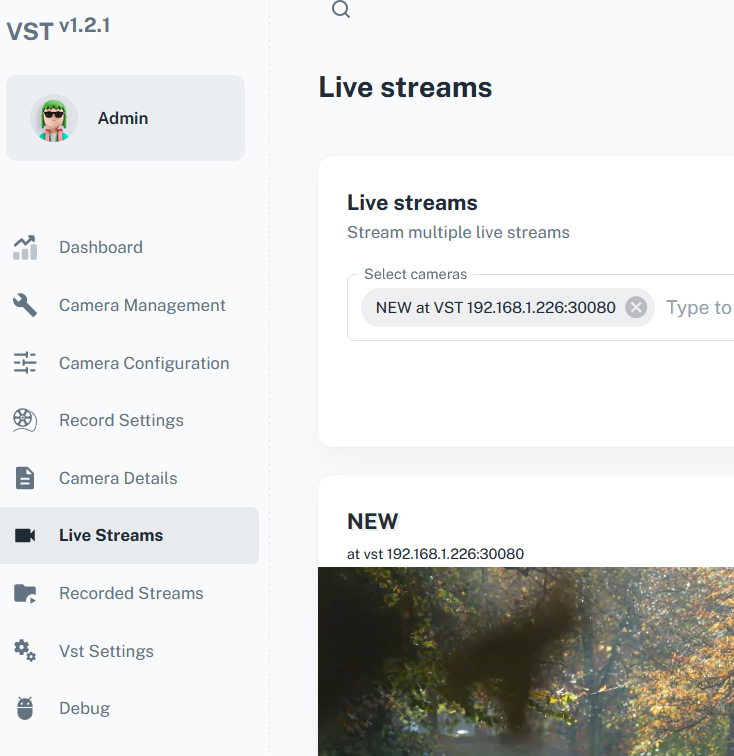
Click on ‘RTSP’, and paste the RTSP address copied from NVStreamer UI to ‘rtsp url’ box. Fill ‘location’ and ‘name’ fields with the same string (it will become the camera name) and hit ‘Submit’. You can now click on ‘Streams tab’ to see the file:
Stop NVStreamer#
To terminate the NVStreamer instance, use below command:
sudo docker compose -f compose_nvstreamer.yaml down --remove-orphansNote
If NVStreamer is stopped the corresponding RTSP Streams will also be closed and streams added in VST will stop working.
NVStreamer on Ubuntu#
If you have a large video files or collection, or want to use multiple streams, then you can alternately install and use NVStreamer on your Ubuntu Desktop or Laptop.
Prerequisites#
Before proceeding with the setup process, ensure that your system meets the following prerequisites:
Linux workstation running Ubuntu 20.04 or later.
Linux system needs enough free space to store video files that you will be serving (typically several hundred GB).
GPU is optional for NVStreamer, if GPU is installed on Linux System then
Driver Version: 535.113.01andCUDA Version: 12.2.
Launching NVStreamer#
NVStreamer on Ubuntu uses a config file that needs to be defined and mounted into the container. Use the sample config file contents shown in NVStreamer Config and copy it to a file named nvstreamer_config.json.
Run below commands to increase the OS socket buffer sizes. This is to avoid packet loss in case of videos with high-bitrate or large IDR-frames. You could see blocky artifacts sometimes for few video files if these buffer sizes are not increased.
sudo sysctl -w net.core.wmem_max=2000000
sudo sysctl -w net.core.rmem_max=2000000
Launch NVStreamer using command line such as below (with GPU) :
sudo docker run -e ADAPTOR=streamer -d --restart always --gpus all -v {local video file path}:/home/vst/vst_release/streamer_videos/ -v {nvstream config file path}:/home/vst/vst_release/updated_configs/ --net=host nvcr.io/nvidia/jps/vst:1.3.0-24.08.1-x86_64 --vstConfigFile /home/vst/vst_release/updated_configs/nvstreamer_config.json
Launch NVStreamer using command line such as below (without GPU) :
sudo docker run -e ADAPTOR=streamer -d --restart always -v {local video file path}:/home/vst/vst_release/streamer_videos/ -v {nvstream config file path}:/home/vst/vst_release/updated_configs/ --net=host nvcr.io/nvidia/jps/vst:1.3.0-24.08.1-x86_64 --vstConfigFile /home/vst/vst_release/updated_configs/nvstreamer_config.json
Two directories are mounted into the container:
Directory on the host where video files are stored is mounted into the NVStreamer container at
/home/vst/vst_release/streamer_videos/. It is shown as'{local video file path}'in the command line above; modify it appropriately depending on where videos will be stored in your system. Make sure this host directory has write permissions for non-root users, since NVStreamer run as non-root user.
sudo chmod 777 {local video file path}
NVStreamer config directory is mounted at
/home/vst/vst_release/updated_configs. Thenvstreamer_config.jsonfile created earlier should be stored in the folder that is getting mounted. It is shown as{nvstream config file path}in the command line above; modify it appropriately depending on where you stored thenvstreamer_config.jsonfile in your system.
Upon successful launch of the docker container, the message below is printed:
'"service_status" : "init_ready"'
Uninstall NVStreamer#
To terminate the NVStreamer instance, use below docker commands:
sudo docker ps
Copy container_id for NVStreamer instance & use in below stop command.
sudo docker stop <container_id>