Configuring the MetroX for the First Time
To initialize the MetroX-3 XC, follow the steps below.
Enable remote access to serial console via IPMI.
WarningThe MAC address for the SOL port can be found in the BIOS or on the outside of the chassis is labeled with the port MAC address.
Connect a VGA monitor and USB keyboard directly to the appliance.
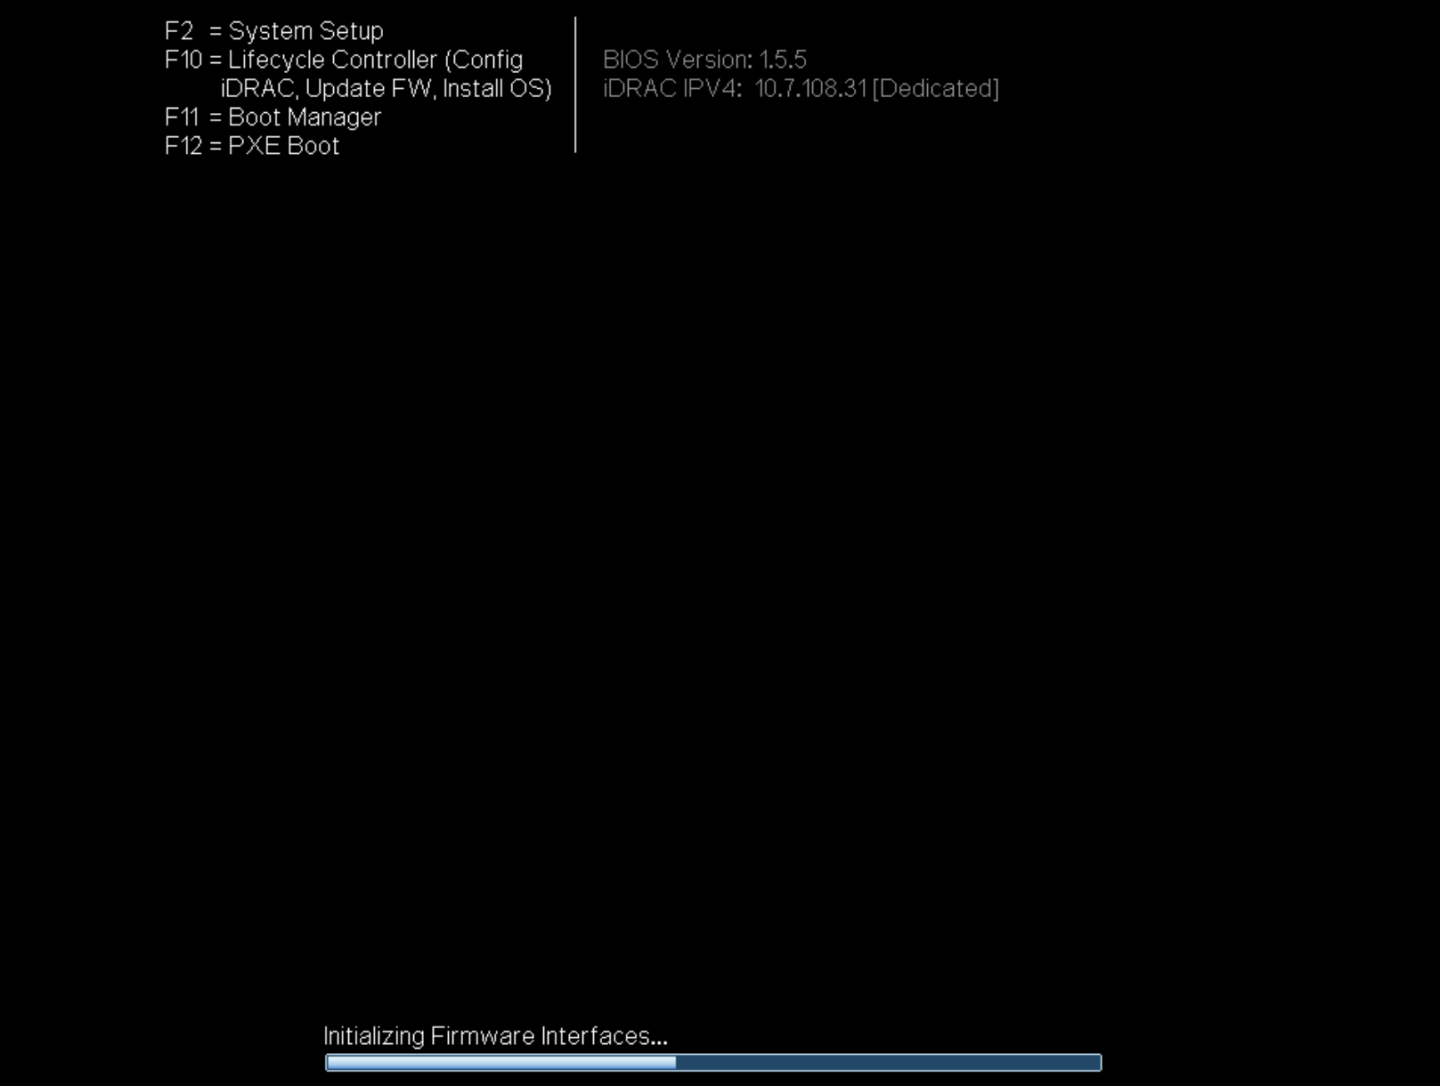
To enter the BIOS, reboot the appliance and press <F2> on the screen below to enter BIOS setup.
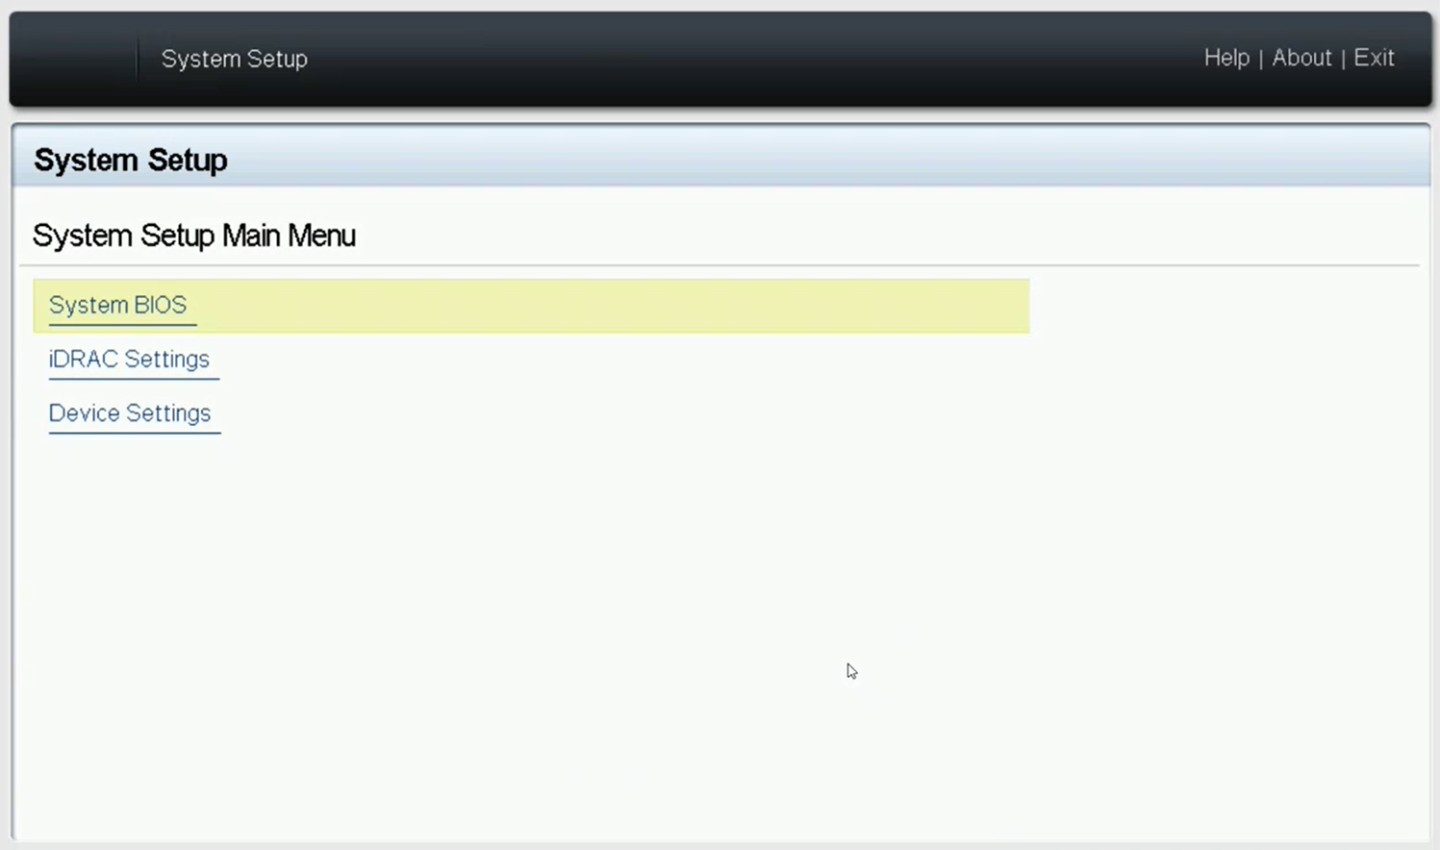
Go to “iDRAC Settings” tab → “Network"
Here the MAC can be found and various network configuration related to the SOL port. its IPV4 settings can also be viewed and configured (by default it will try to get IP via DHCP).
Warningany changes to the IPv4 settings would only take affect after a reboot
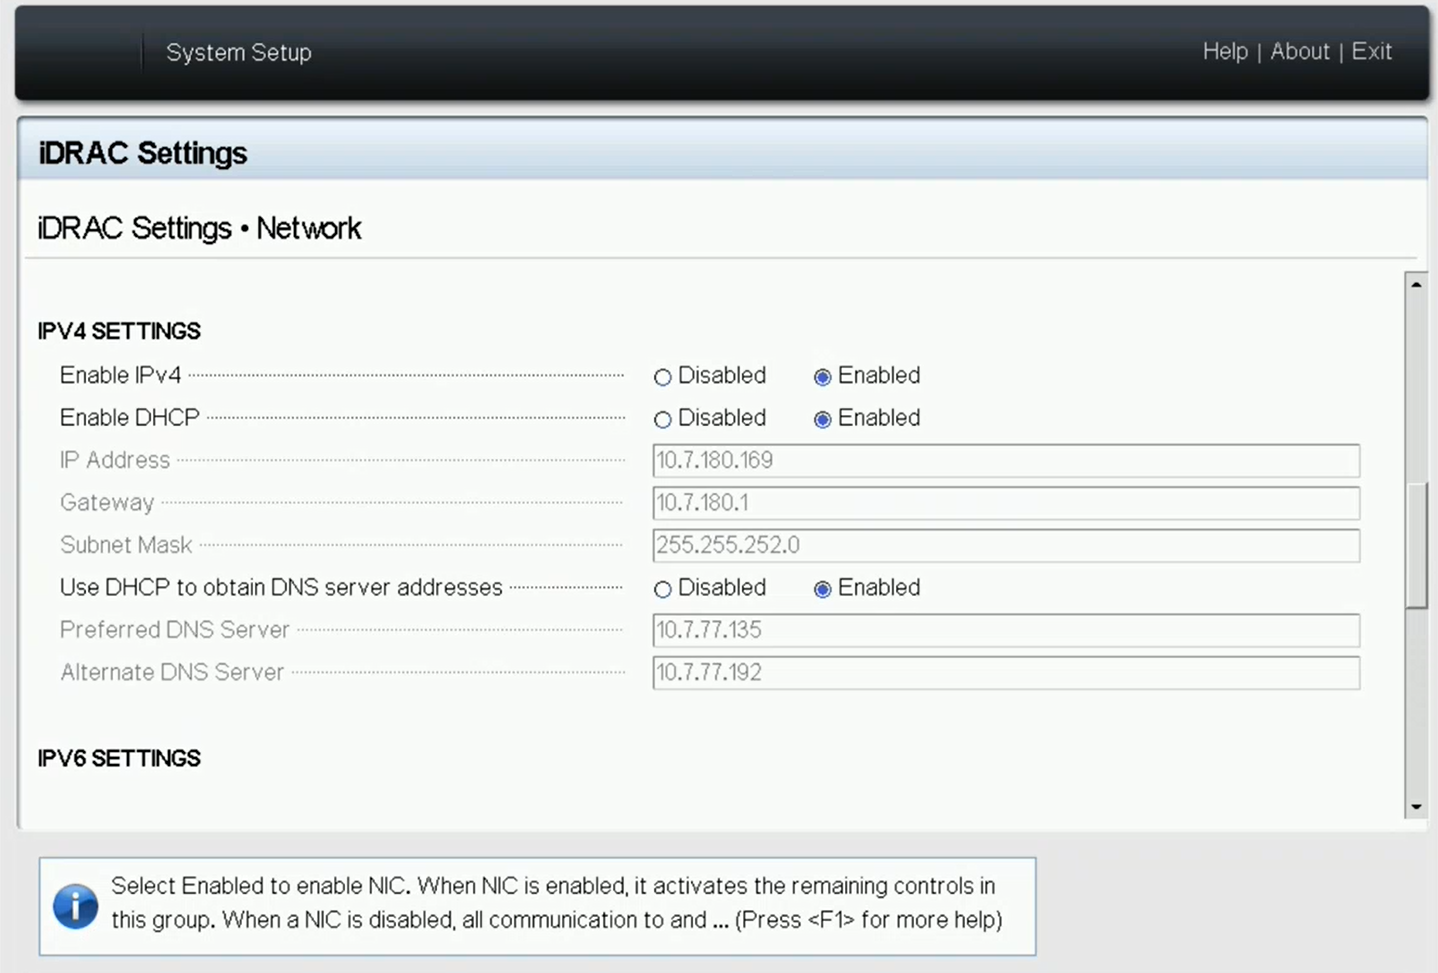
at the bottom of the screen above, make sure "Enable IPMI over LAN" is "Enabled"

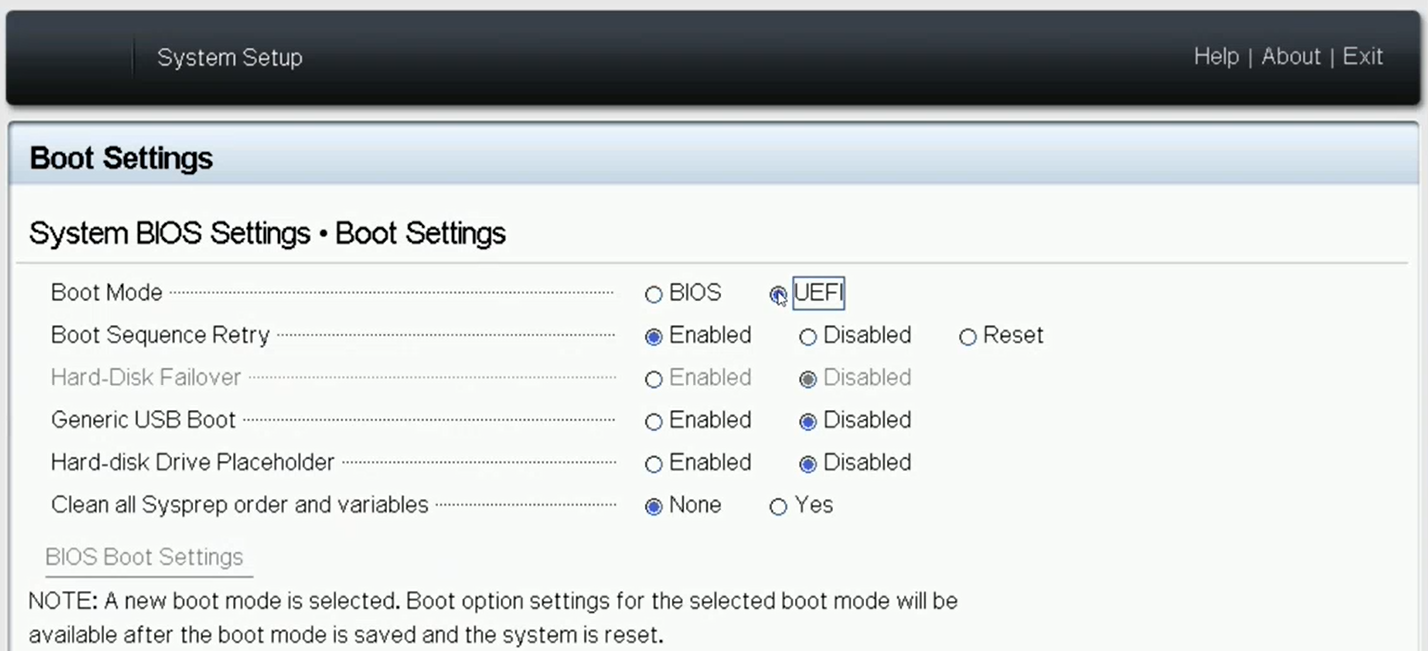
Go back to main BIOS menu shown in step b (press esc and follow prompts), go to "System BIOS" tab → "Boot Settings" and make sure "boot Mode" is "UEFI"
Go back to previous screen ("System BIOS"), go to "Serial Communication" tab and make sure "Serial communication" field is "On with Console Redirection"
Exit the BIOS and save changes. the appliance will now reboot and can be accessiblemn through the IPMI tool
The serial console can now be Accessed remotely by following IPMI command (user and password should be “admin” by default).
ipmitool -I lanplus -H <IPMI_CONTROLLER_IP> -U <user> -P <password> sol activate
Example:
ipmitool -I lanplus -H
10.7.113.60-U admin -P admin sol activate
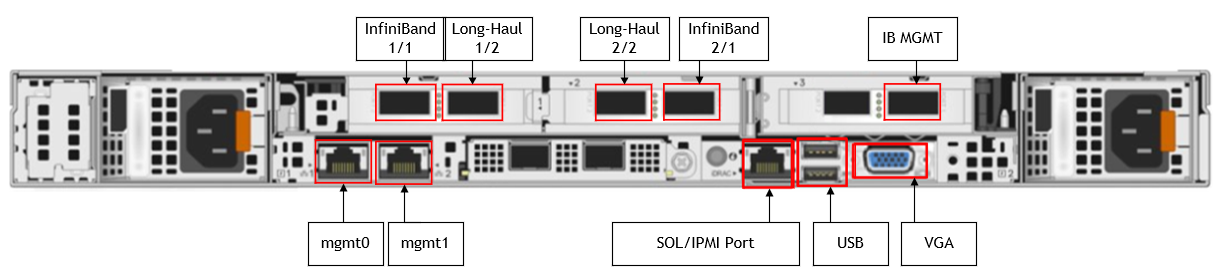
WarningMake sure to connect to the console SOL port of the metroX and not to the management port.
WarningOnce operating system boots, iKVM over HTML5 no longer shows any output. However, iKVM over HTML5 can be used for BIOS configurations at the very beginning of the system boot sequence right before the operating system boots.
Log in as admin and use admin as password, using IPMI tool.
ipmitool -I lanplus -H <IP Address> -U admin -P admin sol activate
WarningOnly a single serial connection via the IPMI can exist at any point, another connection attempt while the IPMI is in use will result in the error.
Info: SOL payload already active on another session
To forcibly disconnect the existing connection, use the following command:
ipmitool -I lanplus -H <IP Address> -U admin -P admin sol deactivate
Connect the management Ethernet cable to mgmt0 port on the back panel of the appliance.
Go through the MetroX Management configuration wizard (Using the IPMI connection from step 2)
Wizard Session Display (Example)
Comments
Do you want to use the wizard for initial configuration? yes
This configuration must be performed the first time the MetroX is operated or after resetting it to the factory defaults.
Type “y” and then press <Enter>.Step 1: Hostname? [MetroX3xc-1]
To accept the default hostname, press <Enter>.
Otherwise, type a different hostname and press <Enter>.Step 2: Use DHCP on mgmt0 interface? [yes]
Perform this step to obtain an IP address for the MetroX (mgmt0 is the management port of the MetroX).
Typing “yes” will have the DHCP server assign the IP address
Typing “no” (no DHCP) will offer the use of the “zeroconf” configuration or not. For the use of Zeroconf, type "yes" and the session will continue. If “no” (no Zeroconf) is typed, enter a static IP and the session will continue.
Step 3: Enable IPv6 [yes]
Perform this step to enable IPv6 on management ports.
Type "yes" to enable enable IPv6.
Type “no” to not enable IPv6 (Step 4 will be skipped)
Step 4: Enable IPv6 autoconfig (SLAAC) on mgmt0 interface
Perform this step to enable StateLess address autoconfig on external management port.
Type "yes" to enable
Type "no" to disable
Step 5: Use DHCPv6 on mgmt0 interface? [yes]
Perform this step to enable DHCPv6 on the MGMT0 interface.
Step 6: Enable password hardening?
Perform this step to enable/disable password hardening on your machine. If enabled, new passwords will be checked upon configured restrictions. If you wish to enable it, type “yes” and press . If you wish to disable it, enter “no”
Step 7: Admin password (Must be typed)? <new_password>
To avoid illegal access to the machine, type a password and press <Enter>.
An admin password must be entered upon initial configuration. Due to California Senate Bill No. 327, this stage is required and cannot be skipped.
Step 8: Confirm admin password? <new_password>
Confirm the password by re-entering it. Note that password characters are not printed.
Step 9: Monitor password (Must be typed)? <new_password>
To avoid illegal access to the machine, please type a password and then press <Enter>.
An admin password must be entered upon initial configuration. Due to California Senate Bill No. 327, this stage is required and cannot be skipped.
Step 10: Confirm monitor password? <new_password>
Confirm the password by re-entering it. Note that password characters are not printed.
You have entered the following information:
Hostname: <metroX name>
Use DHCP on mgmt0 interface: yes
Enable IPv6: yes
Enable IPv6 autoconfig (SLAAC) on mgmt0 interface: yes
Enable DHCPv6 on mgmt0 interface: no
Enable password hardening: yes
Admin password (Enter to leave unchanged): (CHANGED)
To change an answer, enter the step number to return to.
Otherwise hit <enter> to save changes and exit.
Choice: <Enter>
Configuration changes saved.
To return to the wizard from the CLI, enter the “configuration jump-start” command
from configuration mode. Launching CLI...
<metroX name> [standalone: master] >
The wizard displays a summary of choices and then asks to confirm the choices or to re-edit them.
Press <Enter>, to save changes and exit
Enter the relevant configuration step number, to edit any of the choices
To run the command “configuration jump-start”, Config mode must be used.
Rerunning the Wizard
To rerun the wizard, do the following:
Enter config mode.
            NVDA-OS-XC > enable
NVDA-OS-XC # config terminal
Rerun the wizard.
NVDA-OS-XC (config) # configuration jump-start
Check the mgmt0 interface configuration before attempting a remote connection (e.g., SSH) to the appliance. Specifically, verify the existence of an IP address.
NVDA-OS-XC (config) # show interfaces mgmt0 Interface mgmt0 status: Comment : Admin up : yes Link up : yes DHCP running : yes IP address :
10.7.148.61Netmask :255.255.0.0IPv6 enabled : yes Autoconf enabled: no Autoconf route : yes Autoconf privacy: no DHCPv6 running : no IPv6 addresses :1IPv6 address: fe80::268a:7ff:fe53:3d8e/64Speed : 1000Mb/s (auto) Duplex : full (auto) Interface type : ethernet Interface source: physical MTU :1500HW address :00:02:c9:11:a1:b2 Rx:11700449bytes55753packets0mcast packets0discards0errors0overruns0frame Tx:5139846bytes28452packets0discards0errors0overruns0carrier0collisions1000queue len
Set up an Ethernet connection between the metroX and a local network machine using a standard SOL connector.
Start a remote secured shell (SSH) to the metroX using the command “ssh -l <username> <metroX ip address>”.
rem_mach1 > ssh -l <username> <ip address>
Log in to the metroX (default username and password are both "admin").
Read and accept the EULA, when prompted.
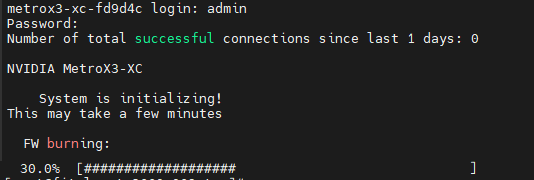
Once the following prompt appears, the system is ready to use.
            NVIDIA MetroX3-XC

Password:
Last login: <time> from <ip-address>

metroX >
If firmware was upgraded, firmware boot bar will appear and the CLI will be blocked until firmware upgrade is complete.