Installation and Configuration
The following steps include illustrations that show front side (ports) installation, yet all instructions apply to all installation options.
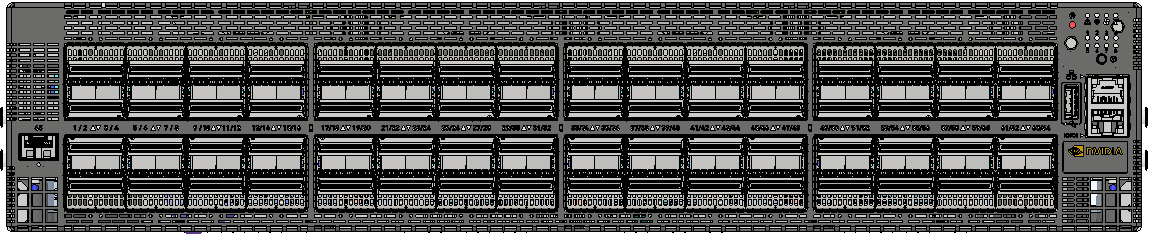
The illustrations show the SN5400 system, yet the installation procedures apply to SN5600 systems as well.
|
# |
Illustration |
|
1 |
Attach the left and right system rails (A) to the switch. 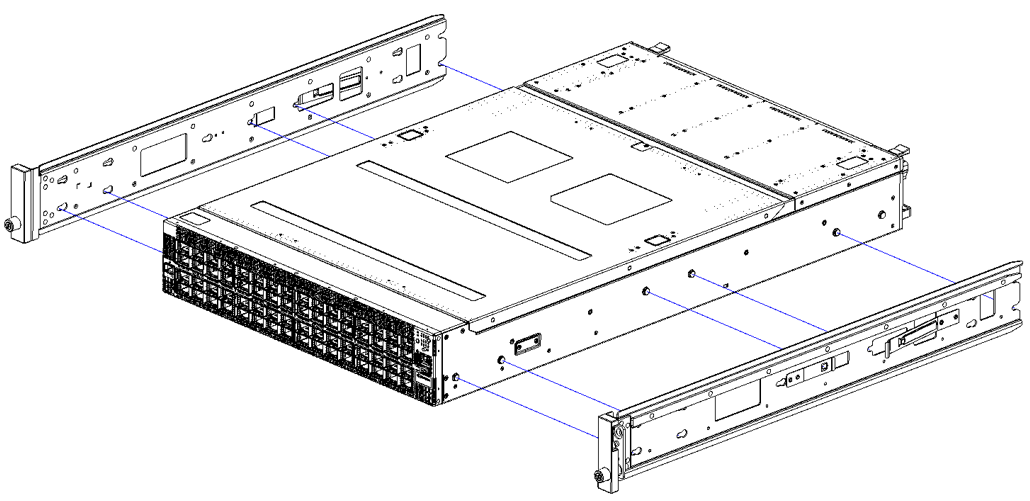
|
|
2 |
Secure the assembly by gently pushing the system chassis’ pins through the slider key holes, until locking occurs |
|
3 |
Mount both of the rack rails (B) into the rack by angularly inserting the brakes located at the rails edges into the designated slots in the rack unit, as shown in the following figure: 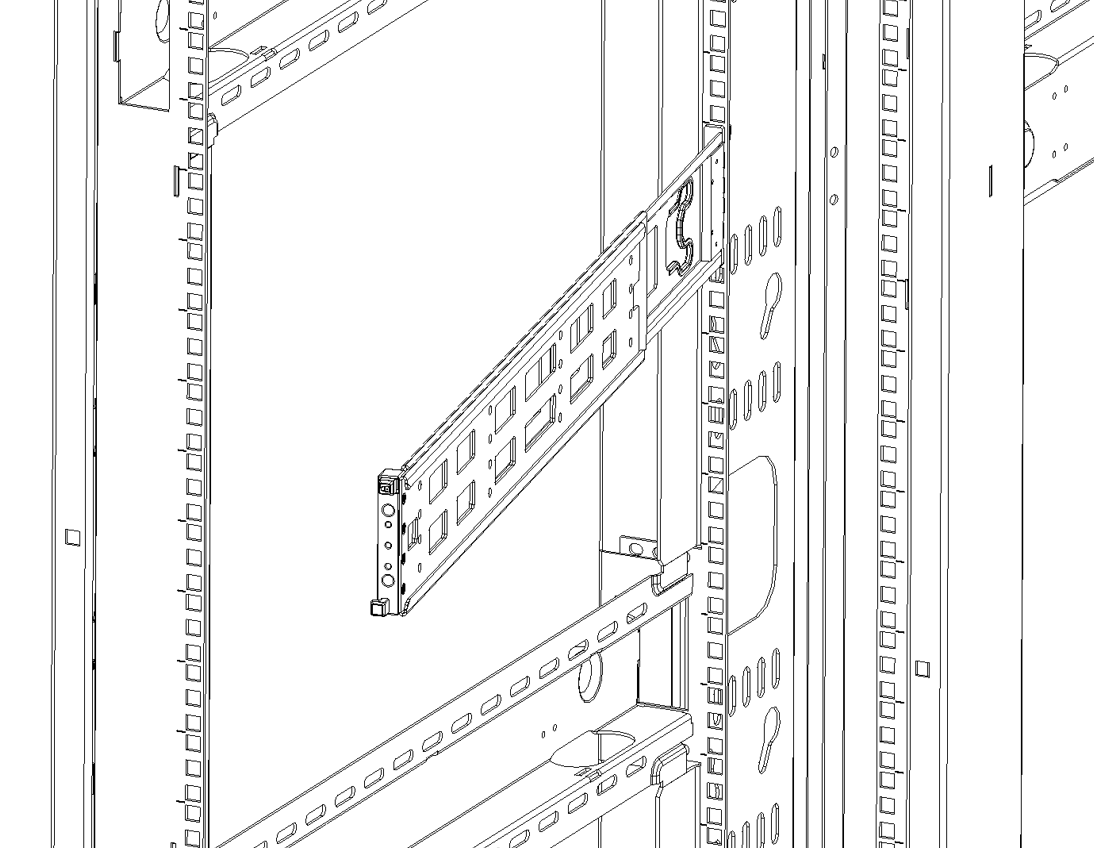
|
|
4 |
Align both rack rails (B) to sit horizontally in parallel to the rack assembly. By straightening the rails' angular position, their breaks will be caught and locked in the rack's slots. 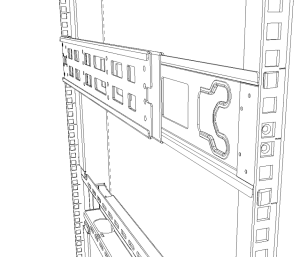
|
|
5 |
Pull the rack rails' telescopic extensions all the way to the rack's opposite side, and insert the latches at the rails' free edges to the rack's slots. A click should be heard as the spring latches are fully inserted and locking occurs.A 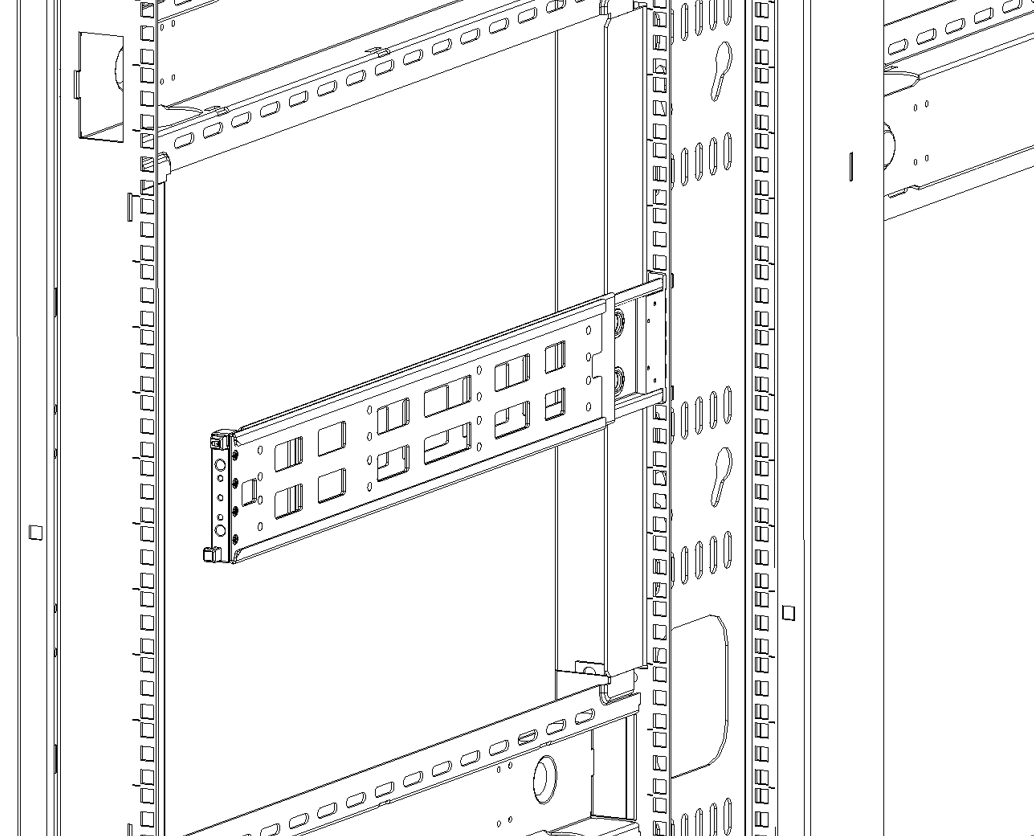
B 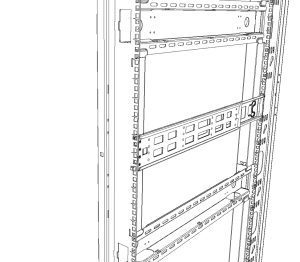
|
|
6 |
While your installation partner is supporting the system’s weight, slide the rails installed on the system into the channels in the rack rails, and push them forward until the locking mechanism is activated on both sides and a click is heard. 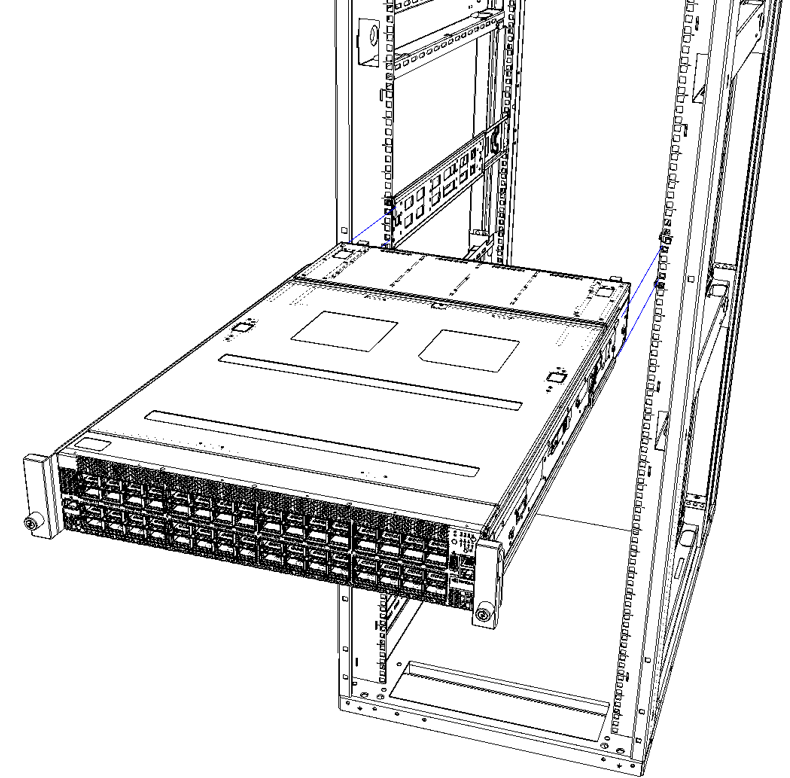
|
|
7 |
Tighten the captive screws on both sides to further secure the system to the rack's posts. 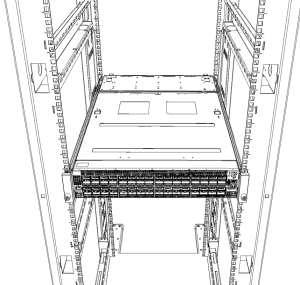
|
Connector (Front) Side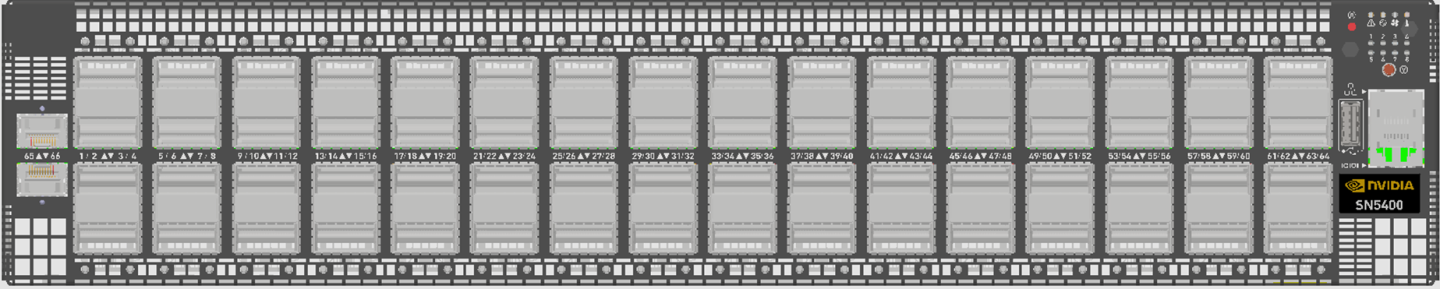
|
|
FRU (Rear) Side* It may take up to five minutes to turn on the system. If the System Status LED shows amber after five minutes, unplug the system and contact your NVIDIA representative. ** Certain systems have a single management port. |
|
* It may take up to five minutes to turn on the system. If the System Status LED shows red/amber after five minutes, unplug the system and contact your NVIDIA representative.
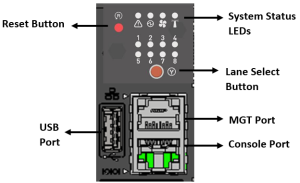
LED Assignments
|
Symbol |
Description |
Normal Status |

|
System health |
Green/Flashing |

|
Fan health |
Green |

|
Power supply health |
Green |

|
Identifier LED |
Off/Blue |

|
Reset button |
|
To view the bring-up instructions for a switch system with Cumulus Linux operating system, go to the Cumulus Linux User Guide.
To view the bring-up instructions for a switch system with SONiC operating system, log into the NVIDIA Enterprise Support Portal, and go to Downloads → Switches and Gateways → Switch Software → SONiC → Documentation Tab.
Configuring Network Attributes Using Cumulus Linux
For Cumulus Linux initial configuration instructions, see Configuring Cumulus Linux in the Cumulus Linux User Guide.
Remote Connection with Cumulus Linux
Cumulus Linux uses the OpenSSH package to provide SSH functionality. To securely access a Cumulus Linux switch remotely, please follow the instructions on the "SSH for Remote Access" page in the Cumulus Linux User Guide.
Configuring Network Attributes Using SONiC
For initial configuration instructions using SONiC, see Configuring the Switch for the First Time in the SONiC User Manual available on the NVIDIA Enterprise Support Portal.
For full installation instructions, go to https://docs.nvidia.com/networking/switches/index.html.