

Quickstart for Harmonizer NIM
Launch Harmonizer NIM and process a sample image. For system and GPU requirements, refer to Harmonizer NIM Prerequisites.
Prerequisites
Before starting, complete these requirements:
- Prepare a supported NVIDIA GPU and install the Docker runtime and NVIDIA Container Toolkit listed in Harmonizer NIM Prerequisites.
- Create an NGC account that can access the Harmonizer NIM container and model assets.
- Install Python 3 and ensure that
pipandvenvare available on the client host.
Quickstart Steps
Complete the following steps to launch the NIM and verify an inference response. Choose one inference transport when starting the container.
-
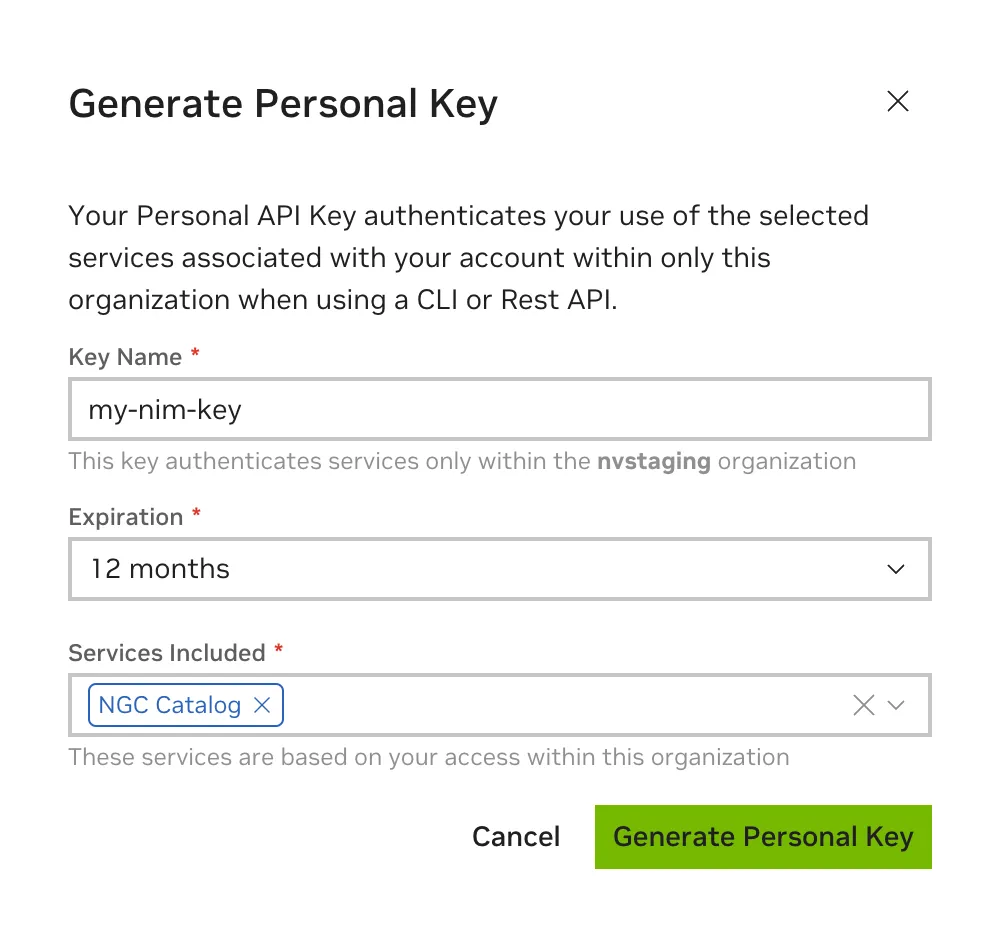
Generate an NGC API key.
An NGC API key is required to access NGC resources. Generate the key on the NGC Setup page.
When you create the key, select NGC Catalog in the Services Included dropdown. Select additional services if you reuse the key for other purposes.
-
Export the API key into the current shell.
Pass the value of the API key to the
docker runcommand in the next section as theNGC_API_KEYenvironment variable to download the appropriate models and resources when starting the NIM.Store the key in a file that is readable only by your user account. Load it into the current terminal without placing the key itself in your shell history:
Do not add the key value to
~/.bashrc,~/.zshrc, or another shell startup file. The exported value applies only to the current shell session. -
Log in to the NVIDIA Container Registry.
To pull the NIM container image from NGC, first authenticate with the NVIDIA Container Registry using the following command:
Use
$oauthtokenas the username andNGC_API_KEYas the password. The special$oauthtokenusername indicates that you authenticate with an API key instead of a username and password. -
Launch the Harmonizer NIM container with HTTP or gRPC inference.
Set the container image and persistent cache location:
The launch command keeps the current terminal attached to the container. Keep it running, and open a second terminal on the same host for readiness checks and client requests.
Select one inference transport when you start the NIM:
HTTP (default)
gRPC
The HTTP and gRPC inference transports are mutually exclusive startup choices. The HTTP health and readiness routes remain available in either mode:
Both transports support both processing modes. Select non-temporal image mode with
context_length=0or temporal mode withcontext_length=4on each request; switching processing modes does not require restarting the NIM.The container runs as user ID
1000, so the cache directory mounted at/opt/nim/.cachemust be writable by UID1000. The setup command above grants the required access for a local cache. NFS-backed home directories can still reject access because of server-side identity mapping or ACLs; in that case, use a local-disk cache or run the container with the host user’s UID. Refer to Environment Variables and Configuration for cache permission options.Docker Launch Flag Reference
-
Check that the NIM is ready.
Check readiness:
Readiness is reported after the model loads and startup warmup completes. A cold start typically takes about 2 to 9 minutes, depending on the GPU. Persisting
/opt/nim/.cachelets later starts reuse the compiled-kernel cache. For per-GPU estimates and startup tuning, refer to Environment Variables and Configuration. -
Download the sample frame and run an HTTP or gRPC request.
The examples use an input frame from the NVIDIA Harmonizer model-publication repository. The API accepts encoded image data rather than an image URL, so download the sample to the current directory first:
The first examples send this image to the non-temporal image lane (
context_length=0) and write the enhanced image back to disk.HTTP Request
This example requires a NIM started with the default HTTP launch option above. Use HTTP for a simple JSON interface for testing and debugging. For latency-sensitive production traffic, prefer the gRPC path below.
In the client terminal, create a Python virtual environment and install the HTTP client dependency:
Save the following example as
http_client.pyin the directory containinginput.png:Run the HTTP client:
Optional: Process a Temporal Sequence
For a compact demonstration of the temporal API, repeat the downloaded sample five times and set
context_length=4. The first four entries establish context, andreturn_policy=exclude_contextreturns only the fifth result. Repeating a frame demonstrates the request mechanics; use consecutive frames from a real sequence to evaluate temporal behavior.Save the following example as
temporal_client.pyin the same directory asinput.png:Run the temporal client in the virtual environment used for the HTTP example:
gRPC Request
This example requires a NIM started with the gRPC launch option above. If the current container is using the default HTTP transport, stop it and relaunch it with the gRPC command:
The persistent cache mounted at
/opt/nim/.cacheis reused after the restart, although model loading and warmup still run. Refer to startup time and compile-cache guidance for representative times.Use the gRPC API when your client can send compressed image bytes directly. It avoids the HTTP base64 and JSON adapter path. The service is
harmonizer.v1.Harmonizerand the method isProcess.Install the Python gRPC runtime and code generator:
Download the canonical schema for this documentation version: harmonizer.proto. Save it in the directory where you will generate the client modules.
Generate the Python message and service modules:
Save the following client as
grpc_client.pyin the same directory as the generated modules andinput.png:Run the client:
The gRPC server does not enable server reflection. Generic clients such as
grpcurlmust be givenharmonizer.protoexplicitly instead of using reflection to discover the service.The gRPC server accepts messages up to 256 MiB (268,435,456 bytes) so a full temporal clip can be sent in a single request. Set the client
grpc.max_receive_message_lengthandgrpc.max_send_message_lengthchannel options accordingly.
Next Steps
Explore the request contract, API, and supported GPUs: