Save a Capture with Source Code Generation
Sometimes starting up an application and getting to a specific spot can take a very long time. Instead, you can save the capture to disk, and reload it later for a much faster startup. Using this method, the capture can also be shared among the development team, to point out any potential errors or problems.
With NVIDIA Nsight Graphics, the serialized frame includes a screenshot of the frame buffer and back buffer.
Saving the current captured frame for later debugging or profiling:
- Begin debugging your graphics project and launch the Frame Debugger.
- You can serialize the capture in one of two ways:
- Click the Save button on the HUD toolbar.

The source code will be generated from the capture and saved on disk. You may hit the Escape key at any time to cancel.
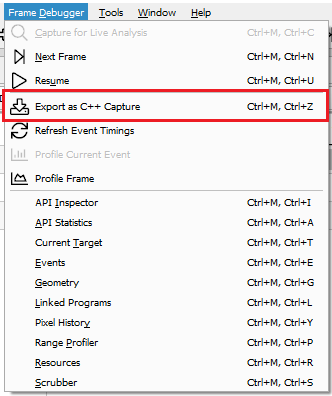
- Go to Frame Debugger > Export as C++ Capture.
- Click the Save button on the HUD toolbar.
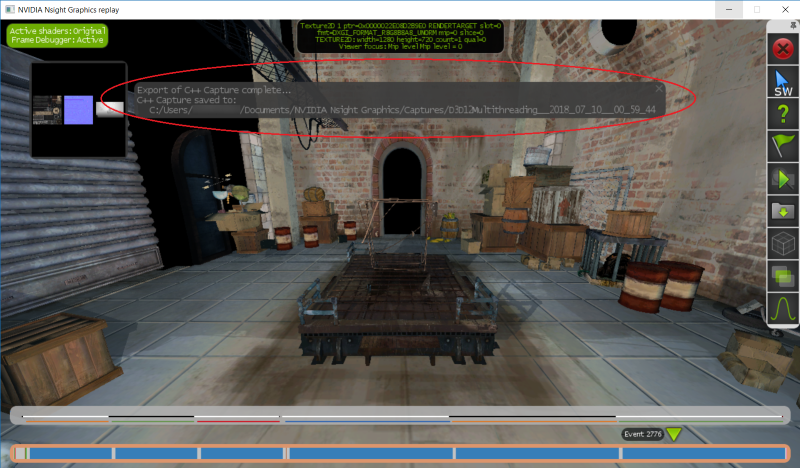
- On both the host and monitor, you will see a message that your serialization is complete, and the capture has been saved in your
Documents\NVIDIA Nsight Graphics\Capturesdirectory.On the HUD, you'll see a message like the following:

WARNING: Writing the frame to disk may fail if the system runs out of memory. If you find that writing the frame to disk is failing, try using the 3GB memory switch.
Using a Saved Capture
- To use the saved capture, open the saved project from the
Capturesdirectory in Visual Studio. Saving a capture will generate the source code, as well as project and solution files for all supported Visual Studio versions.
Versioned Visual Studio projects may be opened with Visual Studio versions that do not match the project version, but note that you may be asked to upgrade your project when opening it for the first time. - These solution files contain a number of generated source files.
Main.cpp— This is where all of the initialization code is called, resources are created, and each frame portion is called in a message loop.ResourcesNN.cpp— Depending on the number of resources to be created, there will be multipleResourcesNN.cppfiles, each with aCreateResourcesNNcall in them, that will construct all of the resources (device(s), textures, shaders, etc.) that are used in the scene. These are called inMain.cppbefore replaying the frame in the message loop.FrameSetup.cpp— This file contains all of the state setting calls to set the API state to the proper values for the beginning of the frame, including what buffers are bound, which shaders are enabled, etc.FrameNPartMM.cpp— In Direct3D and single-threaded OpenGL captures, these files contain the API functions, each namedRunFrameNPartMM(), to replay the frame. It is split into multiple files so generated code is easier to work with. These functions are called sequentially in the message loop inMain.cpp.In this scenario, both NandMMare placeholders for numbers in the multiple files generated.FrameNwill typically beFrame0since only a single frame is captured, andPartMMwill typically be in the00-05range, depending on how many API calls are in the frame.ThreadLLFrameNPartMM.cpp— In multi-threaded OpenGL captures, these files contain the API functions, each namedThreadLLRunFrameNPartMM(), to replay the frame. The functions correspond to the work done by each thread during the frame. These functions are called by their respective threads and synchronized to replay the saved events in the same order as captured.ReadOnlyDatabase.cpp— This is a helper class to access resource data that is stored in thedata.binfile. It is accessed throughout the code via theGetResource()call.Helpers.cpp— These functions are used throughout the replayer for various conversions and access to theReadOnlyDatabase.Threading.cpp— This file contains helper functions and classes to manage threads used in the project.
- Build and run the project.
Changing a Resource
If you want to change a resource (for example, to swap in a different texture), you can change the parameters for the construction by looking within the ResourcesNN.cpp files for the texture in question. Textures can be matched by size and/or format. Once you find the variable for the texture, look for that name in the FrameSetup.cpp file. This will contain source lines to lock the texture, call GetResource() to retrieve the data from the ReadOnlyDatabase, and then call memcpy(…) to link the data to the texture. You can substitute the call to the ReadOnlyDatabase with a call to read from a file of choice to load the alternate texture.
Changing a Draw Call
If you want to change the state for a given draw call, you can locate the draw call by replaying the capture within NVIDIA Nsight Graphics and scrubbing to find the call you want to examine. Search in the FrameNPartMM.cpp files for Draw NN, where NN is the 0-based draw call index that NVIDIA Nsight Graphics displayed on the scrubber. Doing this will bring you to the source line for that draw call, and from here, you can add any state changes before that call. Alternatively, you can also disable that specific call by commenting out the source call containing the draw call.
Parameters
-repeat N— This setting enables NVIDIA Nsight Graphics to use serialized captures in the normal arch workflow. The N setting indicates the number of times to repeat the entire capture; the default setting is -1, which keeps the capture running on an infinite loop.-noreset— This setting controls whether context state and all resources are reset to their beginning of frame value. When this setting is specified, all frame restoration operations will be skipped, avoiding the performance cost associated with them. Note that this may introduce rendering errors if the rendered frame has a data dependency on the results of a previous frame.

NVIDIA® Nsight Graphics Documentation Rev. 2018.4.180813 ©2018. NVIDIA Corporation. All Rights Reserved.