BCM Headnodes Pre-install Preparation#
NFS server#
NFS is used for BCM headnode HA. User home directories (/home) and
shared data directories (/cm_shared, which includes files such as the
DGX OS image) must be shared between head nodes and are stored on an NFS
filesystem that both headnodes mount.
Because DGX BasePOD does not mandate the nature of the NFS storage, the configuration is outside the scope of this document. This DGX BasePOD deployment uses the NFS export path provided in the BasePOD site survey.
The parameters below are recommended for the NFS server export (for
example, as specified in the file /etc/exports). In particular, the
exported NFS directory must be mountable read-write, and files must be
allowed to be owned by UID 0 (root); these are indicated by the rw and
no_root_squash directives in the example below.
/var/nfs/general *(rw,sync,no_root_squash,no_subtree_check)
Verify DNS & NTP servers#
Make sure the DNS and NTP servers are reachable from within the cluster environment.
Cluster Nodes Configuration#
As cluster nodes – control plane (BCM headnodes), workload management nodes, DGX’s, compute & storage fabric switches are racked and cabled. It is recommended to configure each appliance’s BIOS & out of band management interface (sometimes referred to as a BMC, IPMI, etc) ahead of time before the installation of BCM.
Once all cluster nodes have been successfully configured verify that all cluster nodes’ out of band management interfaces are reachable from within the working cluster network space. (i.e. make sure you can load access the BMC/iLO/iDRAC).
DGX BIOS Config and Network Interface Boot Order#
Refer to the DGX System User Guide for specific steps on changing the boot order to use the 2 primary in-band interfaces to PXE boot first.
Control Plane and Workload Management Nodes#
The following is an example for Dell appliances.
Refer to the below references for configuring an appliance with iDRAC9:
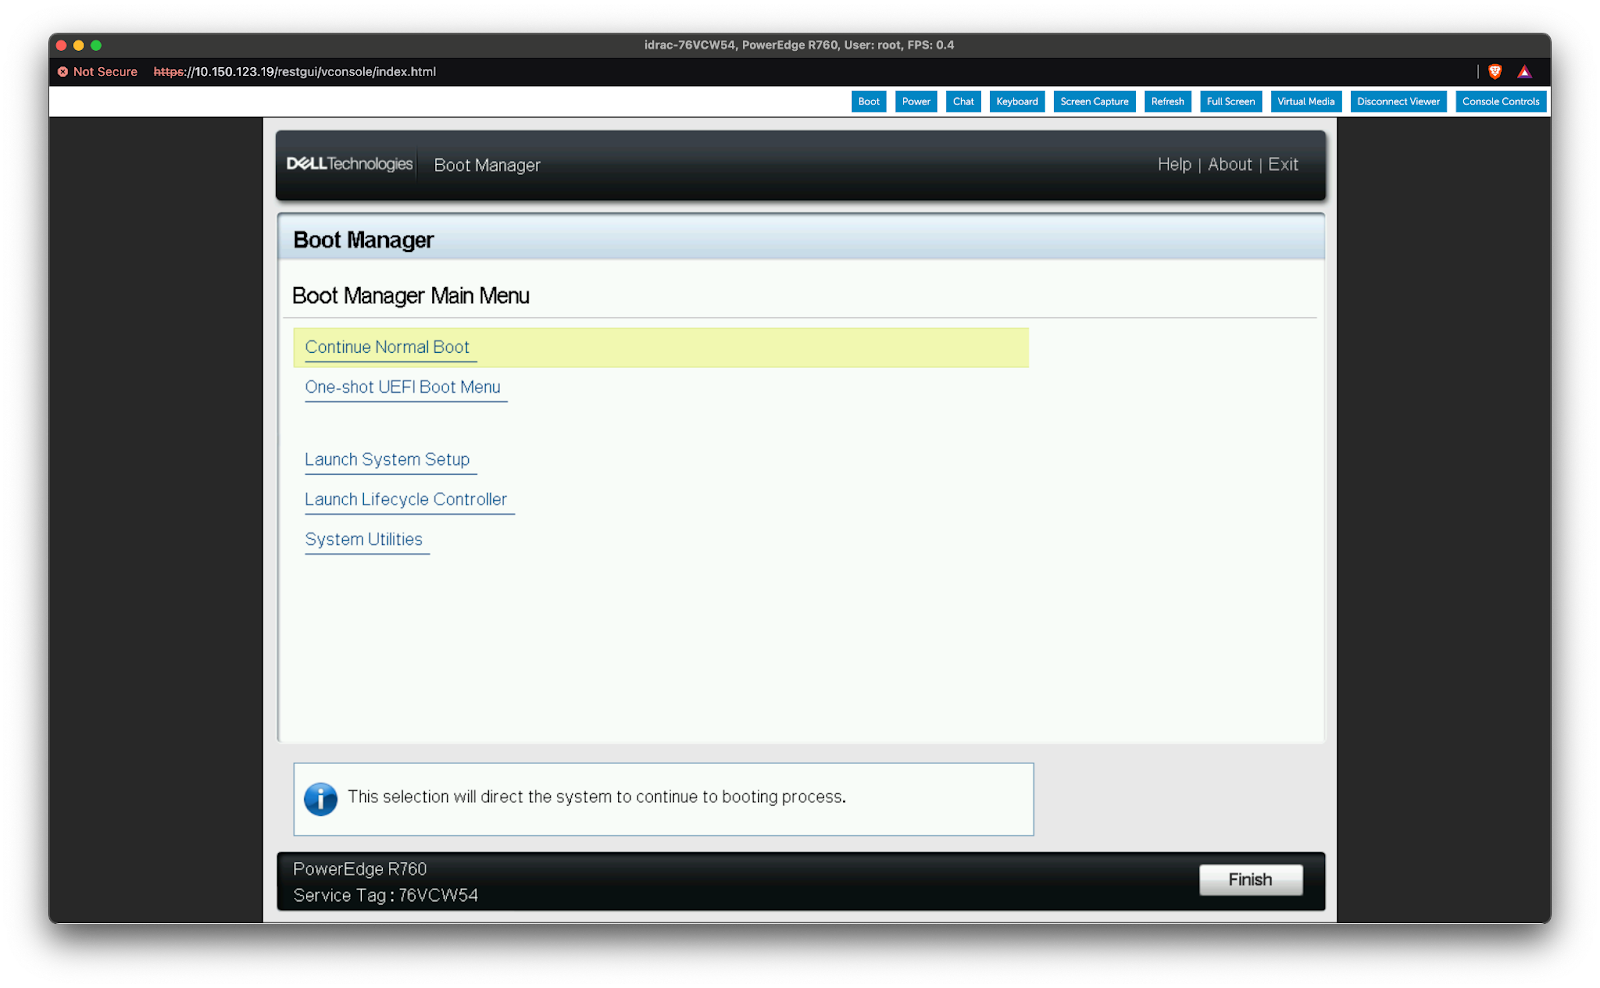
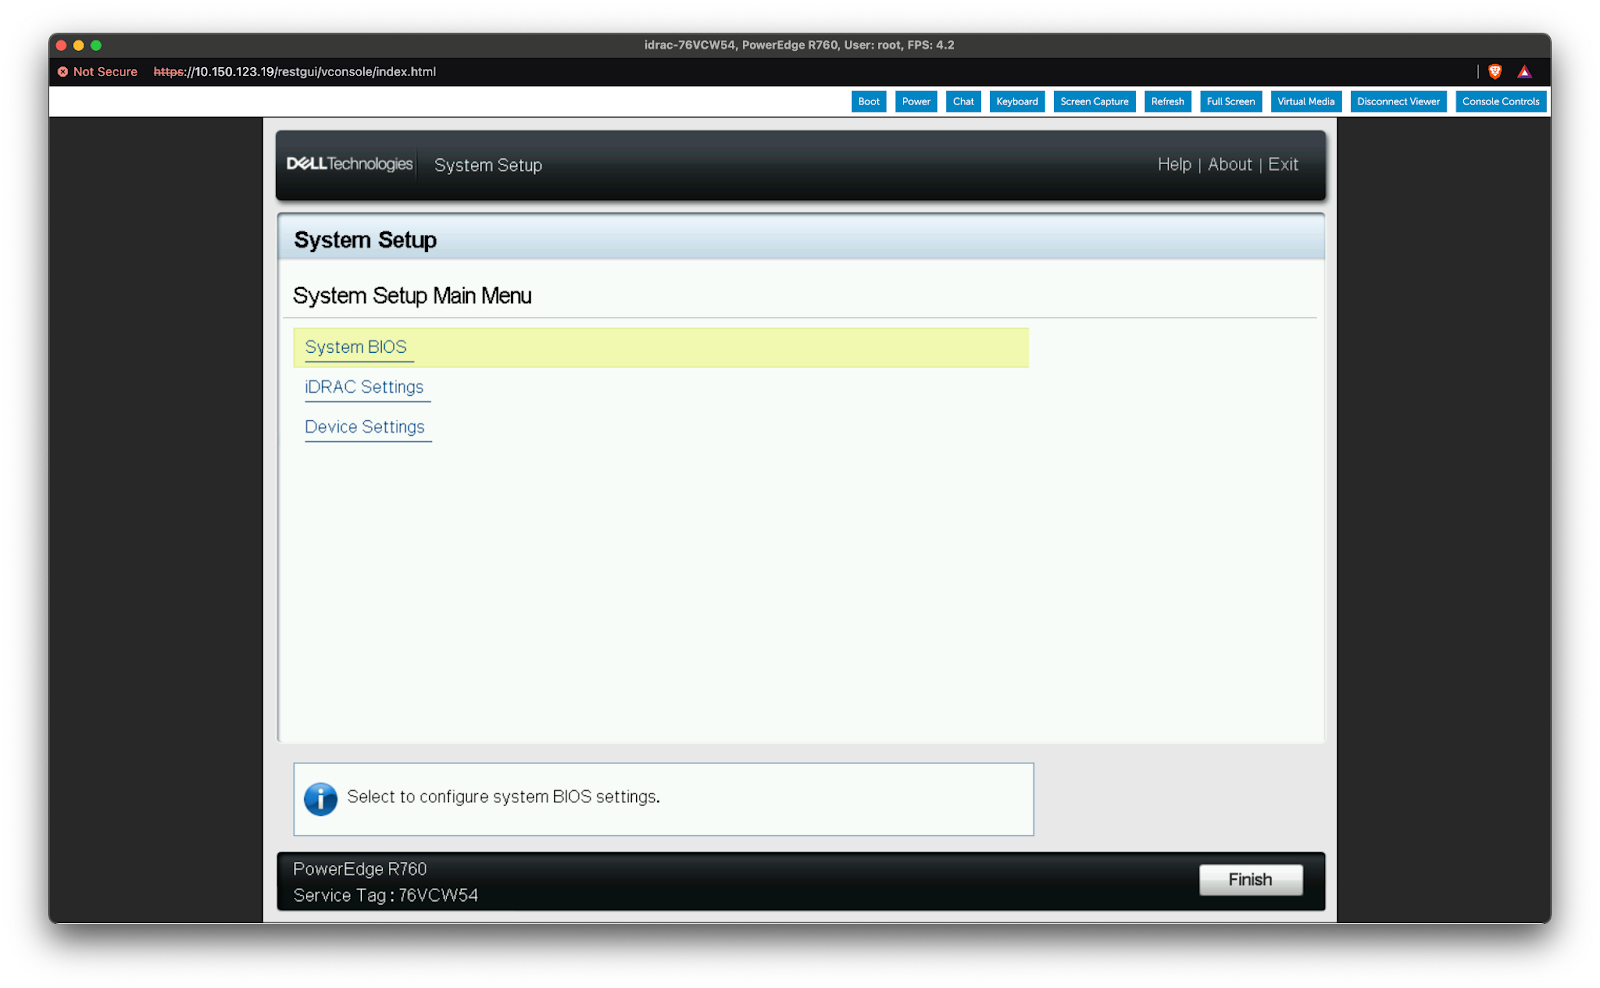
Interrupt the boot cycle to enter the Boot Manager and select “Launch System Setup”.
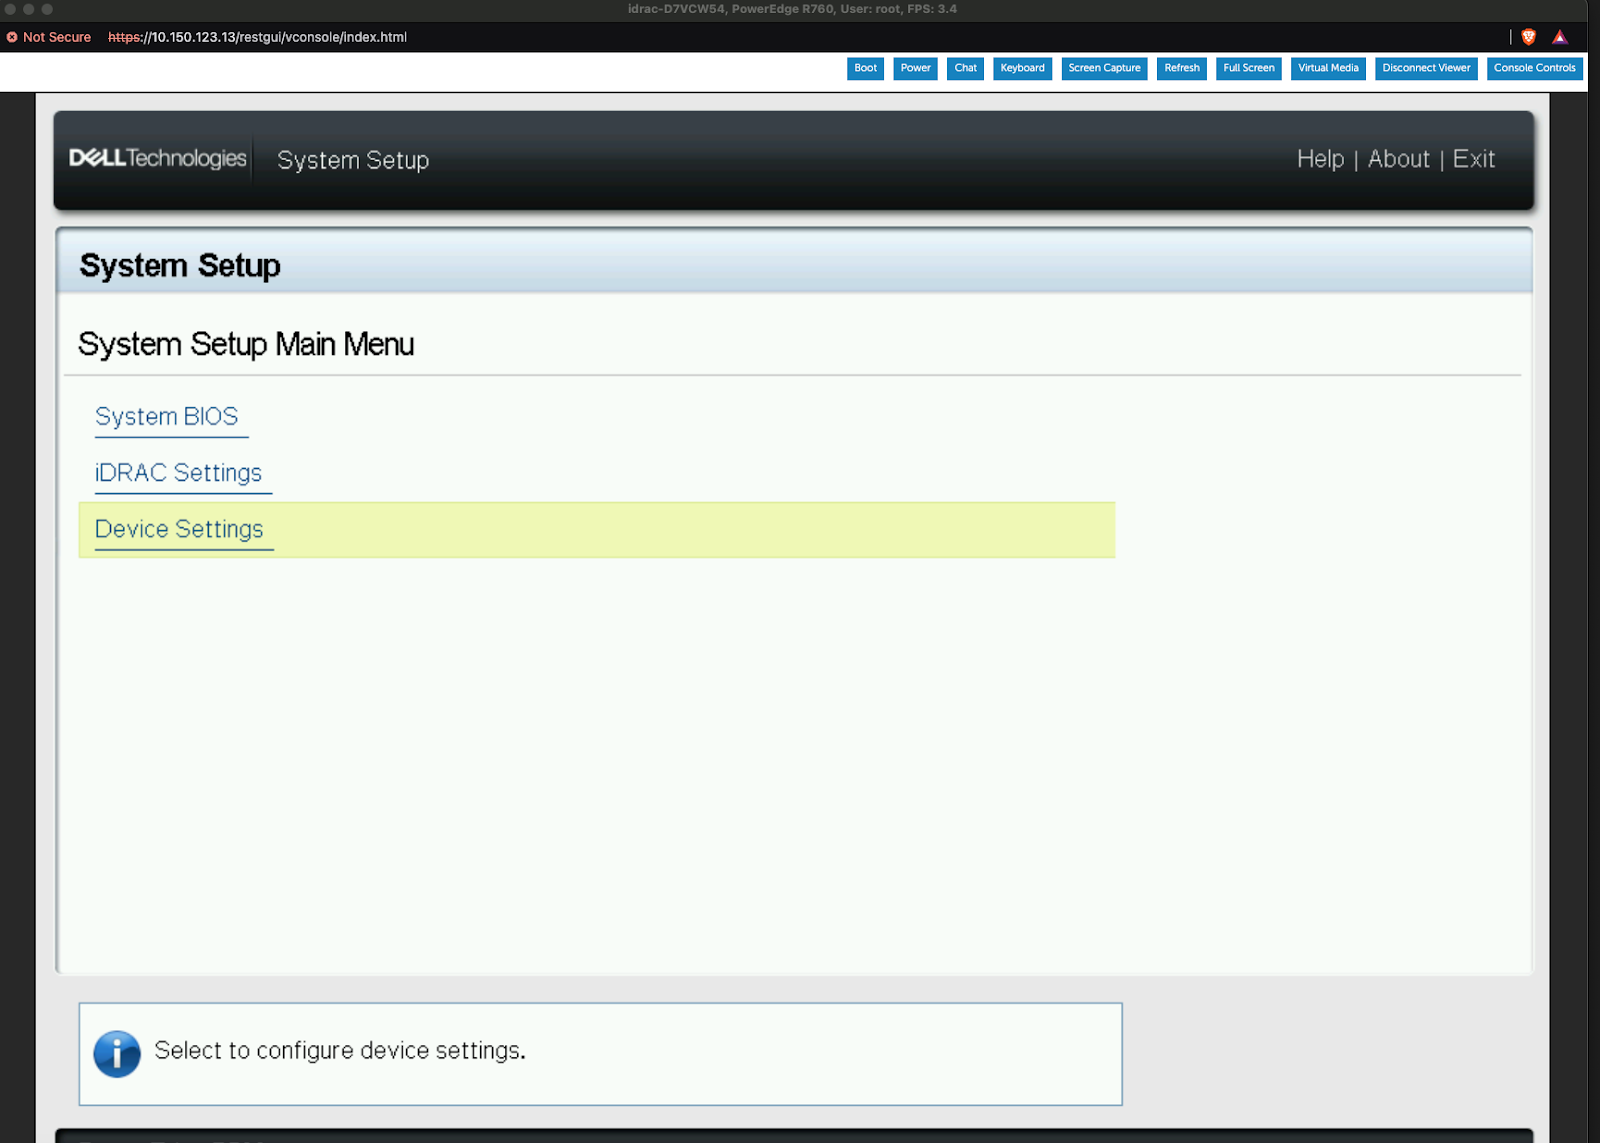
Next select “Device Settings”.
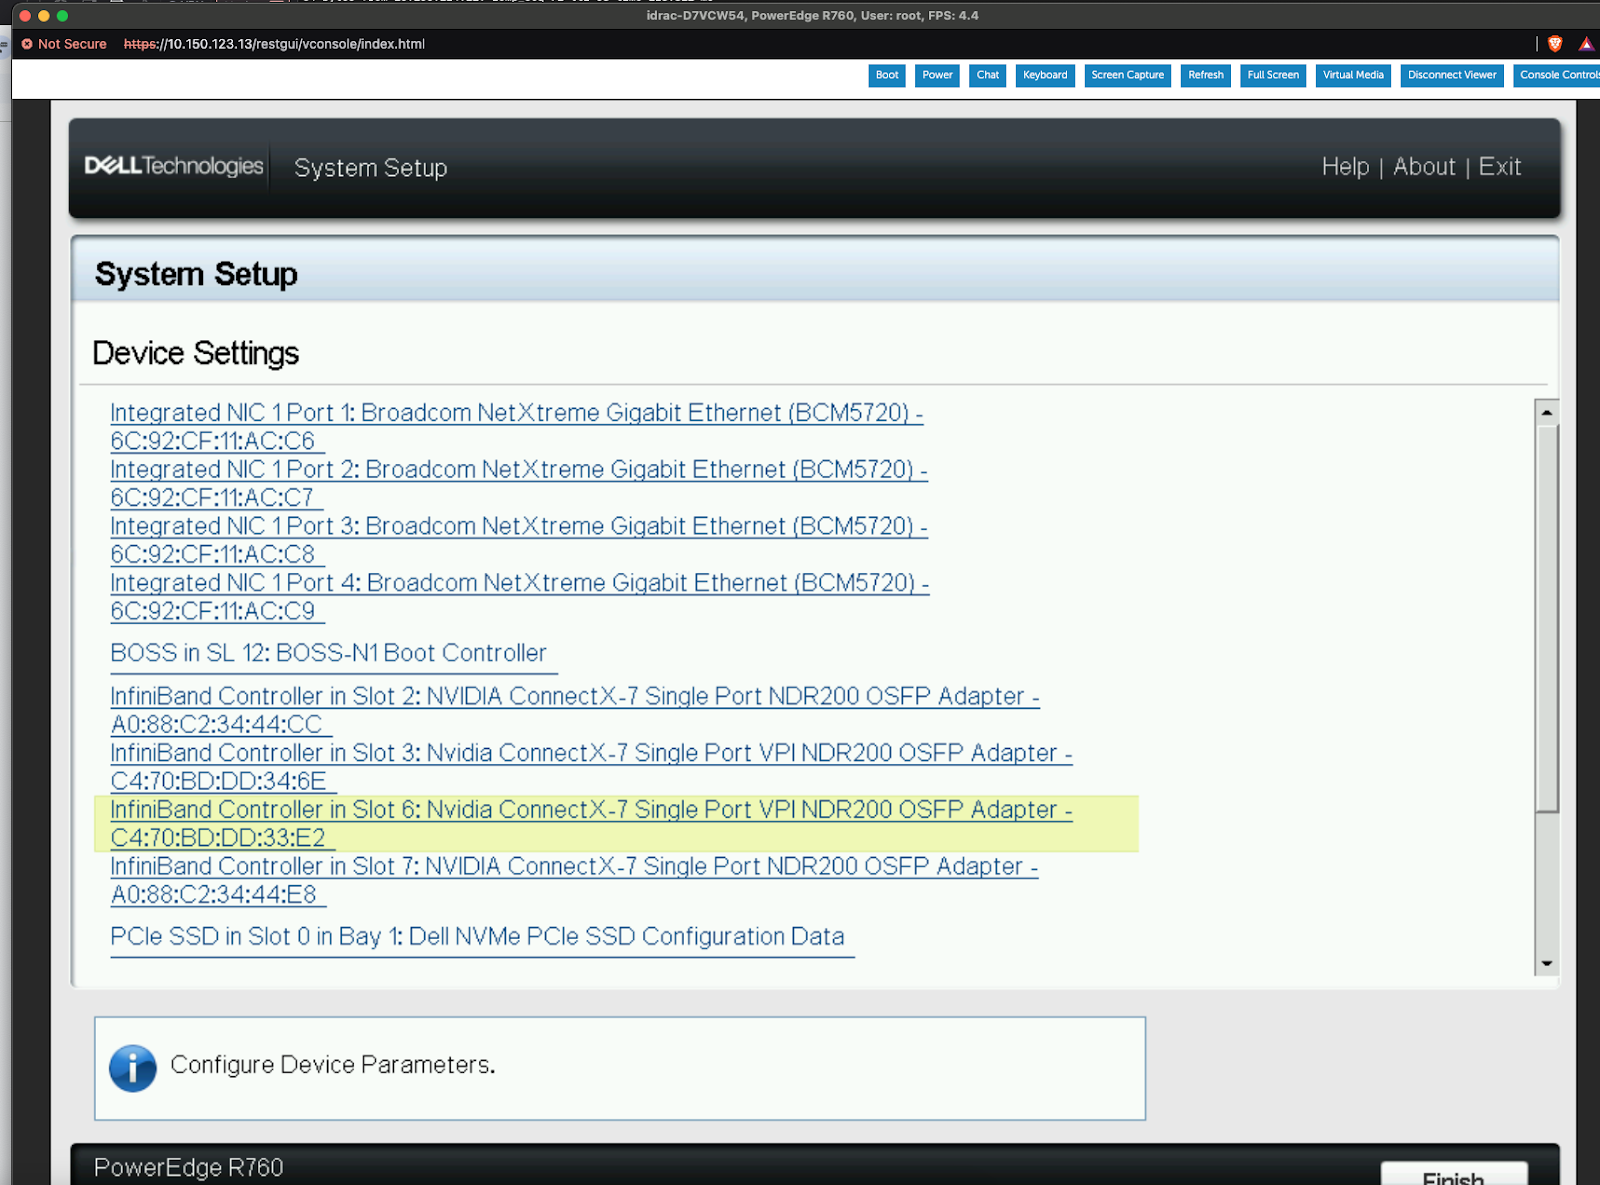
Select the Card that needs the mode flipped from Infiniband (IB Mode) to Ethernet (ETH Mode).
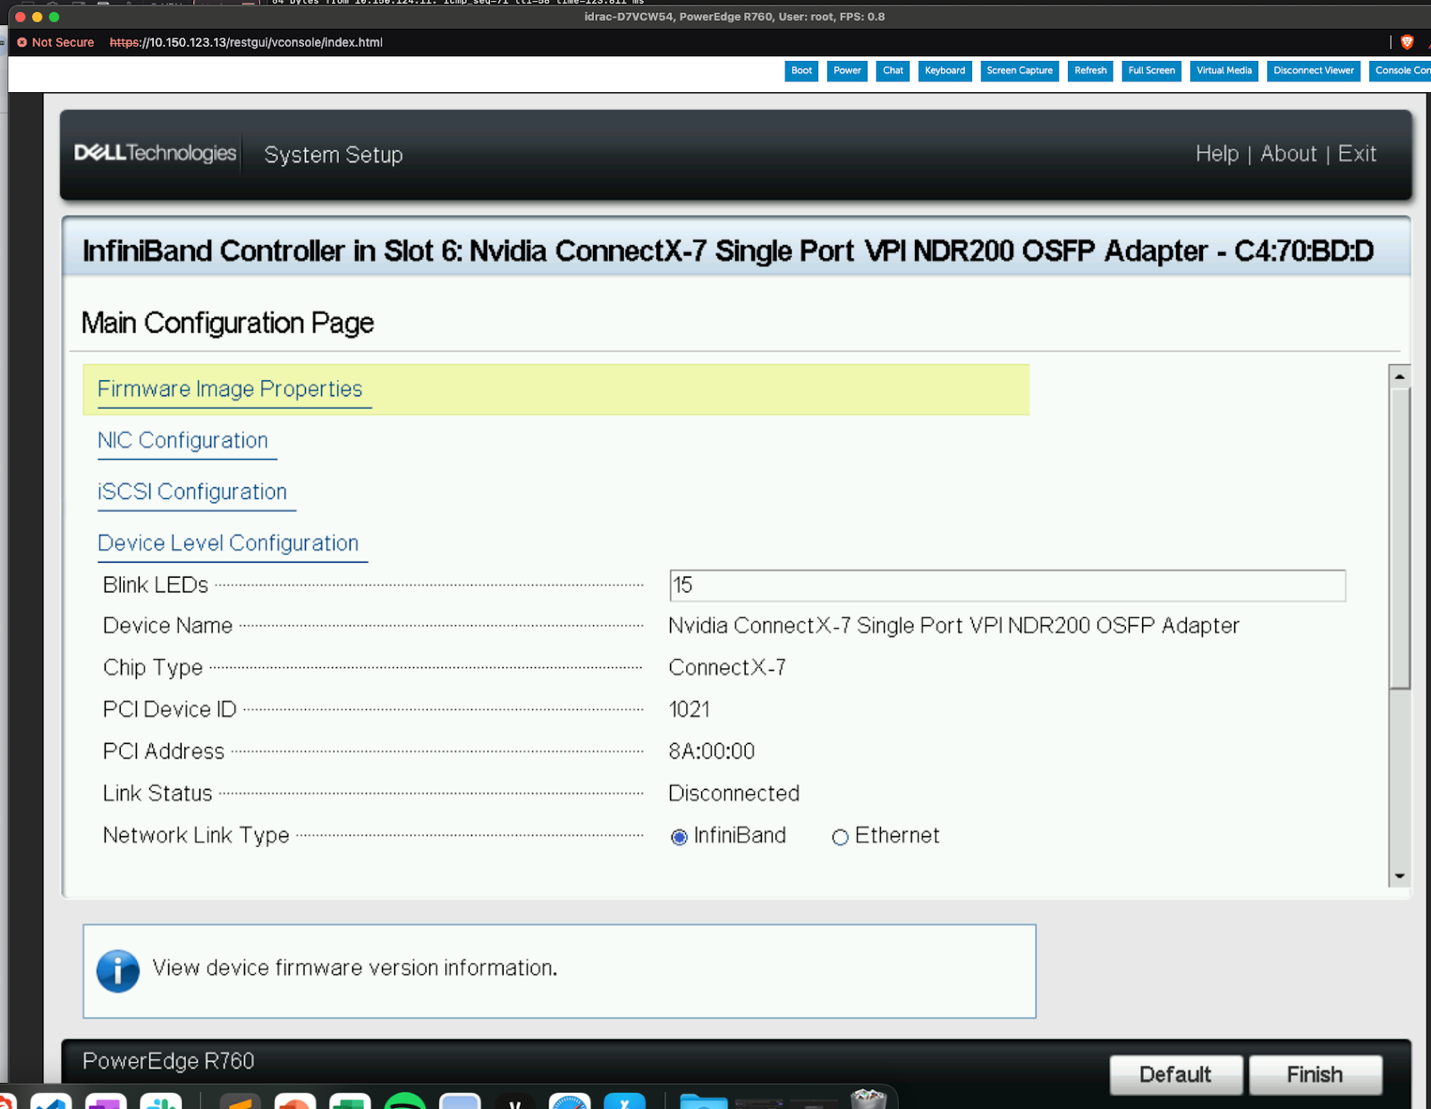
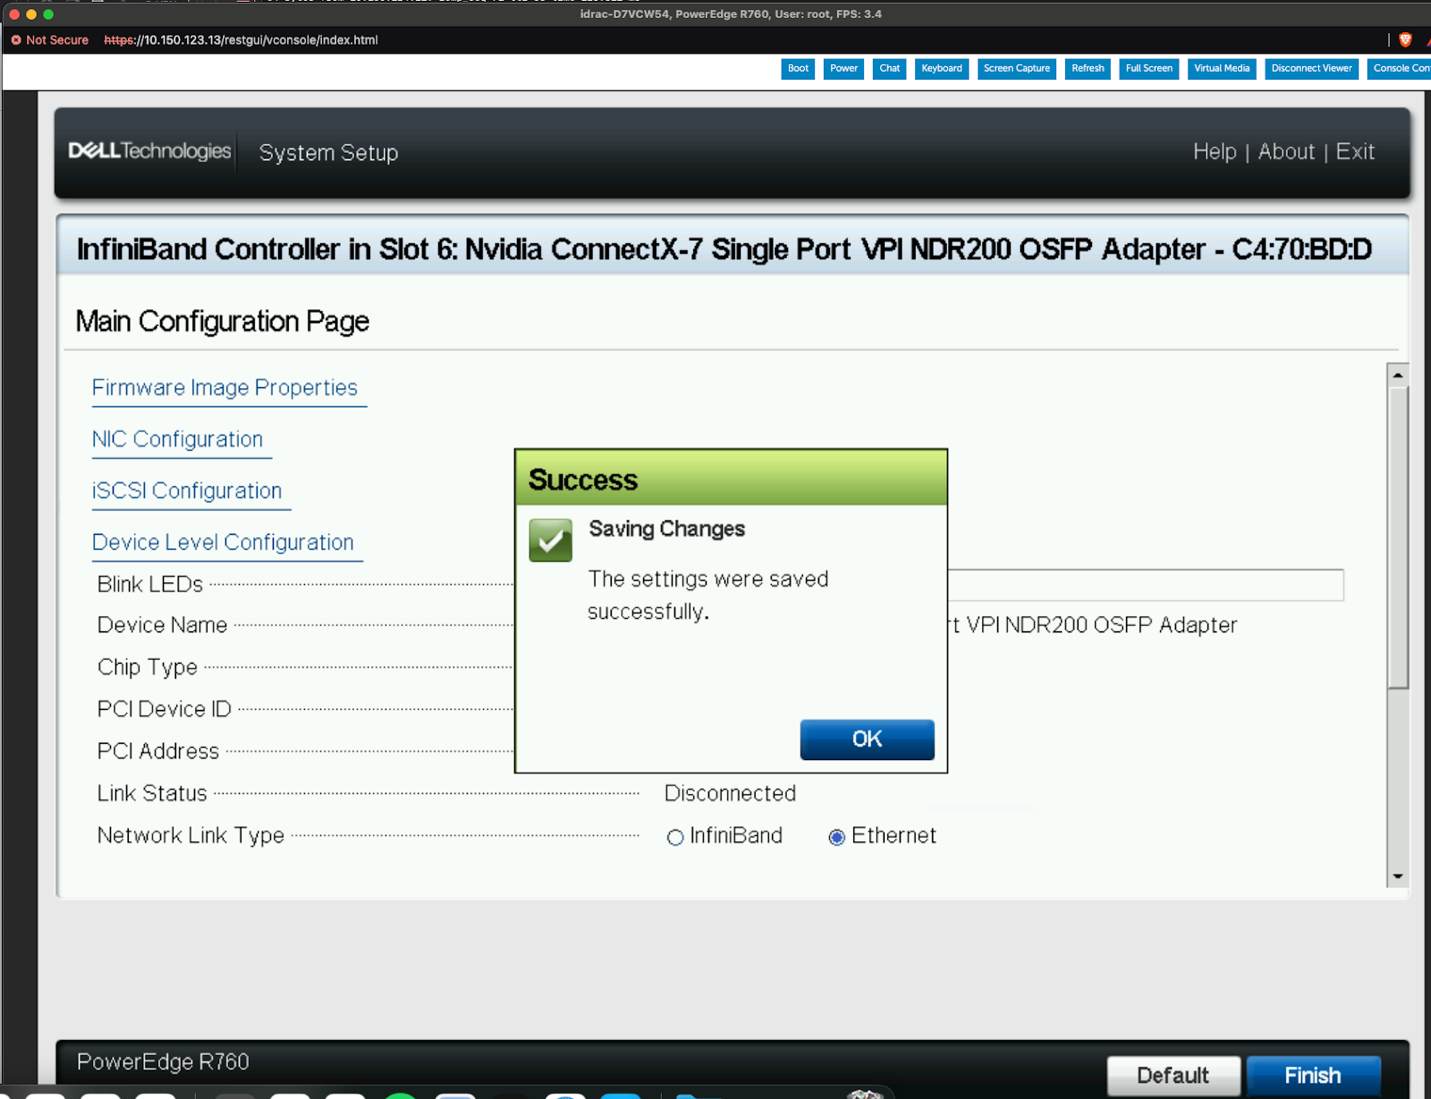
On this screen change the “Network Link Type” from “Infiniband” to “Ethernet” and select “Finish”.
On seeing the following confirmation message, the card is now in Ethernet mode. Click OK.
After confirming the CX card ports are in the correct mode we can proceed to configure the boot order.
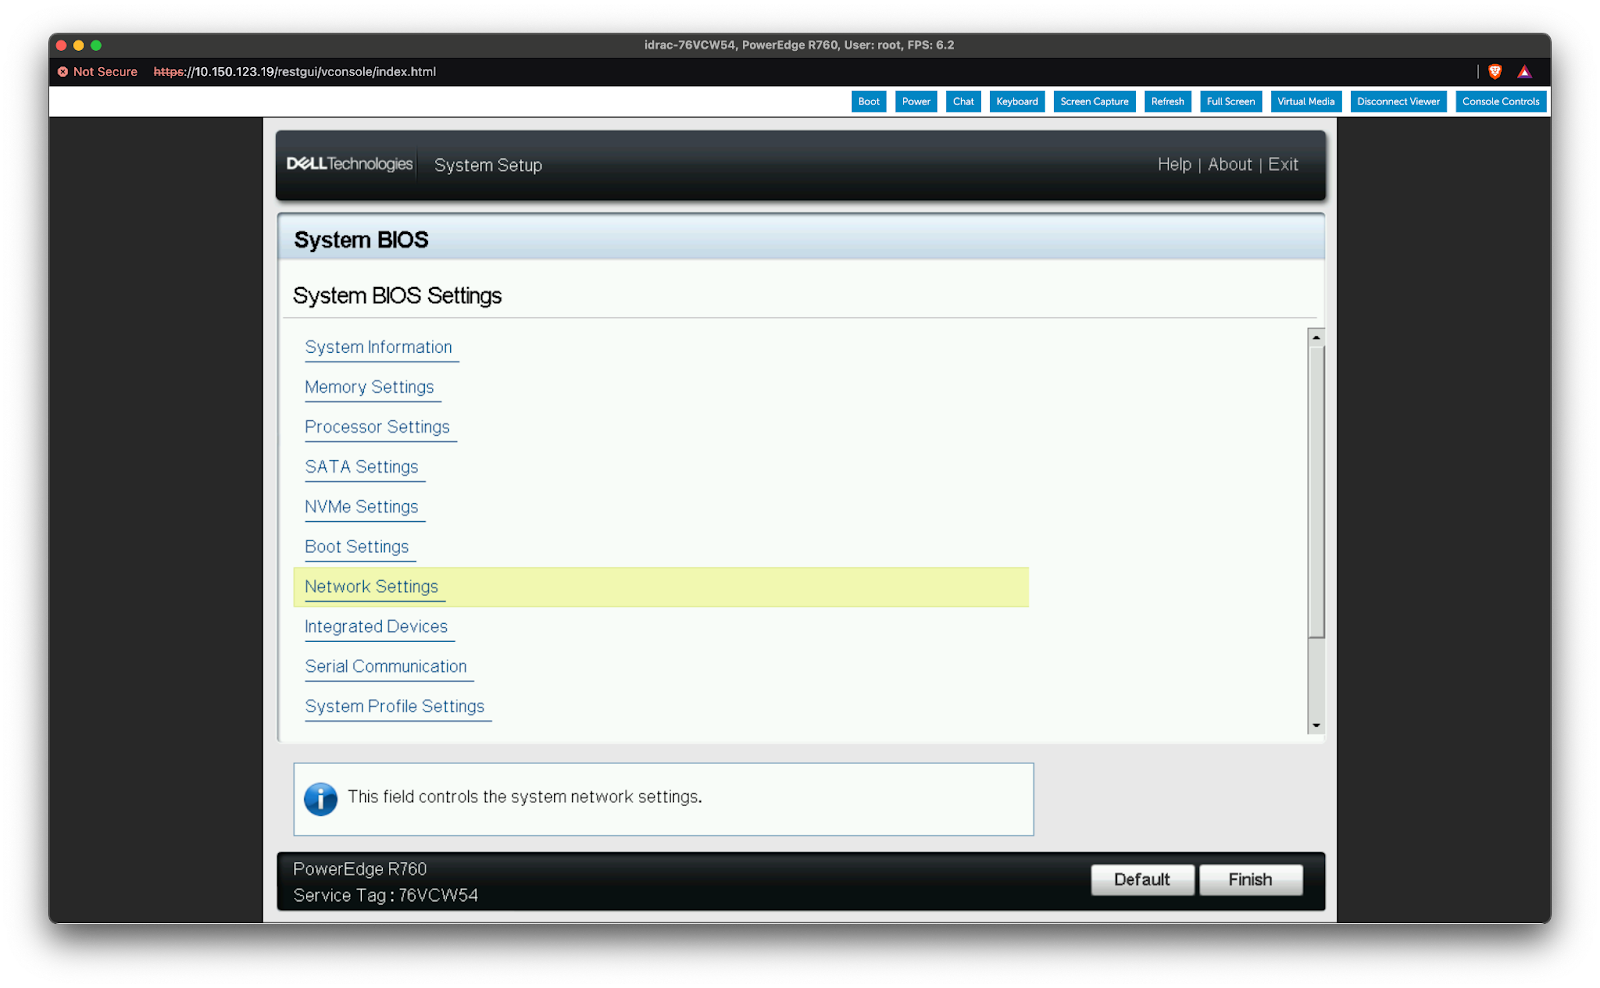
Return to the “System Setup” screen and select “System BIOS”.
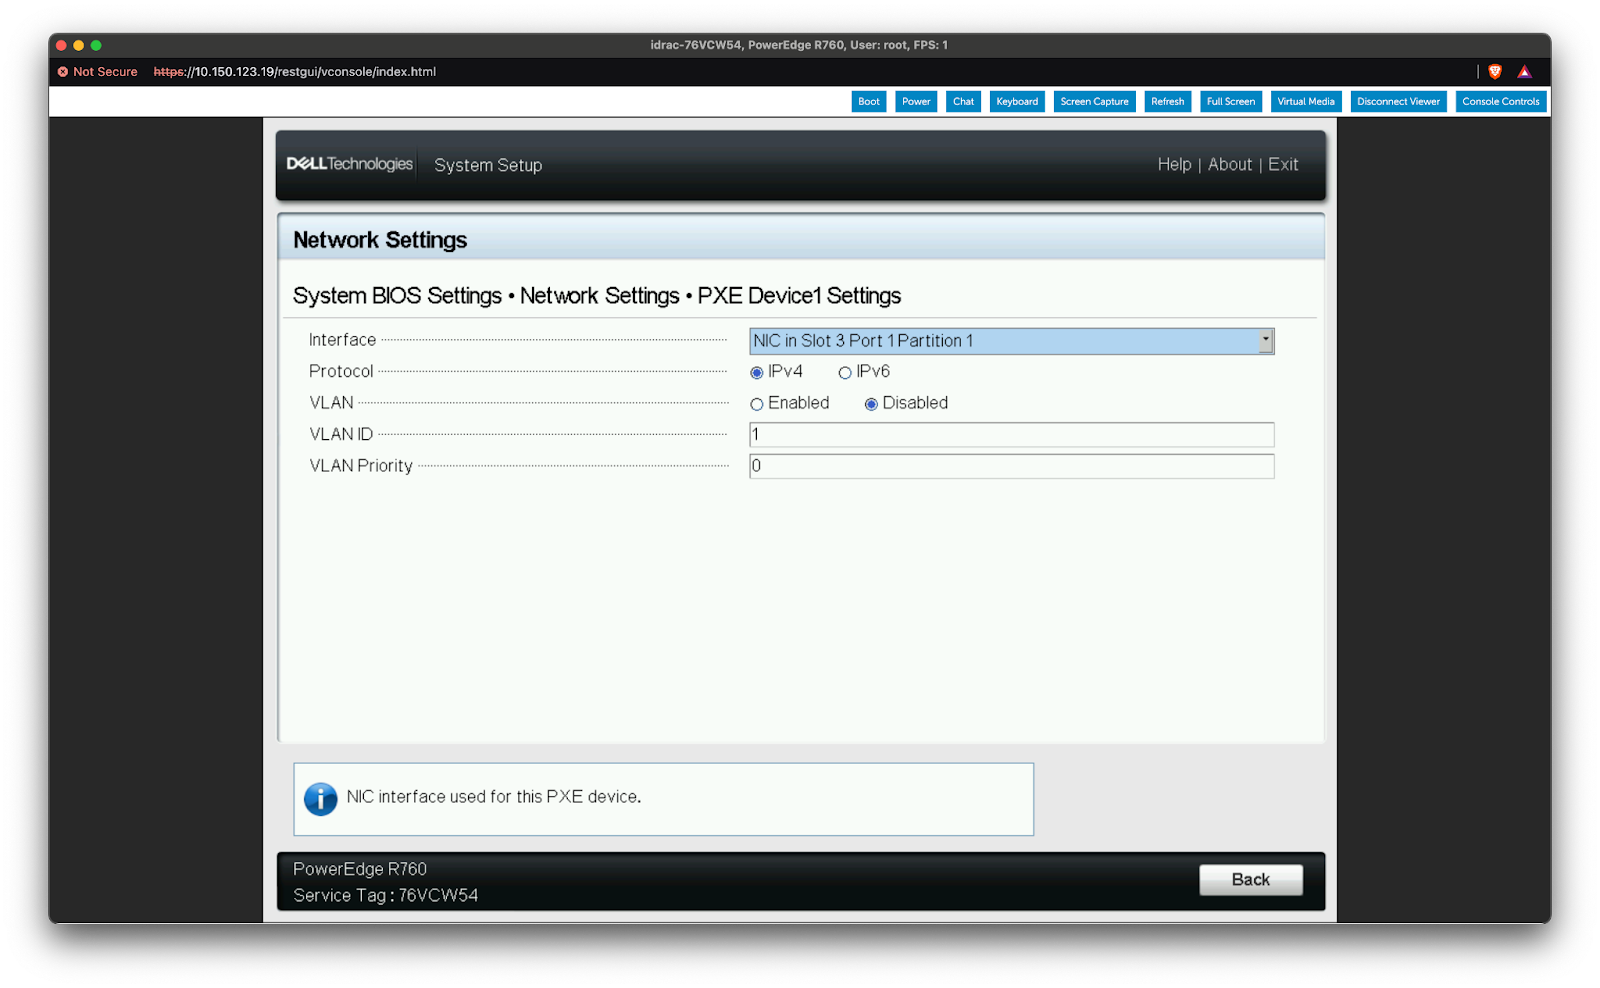
Select “Network Settings”.
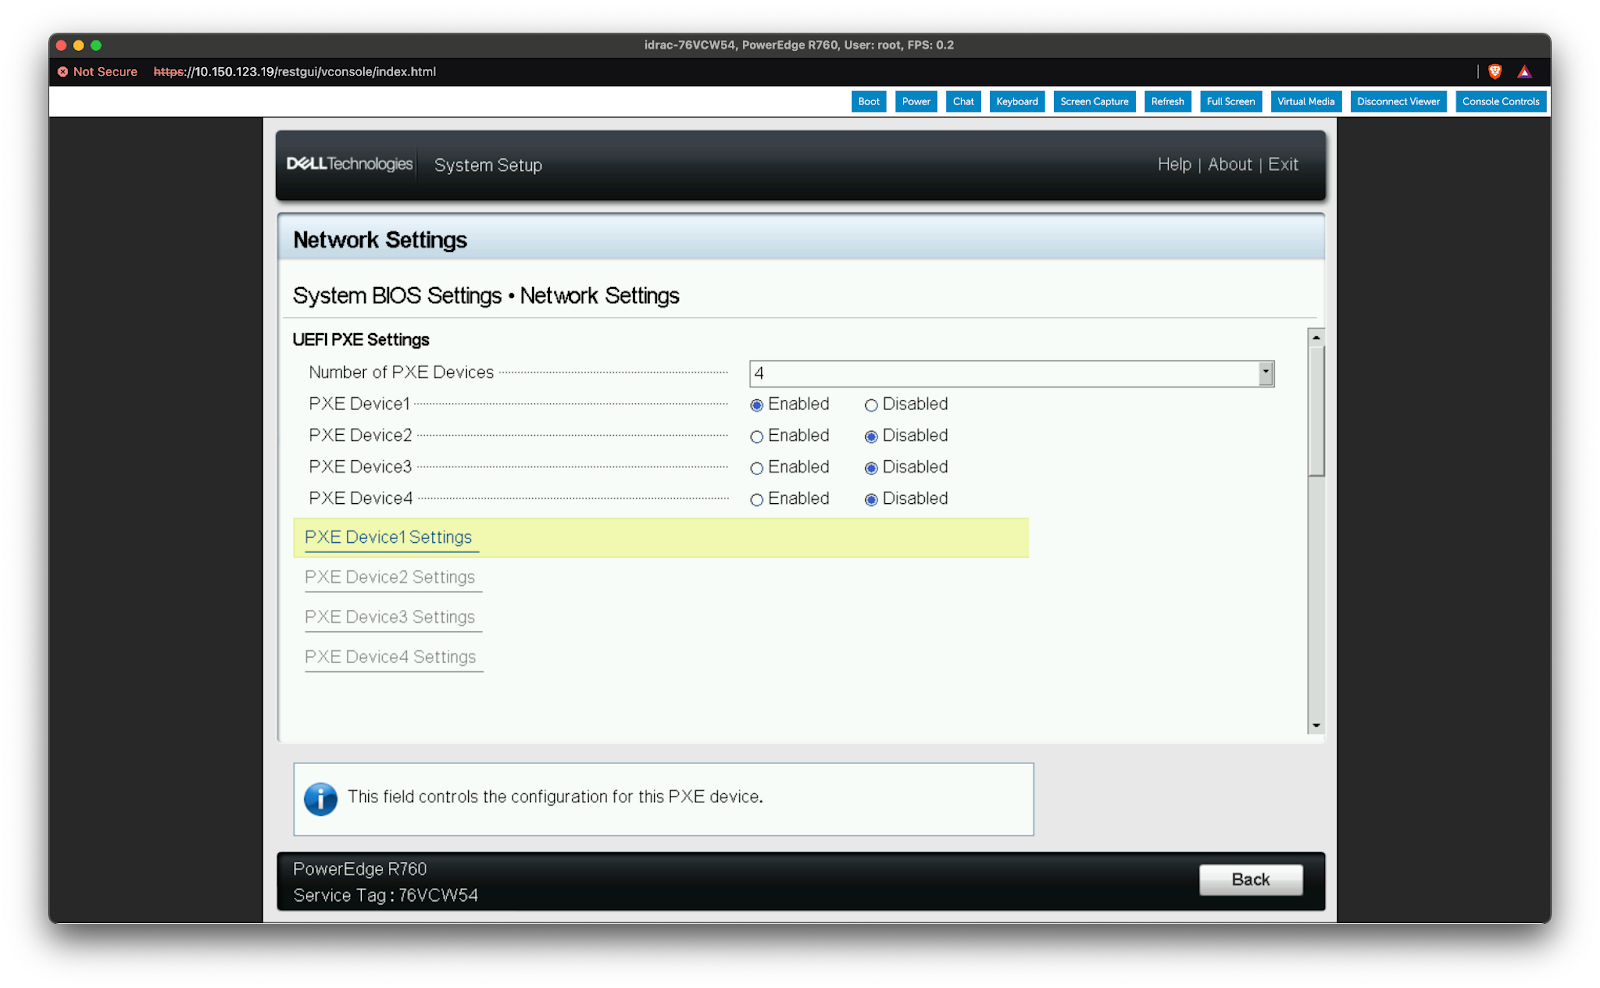
Enable a minimum of 2 PXE Devices, then define each PXE Device Setting such that the In-Band network port is selected as one of the 2 PXE boot interfaces.
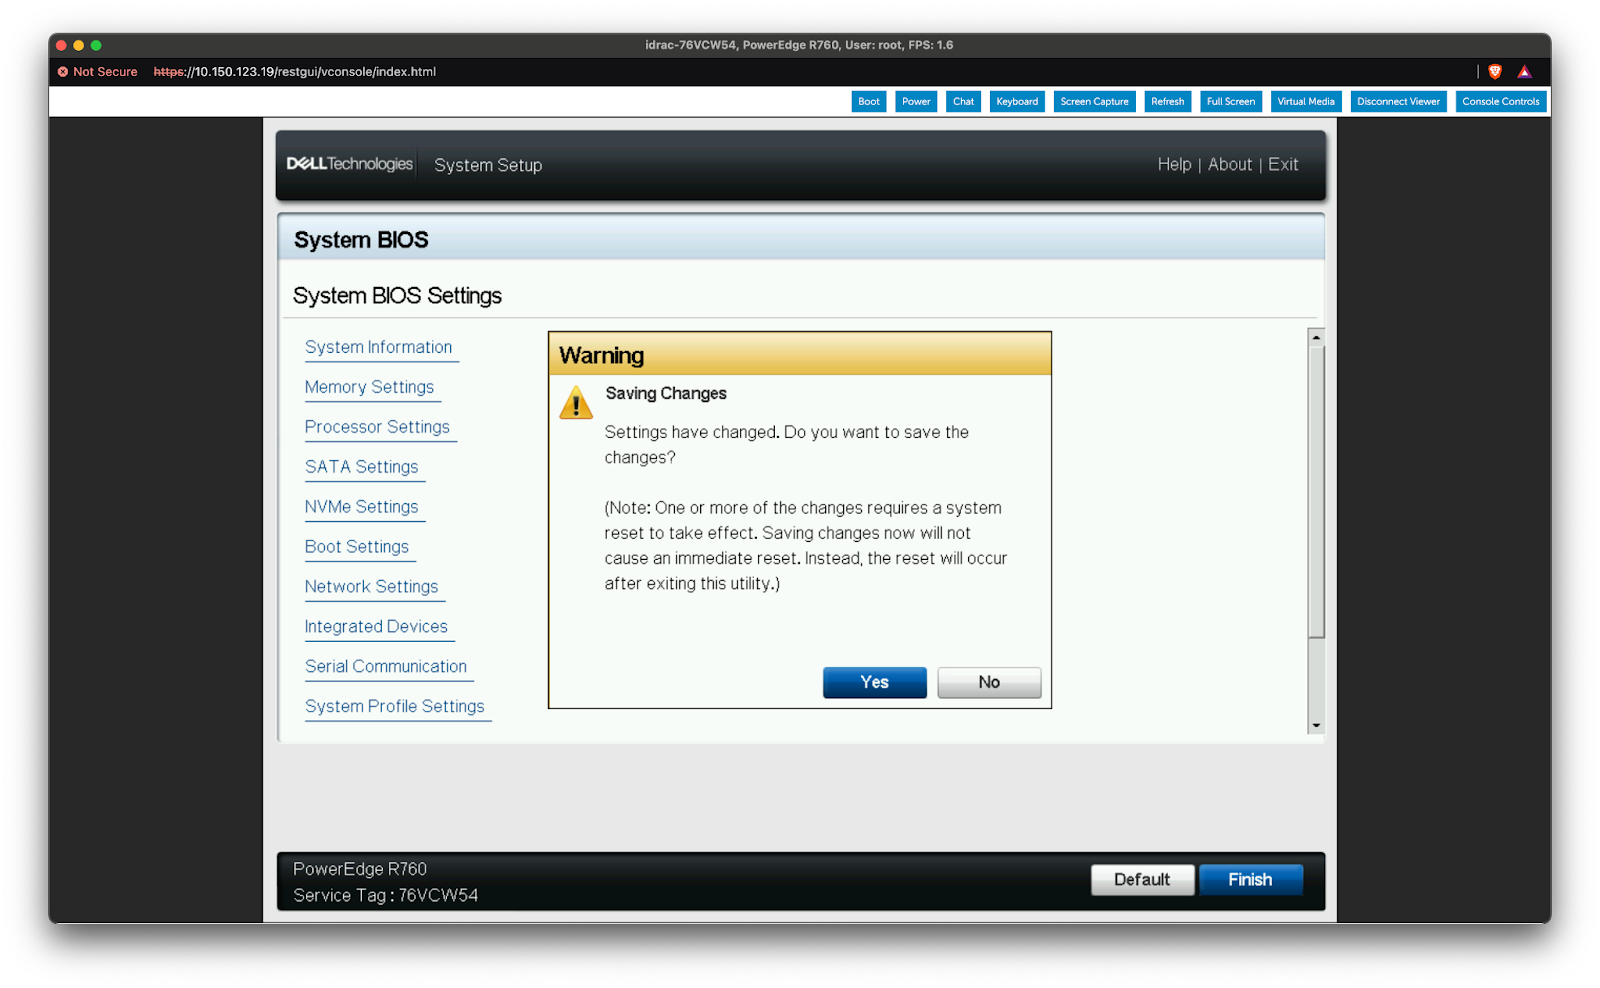
With both interfaces defined as PXE Devices click ”Back” to return to the ”System BIOS” screen with a ”Warning - Save Changes” prompt. Select ”Yes” to confirm saving the changes. Then click ”Finish“ to return to the System Setup Main Menu.
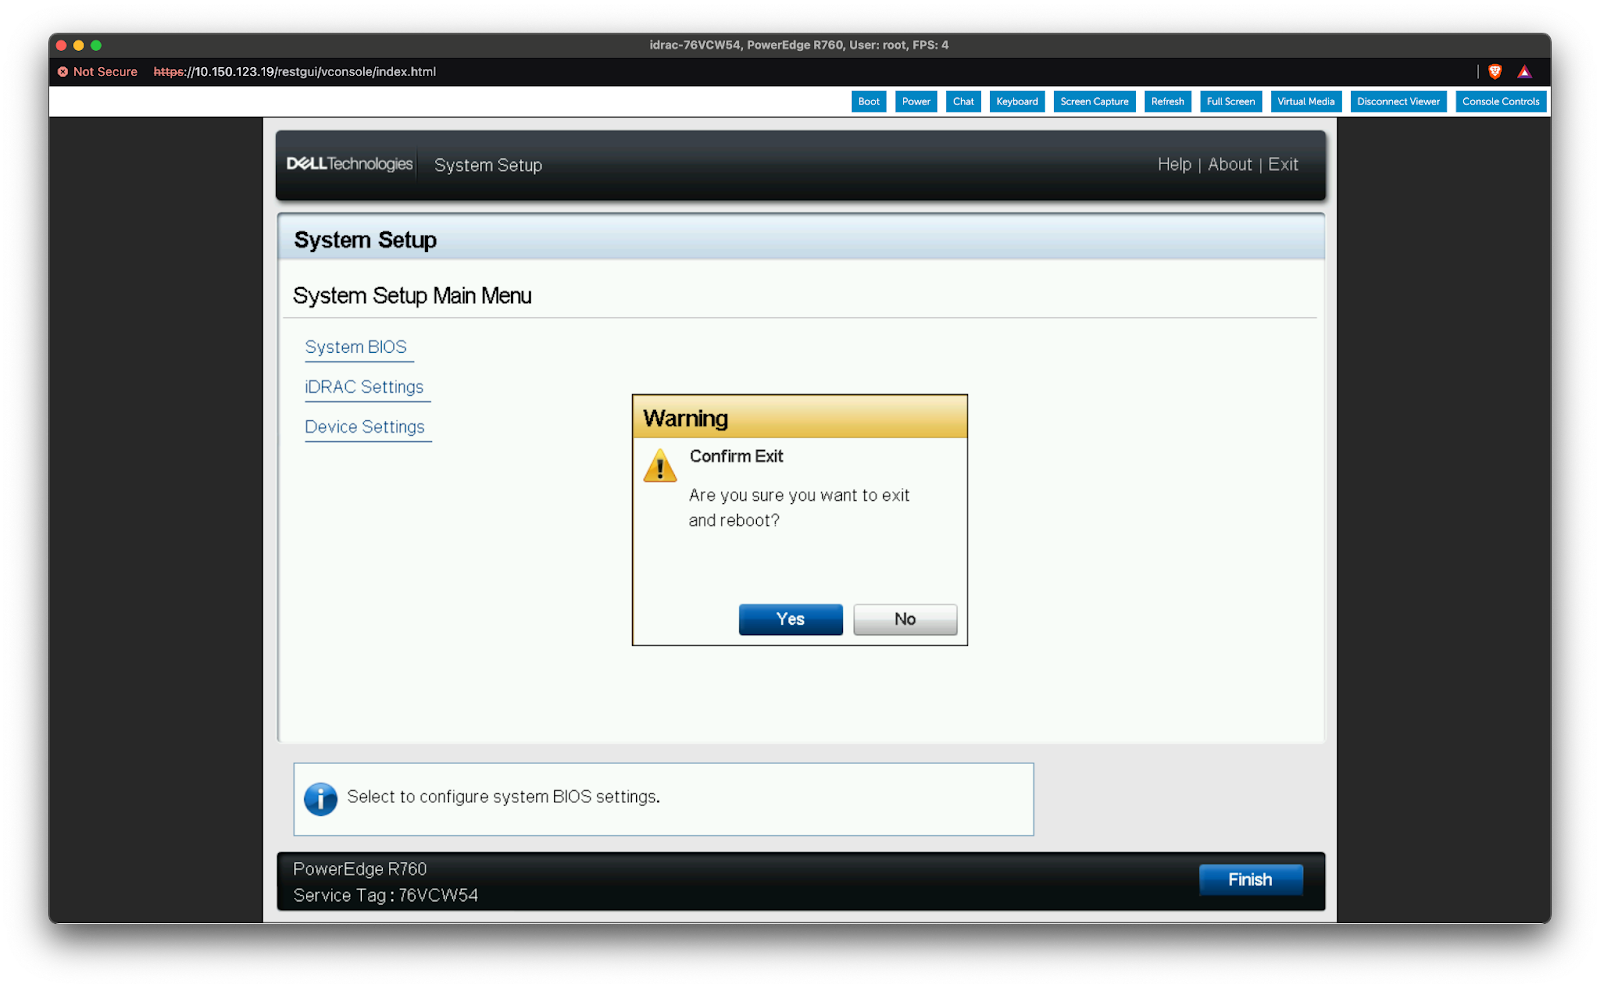
Select “Finish”, and on the “Warning - Confirm Exit” prompt select “Yes” to confirm the appliance reboot.
Other Branded Appliances#
On the ConnectX card that facilitates the In-Band network connections for the management nodes, ensure to set the port mode to Ethernet (not InfiniBand)
If the Connect-X card mode is not correctly set to Ethernet mode, the appliance will fail to communicate on the In-Band network.
The card’s port mode can be modified by temporarily booting the appliance to a linux environment to install the NVIDIA Firmware Tools application which can flip the port mode using the below EXAMPLE command:
mlxconfig -d /dev/mst/mt4119_pciconf0 set LINK_TYPE_P1=2 LINK_TYPE_P2=2
Note
The specified command needs to be used with the correct device id, do not run the below example as is on a production system. Refer to NVIDIA Firmware Tools for usage details.
RAID/Storage Configuration#
If available, configure the hardware RAID controller and disks to minimum RAID level 1 using the appliance’s BMC or BIOS. The procedure varies depending on the appliance vendor and RAID controller. Refer to the specific vendor documentation for the configuration procedure.