Deploy Kubernetes#
With all required public cloud instances deployed and configured for general use, the environment is ready for K8s deployment. In a hybrid environment, the same tool used to deploy on-premises K8s is used to deploy K8s in the public cloud as well.
Run the
cm-kubernetes-setupCLI wizard as the root user on the head node.cm-kubernetes-setup
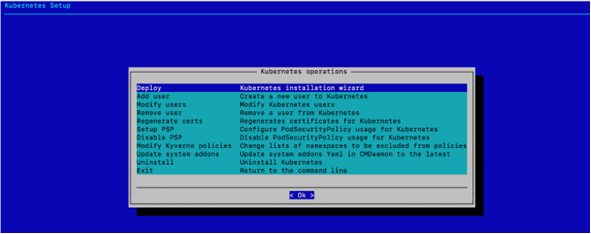
Choose Deploy to begin the deployment and then select Ok.
Choose Kubernetes v1.21 and then select Ok.
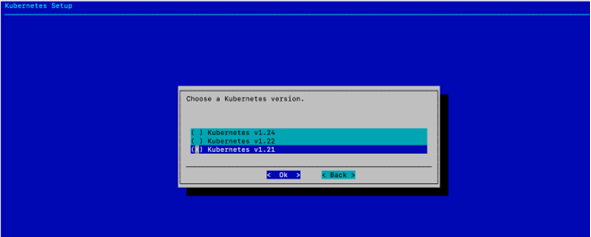
K8s version 1.21 was selected to match the version deployed in the on-premises DGX BasePOD deployment.
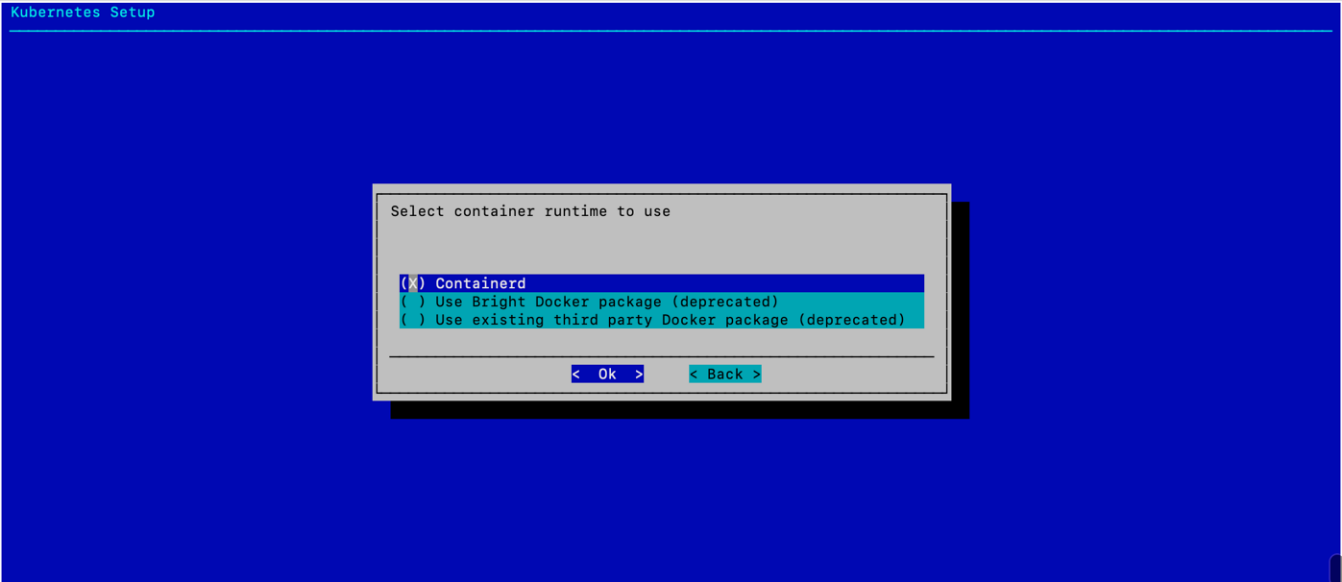
Choose Containerd (it should be selected by default) and then select Ok.
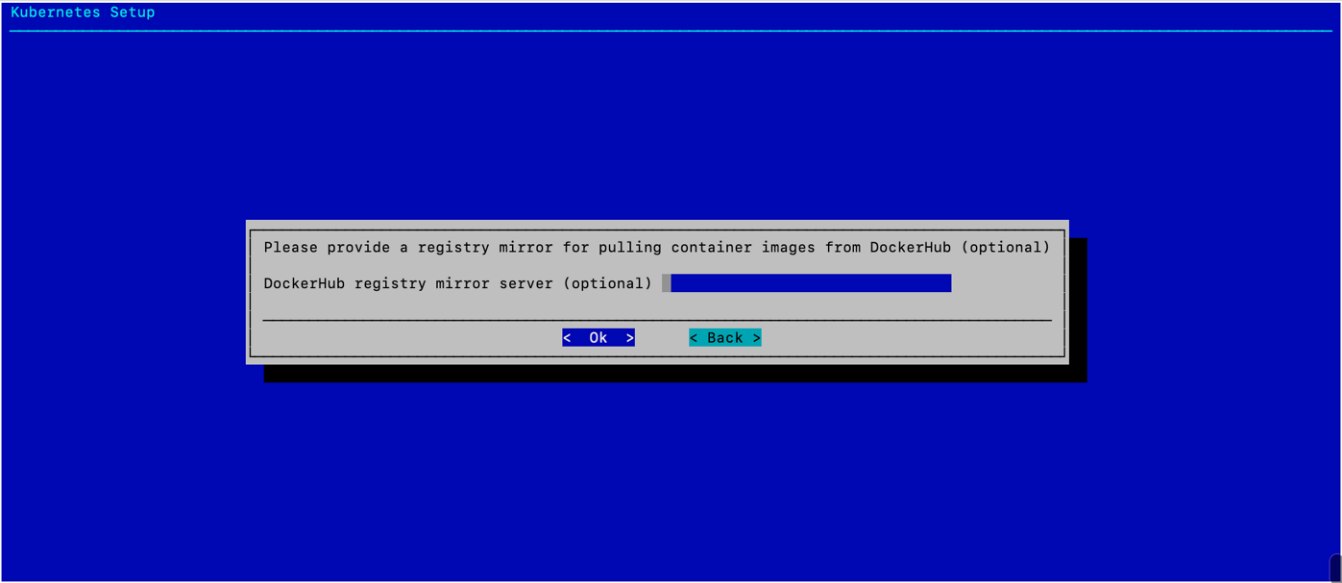
Optionally, provide a registry mirror and then select Ok.
This example deployment did not require one.
Configure the basic values of the K8s cluster and select Ok.
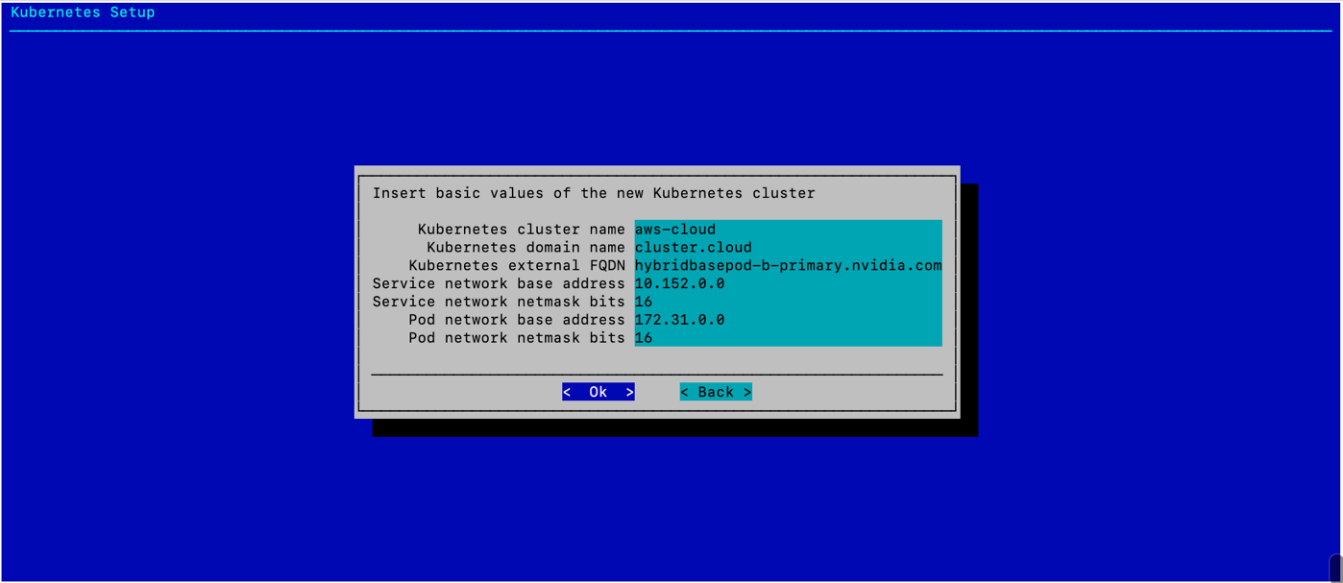
Choose names that make it easy to understand that the K8s deployment is using public cloud resources. In addition, ensure that the service and pod network subnets do not overlap with existing subnets in the cluster.
Choose yes to expose the K8s API server to the external network and then select Ok.
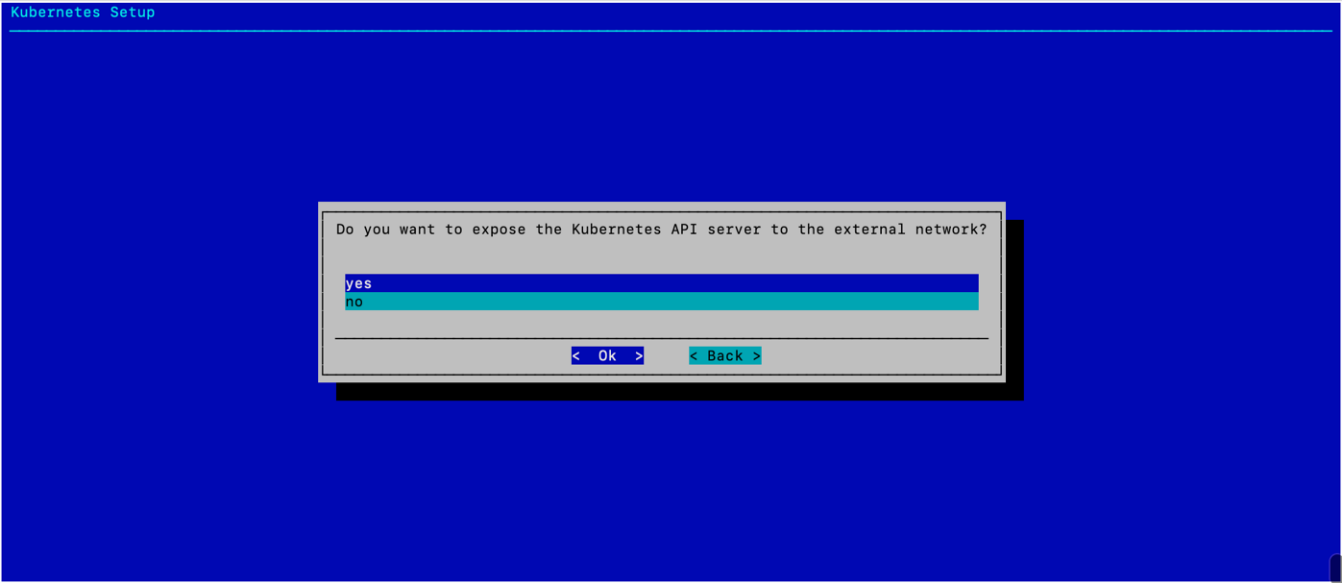
This allows users to use the K8s cluster from the head node.
Choose vpc-us-west-2-private for the public cloud-based K8s environment and then select Ok.
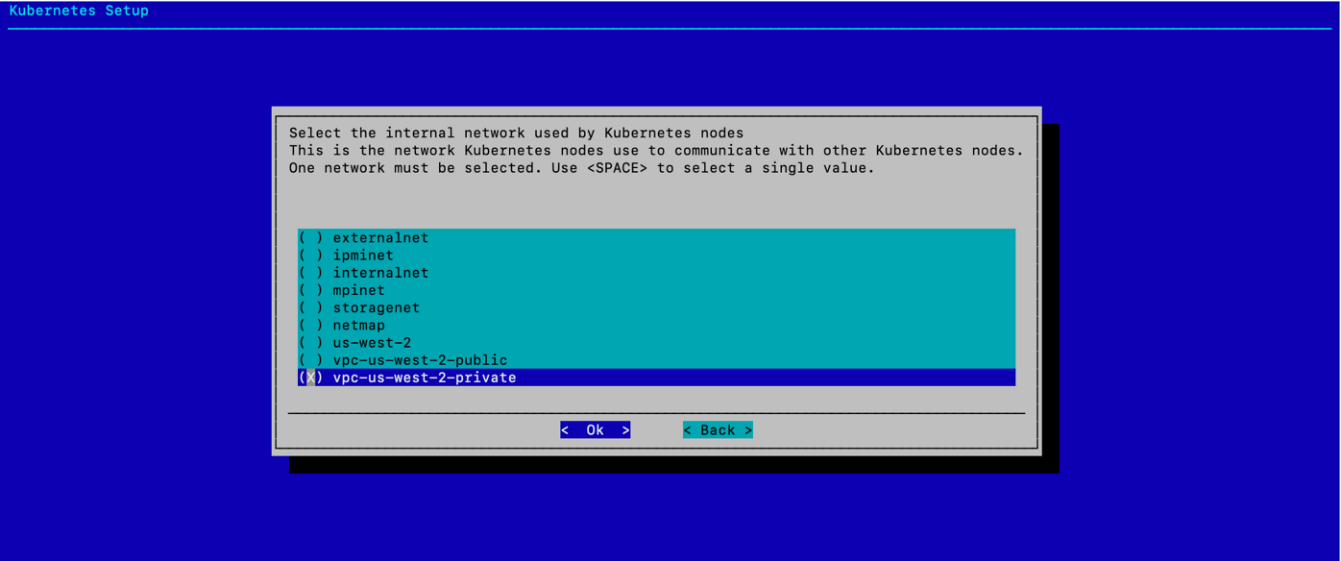
This keeps internal K8s traffic entirely in the public cloud.
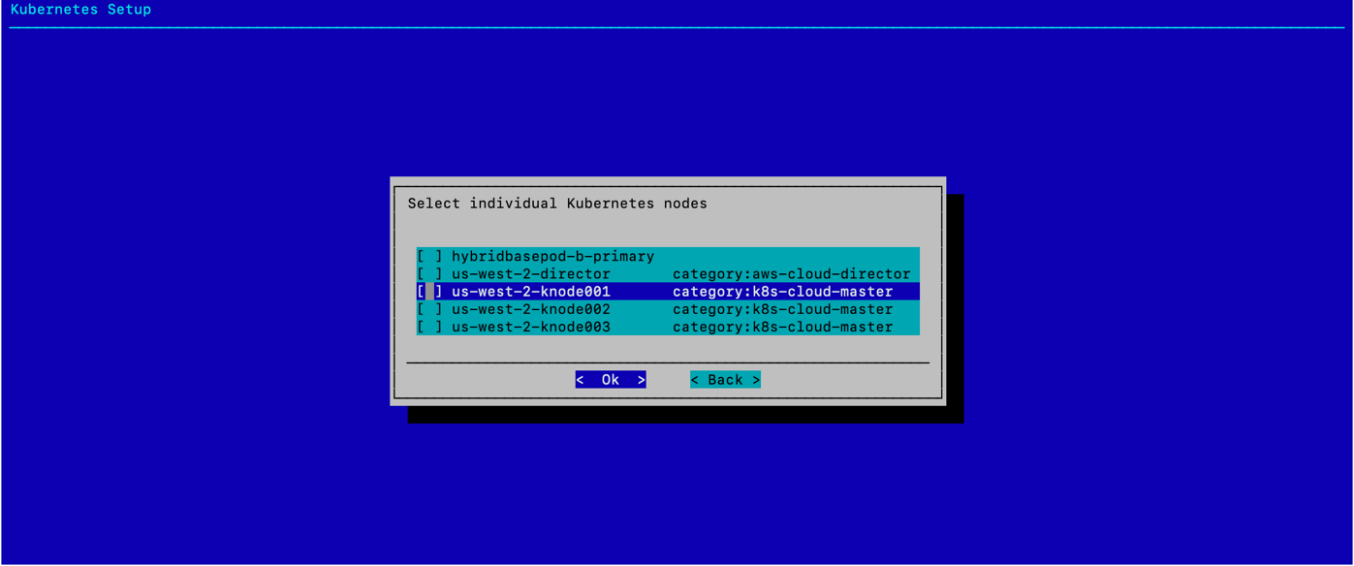
Choose the three k8s-cloud-master nodes and then select Ok.

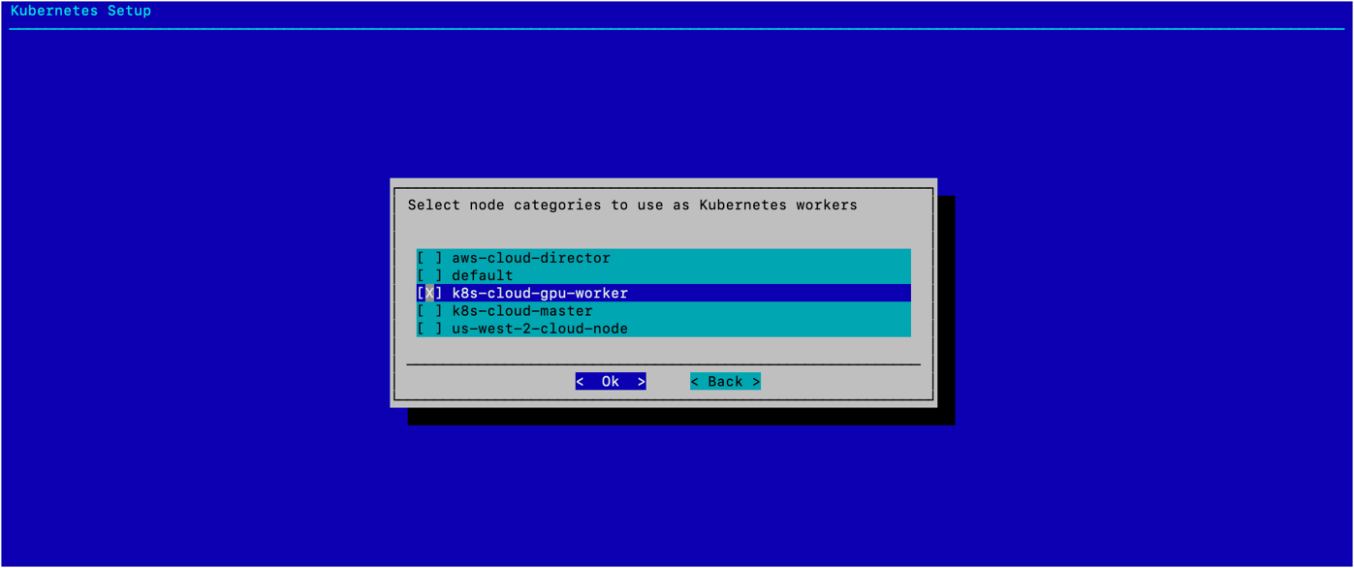
Choose k8s-cloud-gpu-worker for the worker node category and then select Ok.
Select Ok without configuring any individual K8s nodes.
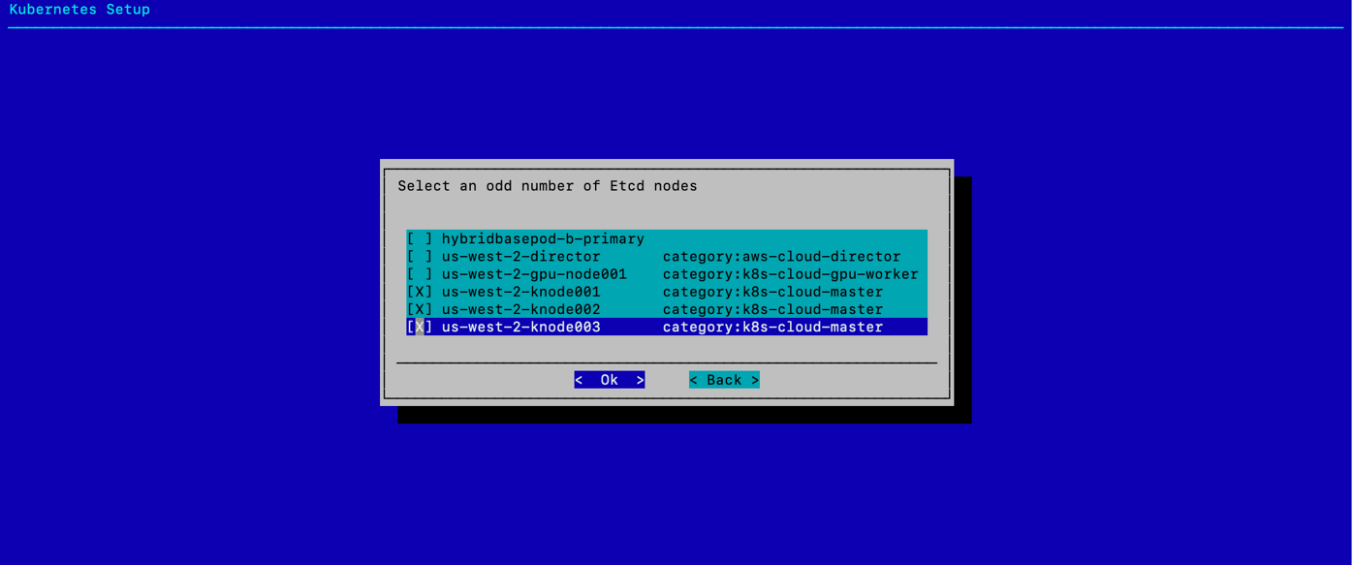
Choose the three knode systems for Etcd nodes and then select Ok.
Configure the K8s main components and then select Ok.
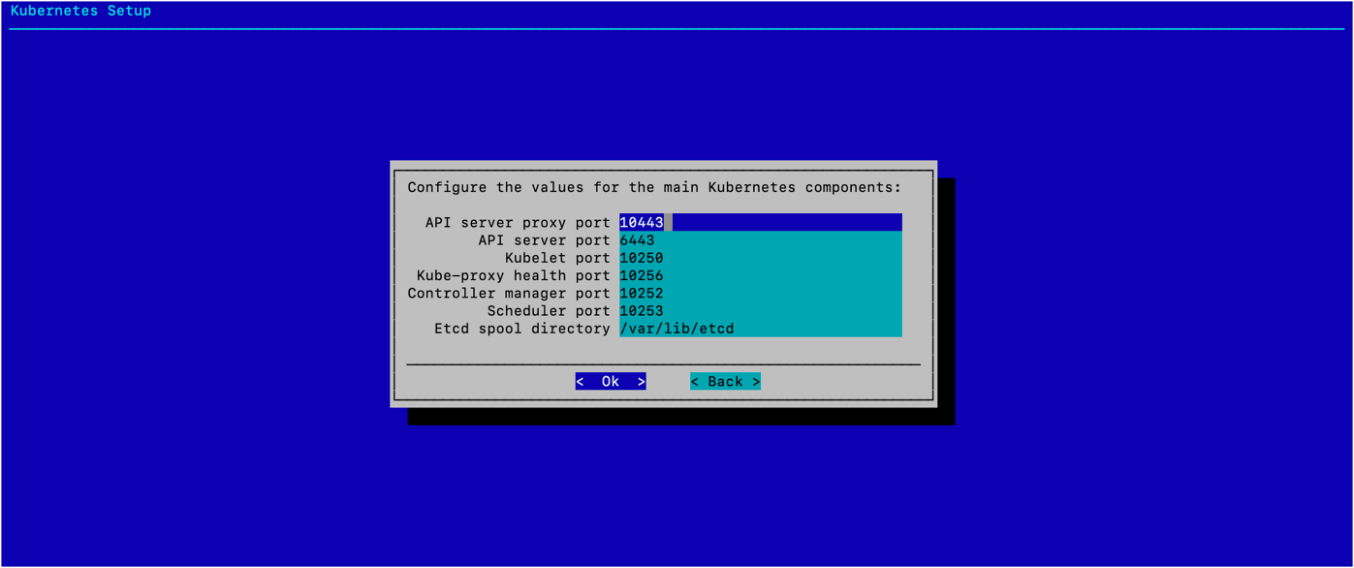
Use the default ports and path here unless the environment requires different values. The default values were used in this deployment.
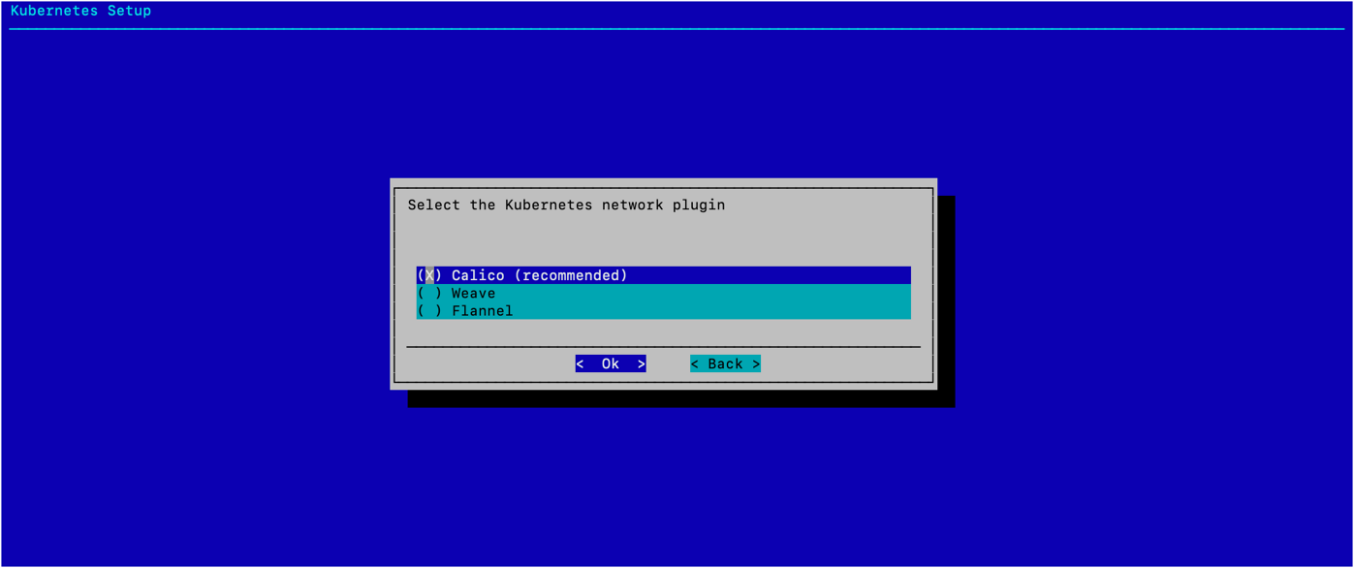
Choose the Calico network plugin and then select Ok.
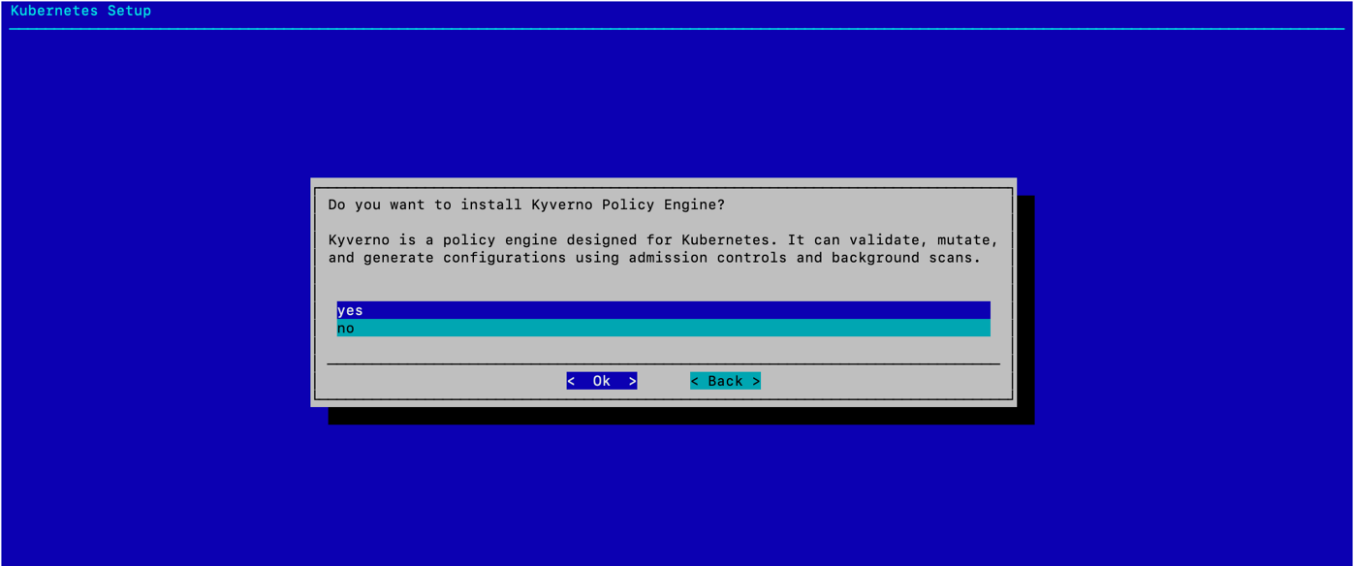
Choose yes to install the Kyverno policy engine and then select Ok.
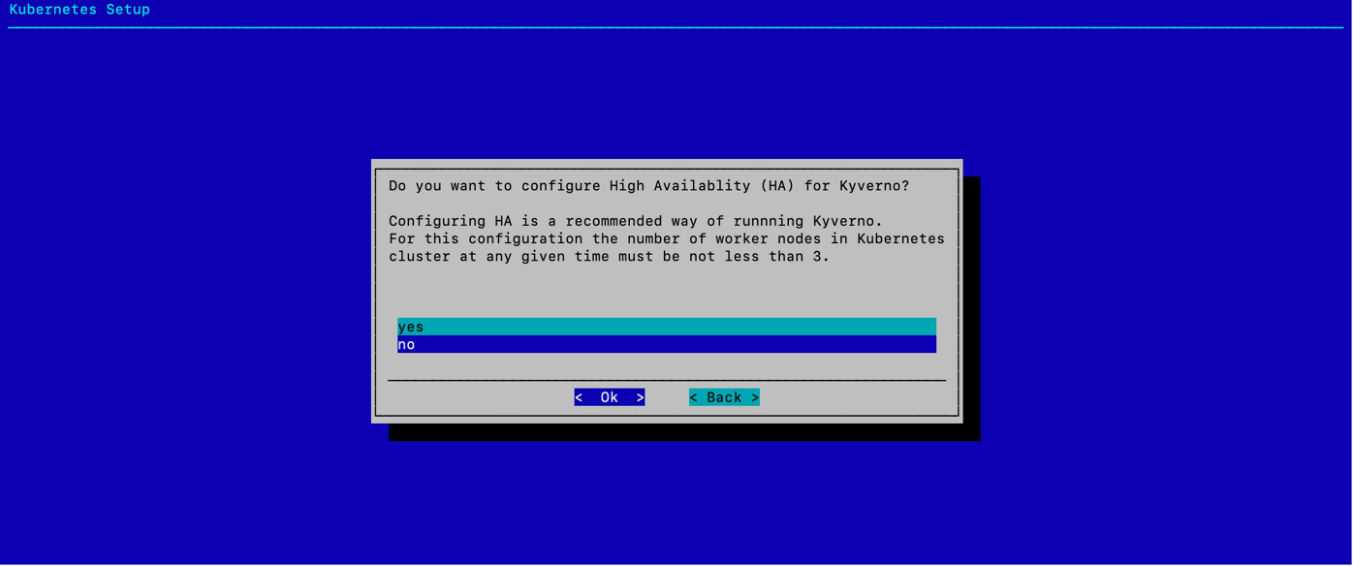
Choose no to decline to configure HA for Kyverno and then select Ok.
This deployment does not meet the minimum node requirement for Kyverno HA.
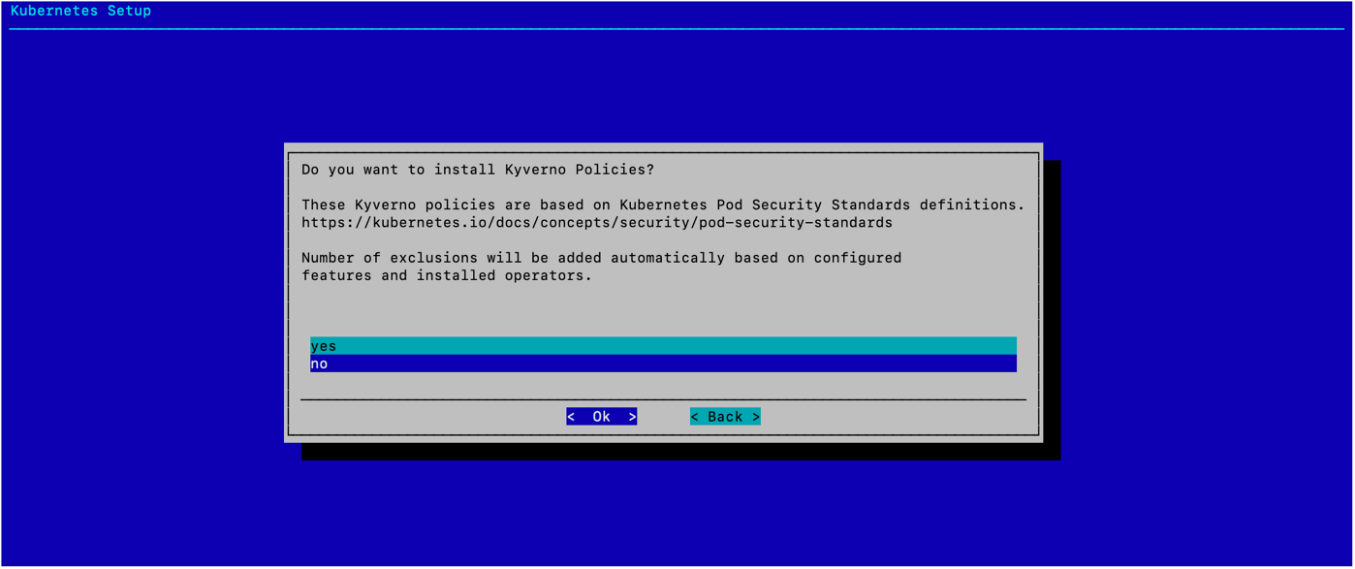
Choose whether to install Kyverno Policies and then select Ok.
Unless required for the configuration, choose no.
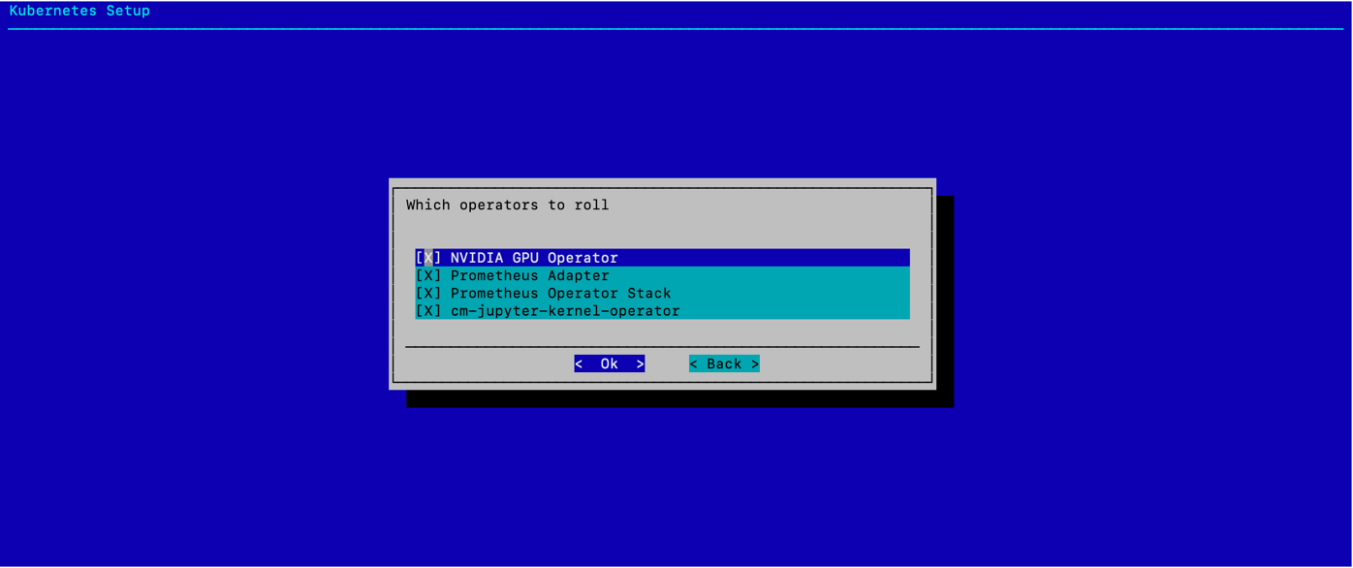
Choose the operator packages to install and then select Ok.
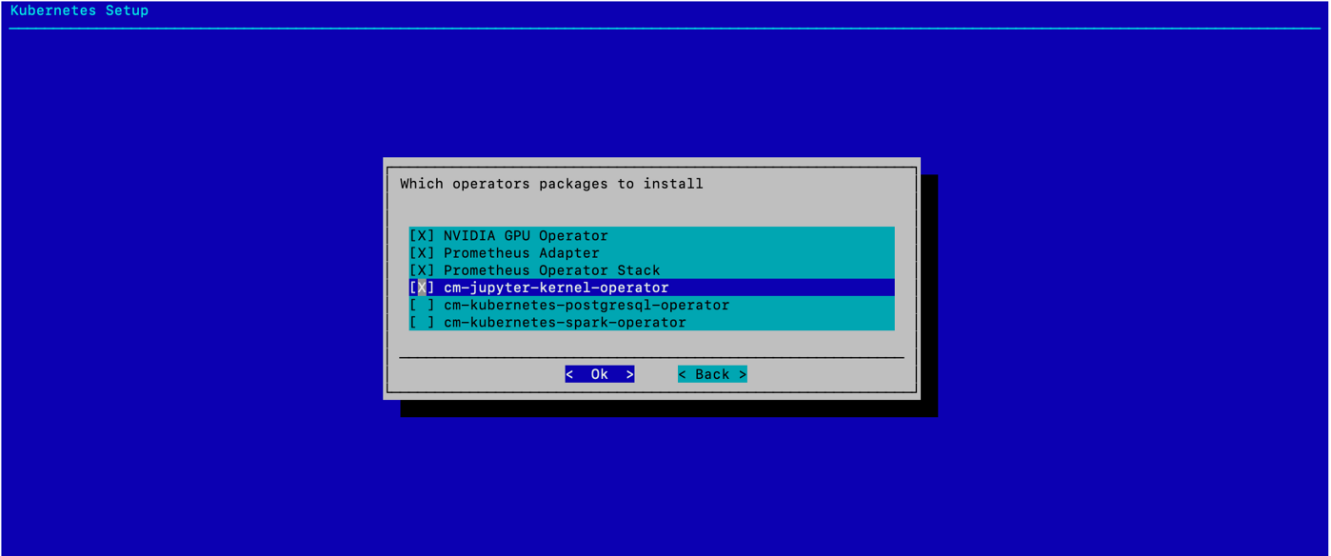
As shown in the screenshot, choose NVIDIA GPU Operator, Prometheus Adapter, Prometheus Adapter Stack, and the cm-jupyter-kernel-operator.
Choose the same four operators to be rolled up with the defaults and then select Ok.
Choose the addons to deploy and then select Ok.

As shown in the screenshot, choose Ingress Controller (Nginx), Kubernetes Dashboard, Kubernetes Metrics Server, and Kubernetes State Metrics.
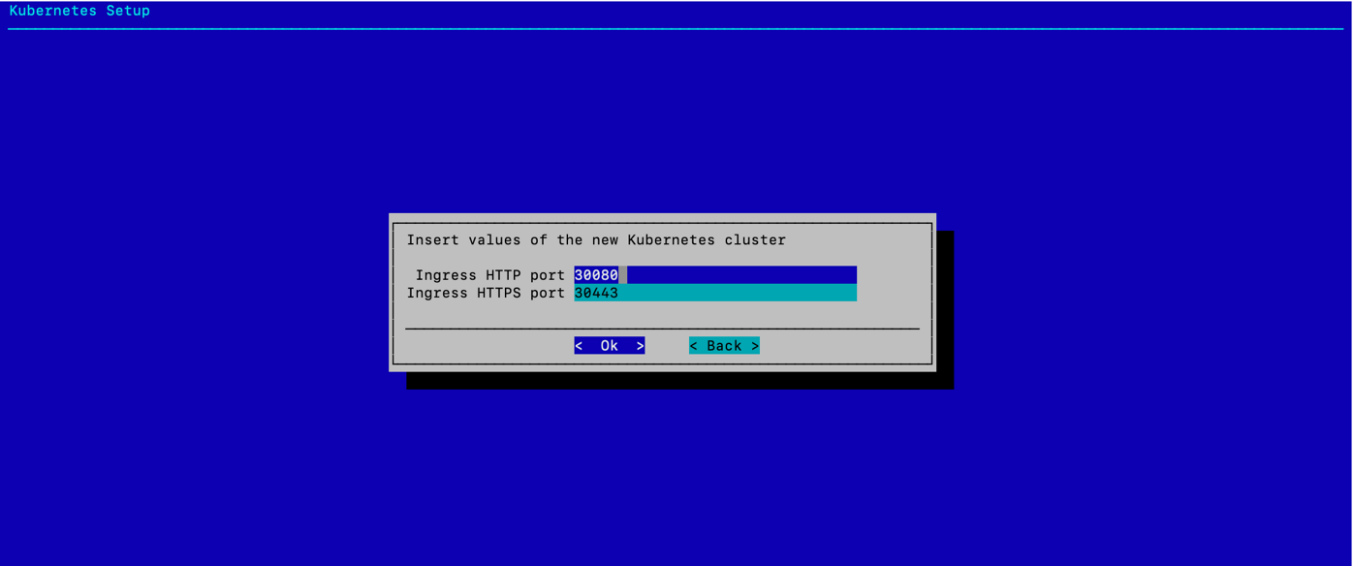
Choose the Ingress ports for the cluster and then select Ok.
Use the defaults unless specific ingress ports are required.
Choose no when asked to install the Bright NVIDIA packages and then select Ok.
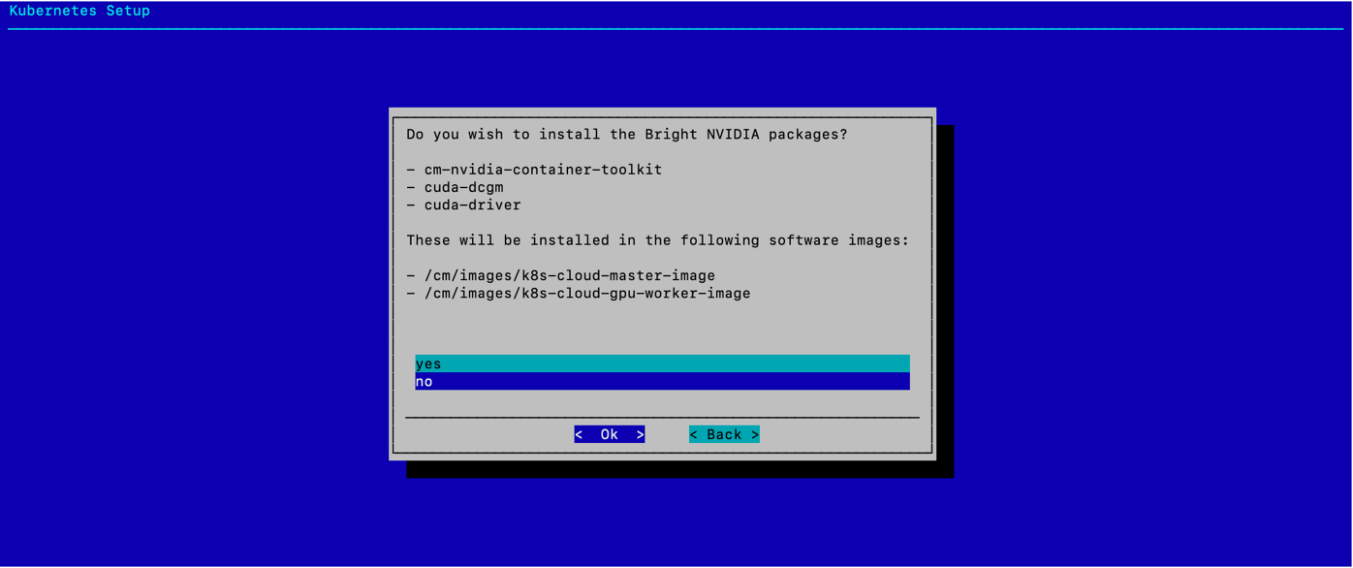
Since the K8s control plane nodes do not have GPUs, the GPU Operator manages NVIDIA OS components.
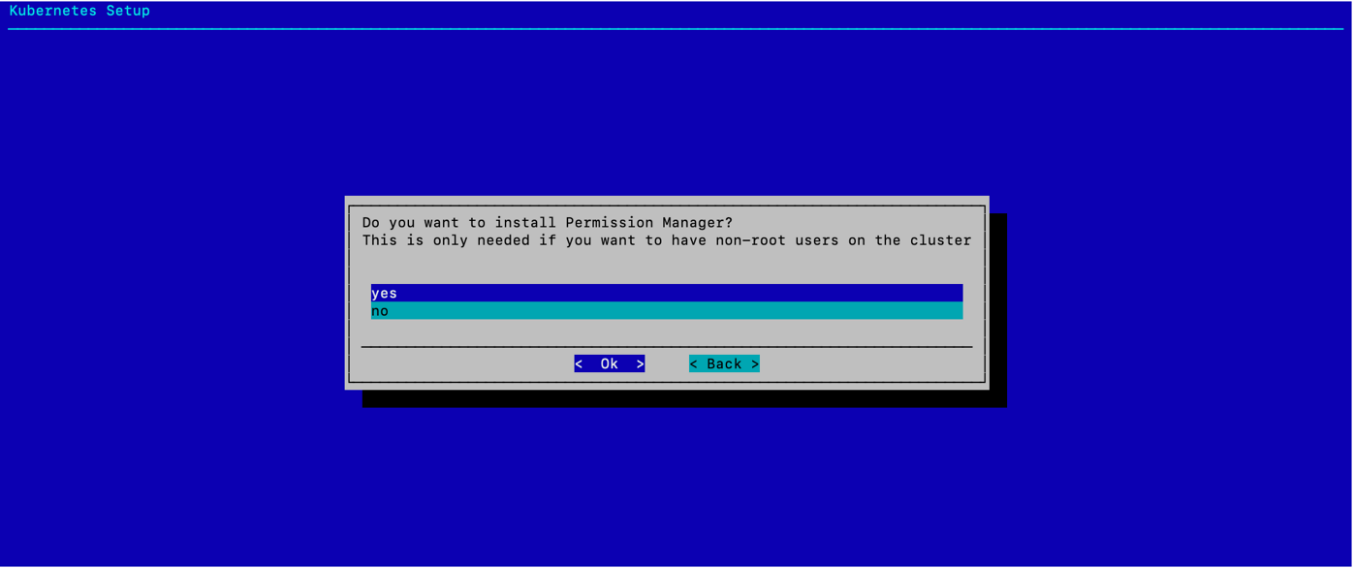
Choose yes to deploy the Permission Manager and then select Ok.
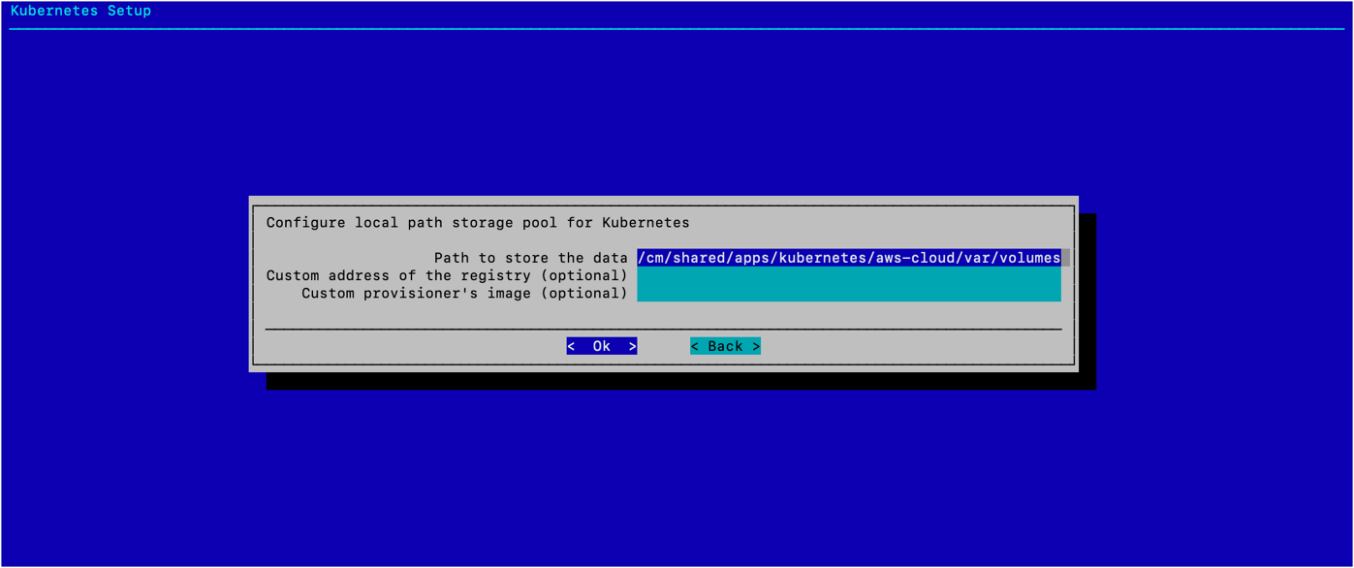
Select Ok without configuring any optional values.

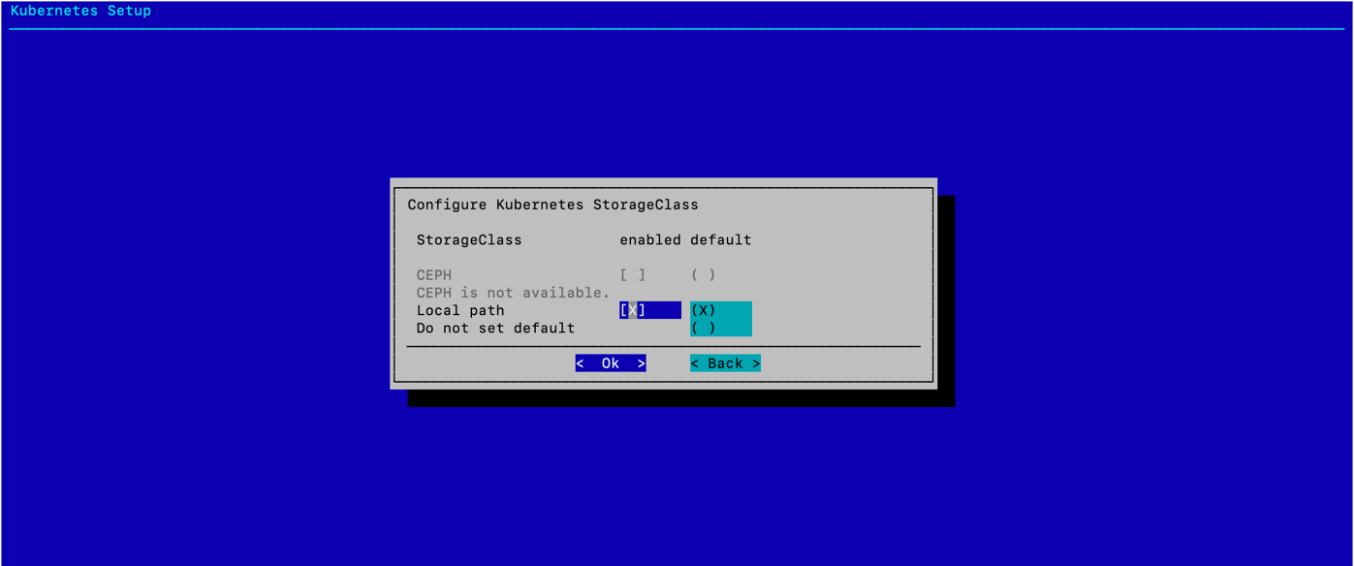
Choose both enabled and default for the Local path storage class and then select Ok.
Select Ok without changing any of the default values.
Choose Save config & deploy and then select Ok.

Change the filepath to /root/cm-kubernetes-setup-cloud.conf and then select Ok.
The filepath was changed to avoid name conflicts with the existing K8s configuration file from the initial on-premises deployment. Wait for the installation to finish.
Verify the K8s cluster is installed properly.
The K8s module may need to be unloaded for the on-premises deployment if already loaded or use the switch command as a shortcut to unload on-premises and load the public cloud module.
1module load kubernetes/aws-cloud/
2kubectl cluster-info
3Kubernetes control plane is running at https://localhost:10443
4CoreDNS is running at https://localhost:10443/api/v1/namespaces/kube-system/services/kube-dns:dns/proxy
5
6To further debug and diagnose cluster problems, use 'kubectl cluster-info dump'.
1kubectl get nodes
2NAME                    STATUS   ROLES                  AGE     VERSION
3us-west-2-gpu-node001   Ready    worker                 6m48s   v1.21.4
4us-west-2-knode001      Ready    control-plane,master   6m48s   v1.21.4
5us-west-2-knode002      Ready    control-plane,master   6m48s   v1.21.4
6us-west-2-knode003      Ready    control-plane,master   6m48s   v1.21.4
Verify that a GPU job can be run on the K8s cluster.
Save the following text to a file named gpu.yaml.
 1apiVersion: v1
 2kind: Pod
 3metadata:
 4  name: gpu-pod-pytorch
 5spec:
 6  restartPolicy: Never
 7  containers:
 8    - name: pytorch-container
 9      image: nvcr.io/nvidia/pytorch:22.08-py3
10      command:
11        - nvidia-smi
12      resources:
13        limits:
14          nvidia.com/gpu: 1
Execute the code using
kubectlapply.kubectl apply -f gpu.yaml
Use
kubectl logsto check the result.The output should be like the following.
 1kubectl logs gpu-pod-pytorch
 2Tue Feb 14 22:25:53 2023
 3+-----------------------------------------------------------------------------+
 4| NVIDIA-SMI 525.85.12    Driver Version: 525.85.12    CUDA Version: 12.0     |
 5|-------------------------------+----------------------+----------------------+
 6| GPU  Name        Persistence-M| Bus-Id        Disp.A | Volatile Uncorr. ECC |
 7| Fan  Temp  Perf  Pwr:Usage/Cap|         Memory-Usage | GPU-Util  Compute M. |
 8|                               |                      |               MIG M. |
 9|===============================+======================+======================|
10|   0  Tesla T4            On   | 00000000:00:1E.0 Off |                    0 |
11| N/A   28C    P8    14W /  70W |      2MiB / 15360MiB |      0%      Default |
12|                               |                      |                  N/A |
13+-------------------------------+----------------------+----------------------+
14
15+-----------------------------------------------------------------------------+
16| Processes:                                                                  |
17|  GPU   GI   CI        PID   Type   Process name                  GPU Memory |
18|        ID   ID                                                   Usage      |
19|=============================================================================|
20|  No running processes found                                                 |
21+-----------------------------------------------------------------------------+