Initial Setup#
This topic describes the setup process when the DGX system is powered on for the first time after delivery or after the system is reimaged.
To start the process, you need to accept the End User License Agreements (EULA) and set up your username and password. To preview the EULA, visit the Enterprise Software Agreements page and click NVIDIA Software License Agreement under NVIDIA AI, DGX and NVIDIA AI Enterprise.
Connecting to the DGX System#
During the installation and initial configuration steps, you need to connect to the console of the DGX system. To connect to the DGX system, use one of the following methods:
Through a virtual keyboard, video, and mouse (KVM) in the BMC.
A direct connection with a local monitor and keyboard.
Refer to the appropriate DGX product user guide for a list of supported connection methods and specific product instructions:
First Boot Setup Wizard#
Here are the steps to complete the first boot process. It differs between the DGX systems:
First Boot Process for DGX Servers#
Here are the steps to complete the first boot process for DGX servers.
Note
The first boot dialogs are presented over a display. This can be a physical display or the virtual one provided by the remote BMC. These dialogs will not be visible using a serial console.
If the DGX OS was installed with an encrypted root filesystem, you will be prompted to unlock the drive. For more information, refer to Advanced Installation Options (Encrypted Root). When you select this menu item, you can encrypt the root filesystem of the DGX system.
Enter
nvidia3dat the crypt prompt.Accept the EULA to proceed with the DGX system setup.
Complete the following steps:
Select your language and locale preferences.
Select the country for your keyboard.
Select your time zone.
Confirm the UTC clock setting.
Create an administrative user account with your name, username, and password.
This username is also used as the BMC and GRUB username.
The BMC software does not accept
sysadminfor a username, and you cannot log in to the BMC with that username.Note
During this step in the procedure, the default BMC administrator user will be disabled, and a new BMC administrator user will be created.
The username must be composed of lower-case letters.
The username will be used for administrative activities instead of the root account.
Ensure you enter a strong password.
If the password that you entered is weak, a warning message appears.
Create a BMC administrator password. The allowed character length for the BMC password depends on the specific DGX product:
DGX A100: 13 - 20 characters
DGX Station A100: 13 - 20 characters
DGX H100/H200: 13 - 20 characters
DGX B200: 13 - 20 characters
DGX B300: 13 - 20 characters
DGX GB200: 13 - 20 characters
DGX GB300: 13 - 20 characters
After you create your login credentials, the default credentials will no longer work.
Create a GRUB password.
Your GRUB password must have at least 8 characters. If it has less than 8 characters, you cannot click Continue.
If you continue without entering a password, the GRUB protection will be disabled. For added security, NVIDIA recommends that you set the GRUB password.
Create a root filesystem passphrase. This dialog only appears if root filesystem encryption was selected at the time of the DGX OS installation. For more information, refer to Advanced Installation Options (Encrypted Root). When you select this menu item, you can encrypt the root filesystem of the DGX system.
Select a primary network interface for the DGX system. This should typically be the interface that you will use for subsequent system configuration or in-band management. For example:
DGX A100:
enp226s0DGX H100/H200:
eno3DGX B200:
eno3DGX B300:
eno1DGX GB200:
enP5p9s0DGX GB300:
enP5p9s0
Do not select
enp37s0f3u1u3c2,bmc_redfish0, or similar names because this interface is intended only for out-of-band management or future support of in-band tools that will access the Redfish APIs.After you select the primary network interface, the system attempts to configure the interface for DHCP and prompts you to enter the name server addresses.
If no DHCP is available, click OK in the Network autoconfiguration failed dialog box and manually configure the network.
To configure a static address, click Cancel in the dialog box after the DHCP configuration completes to restart the network configuration steps.
To select a different network interface, after the DHCP configuration completes, click Cancel in the dialog box to restart the network configuration steps.
If prompted, enter the requested networking information, such as the name server or the domain name.
Select a host name for the DGX system.
After you complete the first boot process, the DGX system configures the operating system, starts the system services, and displays a login prompt on the console. If the IP of the configured network interface is known, you can log in by using the console or secure shell (SSH).
Caution
Before issuing a reboot, ensure the NVIDIA RAID configuration service has completed by issuing
sudo systemctl status nvidia-raid-config until the Finished NVIDIA RAID Configuration message
appears. The configuration service typically takes about 10 minutes to complete.
First Boot Process for DGX Station#
Important
You can connect to the system through a remote BMC console using a virtual keyboard, video, and mouse.
To use the remote BMC console, ensure that the OnBrd/Ext VGA Select SBIOS configuration is set to OnBoard.
If the SBIOS is not configured this way, the system starts the user interface on the display port instead of the remote BMC console.
Refer to
Using DGX Station A100 as a Server Without a Monitor
for details on changing the SBIOS configuration.
When you power on your DGX Station or DGX Spark for the first time, you are prompted to accept end user license agreements for NVIDIA software. You are then guided through the process to complete the initial Ubuntu OS configuration.
During the configuration process, to prevent unauthorized users from using non-default boot entries and modifying boot parameters, you need to enter a GRUB password.
Accept the EULA and click Continue.
Select your language, for example,
English – English, and click Continue.Select your keyboard, for example,
English (US)and click Continue.Select your location, for example,
Los Angeles, and click Continue.Enter your username and password, enter the password again to confirm it, and click Continue.
Here are some requirements to remember:
The username must be composed of lower-case letters.
The username will be used instead of the root account for administrative activities.
It is also used as the GRUB username.
Ensure you enter a strong password.
If the password that you entered is weak, a warning appears.
Enter the GRUB password and click OK.
Your GRUB password must have at least 8 characters.
If it has less than 8 characters, you cannot click Continue.
If you do not enter a password, GRUB password protection will be disabled.
If you perform the automated encryption install, you will be prompted to create a new passphrase for your root filesystem.
The default password was seeded with
nvidia3dwhich will be disabled after you complete this step.This new passphrase will unlock your root filesystem when the system boots.
Caution
Following a reboot, ensure that the NVIDIA RAID configuration service has completed by issuing
sudo systemctl status nvidia-raid-configuntil theFinished NVIDIA RAID Configurationmessage appears. The configuration service typically takes about 10 minutes to complete.
Post-Installation Tasks#
After installing the DGX system, you can proceed with the following tasks.
Performing Package Updates for DGX Servers#
After the DGX Server (A100, A800, H100, H200, H800, or B200) has been installed, the packages in the DGX OS ISO 7.0 image used on the system must be updated immediately.
The NVIDIA DGX™ B200 Systems ship from the factory with DGX OS 7.0.0 already installed. In most cases, this should be the starting point for performing DGX OS 7.0.x update with the general availability version of drivers.
Note
To perform DGX OS updates on systems without an internet connection, refer to Air-Gapped Installations.
Follow these steps for the DGX OS updates:
Add the DOCA Driver to the DGX Server#
The update from DGX OS 7.0.0 to 7.0.x uses an updated location for the DOCA repository. Add this repository and update the DOCA repository following these steps:
$ sudo apt update
$ sudo apt install -y doca-repo
$ sudo apt update
Update Remaining Drivers and Packages#
After the doca-repo installation, install the updates needed for other packages
in DGX OS by following the standard DGX OS update step:
Upgrade all software packages with the latest versions.
$ sudo apt full-upgrade -y
Reboot the system.
$ sudo reboot
Note
If an error about the
nvidia_peermemversion mismatch occurs, refer to The nvidia_peermem Module Does Not Load After an OTA Update to resolve the issue.
Verify the DGX OS Update#
After the update, confirm if the update is completed by reviewing the /etc/dgx-release file.
The file should indicate that DGX OS 7.0.0 was initially used with two OTA lines at the end
containing the DGX OS 7.0.x version and installation date. For example,
$ cat /etc/dgx-release
DGX_NAME="DGX Server"
DGX_PRETTY_NAME="NVIDIA DGX Server"
DGX_SWBUILD_DATE="2025-01-13-10-40-54"
DGX_SWBUILD_VERSION="7.0.0"
DGX_COMMIT_ID="a610e60"
DGX_PLATFORM="DGX Server for DGX B200"
DGX_SERIAL_NUMBER="1663724000002"

DGX_OTA_VERSION="7.0.2"
DGX_OTA_DATE="Wed Mar 19 09:16:58 AM PST 2025"
Performing Package Updates for DGX Stations#
After the DGX Station (Station A100 or Station A800) has been installed, the packages in the DGX OS ISO 7.0 image used on the system must be updated immediately.
$ sudo apt update
$ sudo apt full-upgrade
$ sudo reboot
For more information, refer to Performing Package Upgrades.
Adding Support for Additional Languages to the DGX Station#
During the initial Ubuntu OS configuration, you are prompted to select the default language on the DGX Station. If the language that you select is in the DGX OS 7 software image, it is installed in addition to English, and you will see that language after you log in to access your desktop. If the language that you select is not included, you will still see English after logging in, and you will need to install the language separately.
The following languages are included in the DGX OS 7 software image:
English
Chinese (Simplified)
French
German
Italian
Portuguese
Spanish
For information about how to install languages, refer to Install languages.
Configuring Your DGX Station#
The DGX Display Adaptor card provides DGX OS with multiple display outputs, which allow you to connect multiple monitors to the DGX Station A100 or DGX Spark. If you plan to use more than one display, configure the DGX Station A100 or DGX Spark to use multiple displays after you complete the initial DGX OS configuration. See First Boot Process for DGX Station.
When you power on your DGX station or DGX Spark for the first time, you are prompted to accept end user license agreements for NVIDIA software. You are then guided through the process to complete the initial Ubuntu OS configuration.
Connect the displays that you want to use to the mini DisplayPort (DP) connectors at the back of the unit.
Note
DGX Station A100 also supplies two mini DP to DP adapters if your monitors do not natively support mini DP input.
Each display is automatically detected when you connect it.
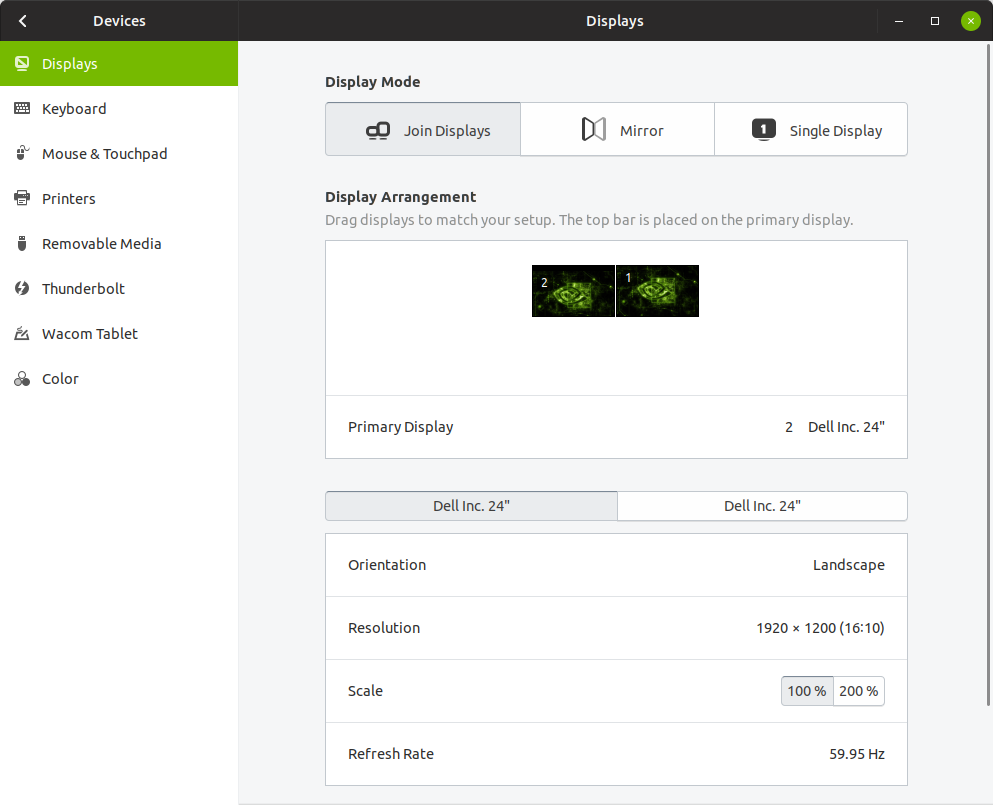
(Optional) If necessary, adjust the display configuration, such as switching the primary display or changing monitor positions or orientation.
Open the Displays window.
In the Displays window, update the necessary display settings and click Apply.
Enabling Multiple Users to Remotely Access the DGX System#
To enable multiple users to remotely access the DGX system, an SSH server is installed and enabled on the DGX system.
Add other Ubuntu OS users to the DGX system to allow them to remotely log in to the DGX system through SSH. Refer to Add a new user account for more information.
For information about logging in remotely through SSH, see Connecting to an OpenSSH Server on the Ubuntu Community Help Wiki.
Important
The DGX system does not provide any additional isolation guarantees between users beyond the guarantees that the Ubuntu OS offers. For guidelines about secure access to the DGX system over SSH, see Configuring an OpenSSH Server on the Ubuntu Community Help Wiki.