E1.S Cache Drive Replacement#
This topic describes how to replace an E1.S cache drive in the compute tray of the NVIDIA DGX™ GB200 system.
E1.S Cache Drive Replacement Overview#
This is a high-level overview of the steps needed to replace a cache drive.
Identify the failed cache drive
Power down the compute tray being serviced
Replace the drive
Power up the compute tray
Rebuild the system RAID volume
Confirm system health with
nvsm show health
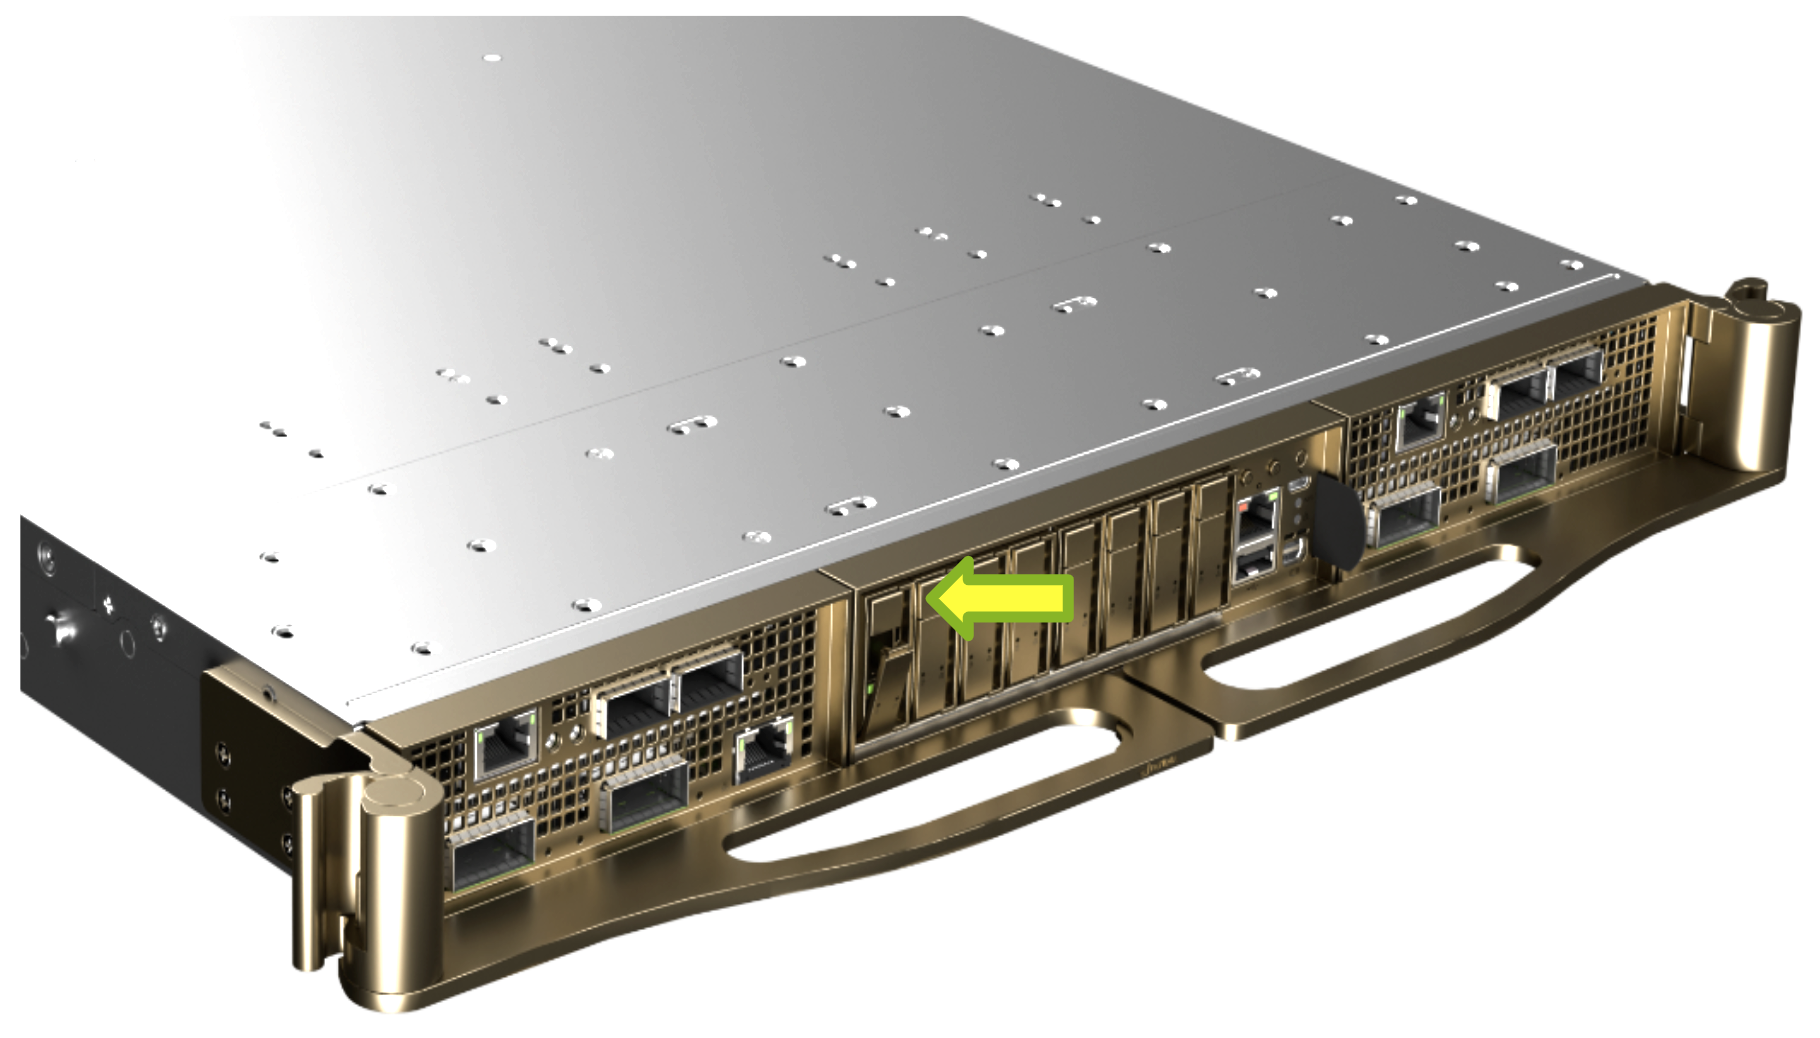
Identify the Failed Cache Module#
This diagram shows the physical location of each cache drive module slot. Only odd-numbered slots are used for NVMe E1.S storage devices.

Identify a failed cache module using any of the following methods:
Run
sudo nvsm show healthfrom a terminal session and look for drive alertsUse the BMC web interface to view the IPMI events log and look for drive alerts
Replace the Failed Cache Drive Module#
Power down the compute tray being serviced.
Identify the NVMe E1.S drive that’s being replaced. Press the button at the top of the drive to eject it and release the lever.
Use the lever to remove the failed drive module, and then insert the new one. As you insert the new module, press the latch button to ensure the lever stays in the open position.
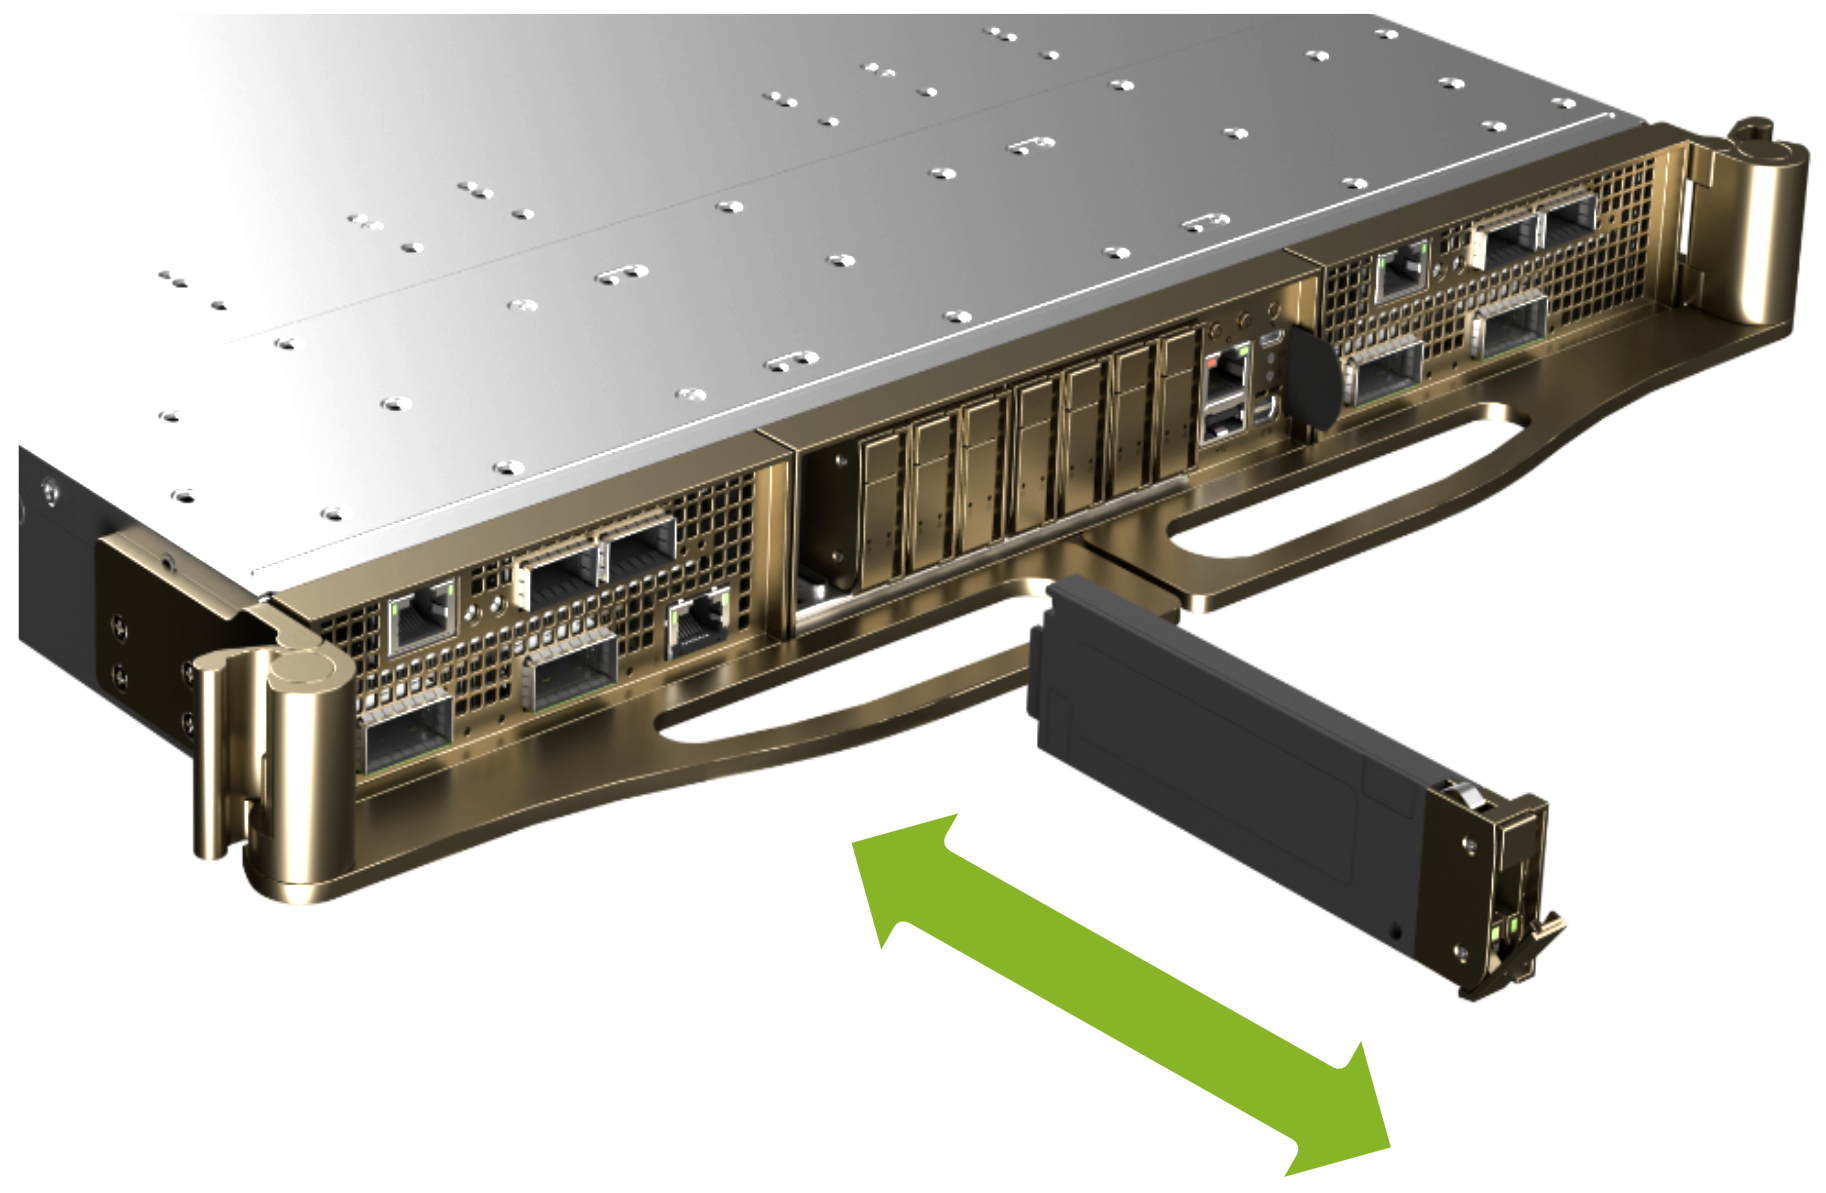
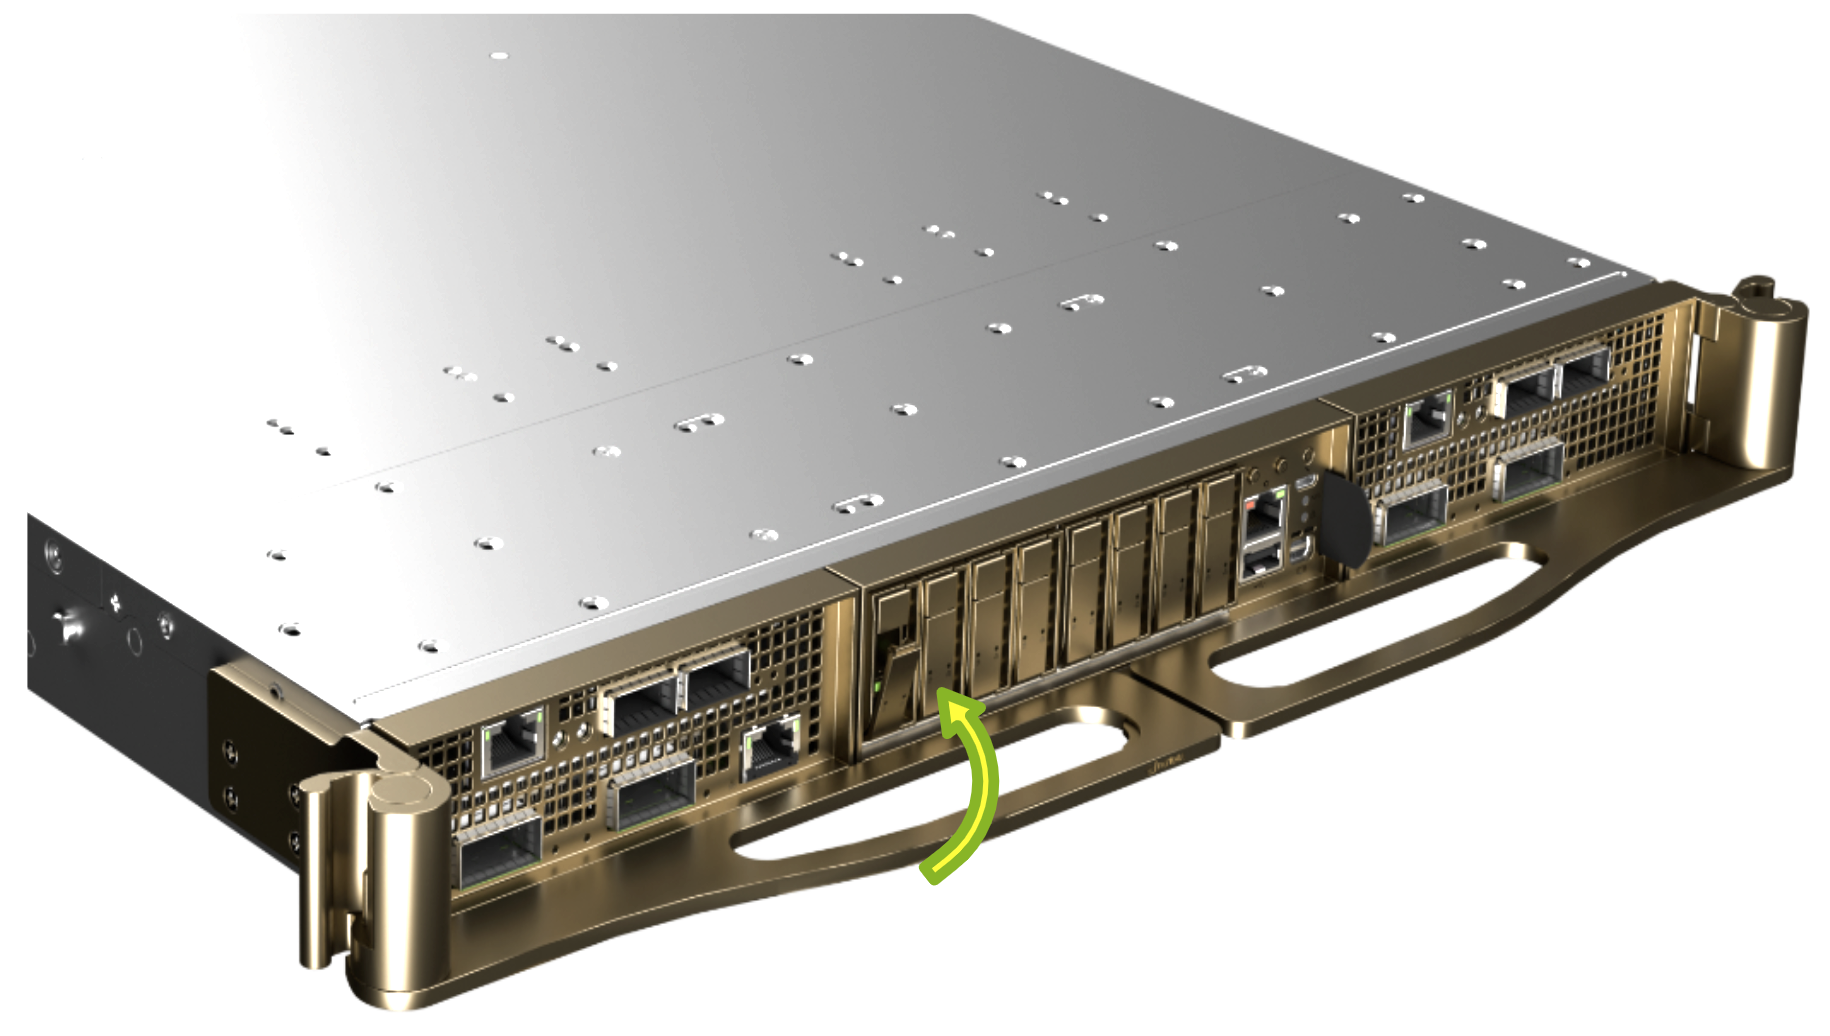
Fully insert the drive module and close the lever to lock it in place.
Finalize the Replacement Procedure#
Power up the system and log into the console.
Confirm the new drive module is recognized by running
sudo nvme list. You’ll see something like the following (one boot and four cache drives will be visible, but the names and models may differ):Node SN Model Namespace Usage Format FW Rev ------------- ---------- -------- --------- -------------------- ------------ -------- /dev/nvme0n1 S4YPNE0N3 SAMSUNG 1 3.84 TB / 3.84 TB 512 B + 0 B EPK9CB5Q /dev/nvme1n1 S4YPNE0N0 SAMSUNG 1 3.84 TB / 3.84 TB 512 B + 0 B EPK9CB5Q /dev/nvme2n1 S436NA0N4 SAMSUNG 1 44.44 GB / 1.92 TB 512 B + 0 B EDA7602Q /dev/nvme4n1 S4YPNE0N2 SAMSUNG 1 3.84 TB / 3.84 TB 512 B + 0 B EPK9CB5Q /dev/nvme5n1 S4YPNE0N1 SAMSUNG 1 3.84 TB / 3.84 TB 512 B + 0 B EPK9CB5Q
If disk encryption is enabled, disable it before rebuilding the RAID array using the
sudo nv-disk-encrypt disablecommand.Rebuild the RAID cache volume using the
configure_raid_array.py -c -fcommand. Enterywhen prompted to confirm the operation.If disk encryption is desired, enable it using the instructions in the DGX OS user guide.
Confirm the RAID volume is healthy by running the
sudo nvsm show volumescommand.Return the failed cache module to NVIDIA Enterprise Support using the packaging provided.