Power Supply Replacement#
This topic describes how to replace the power supplies (PSUs) of the NVIDIA DGX™ GB200 system.
Power Supply Replacement Overview#
This section provides a high-level overview of the PSU replacement process.
Identify the failed PSU
Remove the failed PSU
Install the new PSU
Update the new PSU firmware, if required
Verify the new PSU is operational
If requested, return the failed unit to NVIDIA Enterprise Support using the provided packaging
Identify the Failed Power Supply#
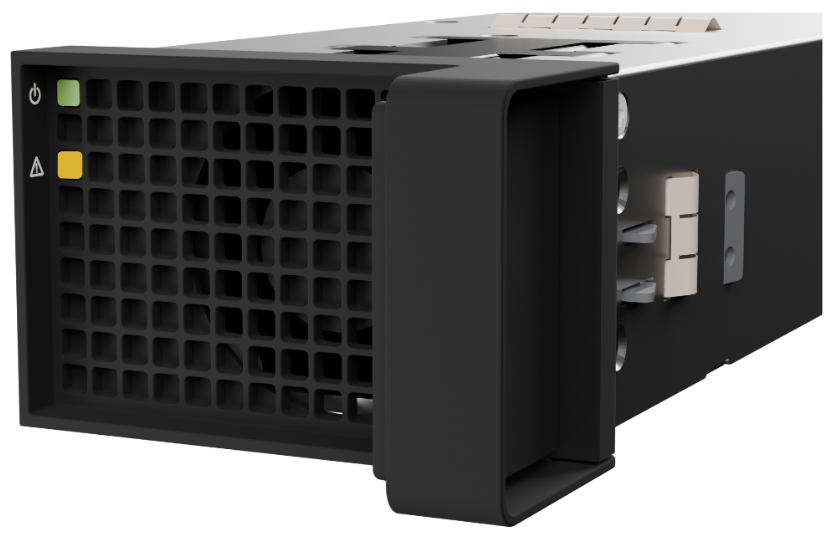
Identify the failed PSU by visually inspecting the LEDs on the power supply modules. The failed module will have an amber LED indicator.
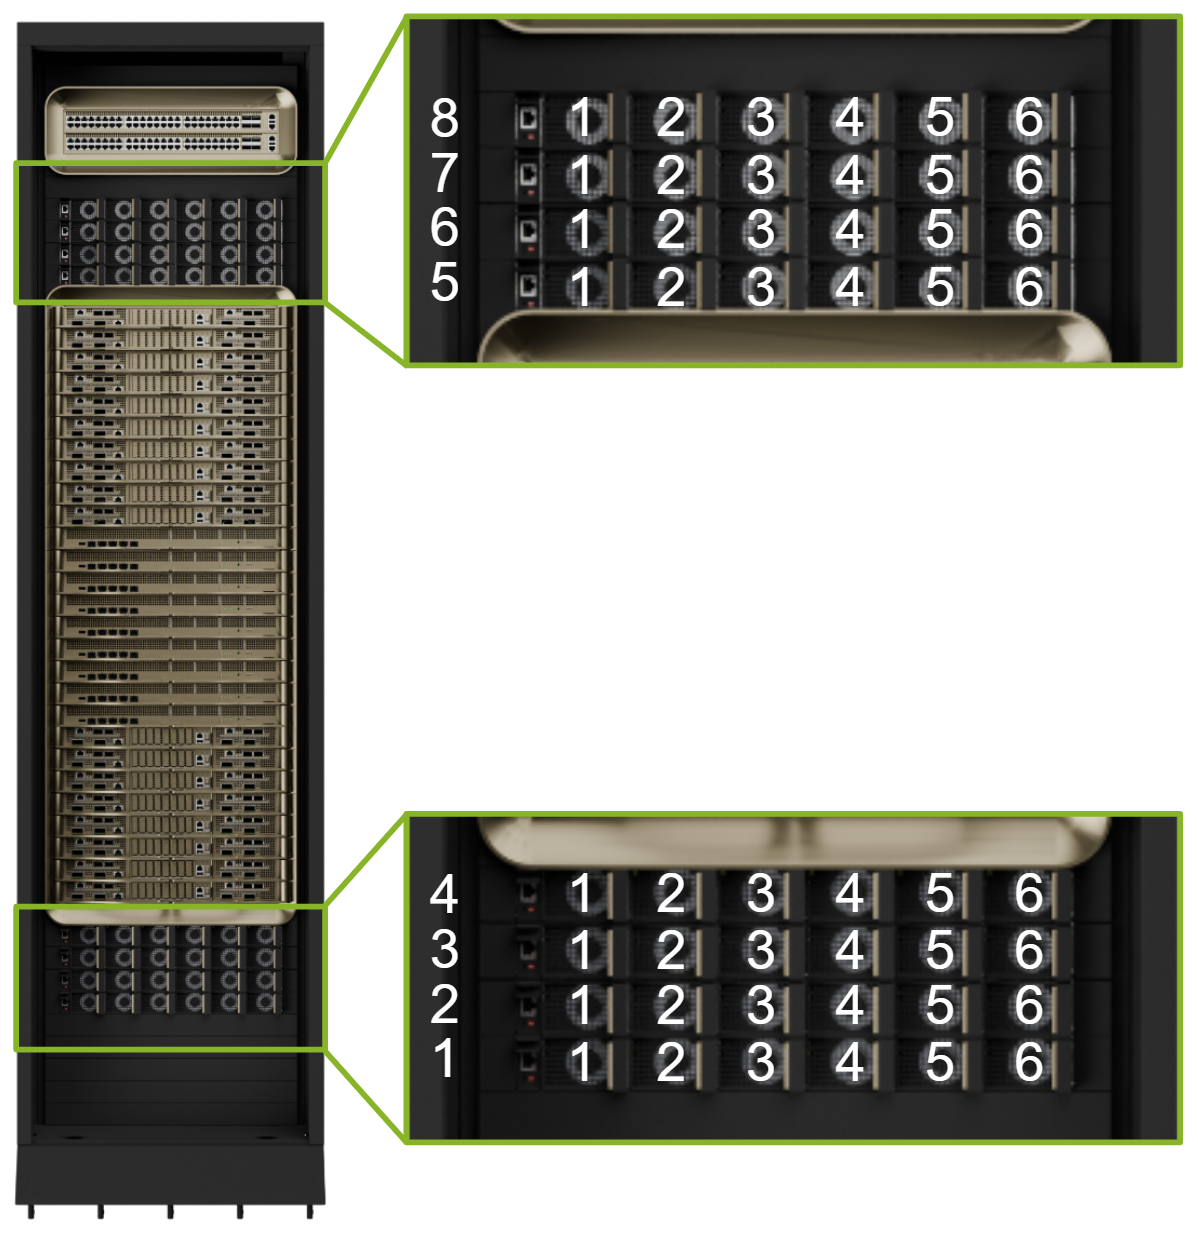
The power supplies are N+N redundant, so any one power supply can be replaced as long as at least four power shelves are fully active and healthy.
Replace the Power Supply#
Once you’ve identified the failed power supply, push the release tab to the left and pull on the handle to eject it from the power shelf.

Pull the power supply straight out of the power shelf and set it aside.
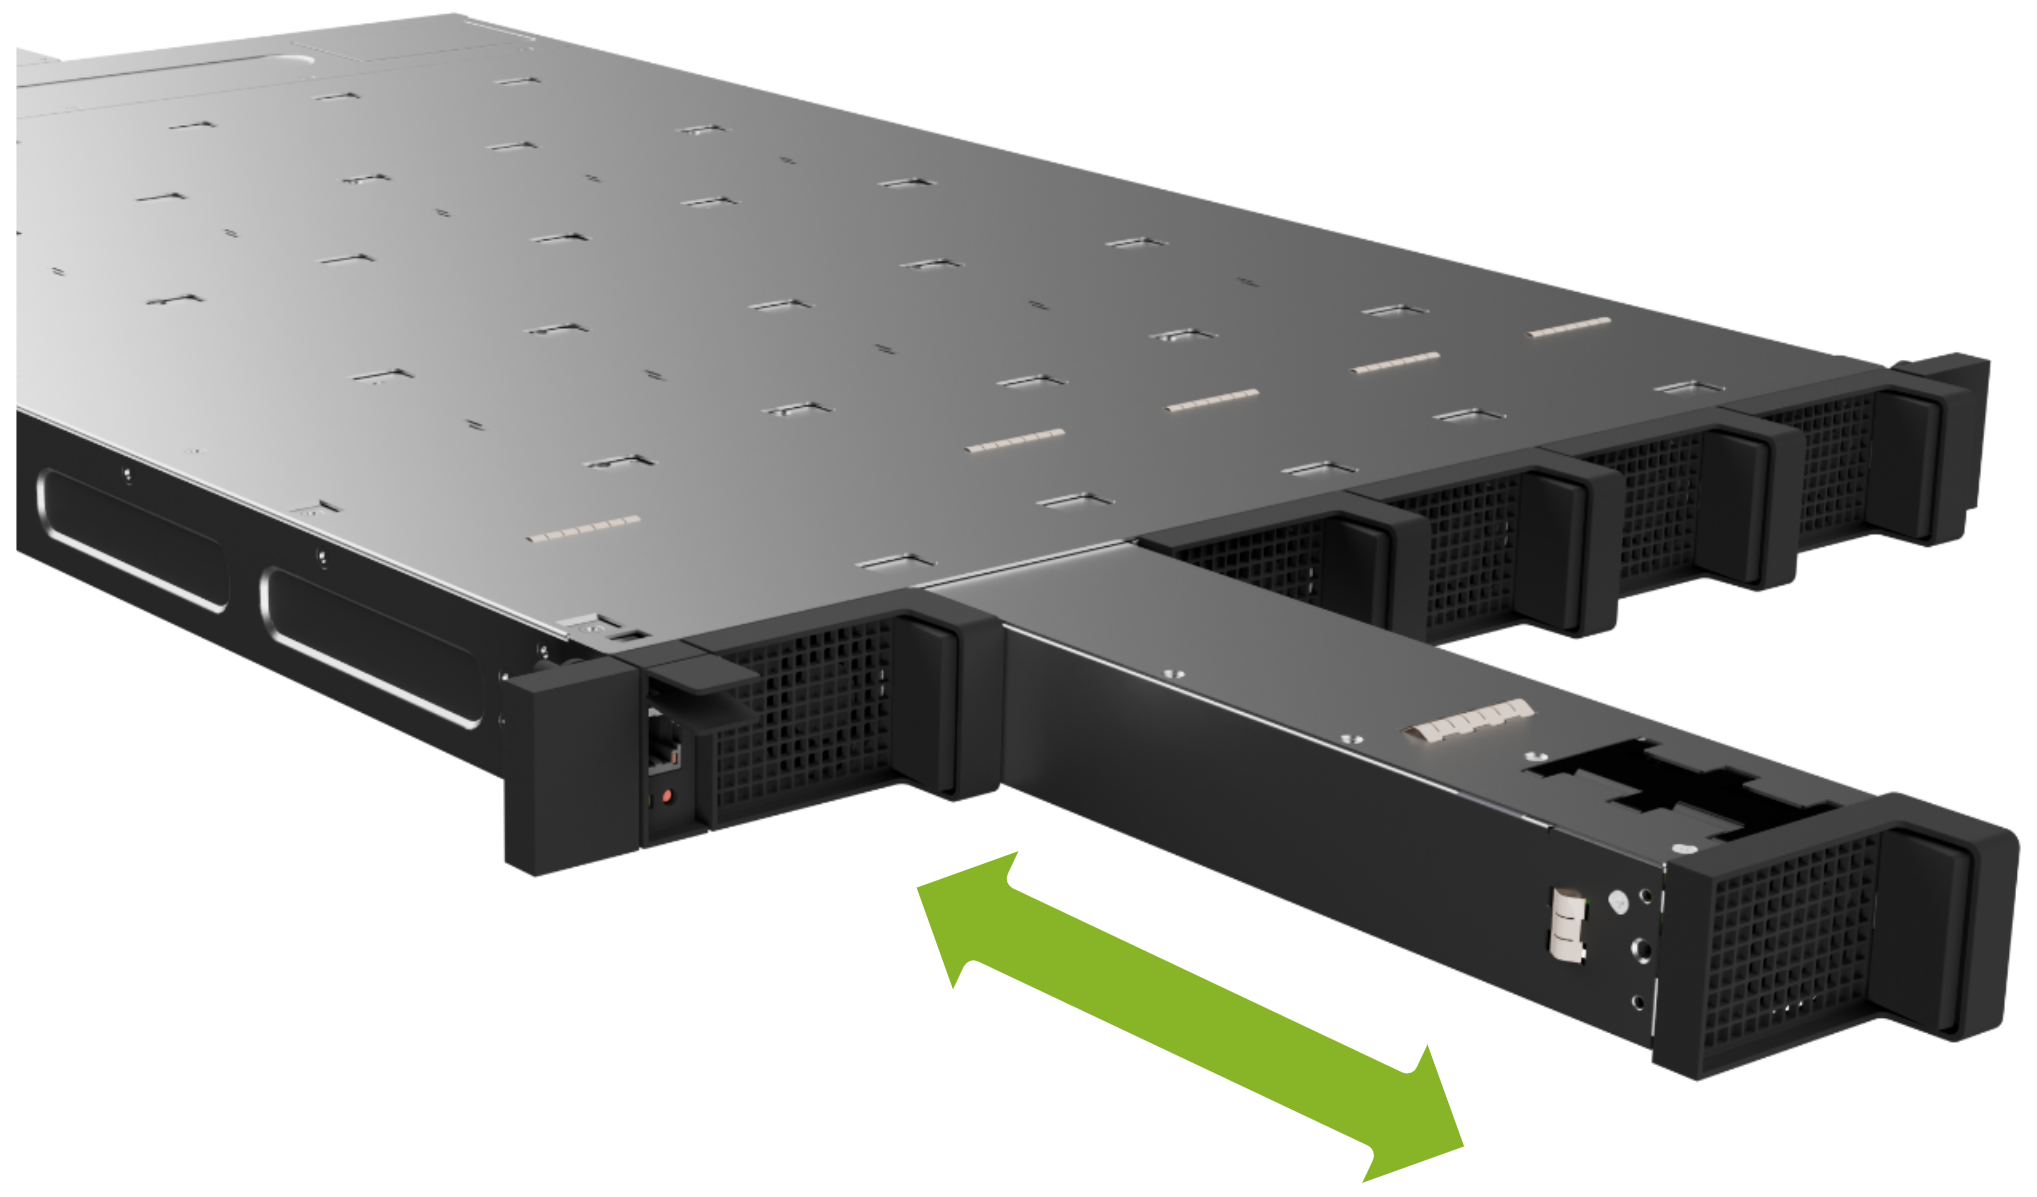
Insert the new PSU until it locks into place. You’ll hear an audible click when it’s fully seated.
Perform the following health checks:
The PSU LED indicator should be green.
Use the Redfish API to check the health of the PSU through the Power Shelf Management Module.
For more information about the Redfish API, see Redfish User Guide.
Navigate to the Power Shelf Dashboard and check Power Management or System Monitoring for PSU presence and PSU health.
If requested, return the failed unit to NVIDIA Enterprise Support using the provided packaging.