Headless installation on UEFI 38.0.0#
Overview#
Scope of the Issue#
The default (factory flashed) UEFI firmware 38.0.0-gcid-41245178 has a known issue to the way the texts are output on those terminal.
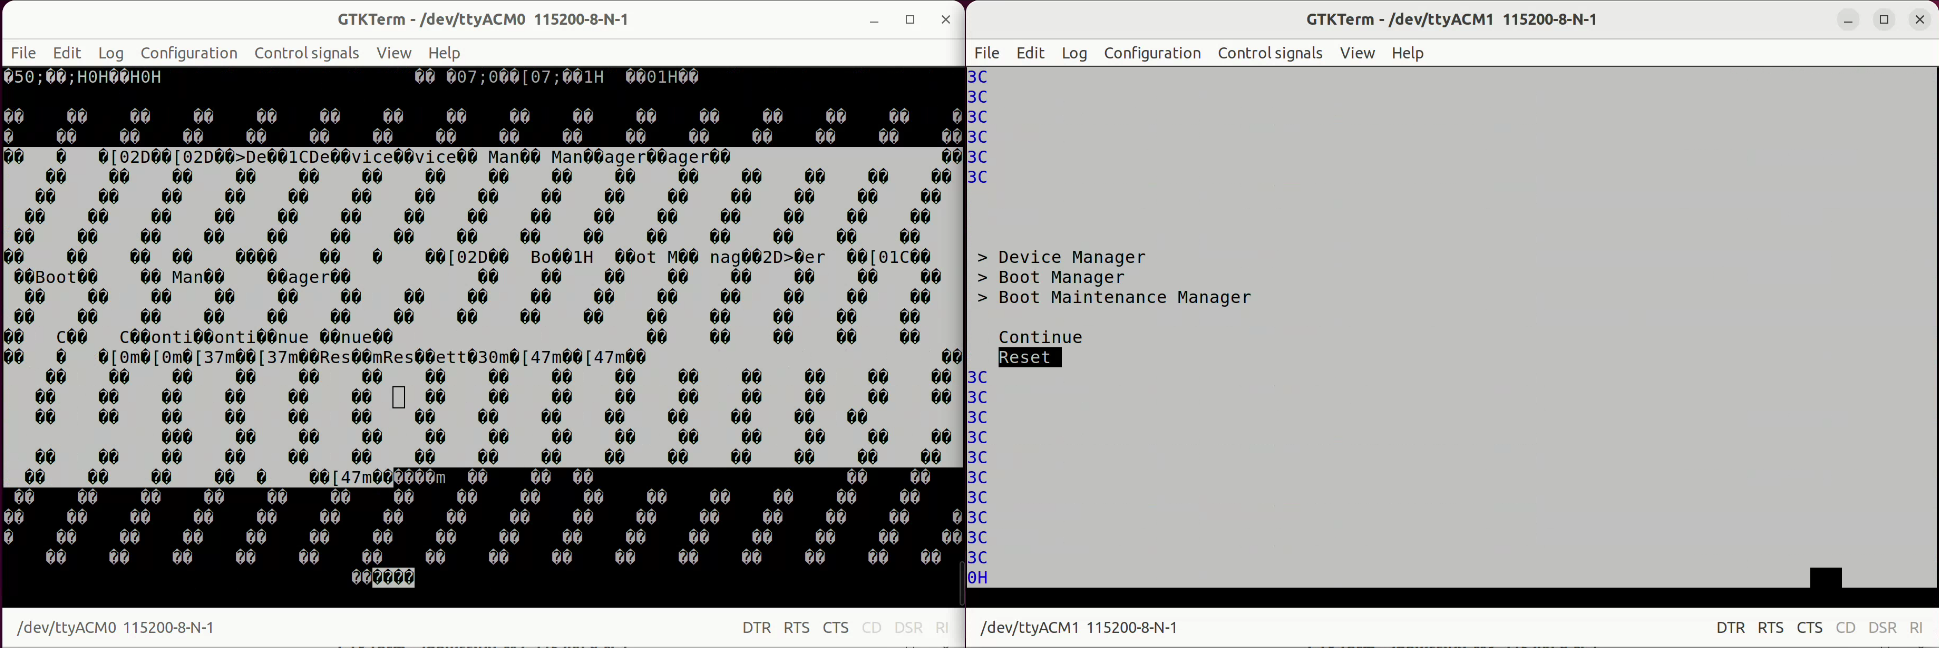
Once the UEFI firmware is updated to 38.1.0-gcid-41245178 or 38.2.0-gcid-41754123, the issue is fixed.
When to use this workaround#
You don’t have a monitor connected to the Jetson AGX Thor Developer Kit but want to use the headless installation using the installation USB stick
You want to go into the UEFI setup menu in the headless way
The workaround - Interim Solution#
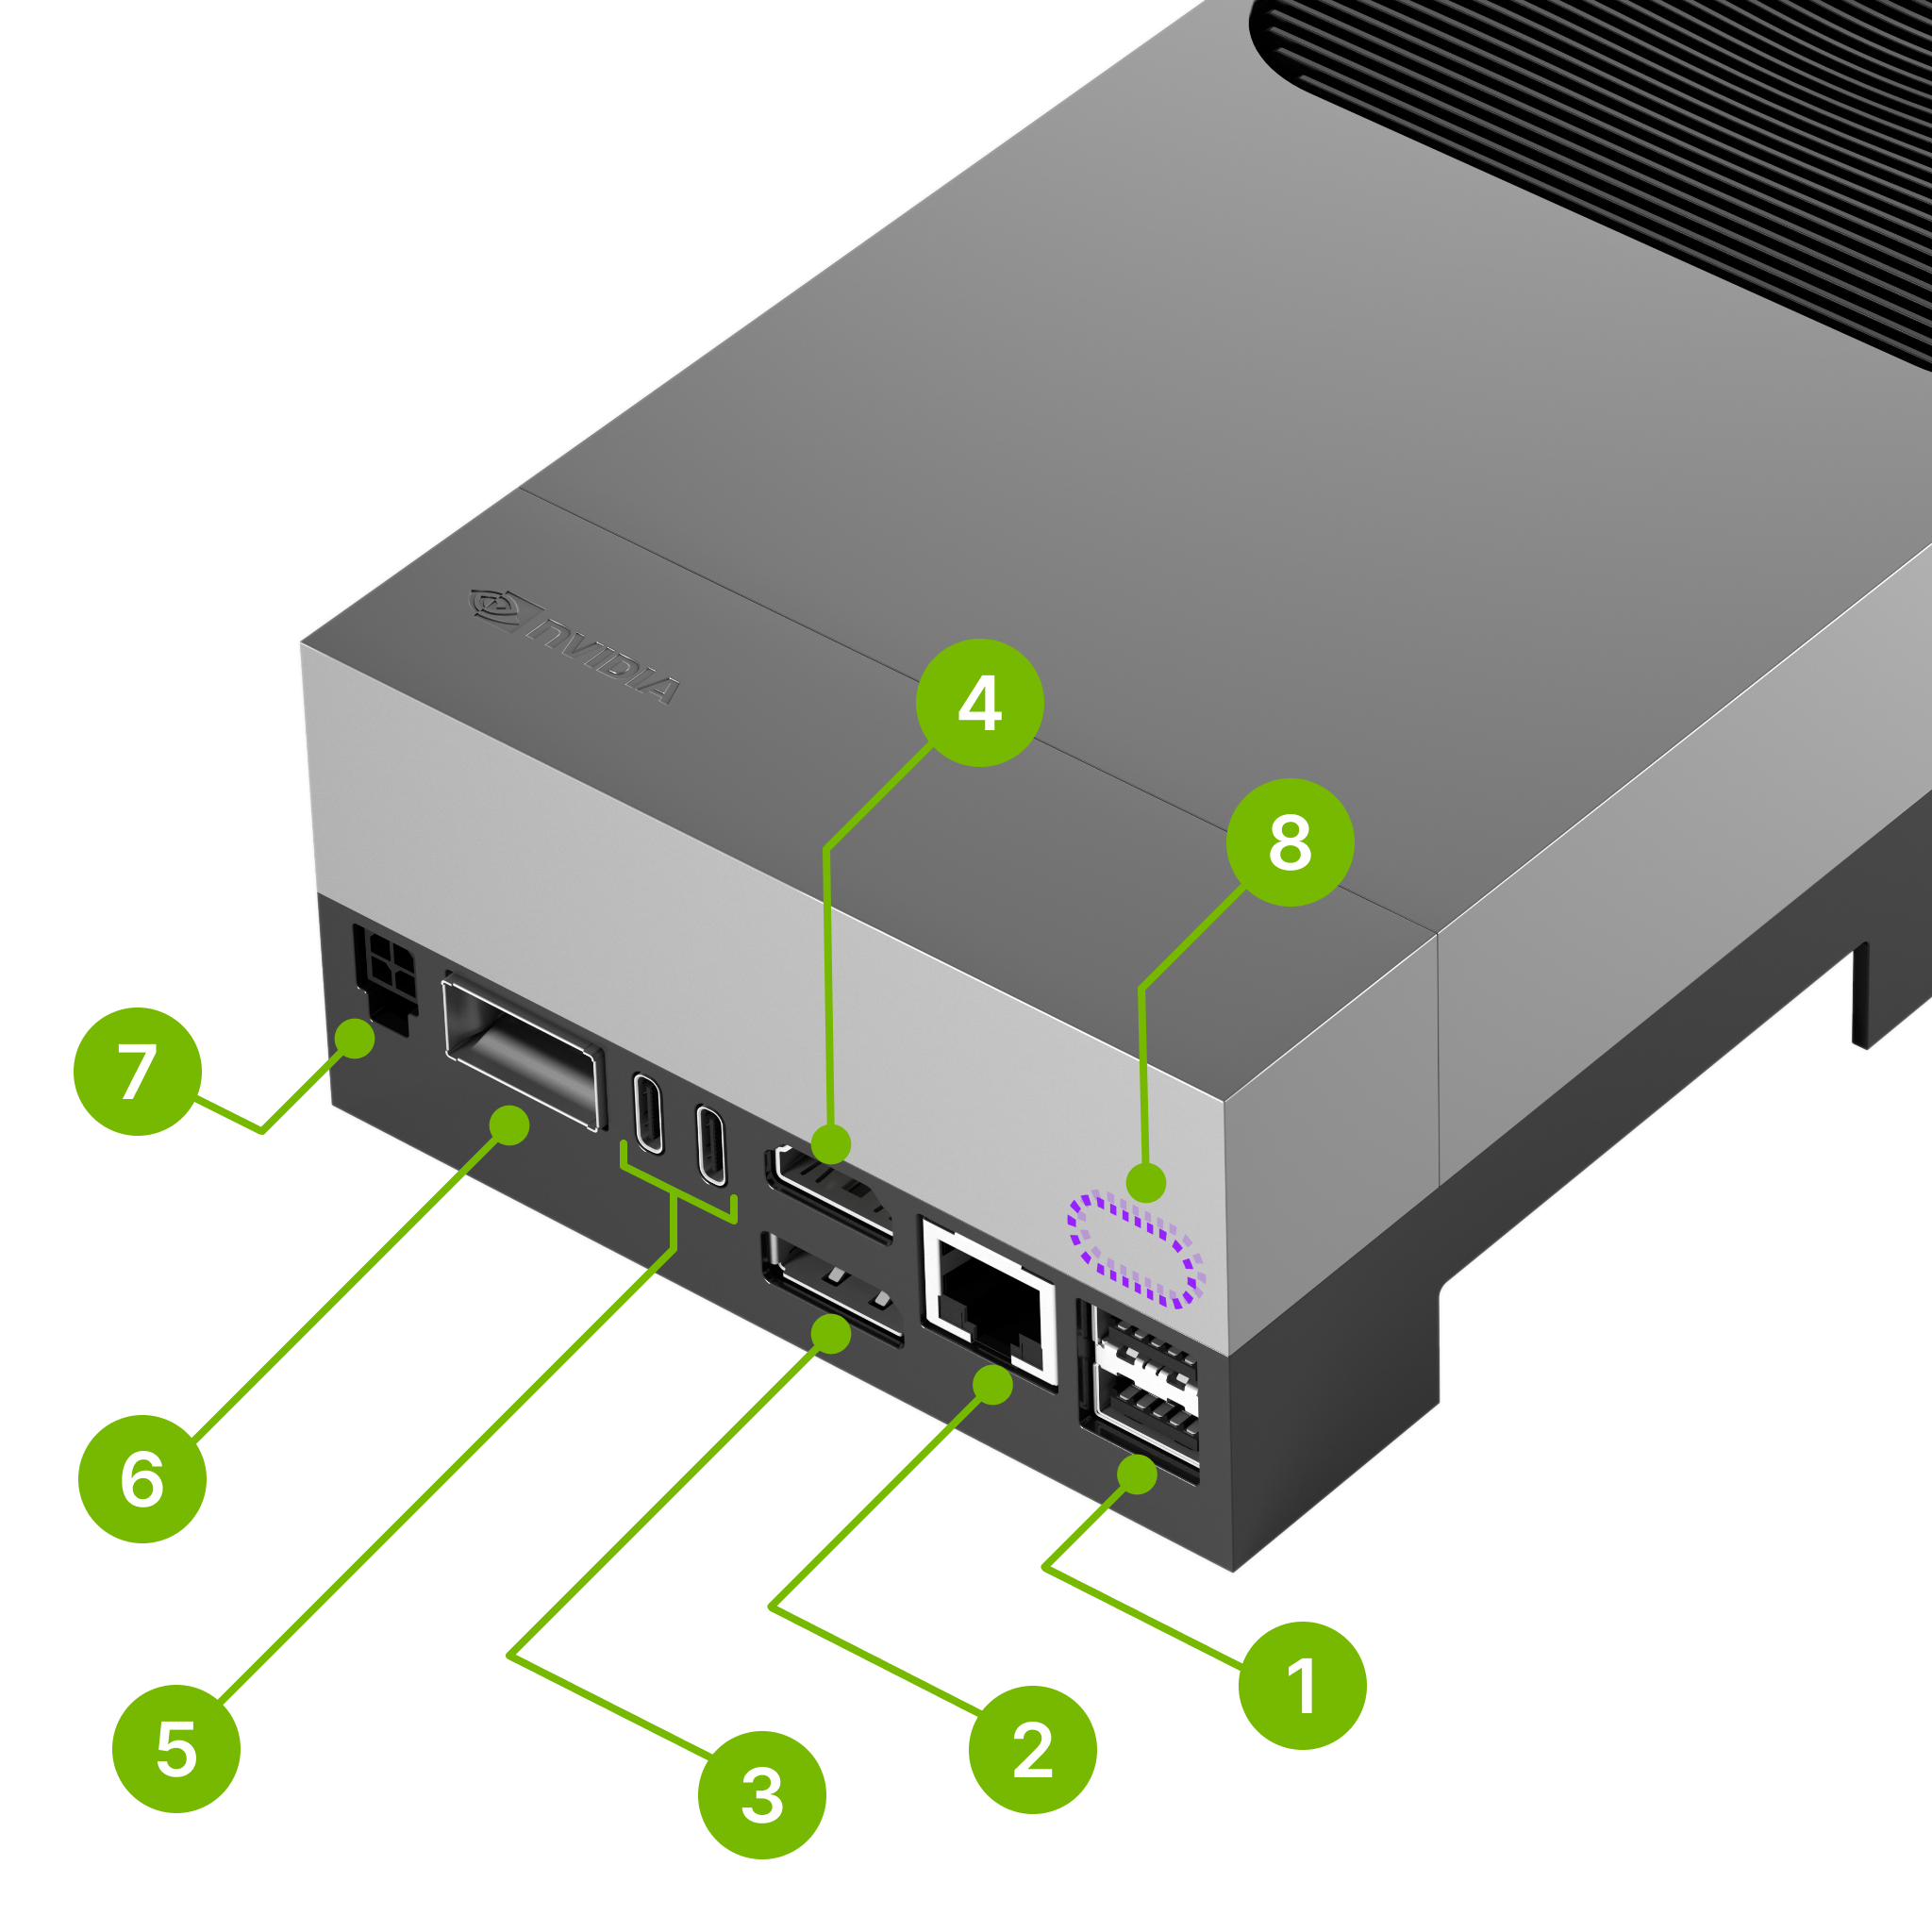
Connect a USB cable from your laptop or PC to the Jetson AGX Thor Developer Kit’s Debug-USB port (8) behind the lid cover .
OS
Terminal software
Typical port name
Windows
PuTTY
e.g.
COM3,COM4,COM5,COM6Mac
Terminal
e.g.
/dev/cu.usbserial-0001, …Linux
minicome.g.
/dev/ttyACM0,/dev/ttyACM1, …
Four (4) USB serial devices should be recognized by your PC.
e.g.
COM3,COM4,COM5,COM6
Use PuTTY to open the second one (in the example above, it is
COM4), which should correspond to UEFI serial port.In the PuTTY configuration, select “Window” in the left pane, and set the following settings:
Columns:
244Rows:
60
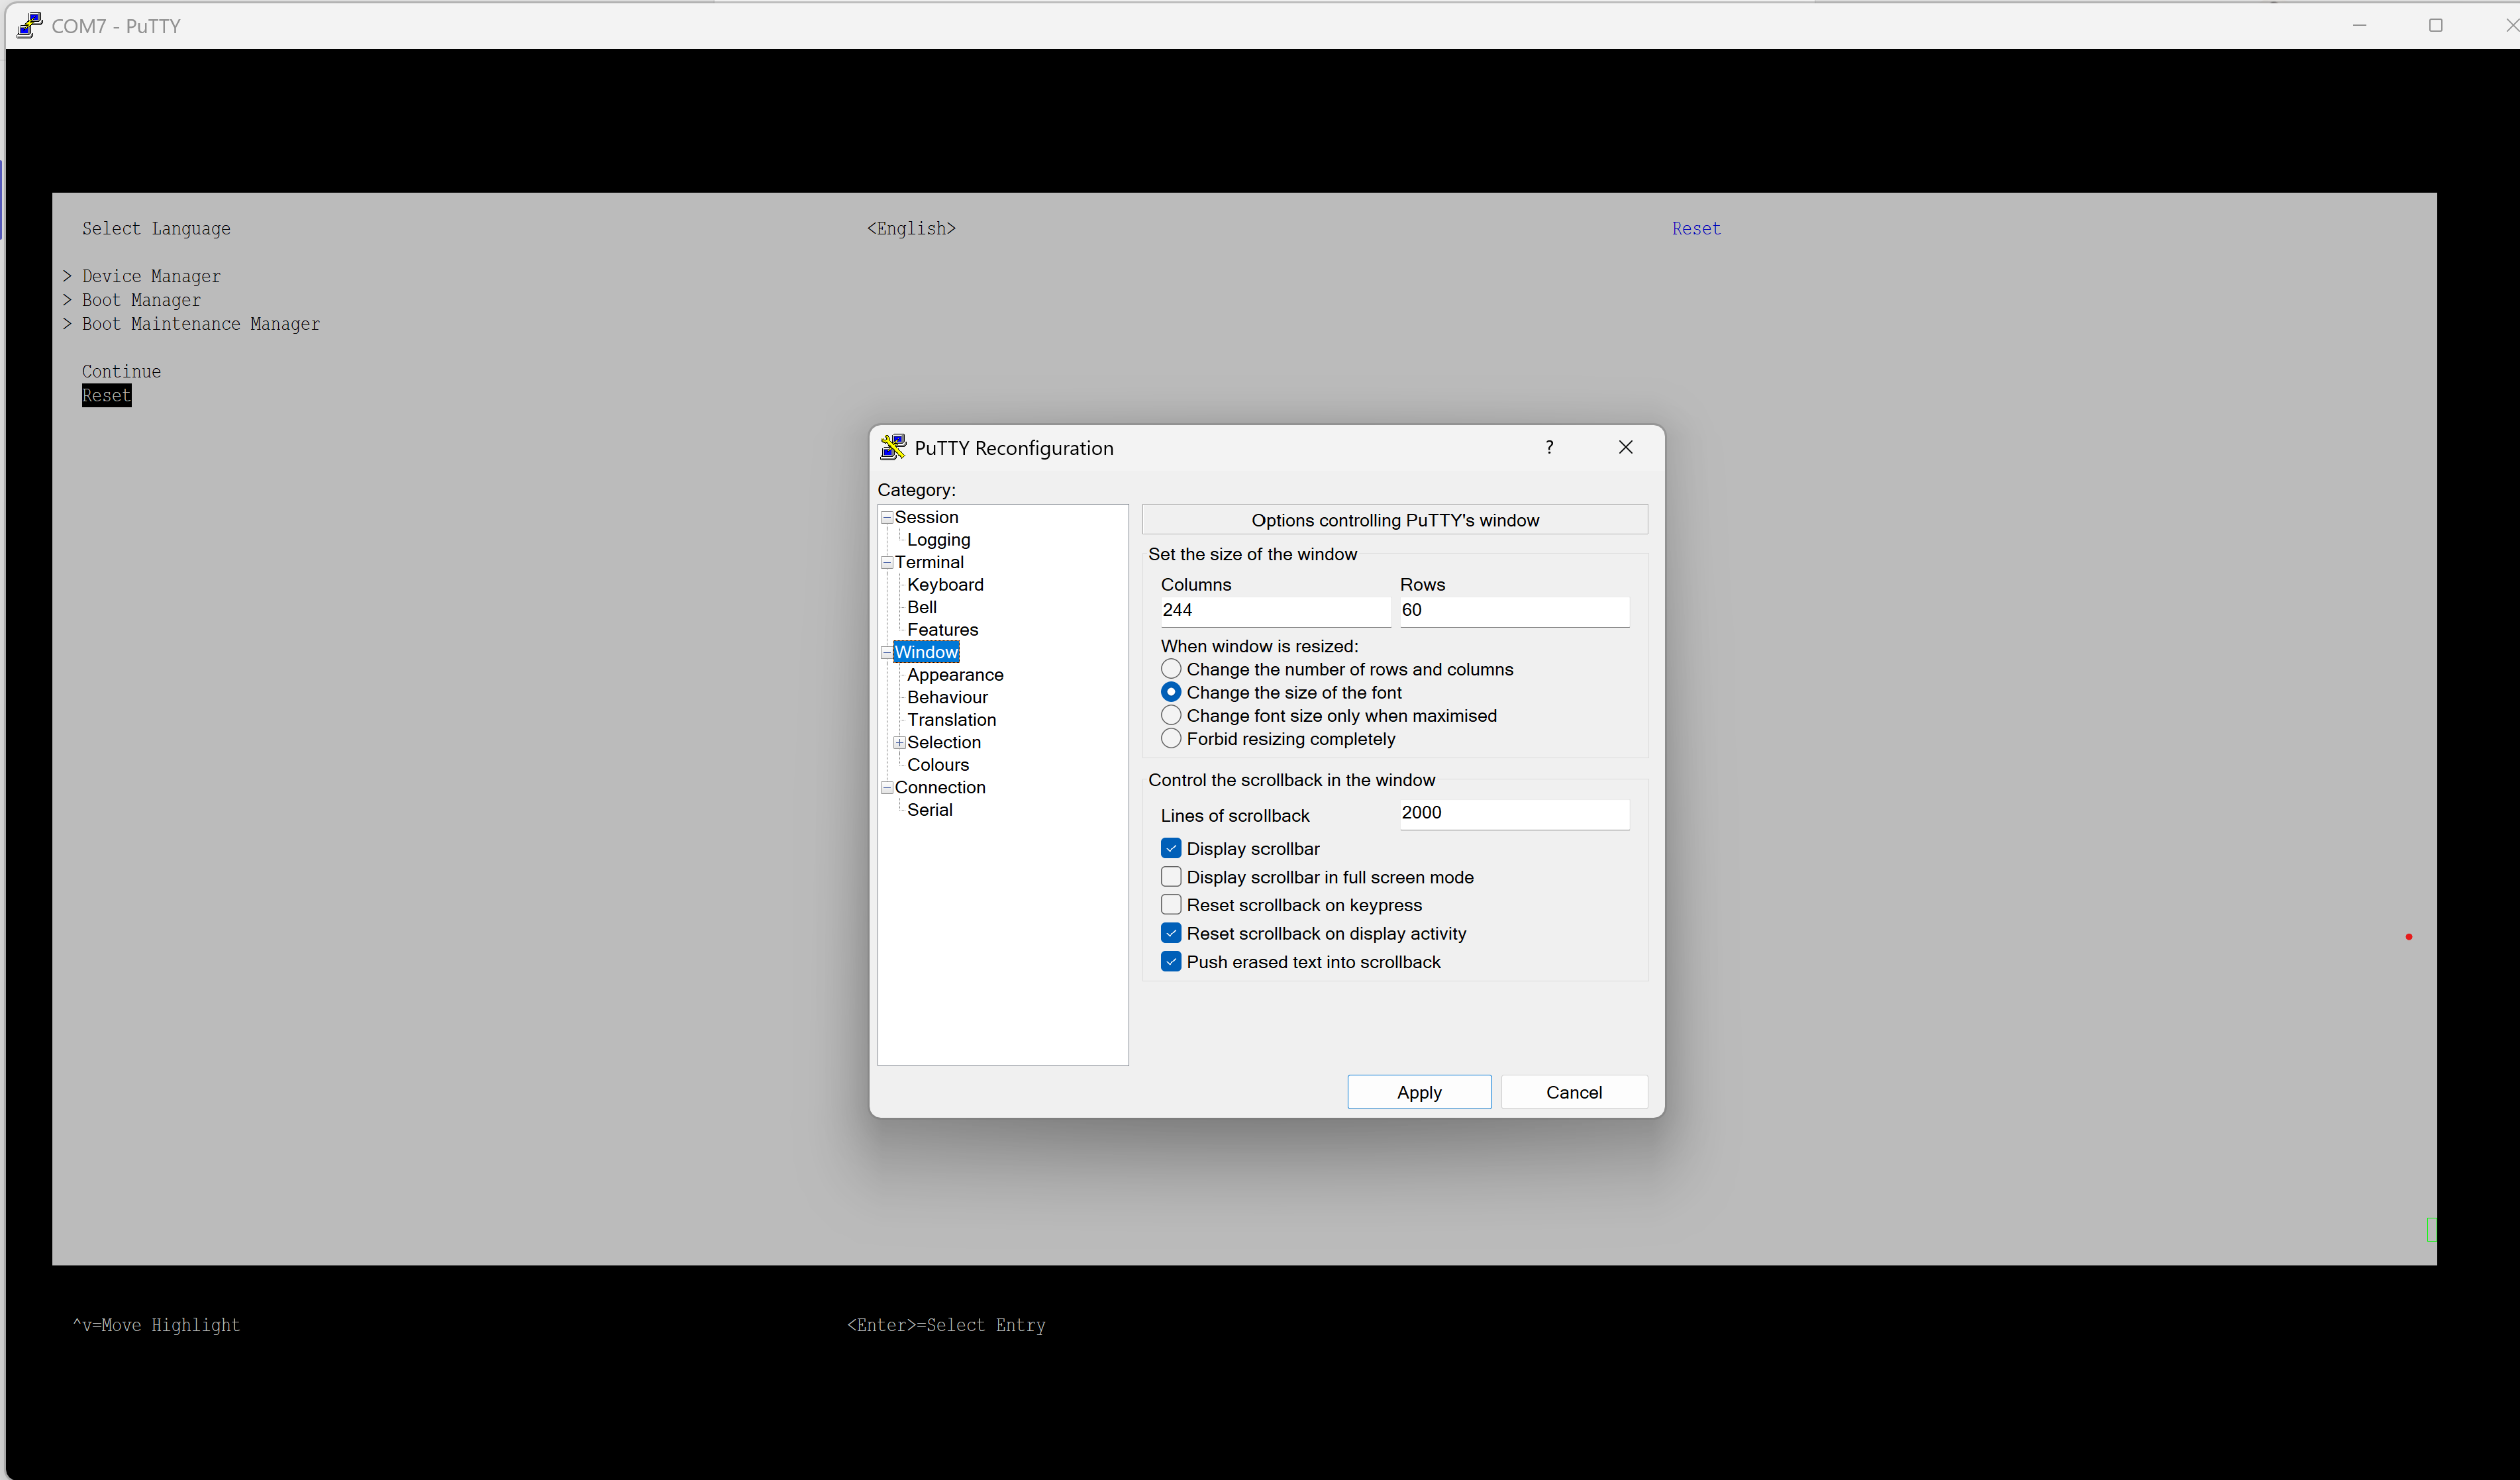
Click Apply to save the settings.
Set Mac Terminal font to 9 or 10 pt.
Adjust the Terminal window size to 242 columns and 61 rows.
Make sure stty -a gives output as below rows and columns:
% stty -a
speed 9600 baud; 61 rows; 242 columns;
Open the second TTY device (for example,
/dev/cu.usbserial-0002).
Need to use xterm terminal
Set stty rows
240and cols60Use screen application with wrap line
Execute
screen /dev/ttyACM1 115200
Press the Power button (11 , the left button in the picture below) to boot the Jetson AGX Thor Developer Kit.

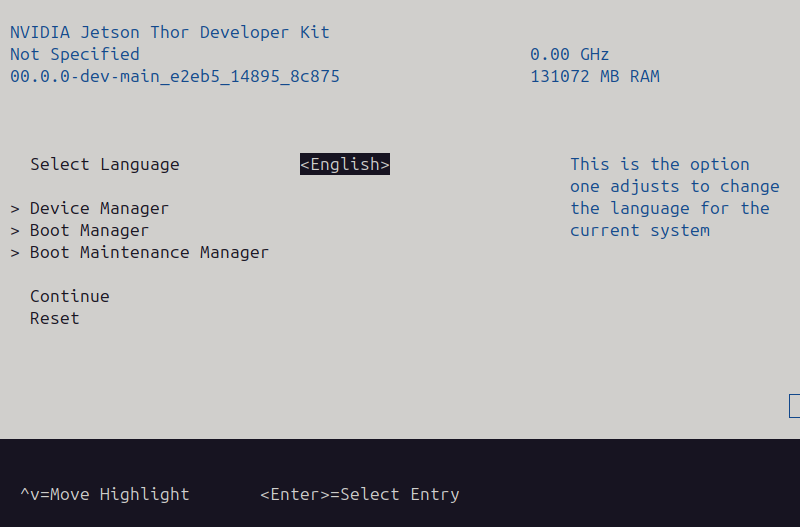
You should see the pre-boot menus like this on your terminal.
UEFI firmware (version 00.0.0-dev-main_e2eb5_14895_8c875 built on 2025-06-06T08:01:19+00:00)
3ht26x_general-t264repo System firmware version 00.0.0-dev-main_e2eb5_14895_8c875
date 2025-06-06T08:01:19+00:00
ESC   to enter Setup.
F11   to enter Boot Manager Menu.
s     to enter Shell.
Enter to continue boot.
Press Esc key repeatedly to enter into the UEFI setup menu.
Hint
If you are to use the installation USB stick, you can now insert the USB stick and go to the Boot Manager menu to select the USB stick and boot from it.
Once you get to have the console access to UEFI, continue from Step 4 of the Quick Start Guide.