Documentation template
This is based on our work for omni-docs repo. It’s a template that you can copy or fork to setup your own documentation system.
Please consult omni-docs to see a full setup that includes publishing of pages to an external website. That part is of course not provided in this template. This template can only publish the internal website, but that should be enough for people that want to experiment or evaluate this approach.
Internal (Review)
When documents are published / merged to the
masterbranch they will appear internally for reviewhttps://deepstreamsdk.gitlab-master-pages.nvidia.com/graphtools-docs/master/public
https://deepstreamsdk.gitlab-master-pages.nvidia.com/graphtools-docs/master/internal
Recommended Software Setup
Though there are many ways to edit, manage and work with RST files and Git; for authors, we are recommending the setup below as it will consolidate gitlab and rst authoring in the most streamlined manner.
Gitlab Repo Setup
Download “Git for Windows” and install: https://gitforwindows.org/
Create a new folder on your computer with ample space to store your local copy of the repo.
Navigate within that folder.
Type “cmd” in the address bar to launch terminal in the repo folder.
Copy/Paste the following into the terminal window opened in the previous step
git clone https://gitlab-master.nvidia.com/DeepStreamSDK/graphtools-docs
Note: documentation source will download and populate in background.
When download completes, Close terminal.
Install the software
Download & install VS Code from https://code.visualstudio.com/
Launch VS Code
Navigate to Extensions Pane
Install Plugins
Git Lens
Git History
reStructuredText
Table Formatter
Spell Right: for .rst documents click on the “eye” icon in the lower right of the VS Code window and select English
Workflow for Authors
Setup a Branch
In VS Code: Open Folder
Navigate to the git repository folder
Select this folder
In VS Code create a task branch from
master
Click Branch

Create a new Branch

Name it based on criteria below.

Please name created branches with
dev/taskordev/username. For example, if your user name isjoeand you are working on adding Kit documentation an appropriate branch name isdev/kit-additionsordev/joe. *
NOTE: Please do not work directly in the master branch. It is protected as well to prevent this. Thank you.
Iteration
Iterate on the documentation by editing the files in docs folder
Binary content (images/movies/etc.) should be added to docs/content folder (do not use subfolders within this folder)
Testing Your Changes
To build the documentation run
.\build.bator./build.shfrom the root. Open a terminal by doing Terminal, New Terminal.The script will tell you at the end where it has placed the output of the docs. Browse to that folder and open the index.html in your favorite browser. You can also launch it directly from the terminal,
.\_build\internal\index.htmlCommit your changes regularly to your task branch.
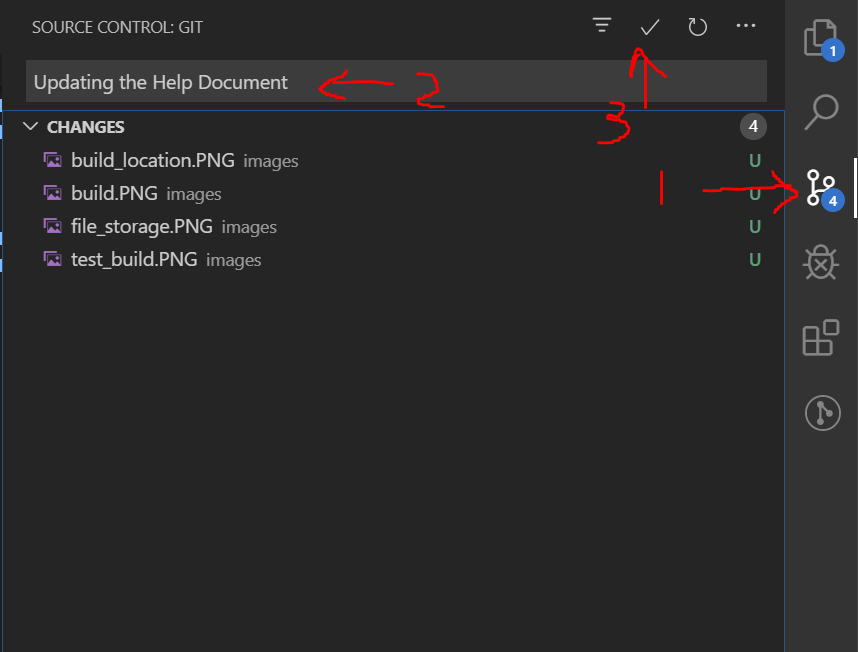
Finalization in GitLab
Push your task branch to gitlab (if you have not already done so).
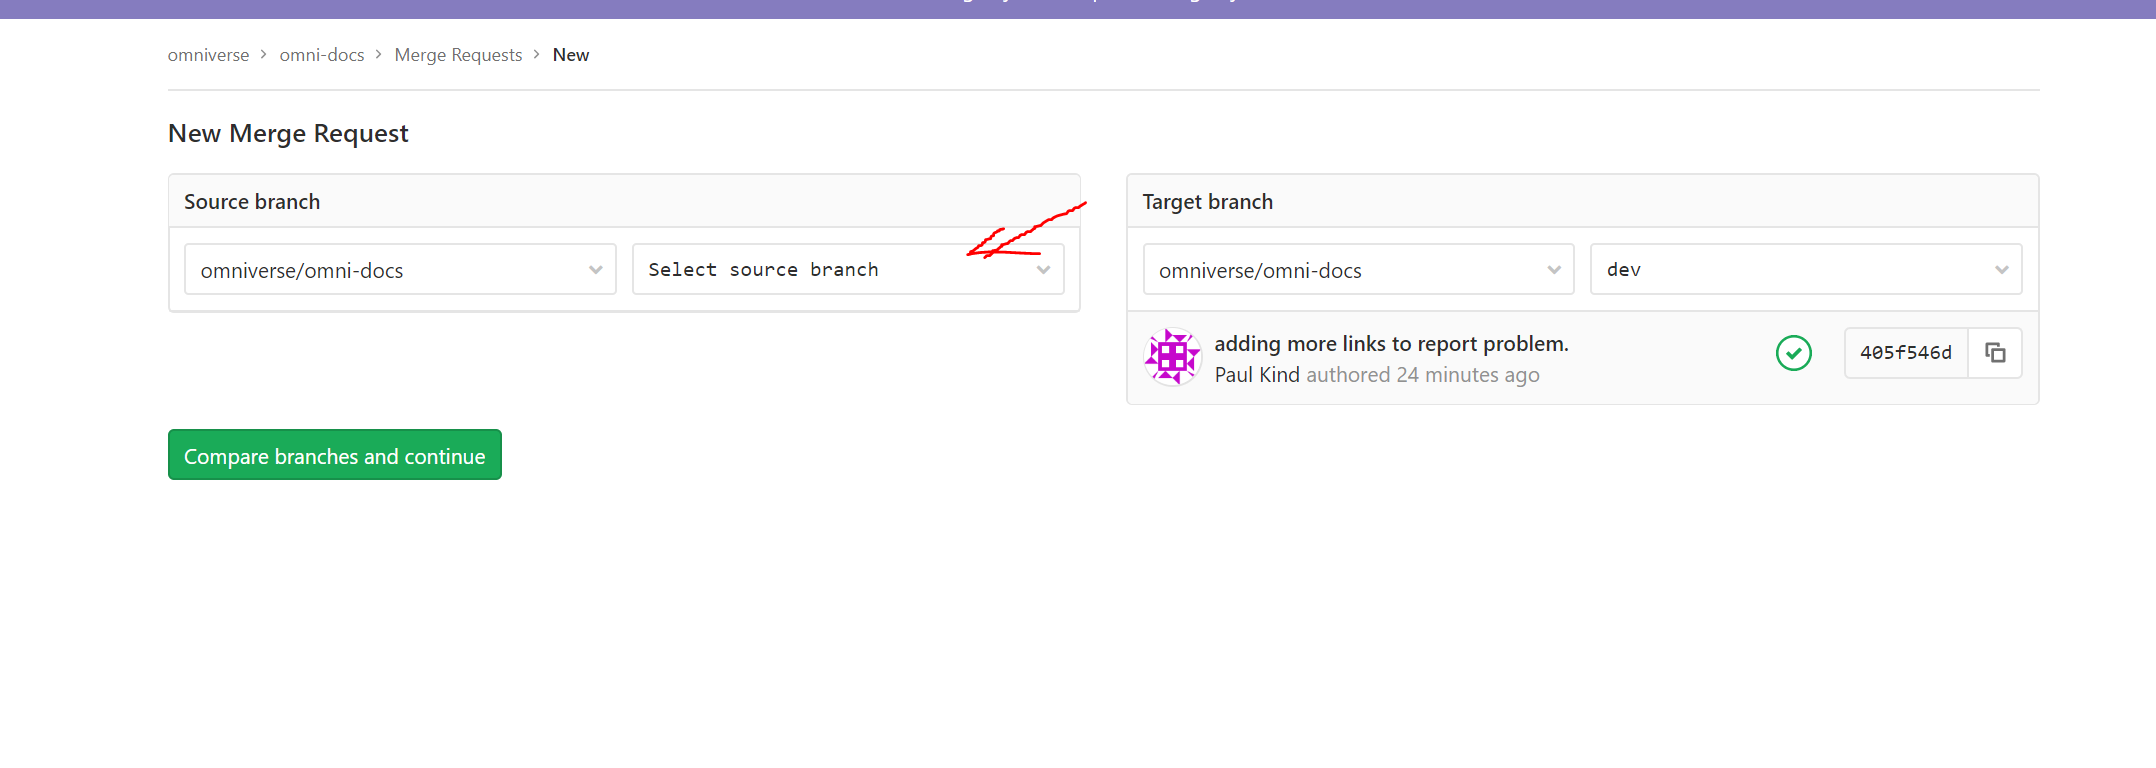
Select Origin
Create a merge request here
Select your task branch as the “Source branch” and press “compare branches and continue”
Check submitted changes and Scroll to bottom of page, submit when complete.
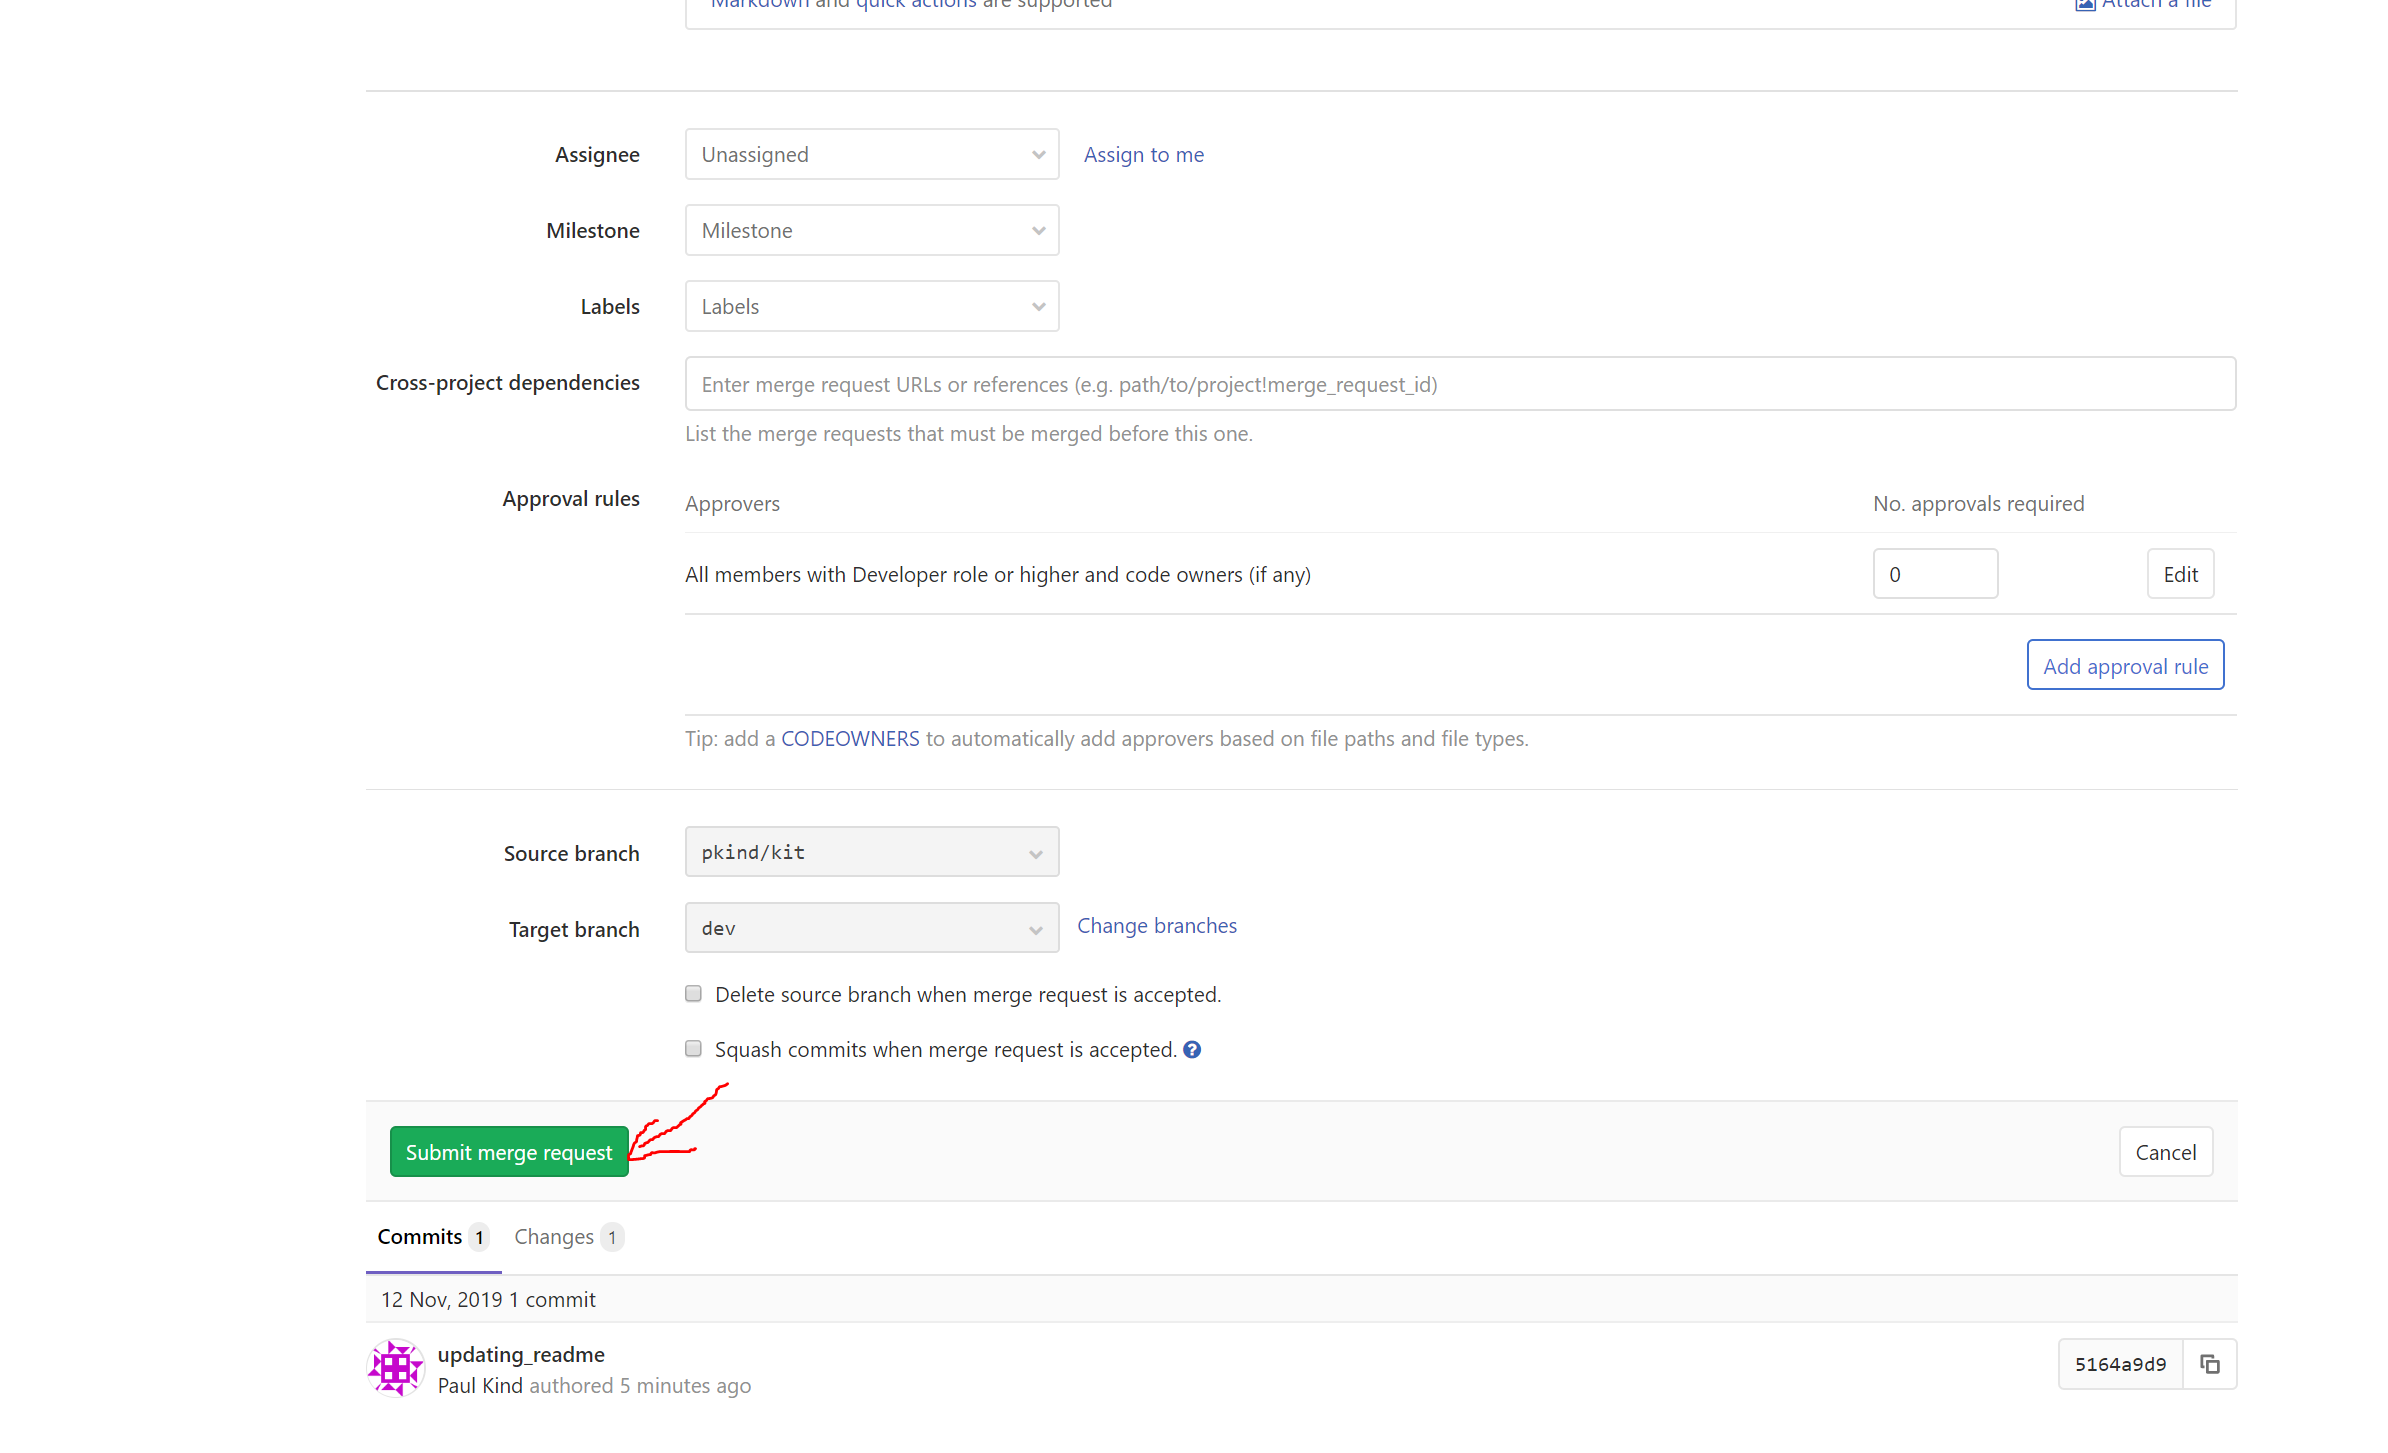
Your submission will be reviewed and merged by documentation owner.
Tips and tricks
Internal and external documentation
If you need to include text or Sphinx directives that are only for internal documentation then use the only directive as follows:
.. only:: internal

    This text is only visible in internal versions of the documentation (published to our internal webserver).

    .. note::

        This will not be displayed in documentation shipped to partners.
Similarly, to include text that is only for external parties do the following:
.. only:: not internal

    This text is only visible in external versions of the documentation (non-internal). For example, the installer we distribute.
Here is an example of how we can use this feature to link documentation to live internal version or statically built version that is bundled for external customers:
.. only:: internal

   The Python manual can be launched |link_int|.

   .. |link_int| raw:: html

      <a href="http://omnidocs-internal.nvidia.com/py/index.html" target="_blank">here</a>


.. only:: not internal

   The Python manual can be launched |link_ext|.

   .. |link_ext| raw:: html

      <a href="../py/index.html" target="_blank">here</a>