Application Workflow
This workflow is for application developers to create AI Application using published extensions and deploy those graphs either to containers or on native systems. Application development is supported only on x86, but can be deployed on both Jetson and x86.
Application workflow includes following steps:
Launch Composer
Sync Extensions from NVIDIA Cloud repository
Load Graph and parameters
Deploy AI Application
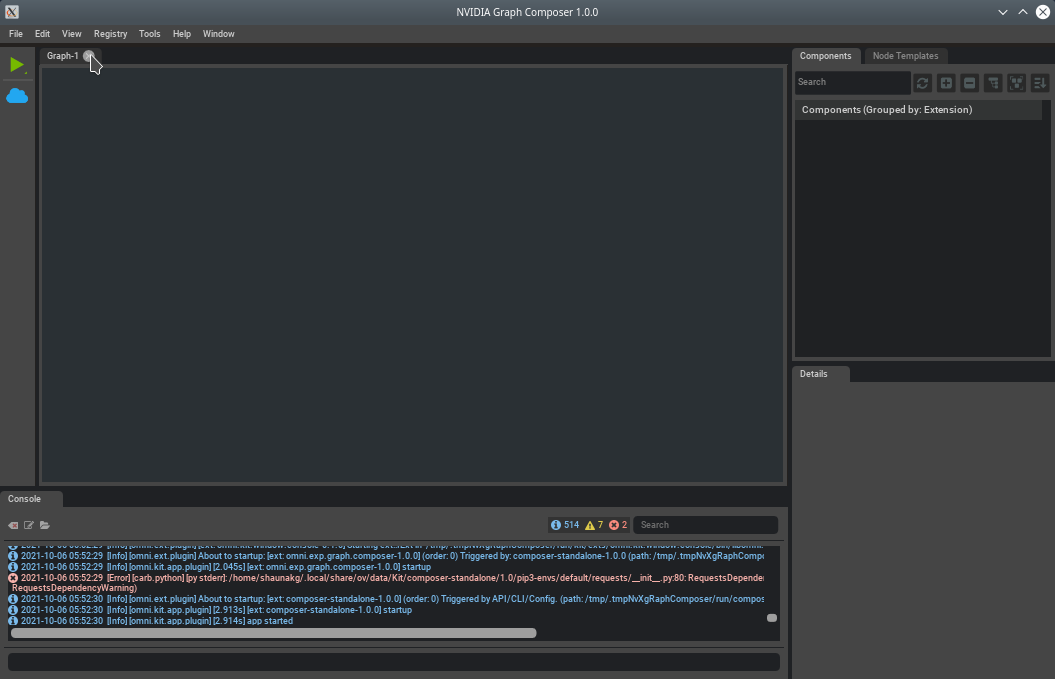
Launch Composer
There are two options to launch Composer:
Native workstation:
Launch Composer from native workstation using following command:
composer
DeepStream SDK devel container image:
Launch Composer from DeepStream SDK devel container image:
docker pull nvcr.io/nvidia/deepstream:6.0-devel
xhost +
docker run -it --entrypoint /bin/bash --gpus all --rm --network=host -e DISPLAY=:0 -v /tmp/.X11-unix/:/tmp/.X11-unix --privileged -v /var/run/docker.sock:/var/run/docker.sock nvcr.io/nvidia/deepstream:6.0-devel
composer

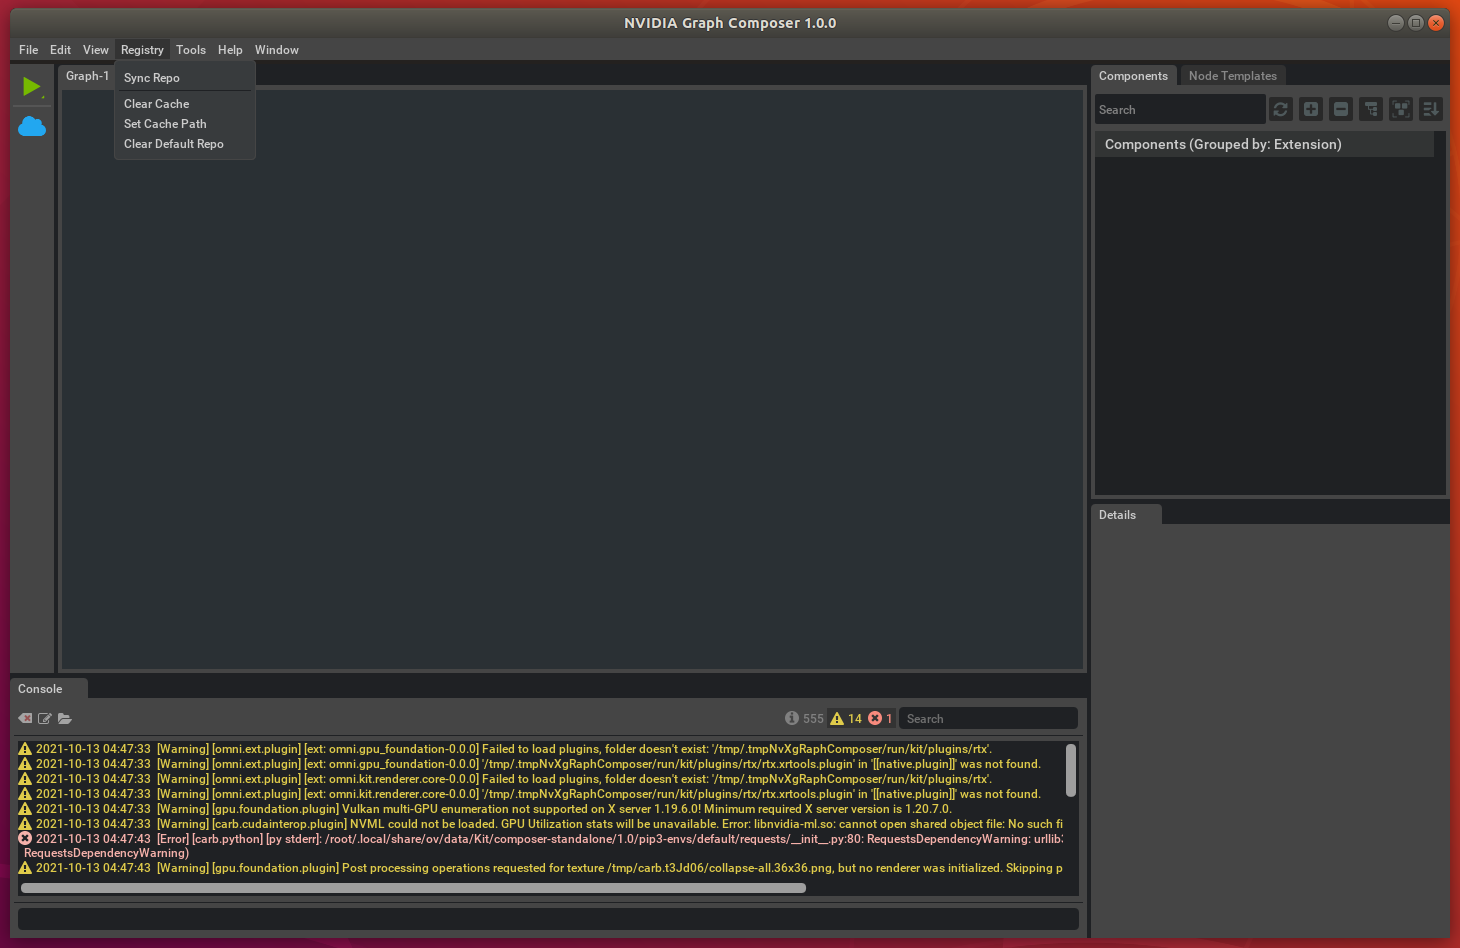
Sync Extensions
Before any graph can be executed or container built, extensions from NGC public repo must be synced. Follow the steps below to sync the extensions:
Close any open graphs
Open the
Registrymenu from the menubar at the top and click onSync Repo
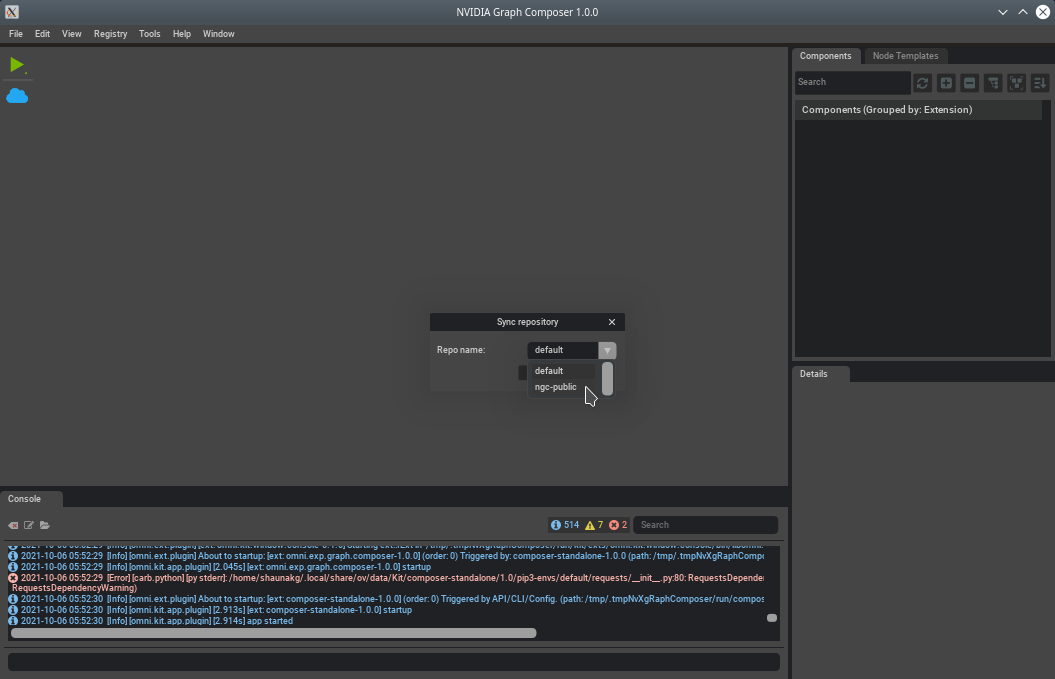
Select
ngc-publicfrom the drop-down list and click onSync
The composer reports the current status using a progress bar.
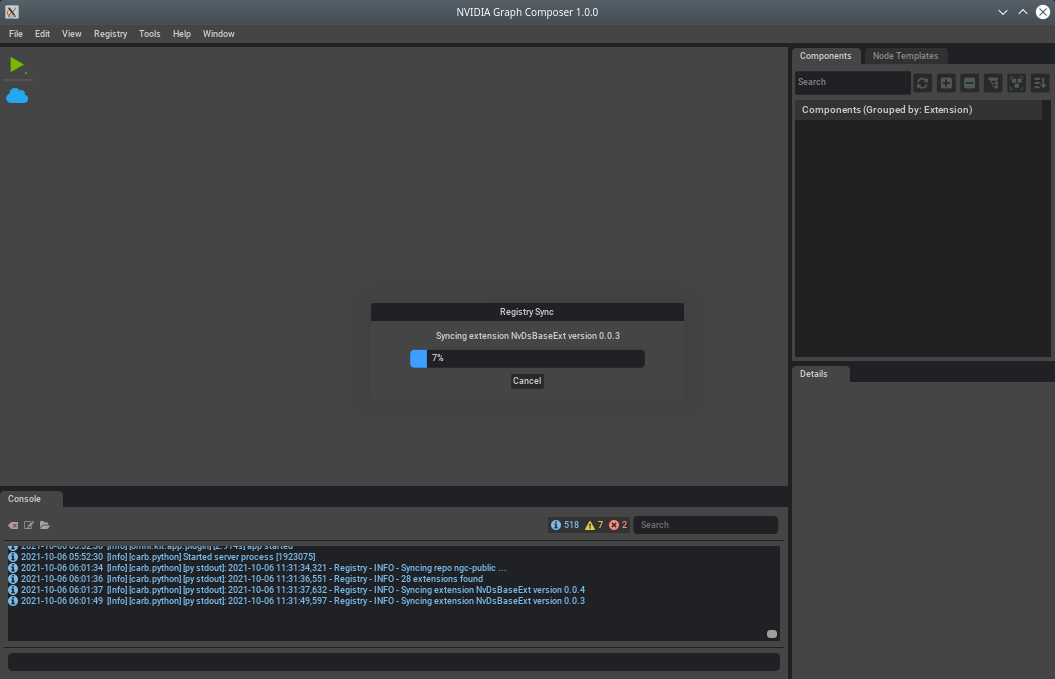
Once the extension sync is complete, the composer displays a success message.
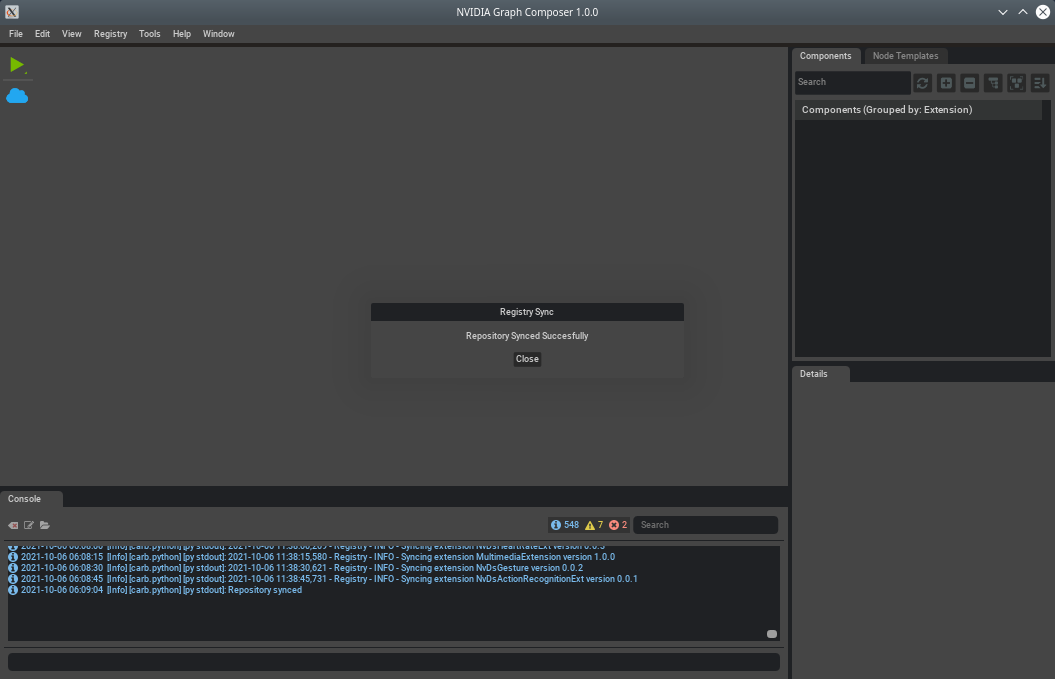
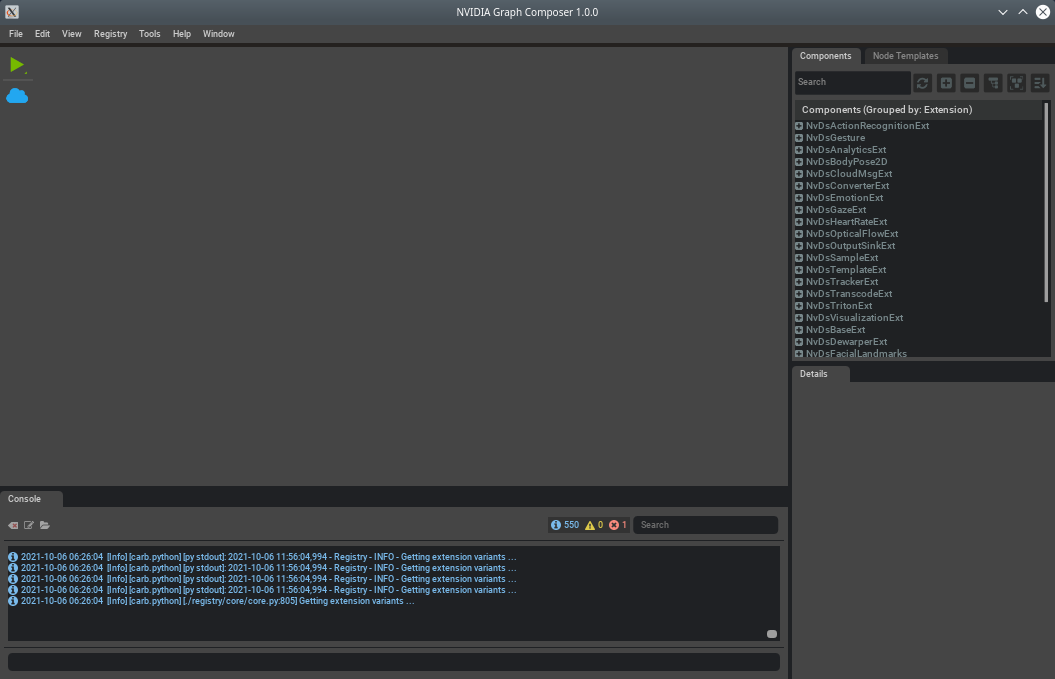
On clicking close, the composer automatically refreshes component list. You can see the refreshed list in the component list window on the right.
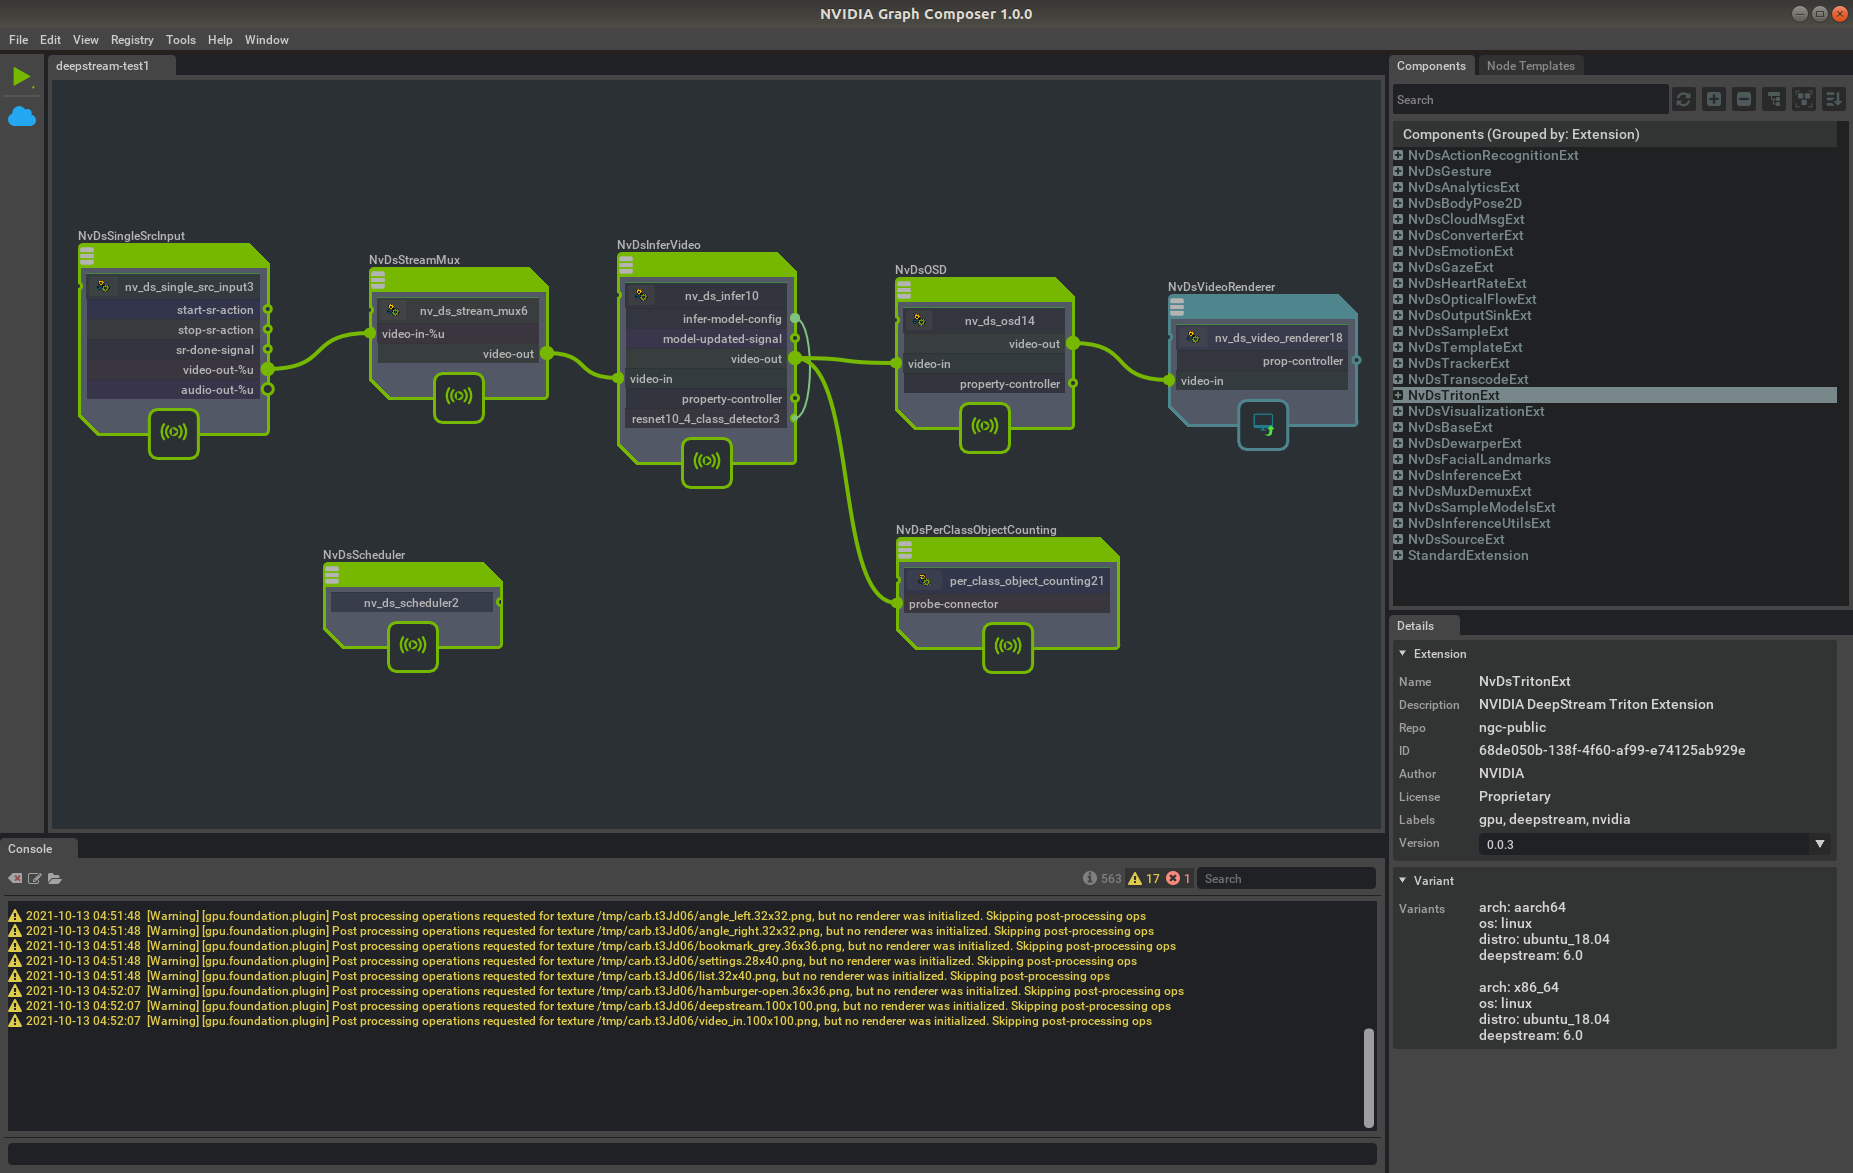
Load Graph
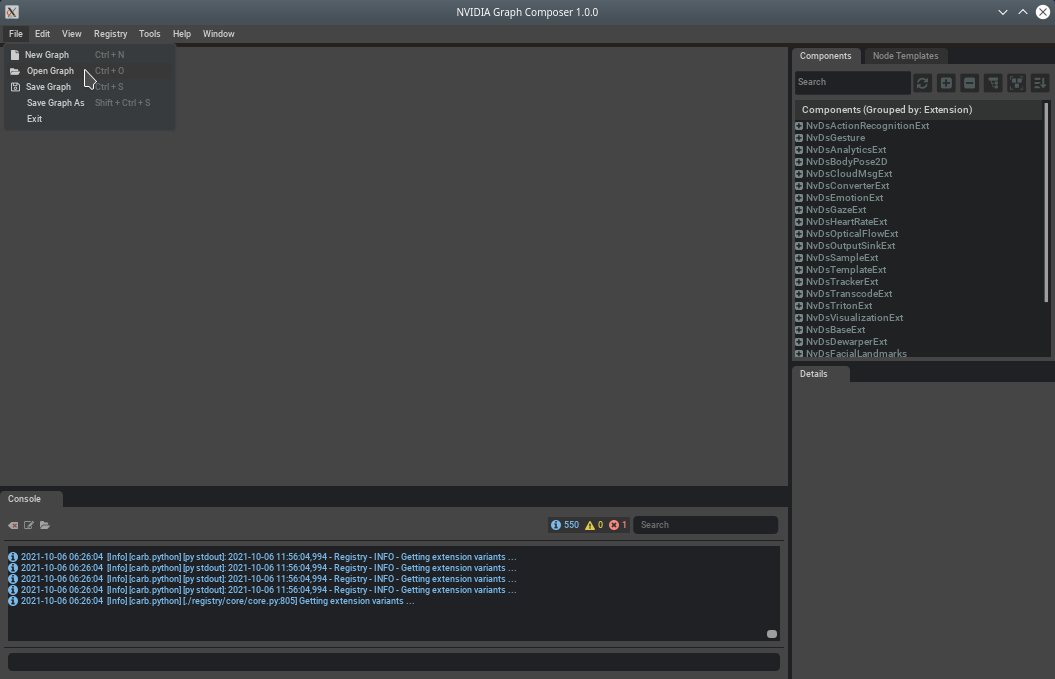
Open the
Filemenu from the menubar at the top and click onOpen Graphto launch the file browser. You may alternatively use theCtrl + Okey combination.
Browse to a valid graph file, select it and click on
Okayto open the graph.
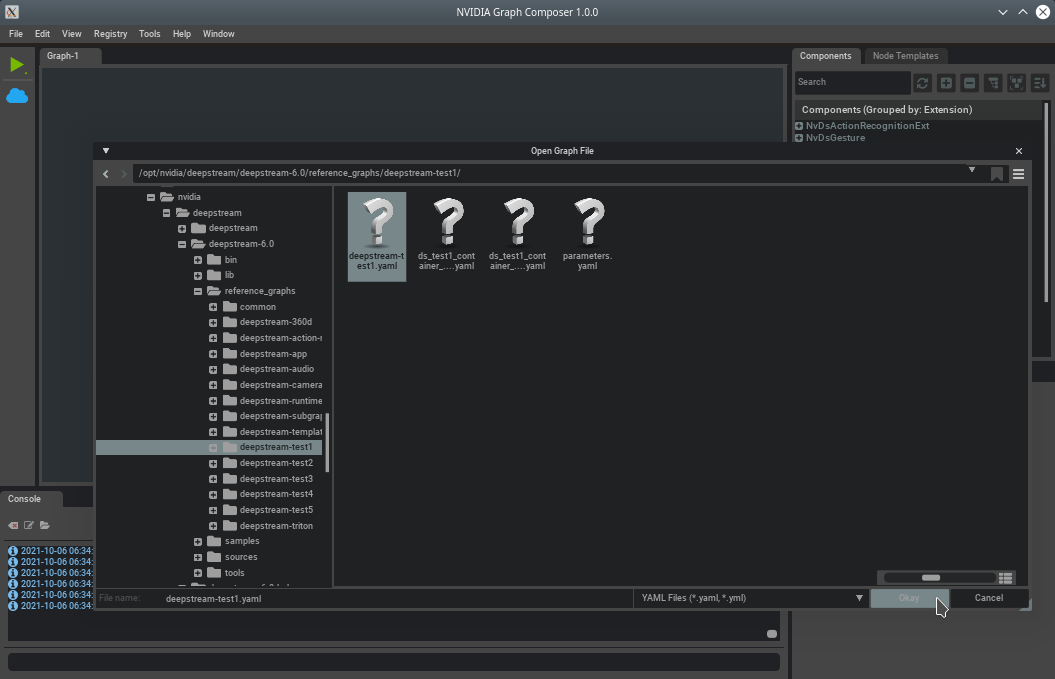
Composer should now show the application graph.
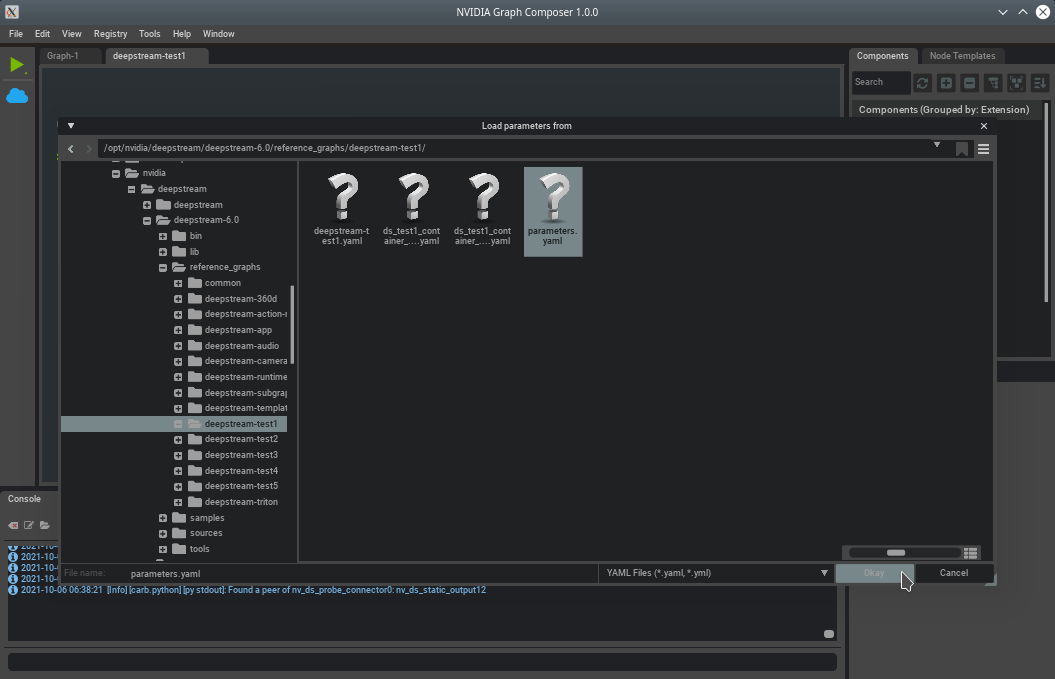
To load component parameters from a separate file, right-click on the graph and select
Load parametersfrom the context menu to launch the file browser.
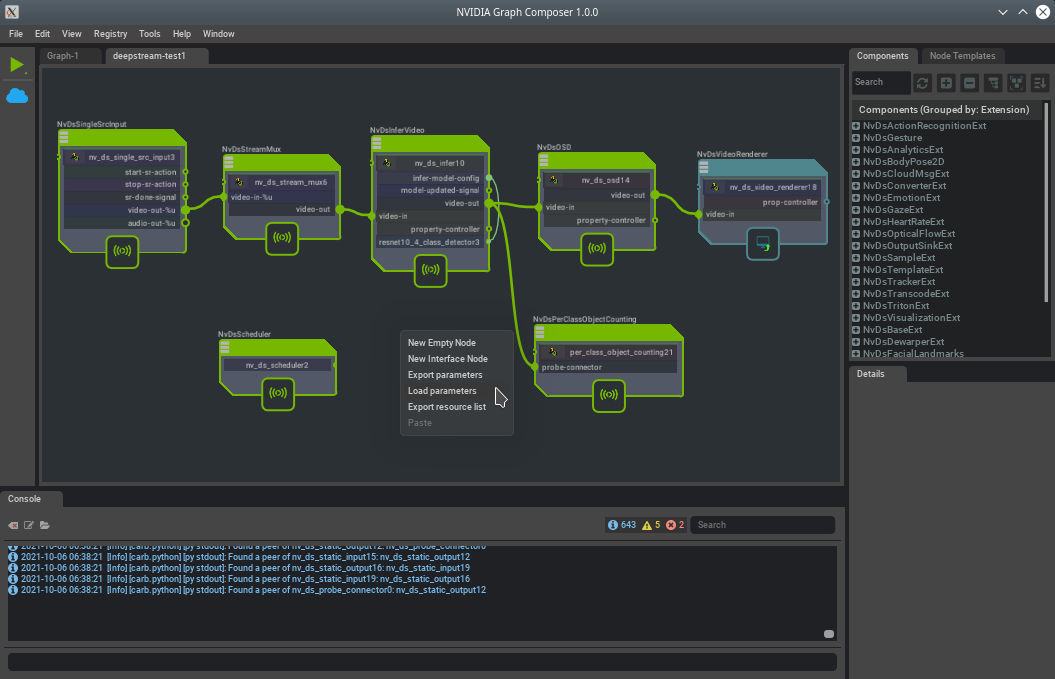
Browse to an appropriate parameters file for the currently open and visible graph, select it and click on
Okayto load parameter values from the file.
Deploy Graph
You can deploy the graph using one of the following methods:
Execute on x86_64 (host)
Execute on Jetson or another remote system
Build Container Image
Execute graph using command-line
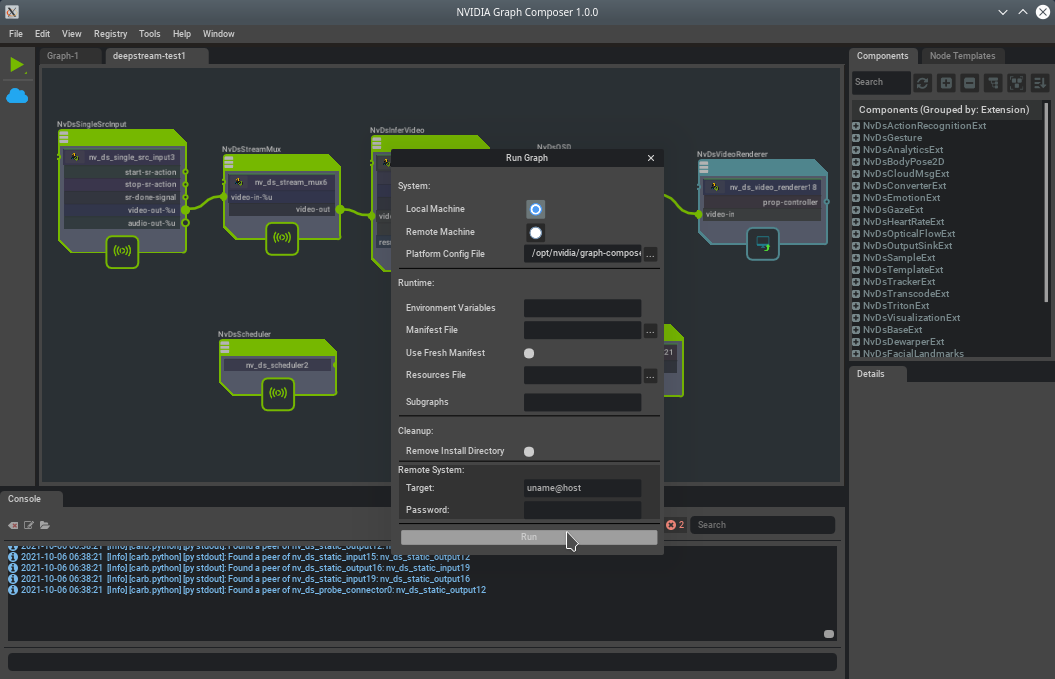
Execute on x86_64 (Same Host)
To execute the currently open graph, click on the
Run Graphbutton from the
toolbar on the left. This will open the Run Graph dialog.
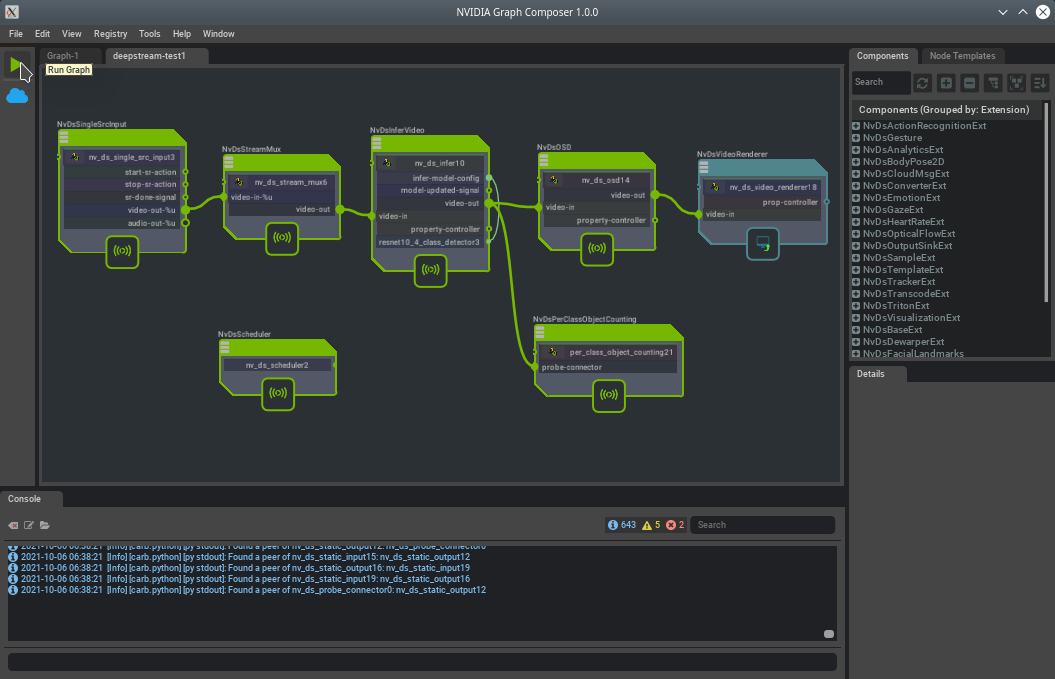
To execute on the same host system, select
Local Machineradio button, select
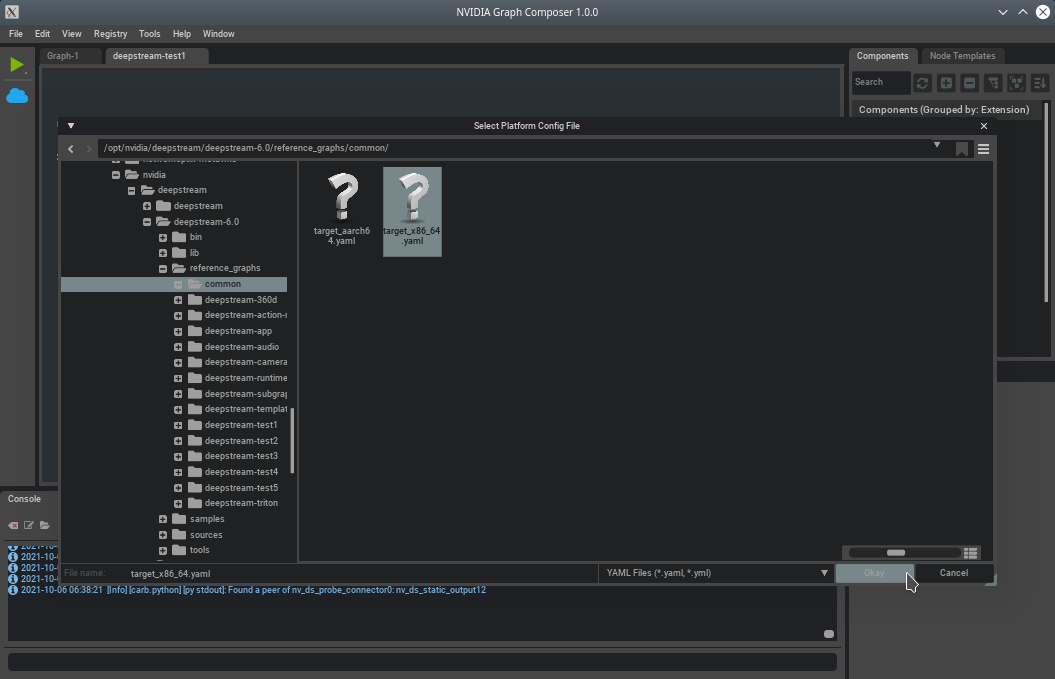
appropriate Platform config file using the file browser and click on Run.
The graph execution progress will be reported via logs in the console window.
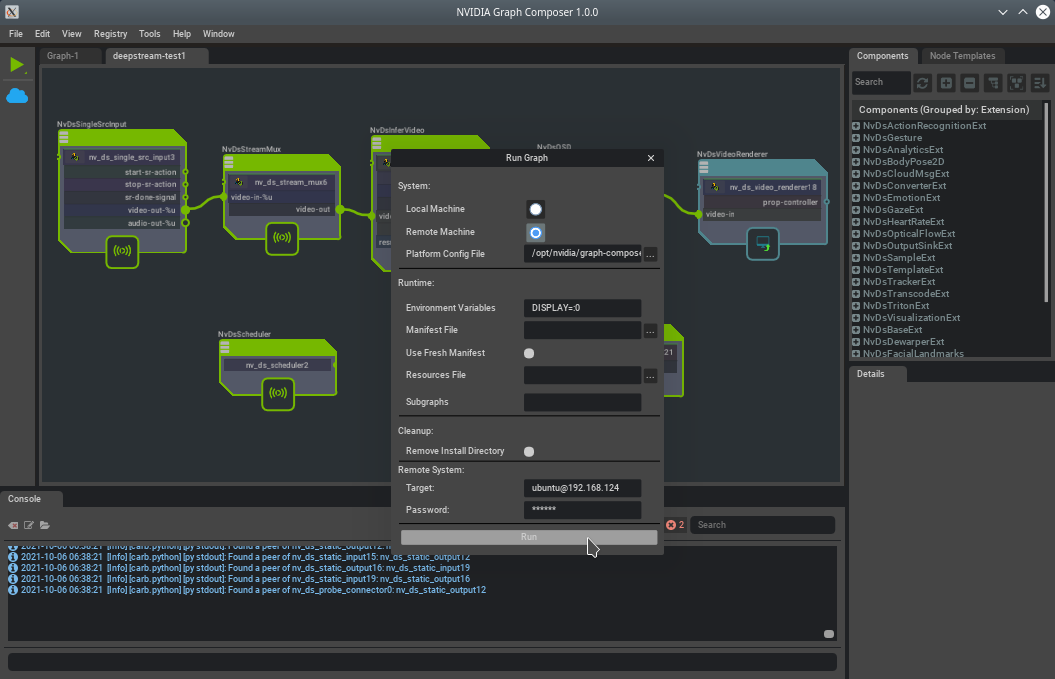
Execute on Jetson or another remote system
Launch the
Run Graphdialog and selectRemote Machineradio button.Select appropriate Platform config file (aarch64 or x86_64) based on the remote machine configuration.
Set any environment variables required to execute the graph remotely (e.g.
DISPLAY=:0) enter the remote system details and click onRun.The graph execution progress will be reported via logs in the console window.
Build Container Image
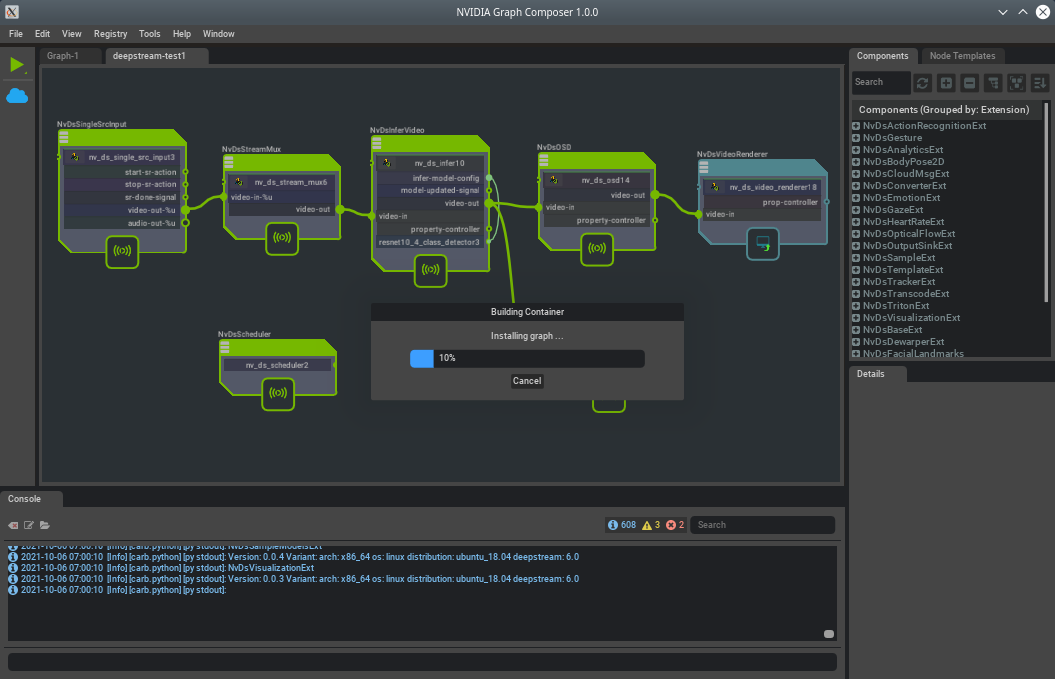
To build a container, first click on the
Build Containerbutton from the toolbar on the left.

This will open the
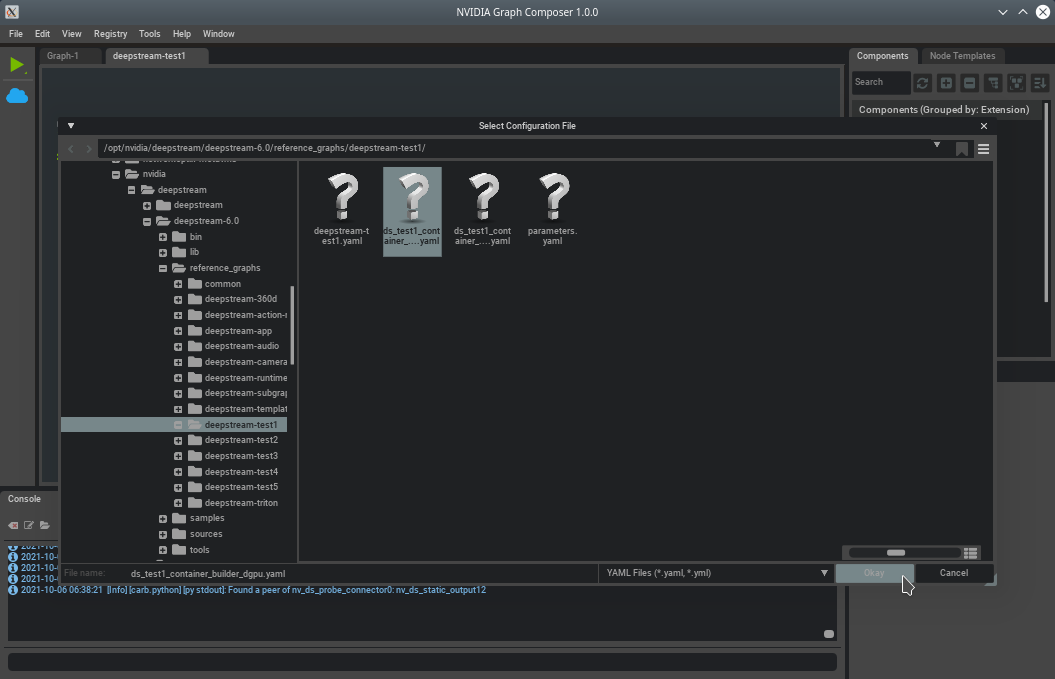
Build Containerdialog. Launch the file browser using the button next to theConfiguration Fileinput.
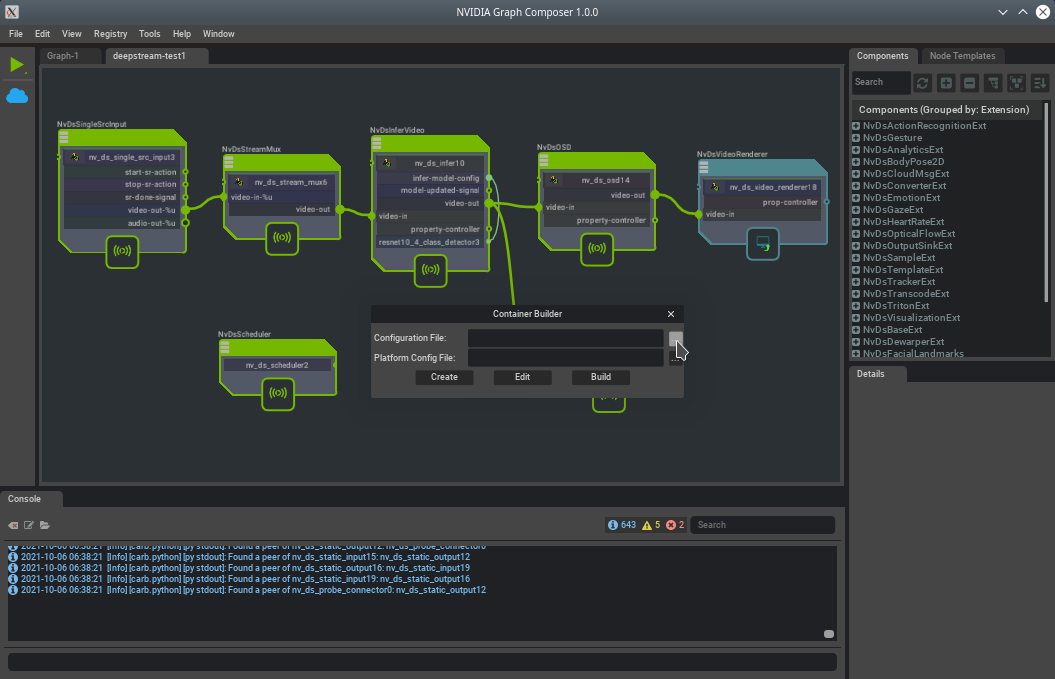
Select a container builder configuration file and open it.
Click the button next to the
Platform config Fileinput to launch the file browser. Select a platform config file and open it.
Click on
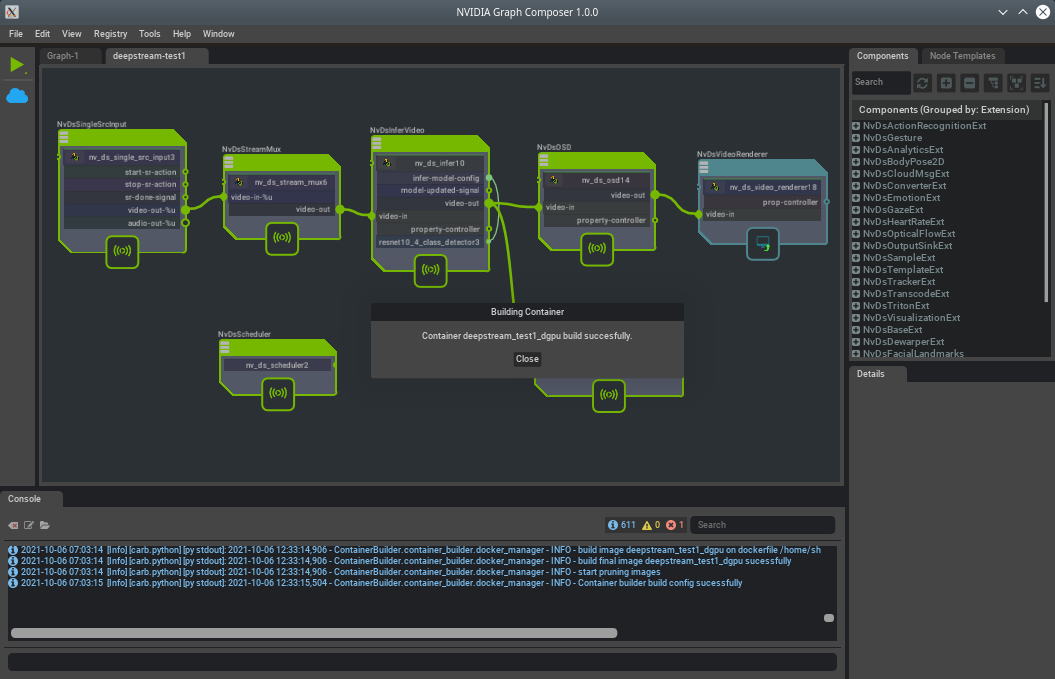
Buildto start the build process. Composer reports the container build status using a progress bar.
Composer shows a success message upon successful completion.
Execute Graph using command-line (execute_graph.sh script)
The execute_graph.sh script provided with the graph composer helps with graph execution and provides added functionality.
Complete usage reference:
    Usage: /opt/nvidia/graph-composer/execute_graph.sh [options] <graph-file> [additional graph files]

Options:
  -d, --graph-target "<graph-target-file>"    [Required] Graph target config file
  -s, --subgraphs <subgraph1>,<subgraph2>,... [Optional] Paths of subgraphs used by the application, comma-separated list
      --resources <graph-resources-file>      [Optional] Graph resources file
  -f, --fresh-manifest                        [Optional] Re-install graph and generate a new manifest file
  -g, --with-gdb                              [Optional] Execute the graph under gdb
  -m, --use-manifest <existing-manifest>      [Optional] Use an existing manifest file
  -r, --remove-install-dir                    [Optional] Remove graph installation directory during exit
  -t, --target <username@host>                [Optional] Target to execute the graph on. SSH will be used
      --target-env-vars "<env-vars>"          [Optional] Separated list of environment variables to be set before running on target
Note
To execute graphs on a remote target: * Graph Composer package needs to be already installed on the target * It is recommended that a password-less login method be used for SSH
To execute a graph locally, run:
/opt/nvidia/graph-composer/execute_graph.sh <graph-file> -d <graph-target>
For example, on dGPU host, run:
/opt/nvidia/graph-composer/execute_graph.sh <graph-file> -d /opt/nvidia/graph-composer/config/target_x86_64_cuda_11_4.yaml
To execute on a remote Jetson target, run:
/opt/nvidia/graph-composer/execute_graph.sh <graph-file> -d /opt/nvidia/graph-composer/config/target_aarch64.yaml \
-t <username@host> --target-env-vars "DISPLAY=:0"
Note
If a graph has resources associated with it described in a resources YAML file, an additional argument
--resources <resources.yaml> can be passed to the script. The resources would be copied to the remote target before
graph execution
Note
When executing a graph that uses subgraphs, you must pass additional argument -s <subgraph1>,<subgraph2>,... containing paths
to the subgraph files. You must not pass the subgraphs as graph file arguments without an option.
Note
To run the graph on the remote machine, install the following packages:
openssh-client
sshfs
Use ssh-keygen to generate an ssh key pair.